


Antique Washstand Rescued With Just Stain!
3 Materials
$75
2 Hours
Medium
Being someone who repurposes furniture, you must constantly be on the lookout for pieces. That’s part of the job. I try to always find pieces that are close to home, and on rare occasions, I luck up.
This piece I found scrolling through Facebook Marketplace. It was located right down the street I live on, SCORE! The photo was sideways and dark, so I could not see the piece very clearly. The asking price was $20.00, and the ad stated that it was an antique cabinet that needed work. My gut was screaming, buy, buy! My gut has never been wrong…. yet.
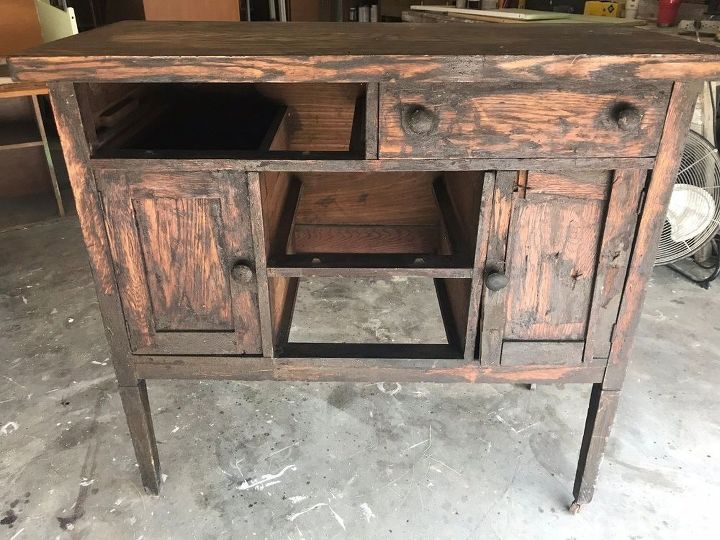
Damaged Washstand
The cabinet was in dire need of some TLC. One door was badly damaged. It looked as if someone tried to repair it but did not know what they were doing. All but one drawer was missing. Sadly, the one drawer that it did have had severe water damage to the inside. However, the rest of the cabinet was in great shape, and even had the original casters!
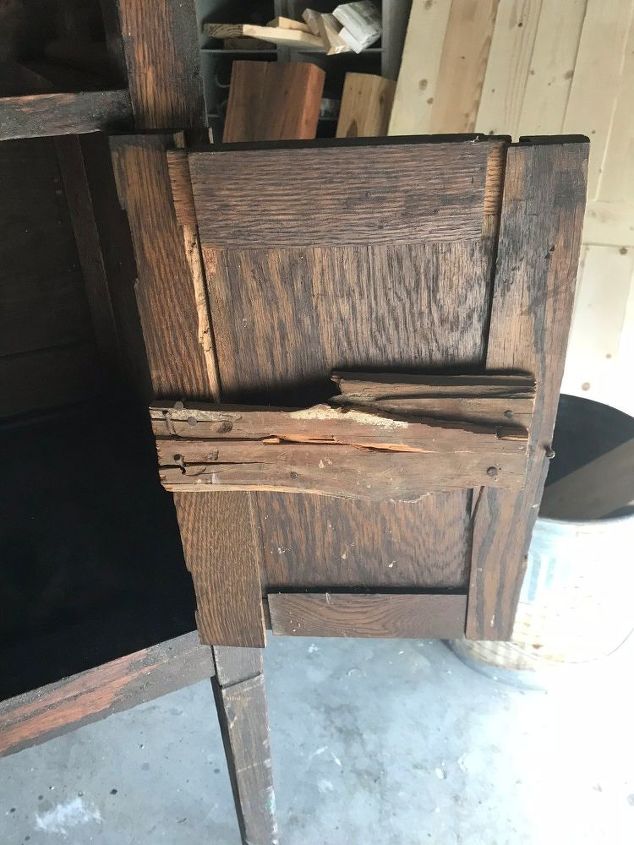
Damaged Door
The Hubs and I decided that we would add shelving where the bottom two drawers would have been. Since the one top drawer had water damage, we decided not to use it. Instead, we would make two faux drawers.
We headed off to Lowe’s to try and find wood for the shelving and faux drawers that would match the grain of the existing wood. The decision was made to use plywood. Its grain was very similar to that of the existing wood.
The Hubs got busy doing his part. He constructed two shelves for the bottom and two plywood pieces that would fit where the two top drawers would have been, making it look like there were drawers.
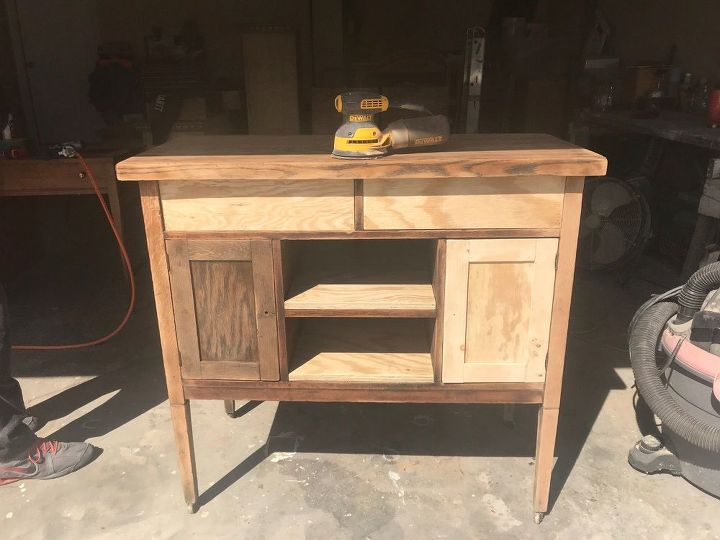
Looking Awesome!
After he finished up, I sanded the entire piece with 120 grit sandpaper. I noticed on each side as I was sanding, there were white specks of paint. It seemed someone had painted it in a past life. I decided to leave those specks and not sand them off.
Instead of staining the entire piece, I left some of the wood raw, and stained wood in other places. I wanted it to still look worn, not like someone had just added a fresh coat of stain. The chipped white paint added to the patina, so I was glad I left it as is. I did stain all the new wood completely.
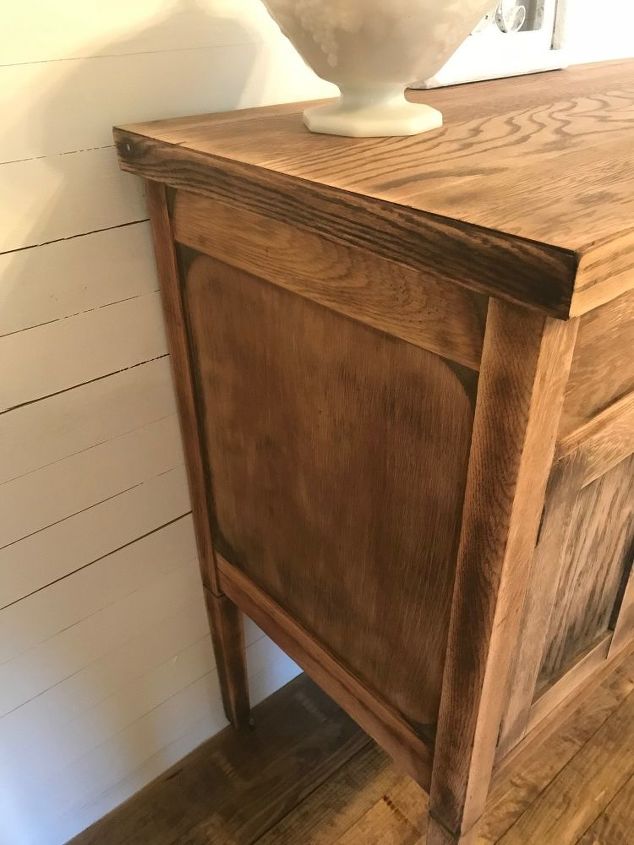
Lightly Stained
After a 24-hour drying period, I used my sander with 220 grit sandpaper and lightly distressed the piece, concentrating more on the edges where it would have naturally worn. I distressed the new wood a bit more heavily.
I finished distressing then cleaned the sanding dust off and applied a thin coat of wax to protect the finish. I then made a trip to Hobby Lobby to purchase the hardware (here). I wanted hardware that had an antique look, not new.
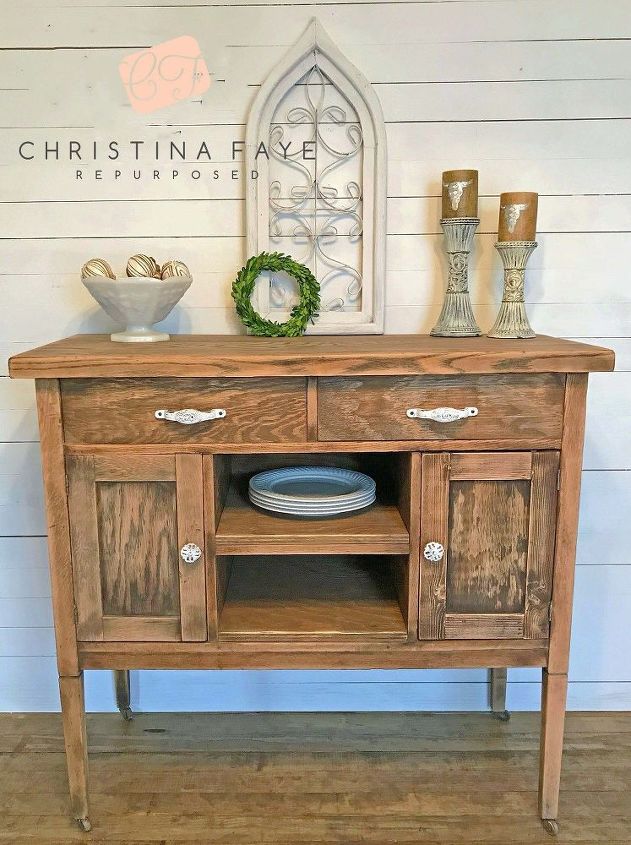
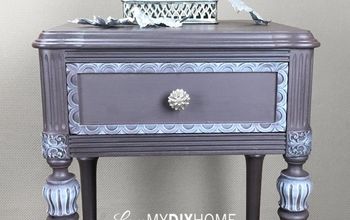
Antique Washstand After
And here it is! I am super happy with the way it turned out!
Resources for this project:


Any price and availability information displayed on [relevant Amazon Site(s), as applicable] at the time of purchase will apply to the purchase of this product.
Hometalk may collect a small share of sales from the links on this page.More info

Want more details about this and other DIY projects? Check out my blog post!
Comments
Join the conversation
4 of 6 comments
-
I just love the 'unfinished' look, so beautiful!
-
It looks stunning Christina - I also love your hardware and the arched panel sat on top - grand job :)


Frequently asked questions
Have a question about this project?