


Building a Farmhouse-style Sofa Table

4 Materials
$15
3 Hours
Medium
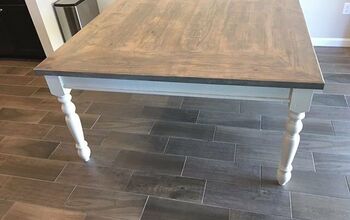
I recently started building simple, rustic farmhouse-style tables and wanted to build a sofa table. I had a design in mind - so I went to Home Depot for my wood.
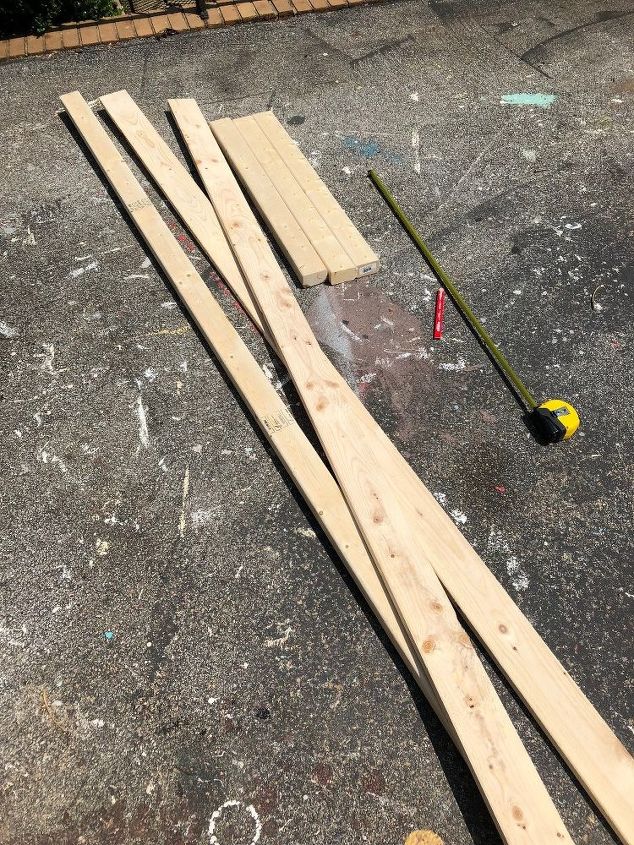
At Home Depot, I decided to buy (cheaper) rough 1 x 4's for the table top and 2 x 3's for the frame/legs. I laid out the boards on my driveway and started measuring and cutting the boards with my trusted chopsaw.
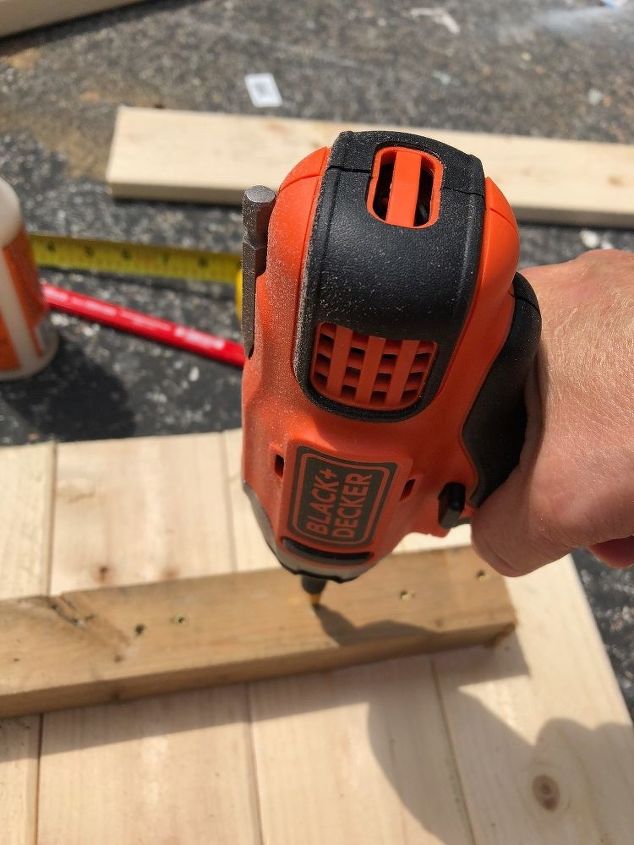
After getting the top boards cut, I laid them upside down, glued them together using wood glue and then braced them with board that I screwed in using my impact driver (love this tool!).
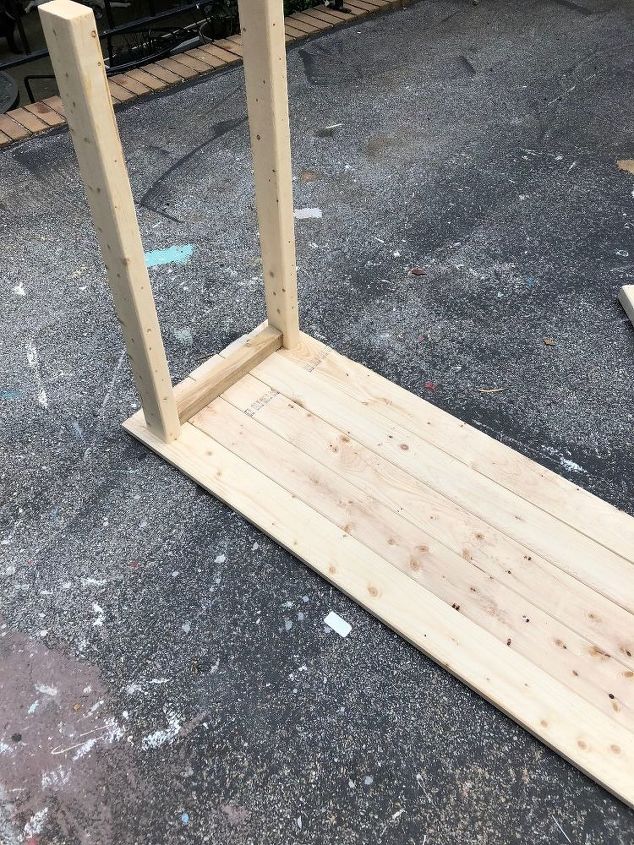
Then I start assembling the table upside down on my driveway. This is the best way for me to visualize the table and continue to glue and screw the boards together -one at a time.
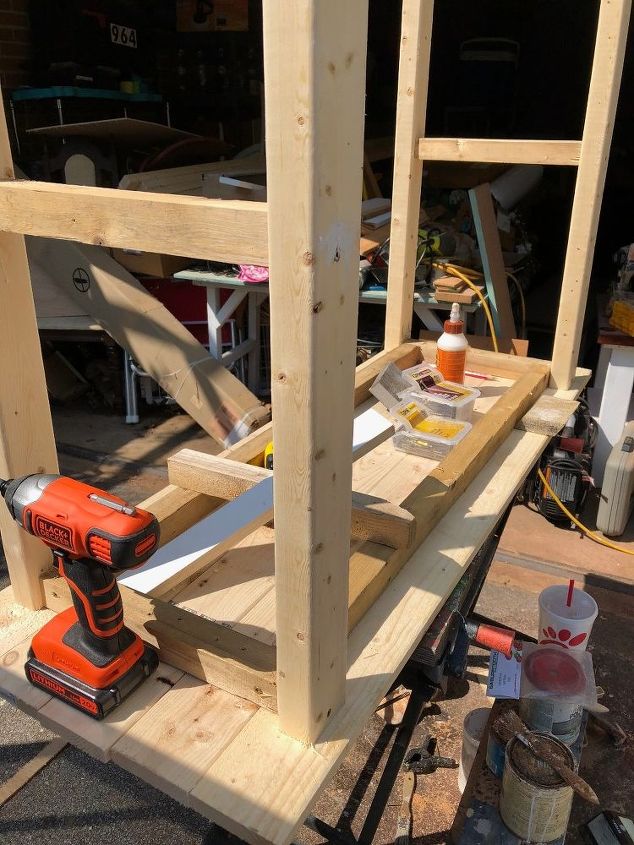
I added some braces in between the legs for extra support.
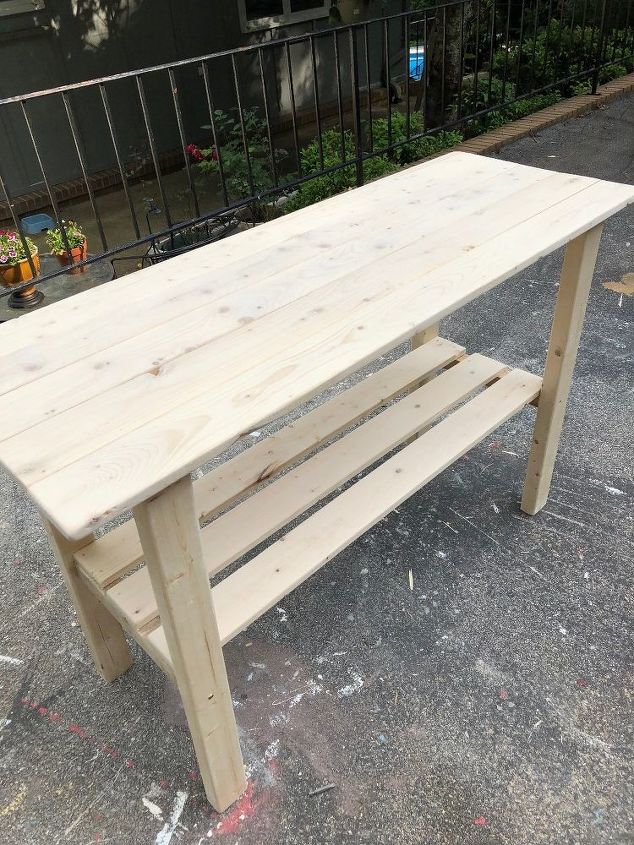
I used the support braces on the legs to add some additional 1 x 4 boards for a shelf. I decided to space out the boards a little bit to create a different look for the bottom vs. the top of the table.
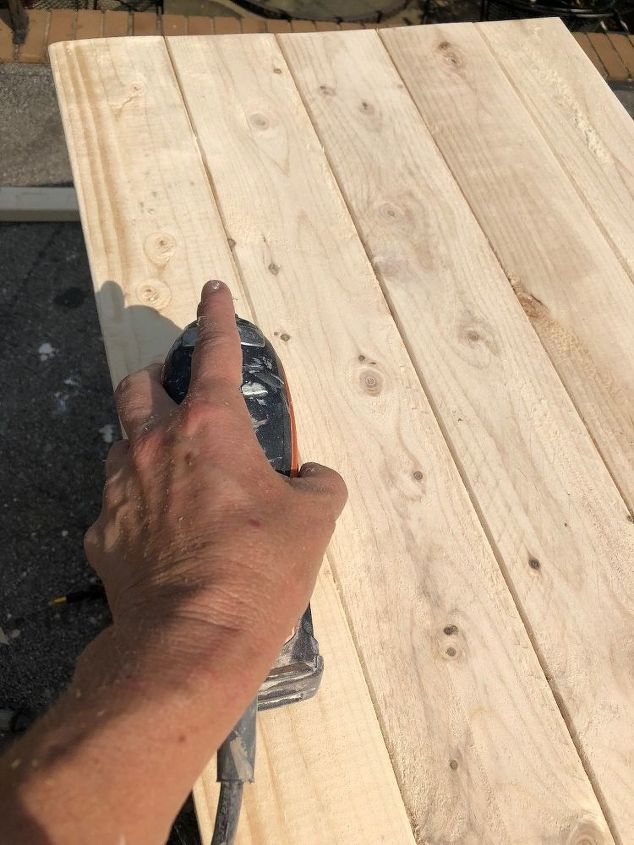
Then I started sanding the table - the top and the bottom shelves were made out of very rough boards - so they took a lot of sanding. I like to use my hand sander that I have had for years - a Black & Decker Sanding Mouse and used 40 grit sand paper to begin with and gradually increased the grit to be finer as the sanding progressed.
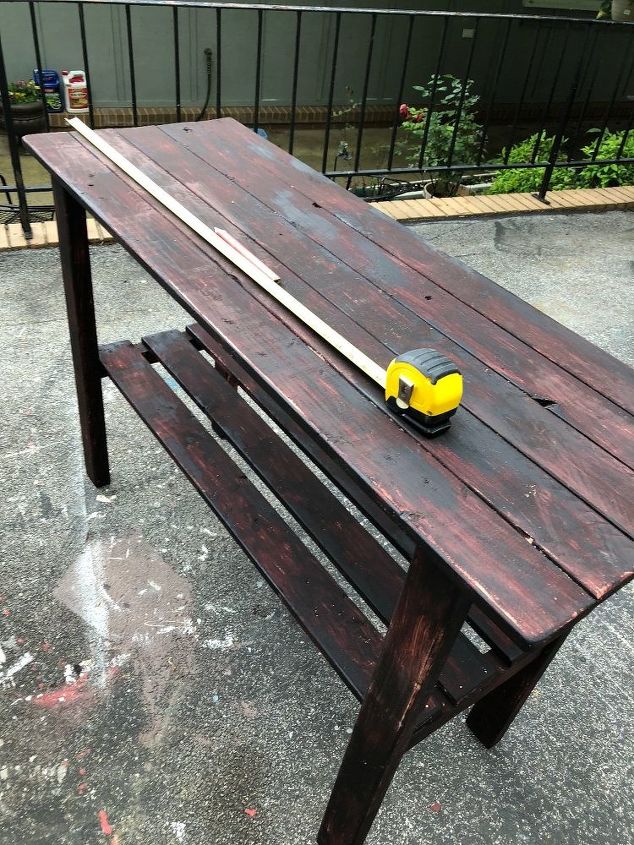
After the sanding process - I used MinWax gel stain in mahogany and stained the entire table (used rubber gloves) and then sanded again with a fine grit paper and a sanding block. I wanted there to be variations of color and depth - especially on the top of the table - to give it a worn look, even though it is brand new wood.
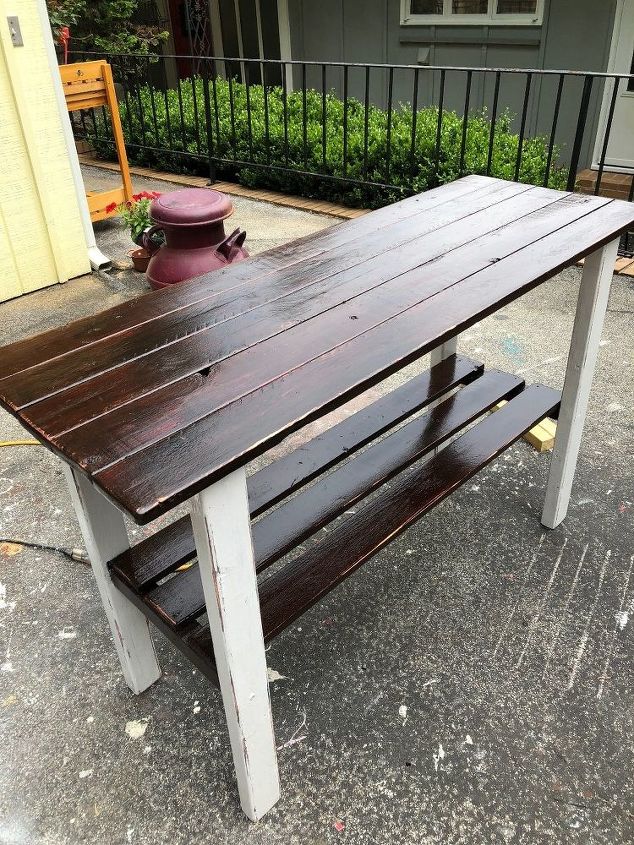
I then used Rustoleum white linen chalk paint (from Home Depot) on the legs, sanded them with my Mouse Sander to give them a worn look, then used satin MinWax polycrylic (water based) on the legs to seal the chalk paint and on the stained top and shelf. The only cost for me on this table was for the lumber ($15), I had everything else on hand. Can't wait to make more tables!
Resources for this project:
See all materials


Any price and availability information displayed on [relevant Amazon Site(s), as applicable] at the time of purchase will apply to the purchase of this product.
Hometalk may collect a small share of sales from the links on this page.More info
Comments
Join the conversation
2 of 47 comments
-
Nice job ! Love that style. And $15 ! Way to go.
-
I made 1 for my sister for her birthday present except I made it not as deep .She wanted a hall table so just did 3 boards deep and 2 shelves instead of 1


Frequently asked questions
Have a question about this project?
Can you provide the dimensions of the table and the amount and length of the wood you purchased?
Great job! I did something similar for my front porch, using 2 by 6’s for the top and 4 by 4’s for the legs. I have to ask tho, in the one picture of you sanding the top it looks like you put a nice edge on the top with a router, am I seeing things? It looks so nice i’m Thinking of doing that on my table. Thx so much & keep up the good work, lots for me to think about.