


DIY Crescent Moon Night Light

by
Zest it Up
10 Materials
$20
1 Hour
Easy
I am a lover of two things: simple Scandinavian design and making things with my own hands. It has actually become comical at this point when people walk into my home for the first time. The dialogue kinda goes like this:
“Oh, I love ________. Where did you get it?”
“Oh, I made that. Yah, that was a fun project.”
Now, just repeat that a few times, and you get the gist. I invariably start chuckling, because the repetition becomes just ludicrous. “Oh, that light, yah, I made it. Oh, that table, yah I made it. Oh that sign, ……”. You get the drift. This isn’t a bragging moment, it is just what I love. There is something so dang rewarding about making things for your home. Yes, there is the obvious: it is WAY cheaper to make what you love, than buying it in a store. Yet, regardless of price tag, there is something so amazing about making what you want EXACTLY the way you want it.
Photo Cred: Anya McInroy
I’m not saying that you need to make all your own furniture, but tackling a couple of small projects might get you hooked. This sweet little nightlight could be just the task. It is a really simple construction, allows you to play with paint and some basic power tools, and has the added benefit of zhooshing up a baby nursery or kid’s room. Aside from making your sweet one’s room even more cute, it will be a source of comfort at night and potentially become a sentimental childhood keepsake as the years go on. Um, have I talked it up enough yet? How about: it is an awesome Scandinavian design of simplicity and uses adorable fairy lights! SOLD!
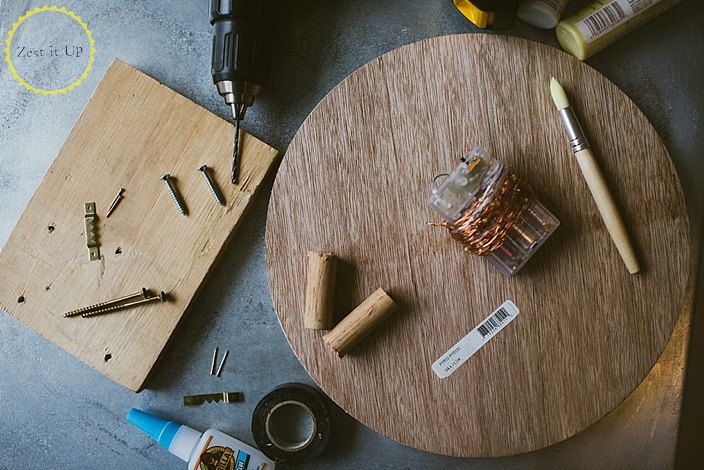
Supplies:
- 12″ round plywood
- 2 pieces of 2″x2″ cut 2″ long
- 1″x 8″ cut to 8″ to make a perfect square
- 6 woodscrews
- 1 picture hanger & nails
- white acrylic paint
- yellow acrylic paint
- drill
- battery operated fairy lights
- strong tape or glue

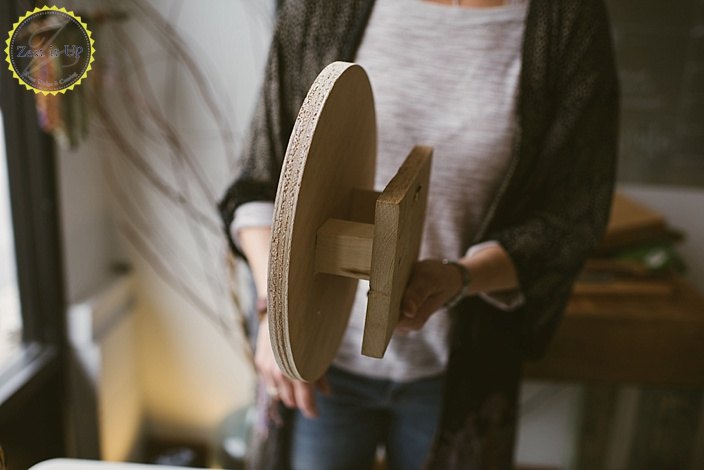
Start by using two wood screws to attach each of the 2″x2″ blocks to the back of your nightlight. These will create space for the fairy lights later.
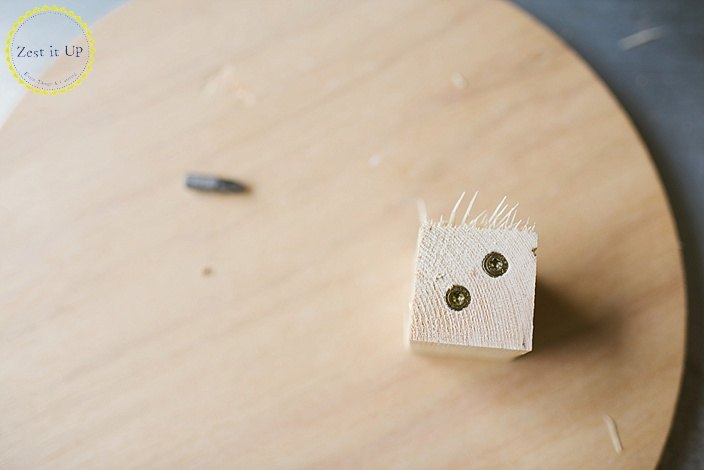
Use the remaining two screws to attach the 8″ square to the two blocks. Then secure the picture hanger with provided nails to back of square.

The basic construction is done!

Now it is time to add the whimsy!
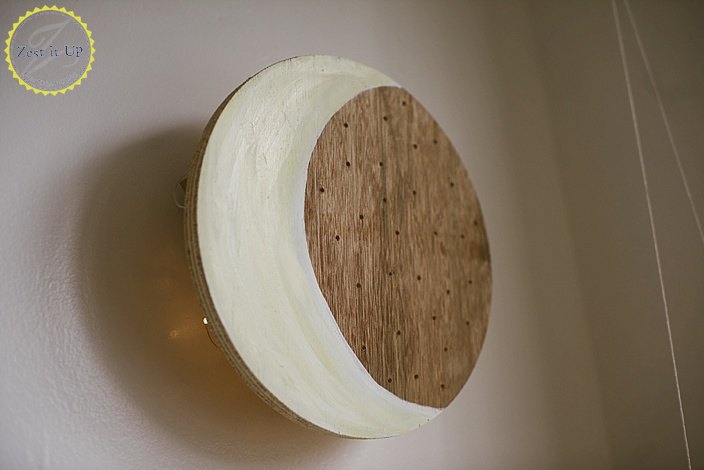
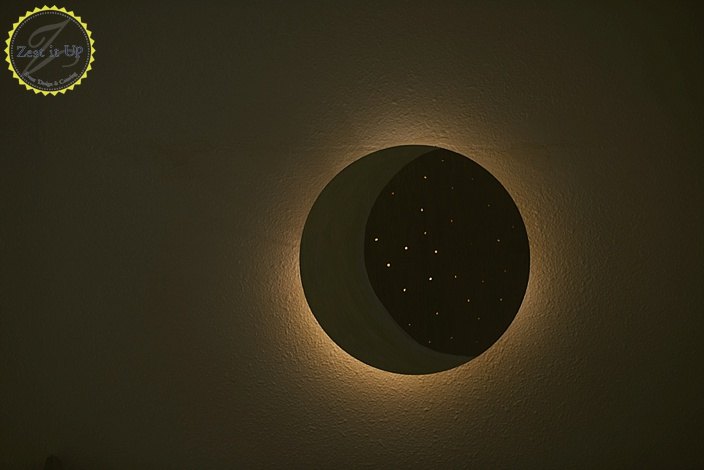
I wanted my crescent moon to be surrounded by stars, so I drilled a bunch of holes for the light to shine through.

My only recommendation here is that you might want to make the “star” holes a bit larger than what I have done here, so that more light will shine through your finished piece.
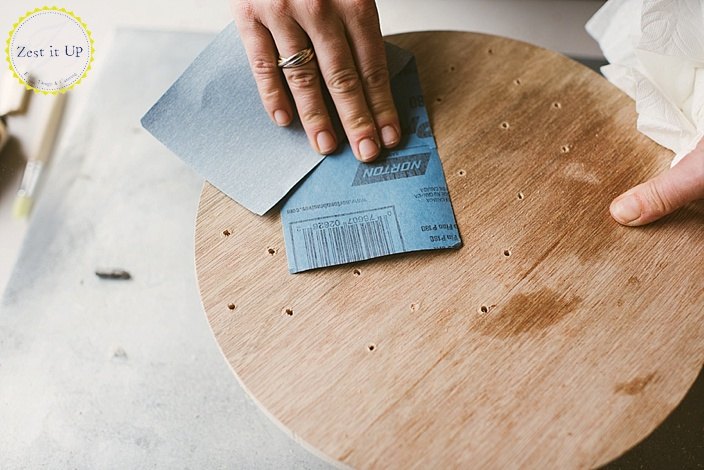
Make sure you sand the wood after you drill the holes for a clean slate.
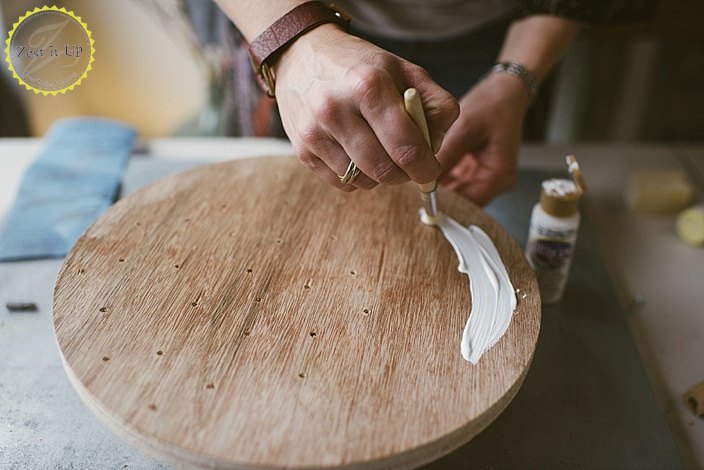
I kept my crescent moon simple, by starting out with some white paint and then layering in some soft yellow while the paint was still very wet.
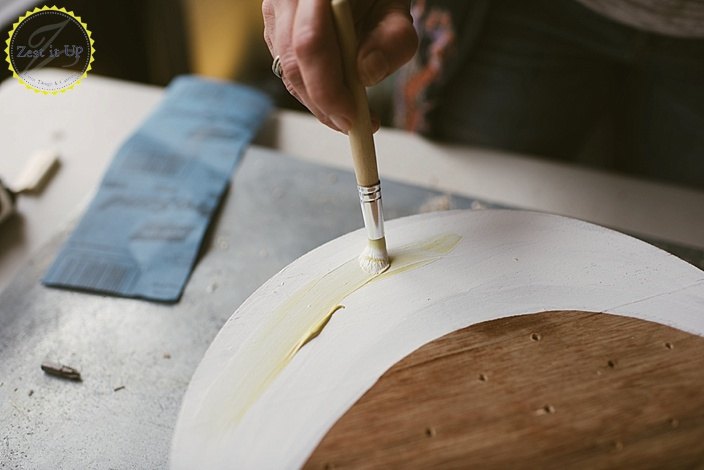
This allowed the colors to blend really nicely!
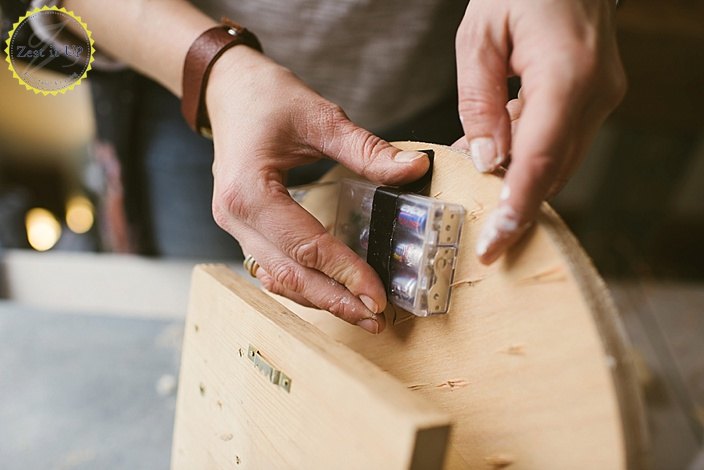
The last step before hanging was to secure the battery pack and fairy lights to the inside of the back of the nightlight.
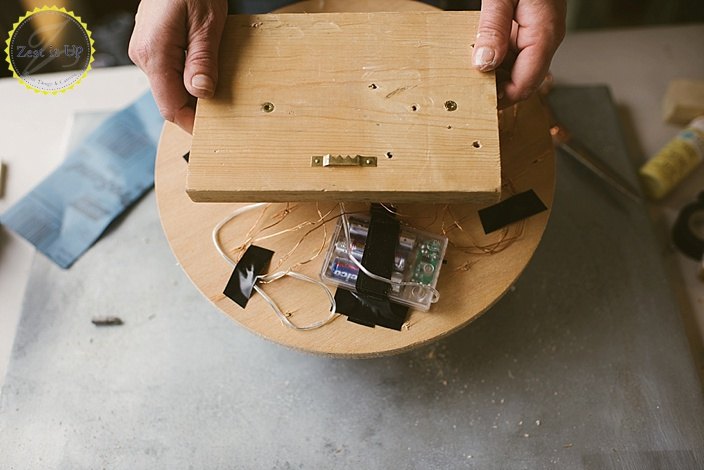
I just used some strong electrical tape, but you can easily glue things into place.
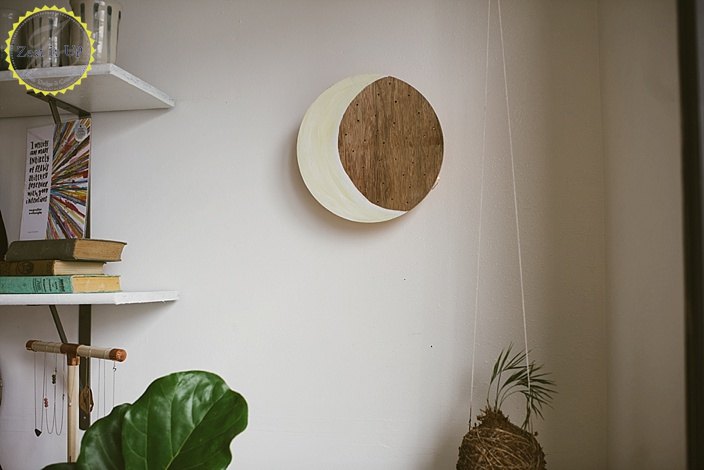
I love the simplicity of this design!
It is such a sweet nightlight and I think my daughter will love it even more, knowing that mama made it for her!
Cheers to handmade and creating whimsy for your kiddos! Childhood memories commence!!
xoxo
Chanda-Panda
Resources for this project:
See all materials


Any price and availability information displayed on [relevant Amazon Site(s), as applicable] at the time of purchase will apply to the purchase of this product.
Hometalk may collect a small share of sales from the links on this page.More info
Want more details about this and other DIY projects? Check out my blog post!
Comments
Join the conversation
2 of 21 comments
-
This is really a sweet idea and could only be improved if you had used some white, glow in the dark paint for the moon. The stars were a perfect idea but the moon doesn't quite show up enough.
-
Love this! Asked my brother to make me one for my birthday. Thanks so much for sharing.


Frequently asked questions
Have a question about this project?
How many lights did you use? Some of the strands I see for sale have a lot.
How about painting on a "man in the moon" face?
If the moon is a crescent and the rest isn’t painted like a moon. Why make it round? Couldn’t it be more cloud shaped then put the stars in there and paint the moon with glow in the dark paint?