


Wine Box to A Special Shoe Rack

by
Jewellmartin
4 Materials
2 Hours
Medium
When we moved into our house 13 years ago, we found some empty wine boxes in the attic. We don’t drink alcohol at all, but I just knew I would have a purpose for those wine boxes some day. I’ve been wracking my brain for a way to keep my favorite shoes From getting lost on the closet floor. I think I’ve found one solution, and the two local grandchildren could help since we had a week together! I hope you can get some ideas from this.
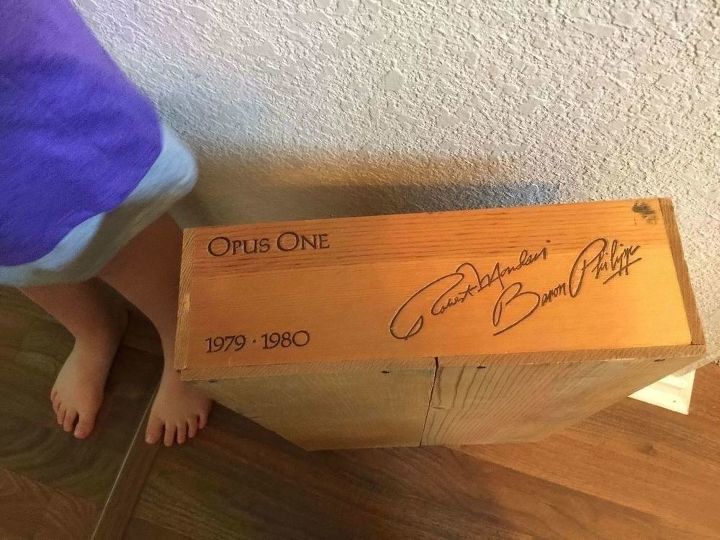
Wine box base with names
I am using each of two bases and two tops for separate projects, but this project was suggested by my 8-yr-old granddaughter. I brought in the box and we started making plans for a shoe rack. And multi-media is my middle name, even in craft work.
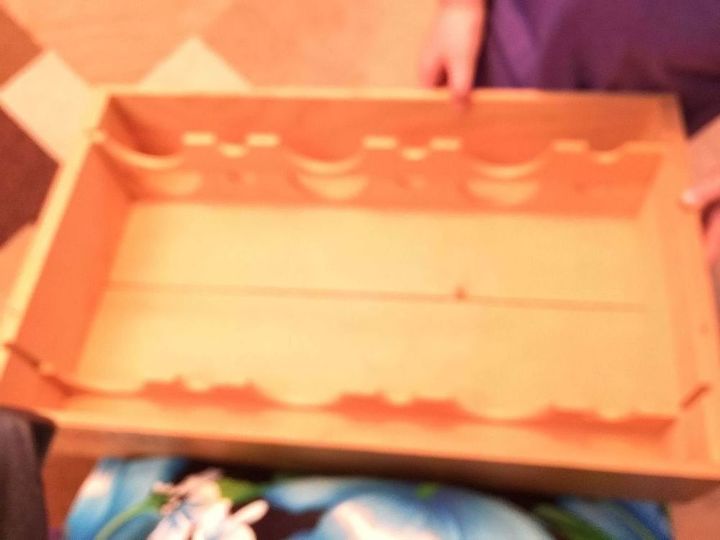
The empty base
The base of this wine box had three carved pieces of wood inside. I assume two pieces were for the bases of wine bottles and one piece was for the wine bottle necks.
First, we dusted out the base since there were slivers of wood and dust inside. Second, grand age almost eight and I sanded the wood dividers and the edges of the base. We just used 180 grit sandpaper in our hands since the wood was soft and thin.
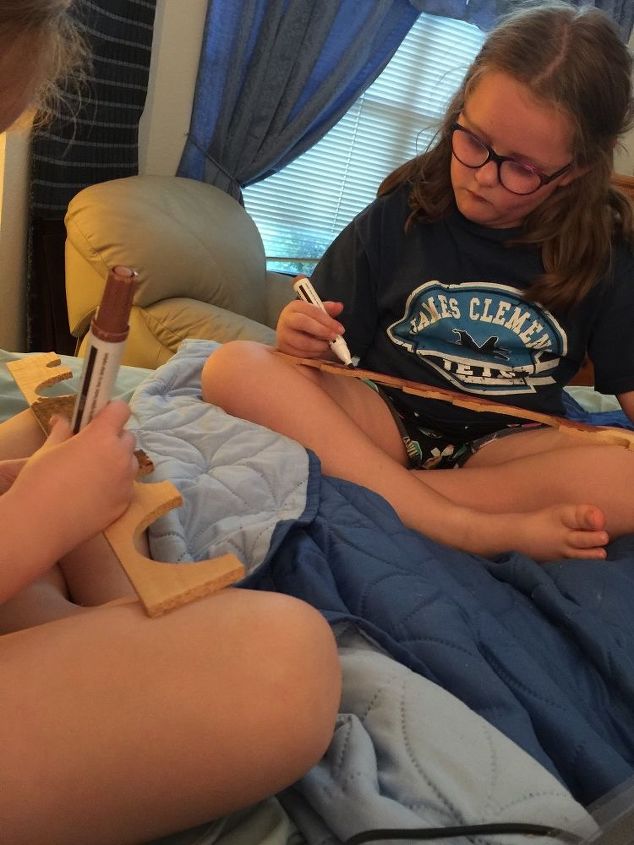
Painting the dividers
Third, both grands and I painted the thin dividers with Furniture Touch-Up Markers, one piece in oak, one maple, and one mahogany. This took a little longer than I thought it would because the thin wood had gaps and feathering that we had to color over and over.
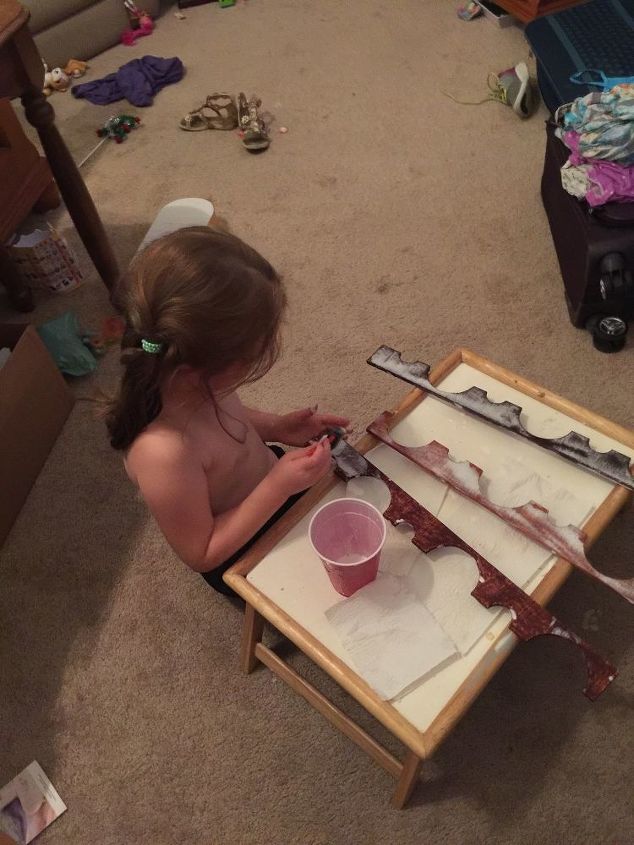
Assembly line work
Fourth, since grand almost 6 got through painting first, we set her to coat all the dividers with homemade ModPodge: white glue and water, equal parts, with a foam paintbrush. I wanted just a little protection from splinters while we continued to work. The white glue dries clear and helps preserve the wood.

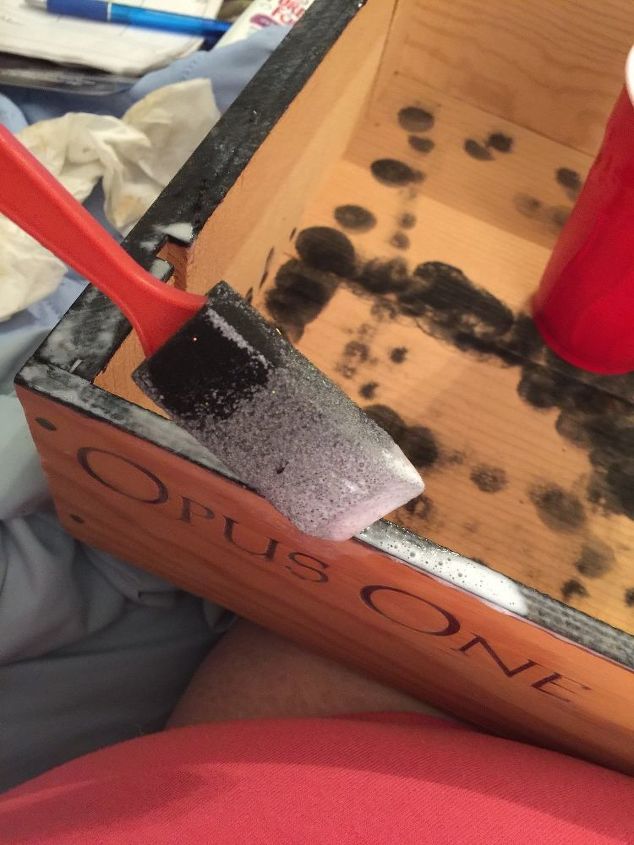
Painting with shoe polish
Fifth, Grand 8 used a new bottle of black shoe polish to paint the inside of the base. The bottle was sealed, however, so I couldn’t take the lid off for pouring, and dab, dab, dab just wasn’t working, so we saved the inside for the next day. Early in the morning I used about 2 oz. of Folk Art Ultra Dye in Blue Bayoo (a gift from Hometalk) to paint the inside of the wine box.
Just a little trim
Sixth, I was able to use the shoe polish to paint the front edge. Then I used the rest of the diluted glue to cover the front edge and all four sides of the base. This added just a little darkening of the wood and gives a little shine. This shoe box will sit on carpet, so I didn’t add anything to the sanded bottom.
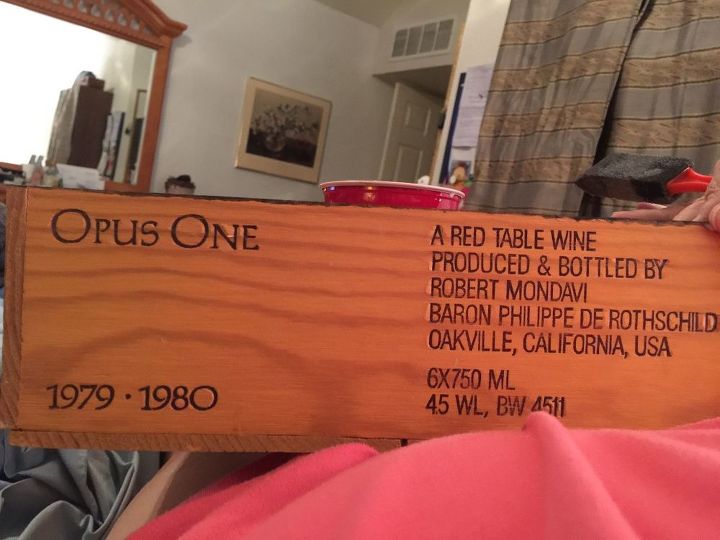
Dropping names
I know almost nothing about wine, but I decided not to paint over the sides with signatures and dates. Even I have heard of Baron Rothschild (of California). Whatever, the box will be in a closet.
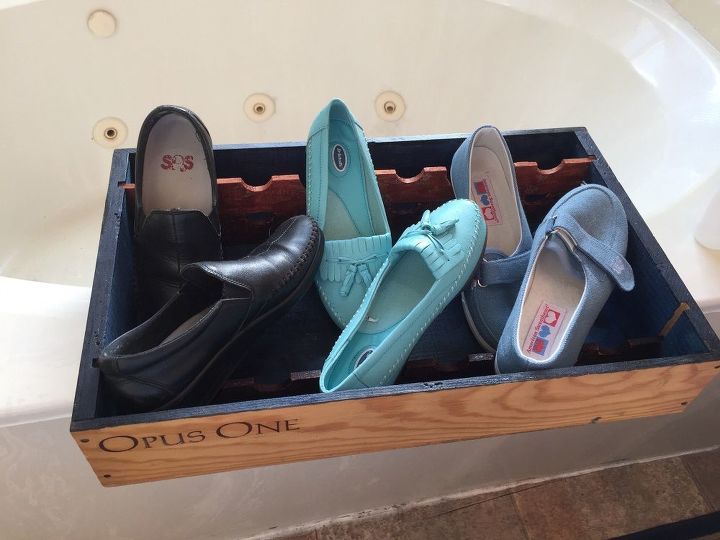
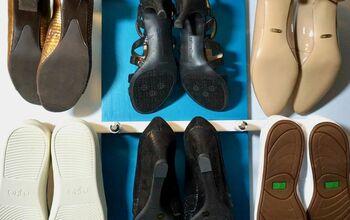
My shoe rack!
And this is the result that makes me happy. Two dividers on the back hold up the heels of three shoes. The shoes’ matches rest on one divider, and I displayed them lying at an angle, just for you. This fits nicely under my coats and garment bags in the closet.
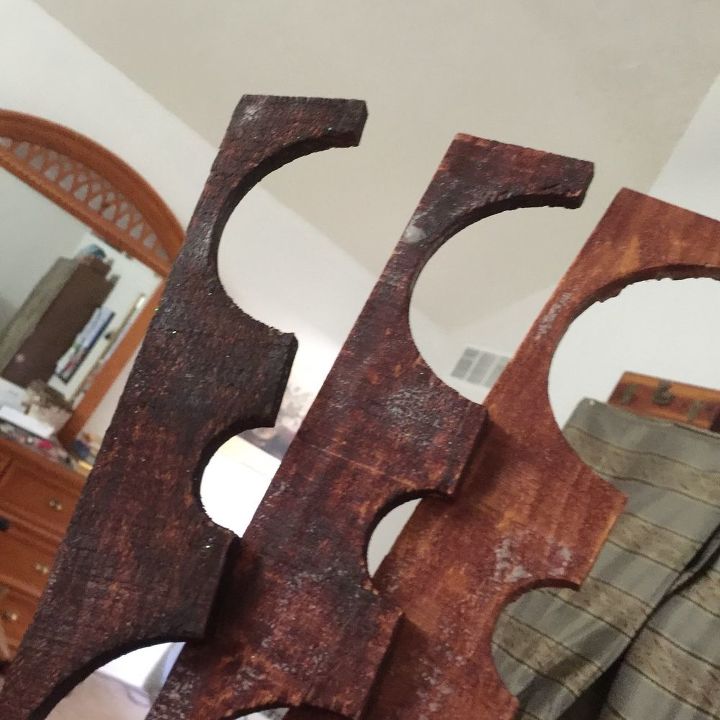
Bottle dividers
These are the wood dividers. I stained each one a different color with Furniture Touch-Up Markers (from Hometalk), in Mahogany, Maple and Oak, left to right.
I hope you get some ideas from my Shoe Rack project, and post yours on Hometalk!
Comments
Join the conversation
2 of 3 comments
-
How adorable! I love how this is a whole family project!
-
Papaw was very happy and tried his favorite shoes in the rack. I also tried six pairs of my own shoes, and they fit, too. So this box will be around for a while. Thanks, Wendy and Kara! ☺️


Frequently asked questions
Have a question about this project?