


Replace Old Windows and Trim
6 Materials
$800
8 Hours
Advanced
During last summer's internal renovation of our lake cabin, we held off replacing the windows because of the expense. This summer we decided to tackle two large window replacements in the living room. Our original windows were aluminum framed single pane glass, super inefficient! In the Texas heat, it made it very hard to cool down during 100+ days.
Note: this is a two person job because of the size and weight of the windows when you get both windows mulled together....
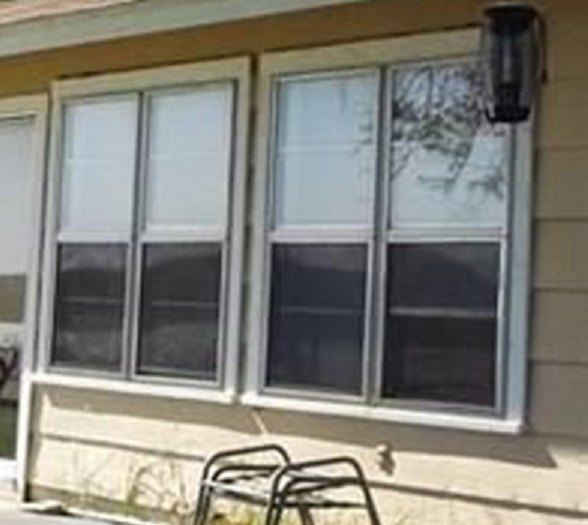
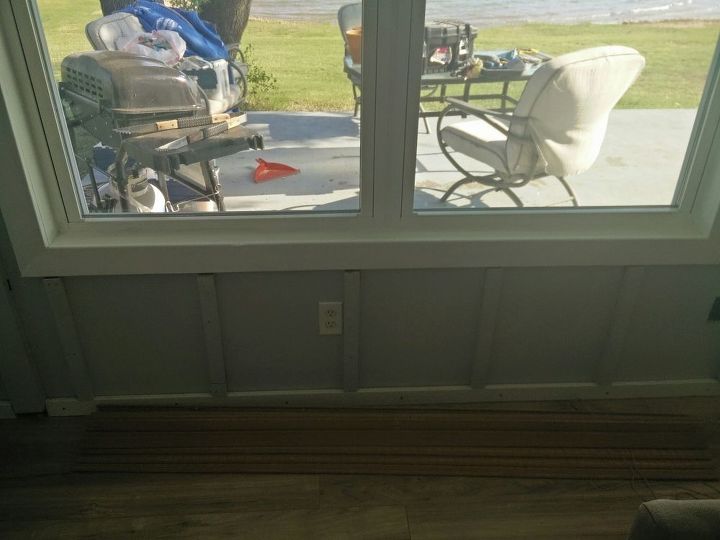
Here's the picture of the old windows. Notice how the trim was small only two inches wide and it needed replacing. We had to be careful not to damage the siding, because that is a project for down the road...
Step 1 - remove the trim (on exterior) with a small crow bar or back of a hammer, then we loosened the siding and in some spots removed it completely (small pieces next to the door). If your trim will be reused, be really careful not to break it during removal. We opted to replace ours with wider trim.
Notice that these windows are a standard size width and height (36 inches wide 72 inches high), but you have to buy two per window, for a total of 4 and two mulling kits. The mulling kit holds the two windows together.
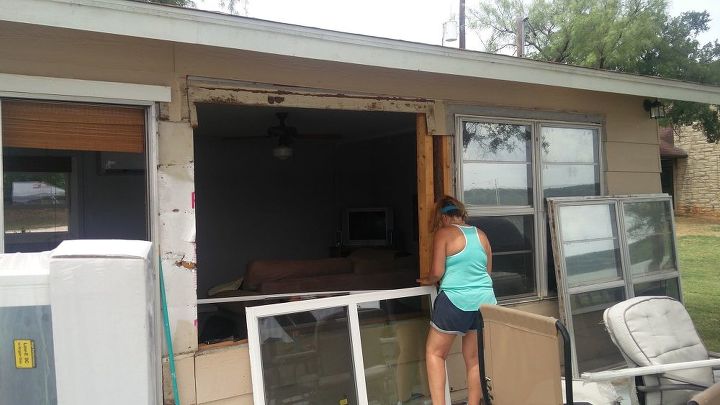
Step 2 - Remove the window by taking out the nails that are holding it to the frame. This is a cumbersome process and because these windows were also mulled together, they bend a little when you have them out. This caused us to break one, which led to more clean up.
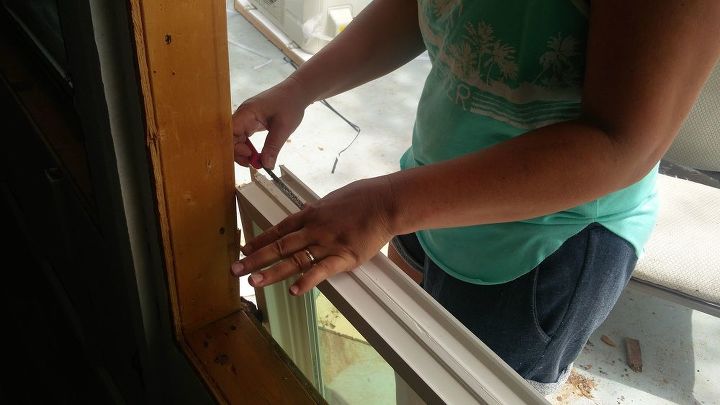
Step 3 - Mull the Windows together. These windows are standard pvc framed, double paned with argon gas in between for super efficiency. Available at HomeDepot or Lowe's, as well as the mulling kits. The mulling kits don't work very well, they were a major source of frustration. In order to get the mulling kit to slide together, I had to file parts of the window frame slightly...in the picture above, I am filing that internal strip smooth so the mulling piece can fit properly. We found that the mulling kit would not "snap" together like the instructions explained, so we ended up adding screws to each side to secure the window and the mulling.
Step 4 - Hang your window, sorry no picture but our hands were all busy at this point of the project .. It takes two people on each side to lift the window into place and then we had to sneak under our loosened siding to get it in the correct place. Once you think you have it place correctly, use a level to make sure it's straight, if not, level the window by adding a small wood piece to correct. Then using two inch screws, attach your window to the frame of the house.
.. It takes two people on each side to lift the window into place and then we had to sneak under our loosened siding to get it in the correct place. Once you think you have it place correctly, use a level to make sure it's straight, if not, level the window by adding a small wood piece to correct. Then using two inch screws, attach your window to the frame of the house.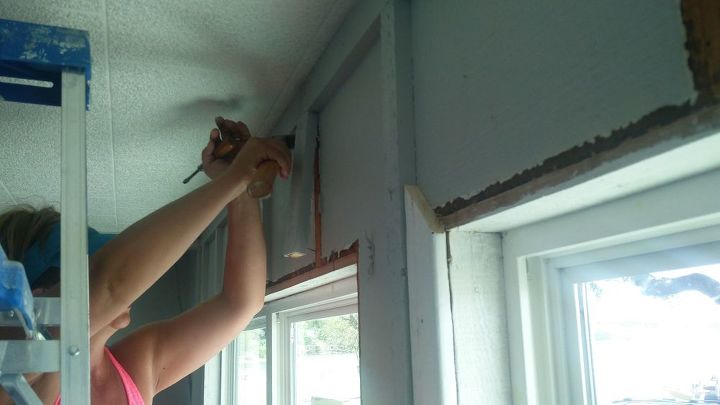
Step 5 - Trim the window inside and out. Several areas had to be reconfigured because we were using larger trim than the original. So the "shiplap" like wooden strips on the inside had to be taken off and cut down, kind of a pain but I really wanted the larger trim.
Once your trim is on, caulk around the seams and then paint.
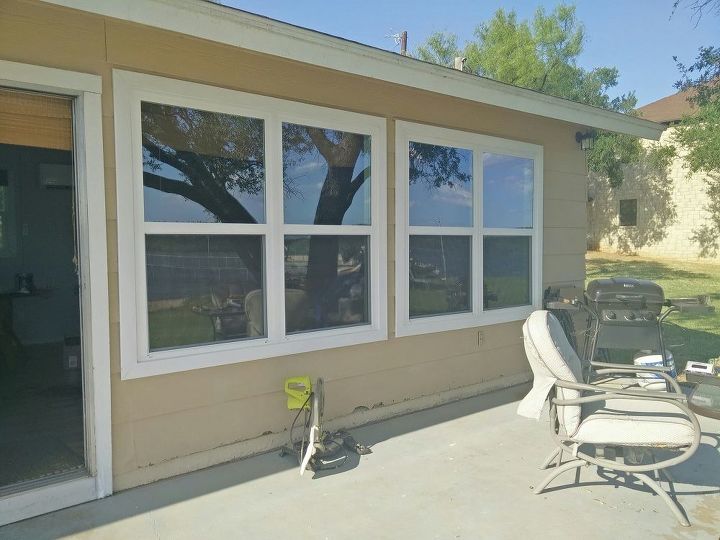
The finished product! It's really an impressive upgrade to the house, not to mention way more energy efficient!

Want more details about this and other DIY projects? Check out my blog post!
Comments
Join the conversation
2 comments
-
Wow, what a project. Nice work. Looks lovely!
-
They look great. Great job.


Frequently asked questions
Have a question about this project?