


Bowling Ball Glitz

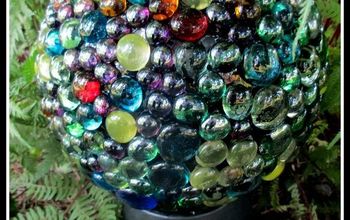
I wanted to try the garden gazing ball DIY so purchased a bowling ball from a thrift store, flat glass marbles , E6000 glue, silver metallic paint and spent a few days making this.. I have gone through multiple versions and lessons learned .. I liked this project so much that I have purchased thin-set mortar to use for the next one.
7-21-19 update. A little over 1 year - the hot GA sun did a number on the E6000 glue and grout cracked and beads fell off. Definitely going to use mortar as the glue for beads and adjust spacing to see how will hold up. Hope to finish end of August 🤗 (see last image)
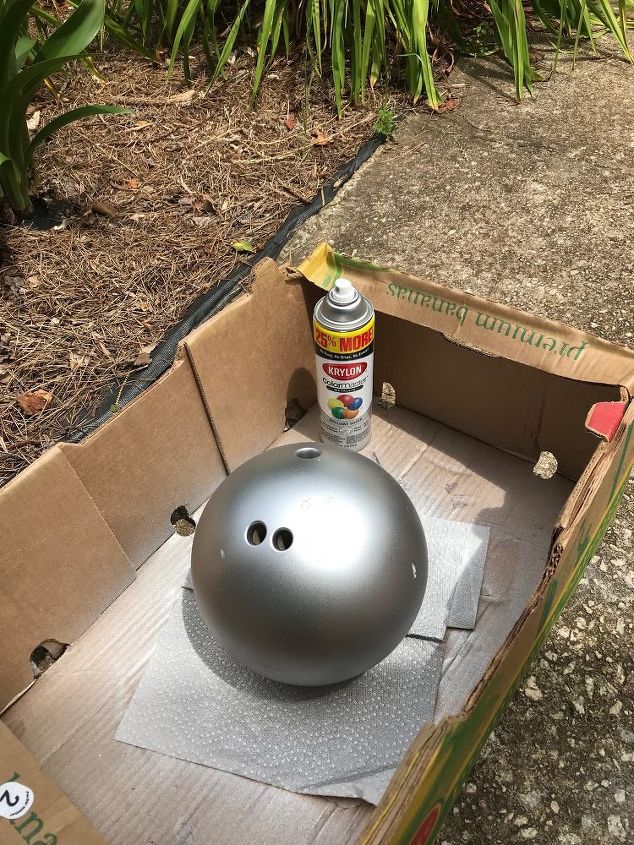
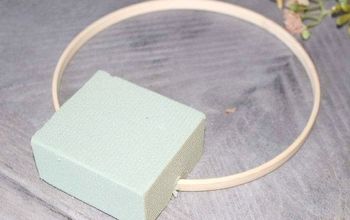
Start with one balling ball, clean the surface well to remove grime and grease.
Then paint - I used a silver metallic paint

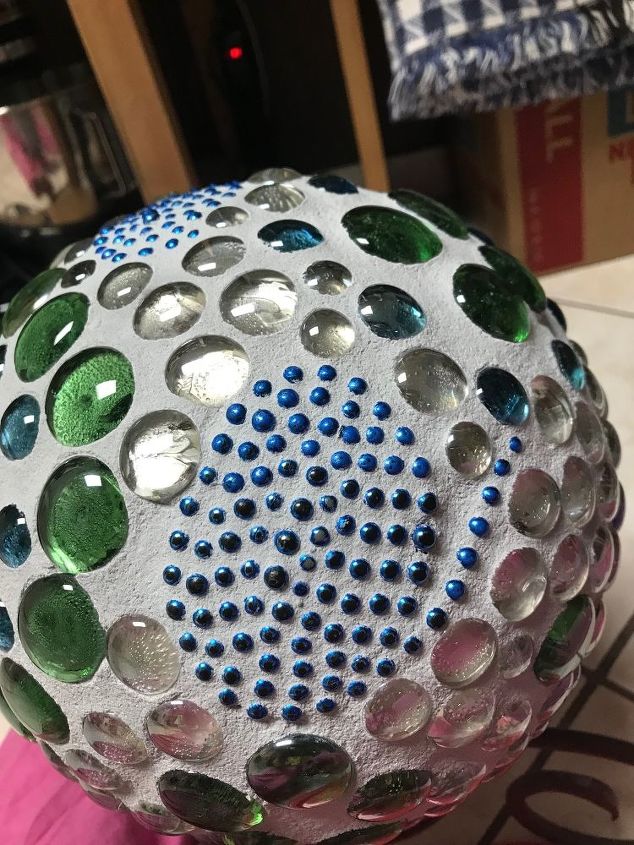
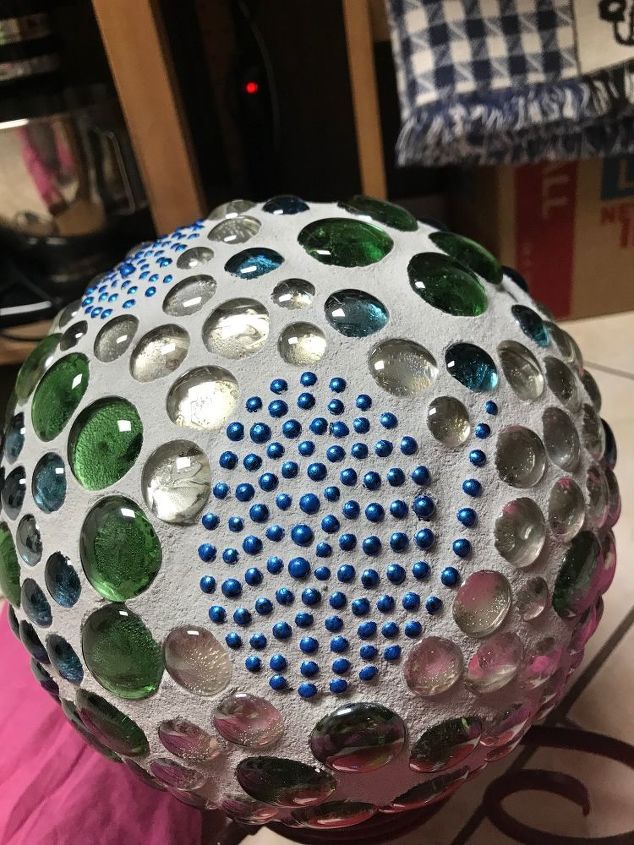
Next start gluing flat marbles (Dollar Store green and blue) down in design that you prefer with E6000 glue.
Gravity did come into play and the marbles did slide so I had to do a small area at a time and used cellophane tape and taped across full length so that they held each other in place. I did that in all directions.
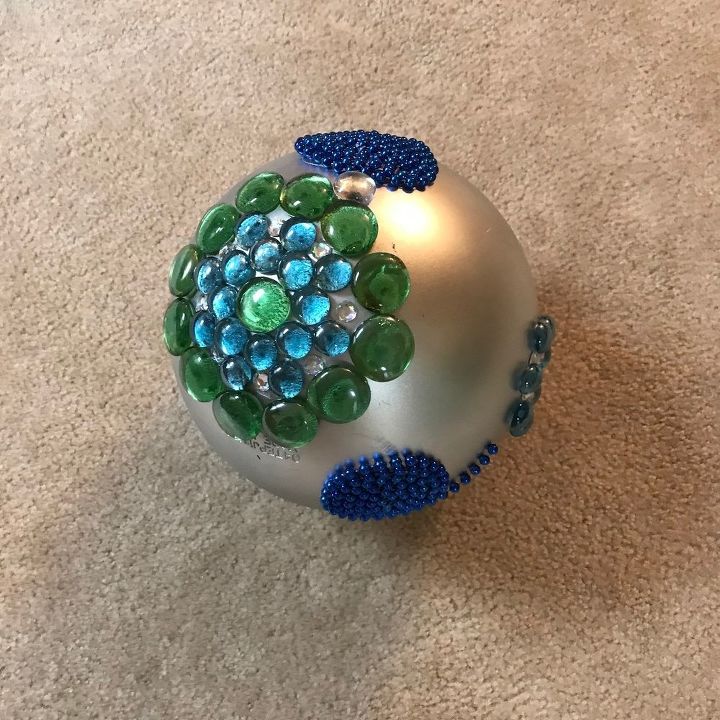
Keep going. I randomly selected areas and would place another flower or shape. I wanted texture so I used blue mardi gras beads (plastic) 6 strands for $1 in various swirl patterns.
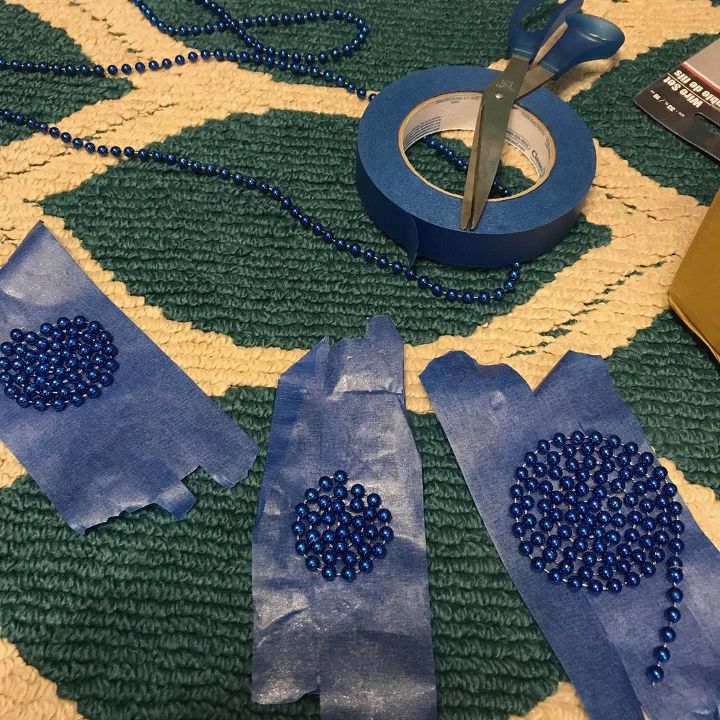
To make the swirl patterns, I tore off strips of painters tape and overlapped edges to create a large sticky area. I then laid the beads down in whatever pattern I came up with and then I then put glue on the ball and pressed the beads down. I first tried to smear glue across the beads but that did not cover well
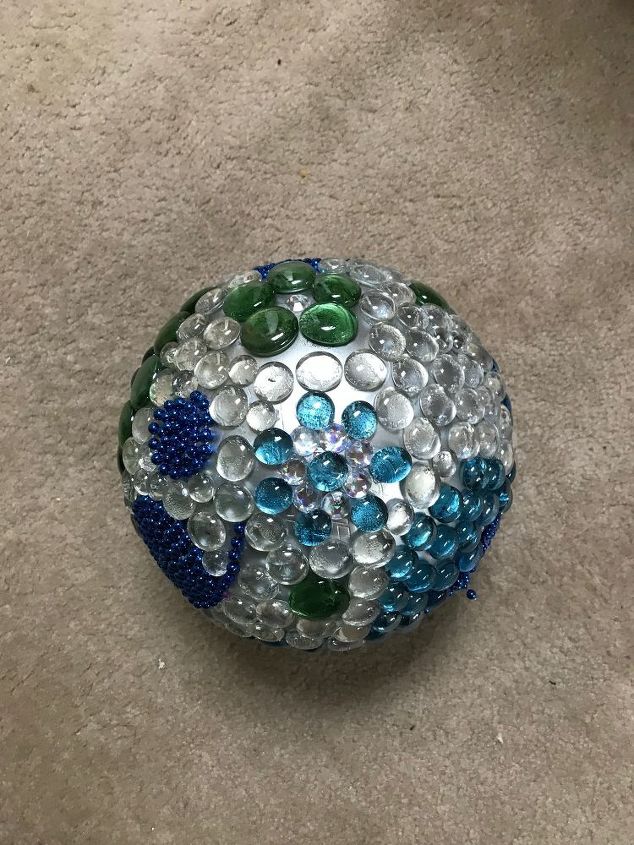
I decided to add clear flat marbles in two sizes to fill in the large spaces. I also added plastic diamond gems but those did not want to stay glued down and disappeared in final stage

Gazing Garden Ball in it's glitzy glory but the 95 degree heat seemed to take a toll and make a few marbles lose. Sadly the ball took a tumble off the little man stand and lost a couple marbles. At this point, I knew I wanted it outside, so I decided to grout. If you made one for an inside room, the grout would not be needed unless you preferred it.

Grouting - This is the first thing I ever grouted and why oh why am I doing something round?? Poor judgement - but it really was not that bad. I watched several mosaic YouTube videos and still ended up with my grout mixture a little on the runny side but thankfully it held.
- You want the mixture to be like frosting or oatmeal consistency. Follow manufacturer direction or buy the already made.
- I have a couple of mosaic projects in mind, so purchased the sanded grout powder. I filled the finger holes last and let it set up.
- I am missing the shine and glimmer of the silver metallic paint but it does still come through the clear marbles.
- The cleaning process is simple. After about the first 10 minutes - Use a damp (completely wrung out ) sponge and gently wipe over surface.
- Let haze build up again and wipe again. Again, I recommend watching mosaic YouTubes to prep for this.
- The grouting process took less than an hour as you will work fast once you have the mixture ready and start applying.
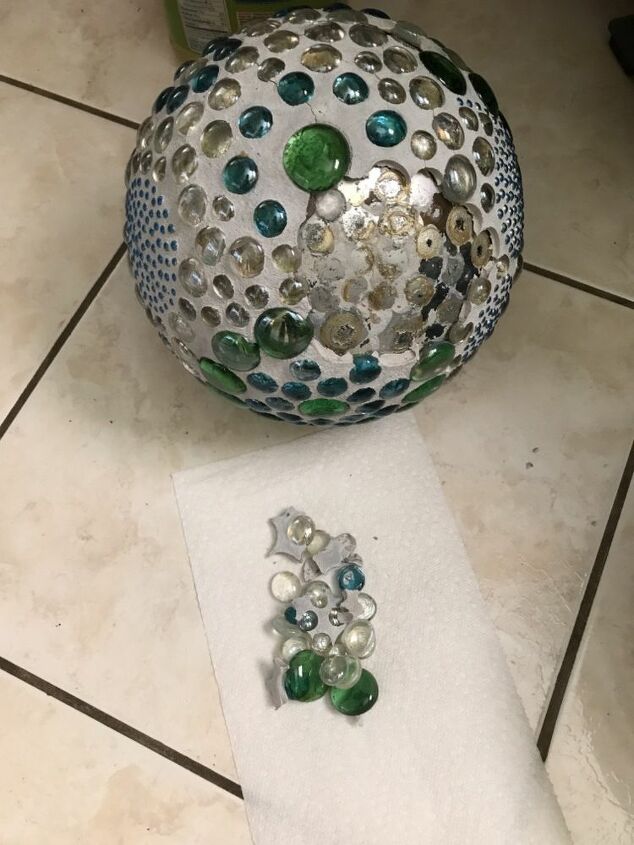
Wiping the grout off took some of the color off the beads; I assume because it was sanded grout.
I used sanded grout as supposed to be better and more durable for outdoors. bummed but fixable.
So I did a touch up with blue metallic acryllic paint and it worked! Hooray!
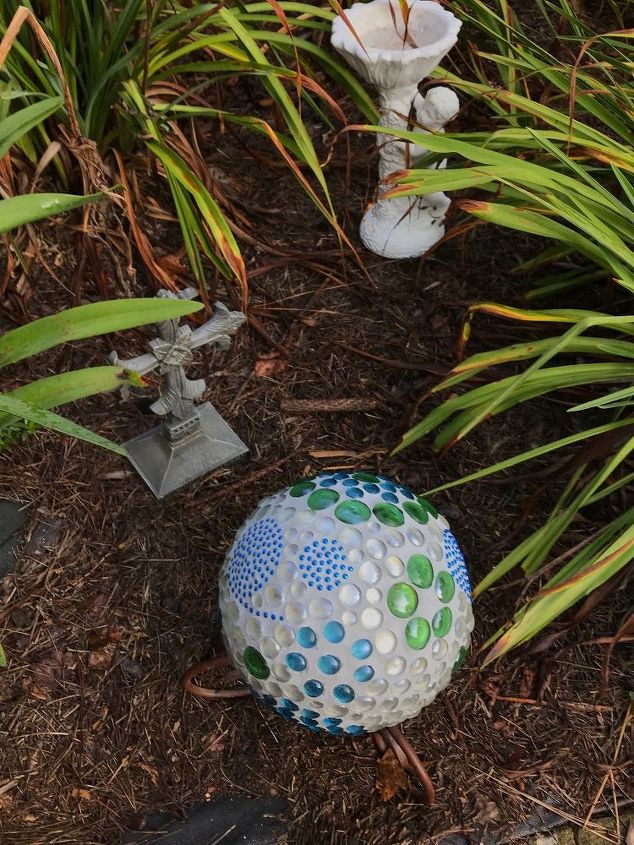
This is the finished piece actually on a rainy day. It is not as glimmery as before but I am still very happy with it.
Lessons learned -
- Since grouting I would space out the marbles more so that more of the marble would show.
- I had glued them touching when I thought it would not be grouted.The plastic gems are buried in the grout so that was a waste.
- I may try to add glitter to the grout or at least in final wipe down to see how that looks on a future one.
- I liked this project enough that I have purchased 3 more bowling balls and am planning to make one for a fundraiser for my daughter's mission group.

- The total time was less than 15 hours but had to be spread over days due to working in small areas because of marbles sliding.
- The next gazing ball will be a mixture of thinset mortar and E6000 as I want to use silver paint again so we will see what happens.
- Figure out how to do a time lapse video of project for future projects
Hope you enjoyed!
2 Hot Georgia summers and cold rainy winter did not = success for E6000. Bummed but not defeated. Will redo soon with mortar and grout.
Resources for this project:
See all materials


Comments
Join the conversation
-
With all the problems you had is it even worth the hassle?
-
I just left my ball the way it was - green marble - and set it on the agitator from a washing machine. I really like it and people don't guess what it is.


Frequently asked questions
Have a question about this project?
I wonder if you could use epoxy?
Will the gems and the grout hold up in heavy rain or extreme heat outdoors?
I too have projects with bowling balls and dealt with sliding gems! Next time I am going to use tape and glue gems around the center! When they set, I can work my way up and flip it and do the same on the other half! Just an Idea...