


DIY Round Farmhouse Coffee Table
9 Materials
$30
4 Hours
Medium
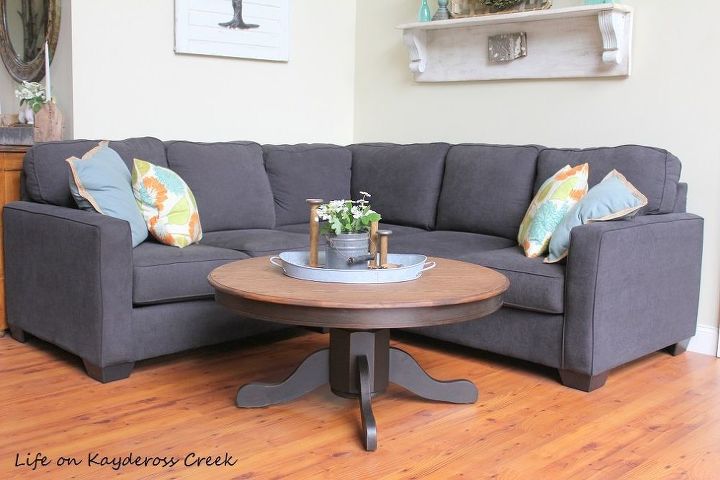
I have been looking for a round coffee table for a while now and can not find the size and color I wanted to I decided to DIY it. I bought this old orange-y dining table for $20.
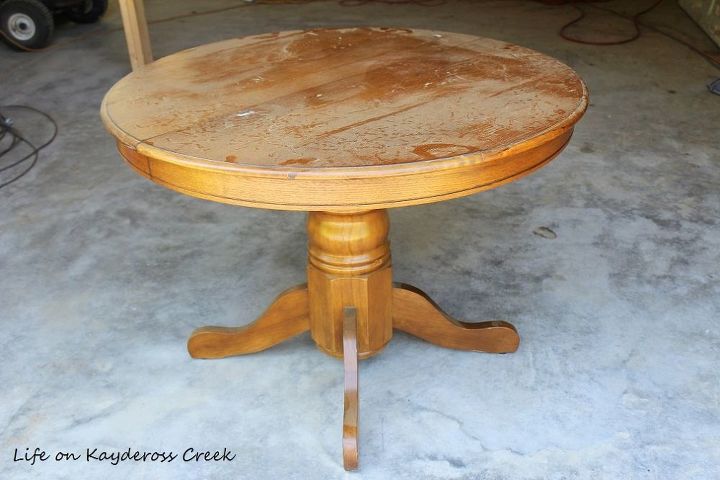
I really like the shape of the base and the fact that it has the “skirt” around the top.
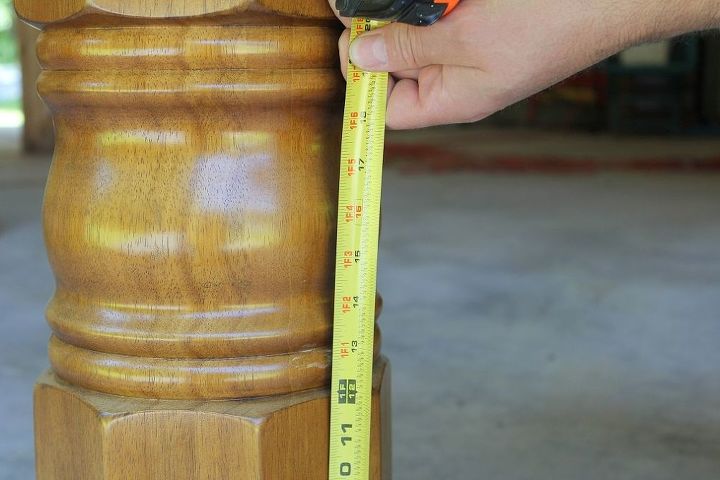
Fun fact: the average coffee table is about 16-18 inches. The one we have in our family room now is 19 and it seems to fit well with the new sectional so we’ll stick with that height. The way the top attaches to the base is through 2 different levels of boards which in total measures 4 inches so we only need the actual base itself to be 15 inches.
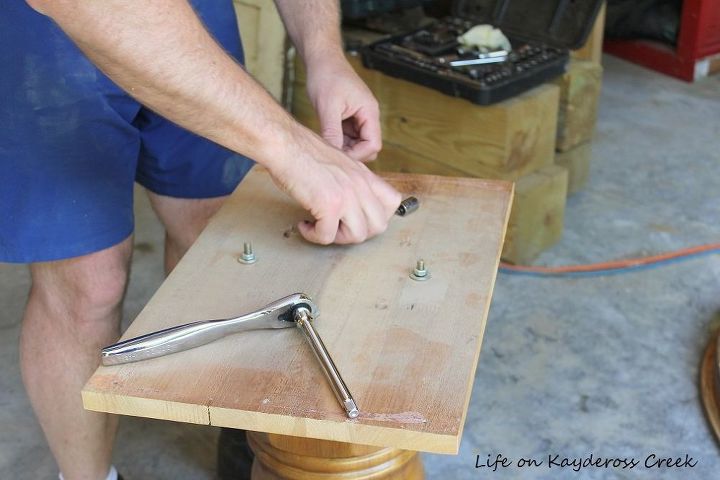
We removed the top. See how the boards are attached?
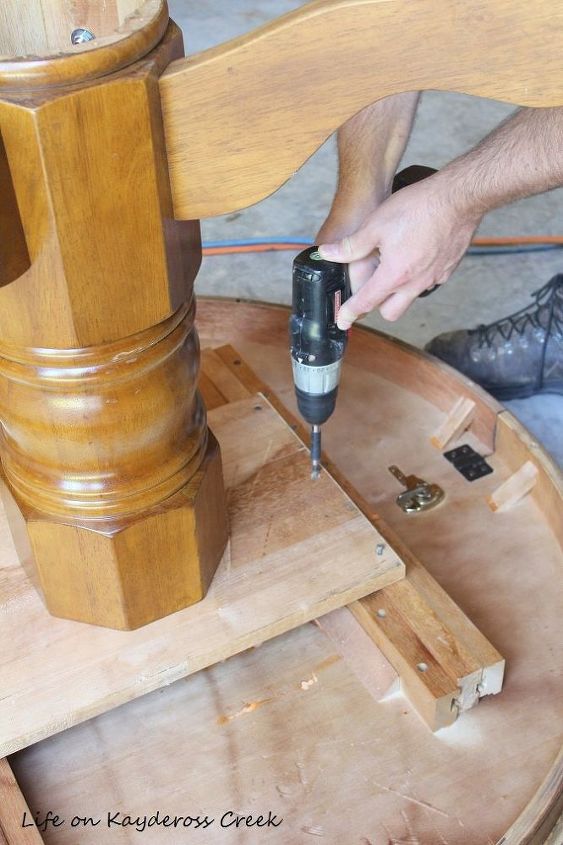
We saved all of the pieces to re-attach it.
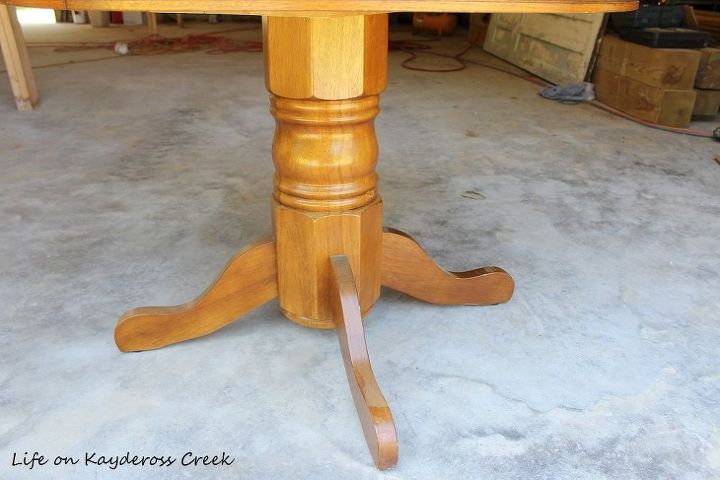
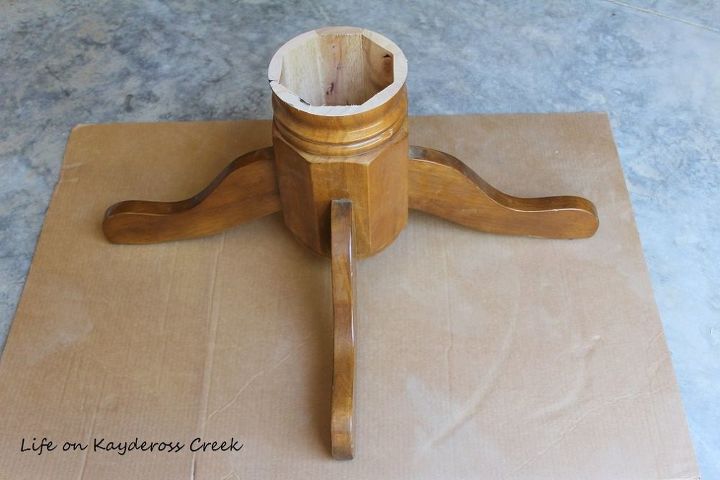
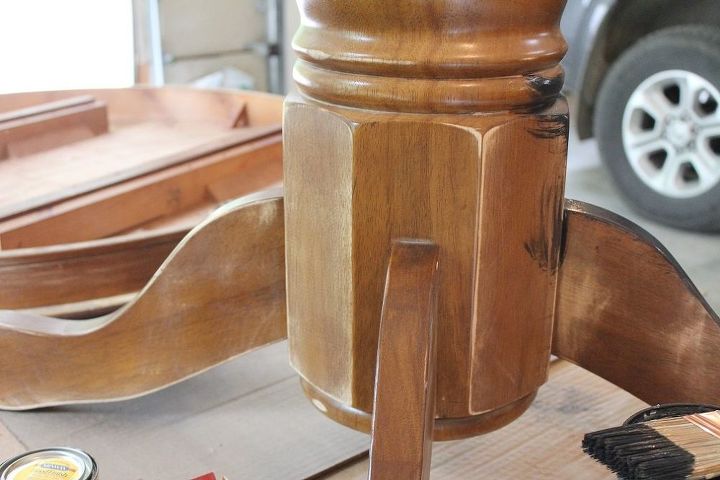
We removed two of the legs and used the chop saw to cut it. This required hubby to turn it over a few times to get it cut all the way through.
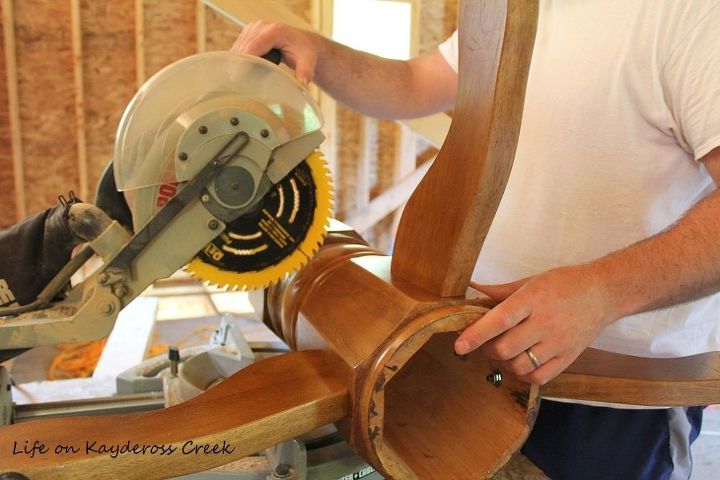
It wasn’t perfect but it worked. It’s was a bit uneven so I used my palm sander around the edges to get it level.
I put that aside and got to stripping the top.
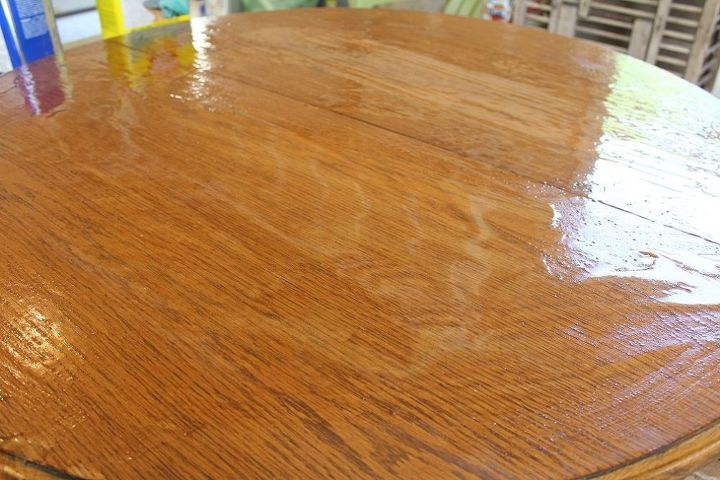
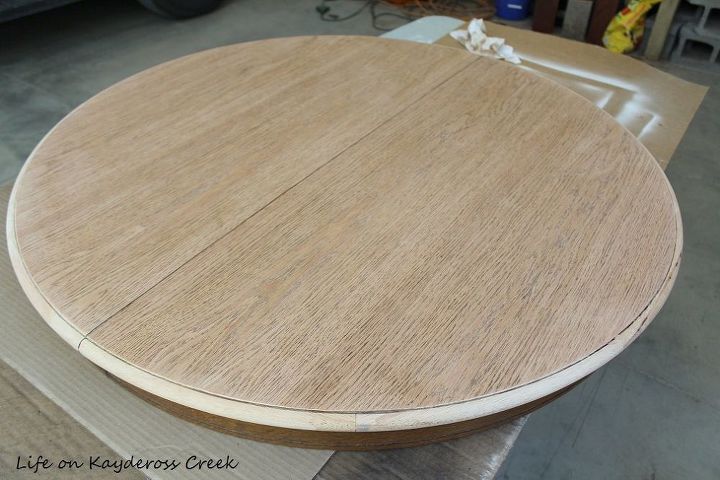
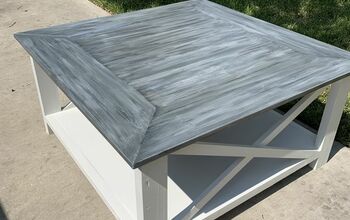
I stained the top with a color that was too light and ended up going over it with dark walnut to make it darker but it was still not what I wanted. I sanded it down a bit and went back over it with Honey.
For the bottom and around the “skirt”, I decided to go with a distressed black. I sanded it down with the palm sander to get some of the shine off. I used the same Behr black paint and primer in one in a satin finish that I used on our dining room hutch. Then roughed up the lines here and there with a 120 sand paper to let some of the wood show through. Then I went over it with the a little stain. Rustic, farmhouse goodness.
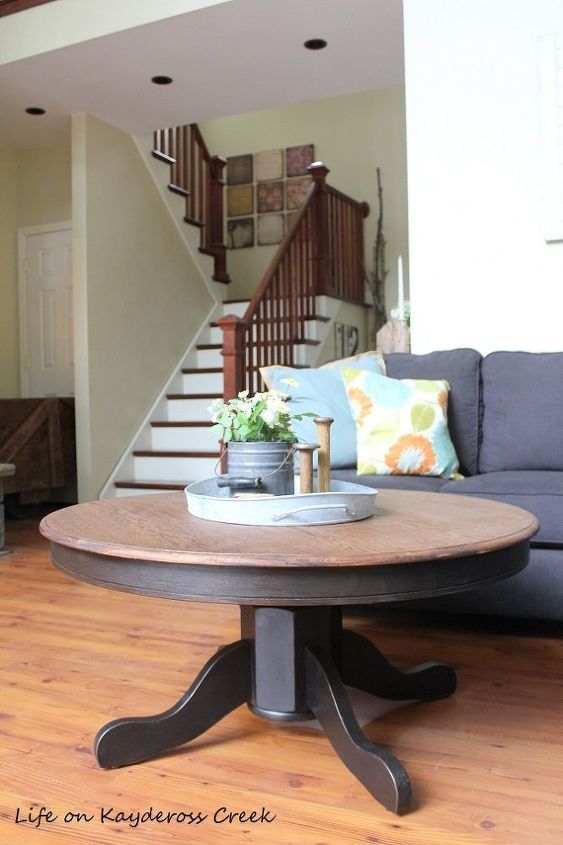
We put it back together exactly how it was originally attached with the bolts. Here she is in her new home. I LOVE it!
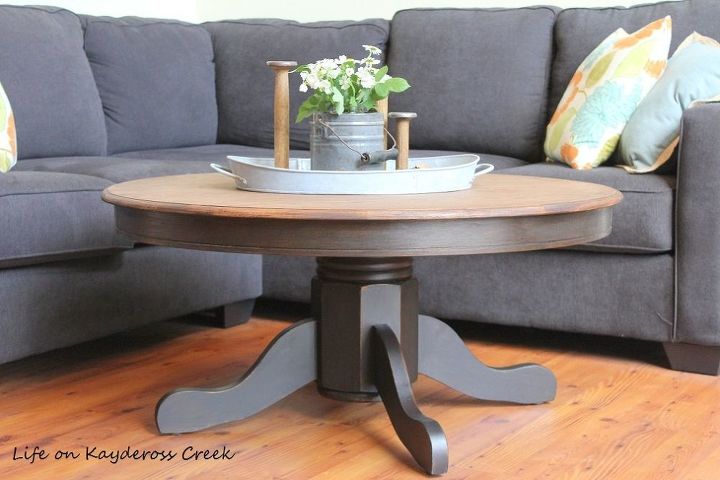
I think the round shape helps with the flow a bit better as we are walking from the stairs into the family room. Unfortunately, now I notice how much we really need a rug. 
A bit time consuming but not hard.
To see more about this project and other DIY projects, visit my blog at http://mylifeonkayderosscreek.com or you can find my on Facebook
https://www.facebook.com/lifeonkayderosscreek/ or Instagram at
https://www.instagram.com/lifeonkaydeross/
Resources for this project:
See all materials


Any price and availability information displayed on [relevant Amazon Site(s), as applicable] at the time of purchase will apply to the purchase of this product.
Hometalk may collect a small share of sales from the links on this page.More info

Want more details about this and other DIY projects? Check out my blog post!
Comments
Join the conversation
2 of 481 comments
-
Love itB
-
My Dad turned a round oak dining table into a coffee table back in the mid 60’s. The base has a crack in it, so he cut it off and made a coffee table.


Frequently asked questions
Have a question about this project?
I have a very old dining room table (rectangular) that belonged to my Grandmother. I can't use it in my dining room, but would love to reduce the size (both the height and the width) and use it somewhere else in my home. I was thinking of possibly just cutting it in half and using it as an occasional table with the cut side against a wall? Anyone have any ideas?
LOVE IT! I found a table similar to that except it has claw feet! It is in an old, ricketty shed at an abandoned lot. The top has seen better days on the top surface bc of being exposed to the elements it is streaked with black mold or mildew. I saw it and instantly thought coffee table!should I paint the whole thing or stain the top? And how to disinfect and prep it with all the icky water damage?
In your written description you said, “I used the same Behr black paint and primer in one in a satin finish that I used on our dining room hutch. “
In your link it was a black satin by Rustoleum, protective enamel?
Which did you use on the coffee table, and did you add something to give it a more chalky appearance?