


Replacing a Broken Wood Handle on a Sledge Hammer

by
Jan Marie
8 Materials
$6
30 Minutes
Easy
It is far less expensive to fix a mallet or sledge hammer with a wood handle then it is to buy a new mallet or sledge hammer. A quick trip to the hardware store and less than 6 bucks will give you a good as new mallet or hammer.
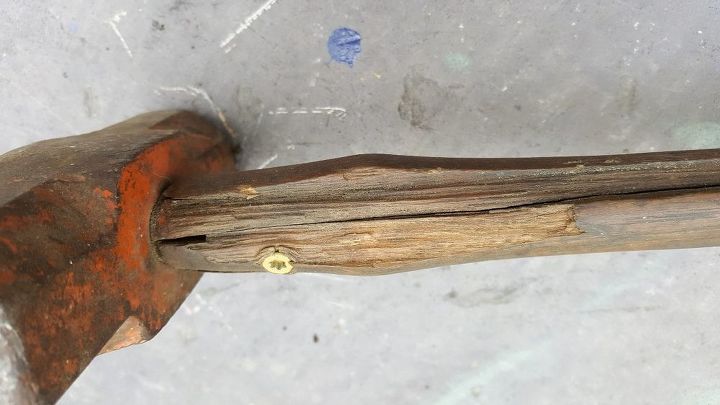
This mallet was a disaster waiting to happen. Not only was there wood missing from the handle but it also had a crack nearly the full length of the handle. So off to my local Ace Hardware where I purchased a new handle for $5.59. Make sure you take your broken hammer or mallet with you so that you get the correct replacement.
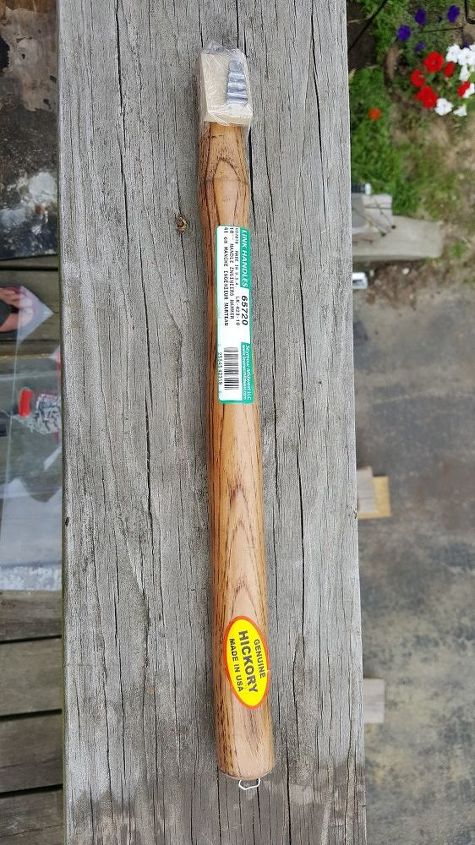
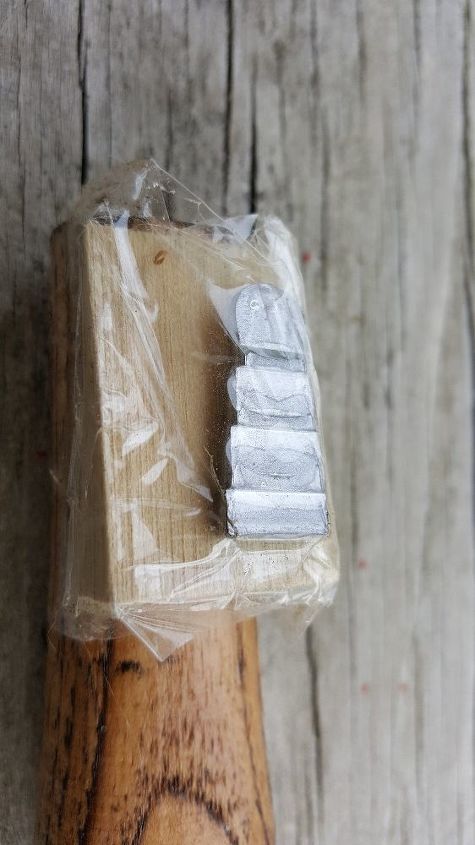
Here is the replacement handle that I purchased. Taped to the handle should be a metal shim. Make sure the that the handle has the shim before you head to the cash register. The handle will be of little use to you without the shim.
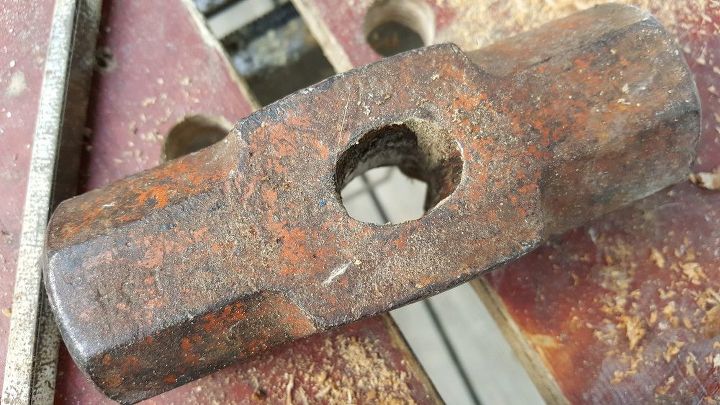
Now that you have the handle home you will need to remove the old broken handle. The easiest way is the place the mallet or hammer head in a work mate or vise and drill into the wood on the top of the head of the mallet or hammer.
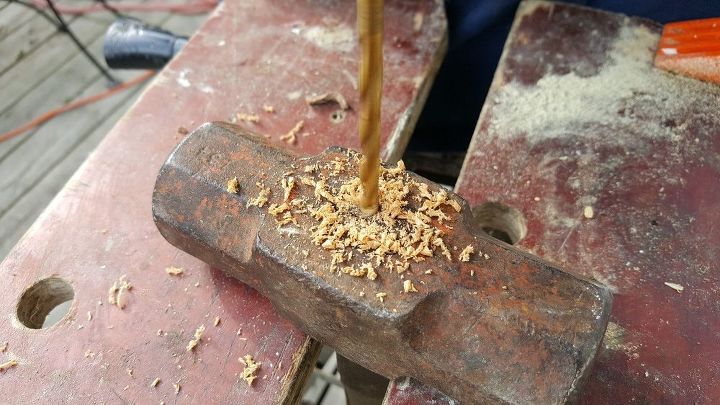
This will allow you to use a center punch, chisel, or basically anything solid that will fit the area and that you can use a hammer to hit it. Do not clamp the handle into the vise or work mate table.
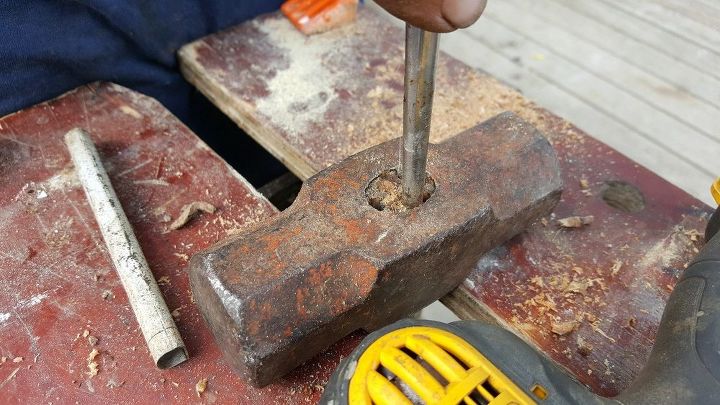
The handle will come out after a couple of whacks. If it doesn't appear to be moving then drill out more wood.
Next try to insert the new handle. It will be too big but don't worry it will fit eventually. Start by sanding the edges on the very tip of the handle. This will allow you to start to insert the handle in the head.
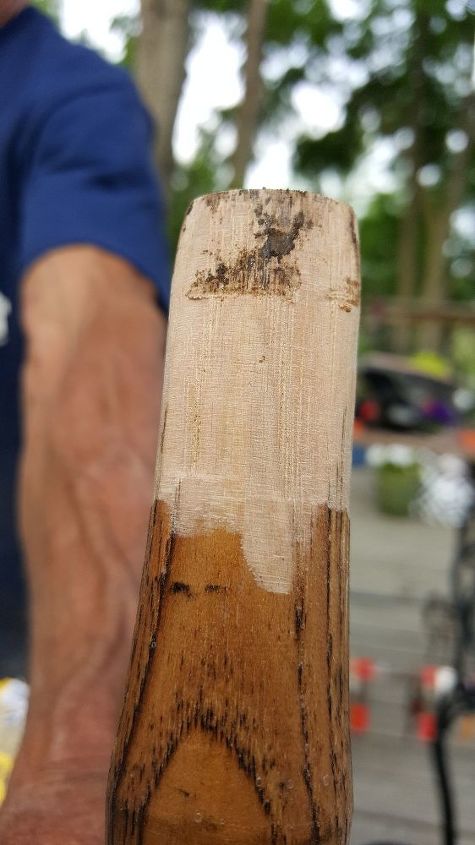
Take your time. It will take about 30 minutes from start to finish. We use a belt sander turned upside down and clamped into a workmate table. Use safety glasses to keep saw dust out of your eyes. Once the handle starts to fit you will then move down the handle and sand some more. Periodically stop and test fit the handle. When you remove the handle you will see marks on the freshly exposed wood that will show you where it is too tight and needs more sanding.
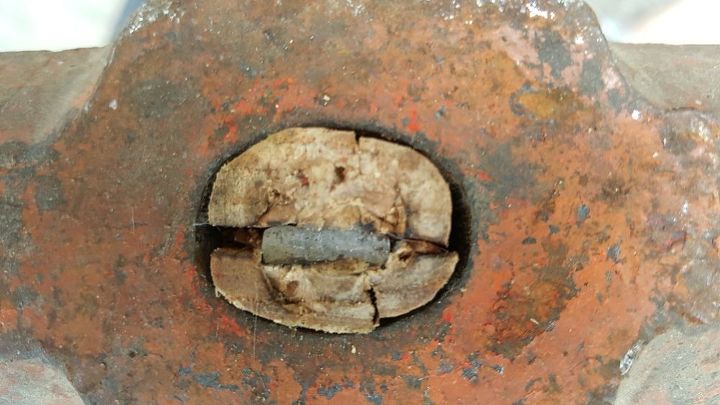
Now that the handle fits you will need to insert the shim in the factory made slit in the tip of the handle.
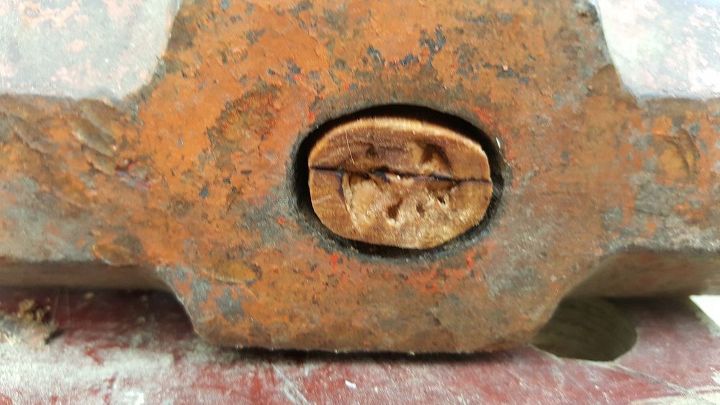
Place the small end of the shim into the slit and gently hammer it downward and once the shim is flush with the top of the wood handle use a chisel to slightly countersink the shim.
Now your hammer or mallet is ready to go to work and you have saved yourself at least 20 bucks on a small sledge hammer but the savings increases on the larger sledge hammers with longer handles. This is an easy project but the most hardest part is patience. Take a little wood off at a time when sanding and test fit often. Do not take too much wood off the handle or try to shave the wood handle with a knife. The shim will only take up a sliver of space. The key is to have a tight fit before you insert the shim.
Want more details about this and other DIY projects? Check out my blog post!
Comments
Join the conversation
1 comment
-
Excellent project that everybody needs to know! Thank you for taking the time to share this.


Frequently asked questions
Have a question about this project?