


Stove Pipe Outdoor Solar Lighting

by
Melanie
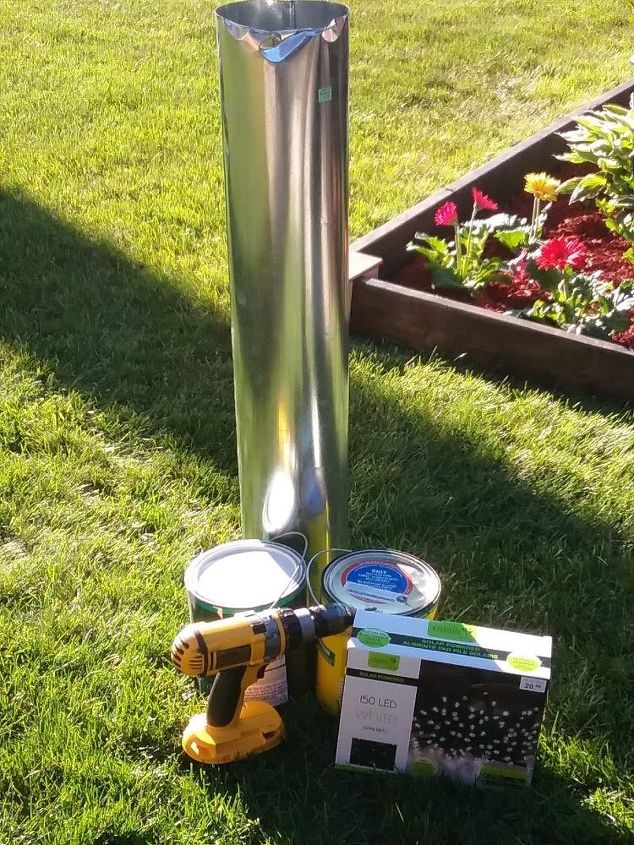
7 Materials
$27
2 Days
Medium
I seen this outdoor garden solar lighting at Costco. It looked like it was made from tin with holes all up and down the sides of it, and solar lights strung up and down inside of it. I loved it but not the price for it so needless to say it stayed at Costco. The idea though stuck in my head and I knew I had to try and recreate it. So off to my Restore.
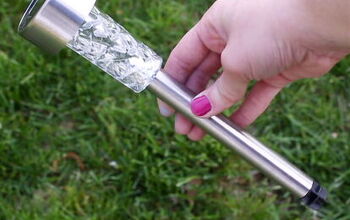
First step is to buy your pipes. Restore had the perfect size I wanted and only cost me $3.00. Next was to purchase outdoor string solar lights. I found mine at Giant Tiger 150 solar light set. All you need now is a cordless drill.
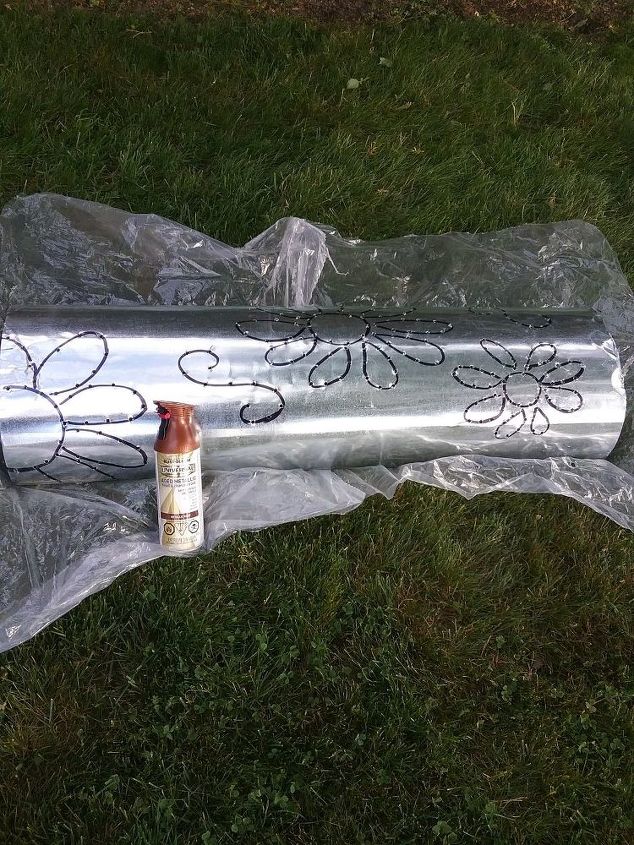
You are going to take your pipe and draw the design on it that you want in a black permanent marker.
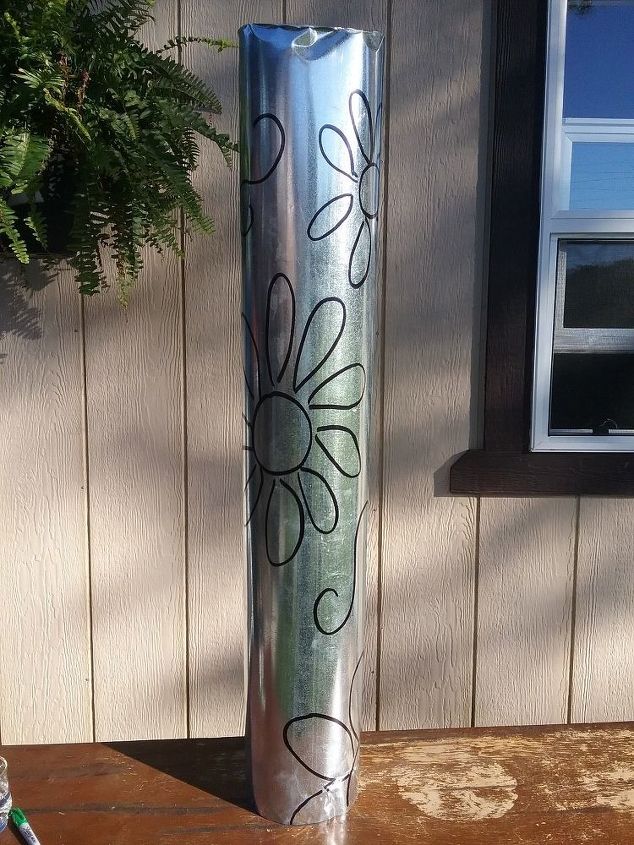
Next you are going to unfold your pipe. There is a seam at the back of the pipe and two grooves that the pipe sits in. You are going to pull it apart. The reason you are doing this is to prepare for drilling.
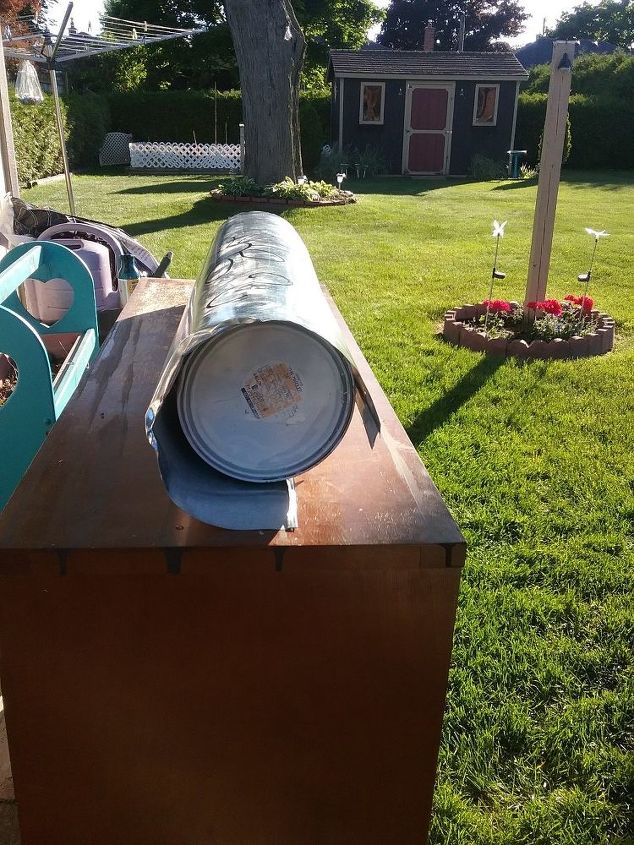
If you noticed in the picture with the supplies needed there were two paint cans. These are empty, you are going to use them for support to drill your holes. I placed them where I was going to start drilling. Take your drill and start drilling into the design you drew.
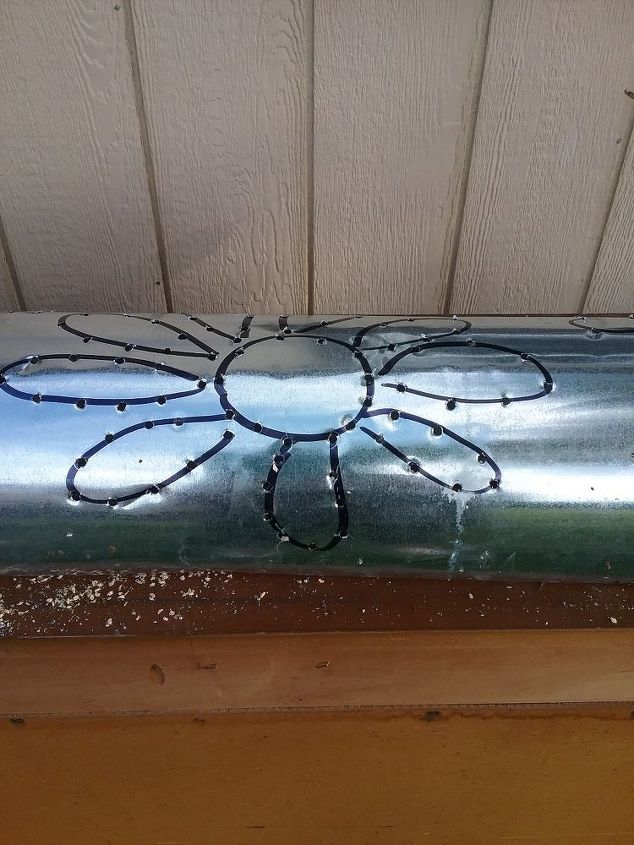
You can make the holes any size you want, and here is what it should look like. Continue until you are finished. Once complete you can leave as is or paint it.
I chose to paint mine in a copper color using Rustoleum spray paint.
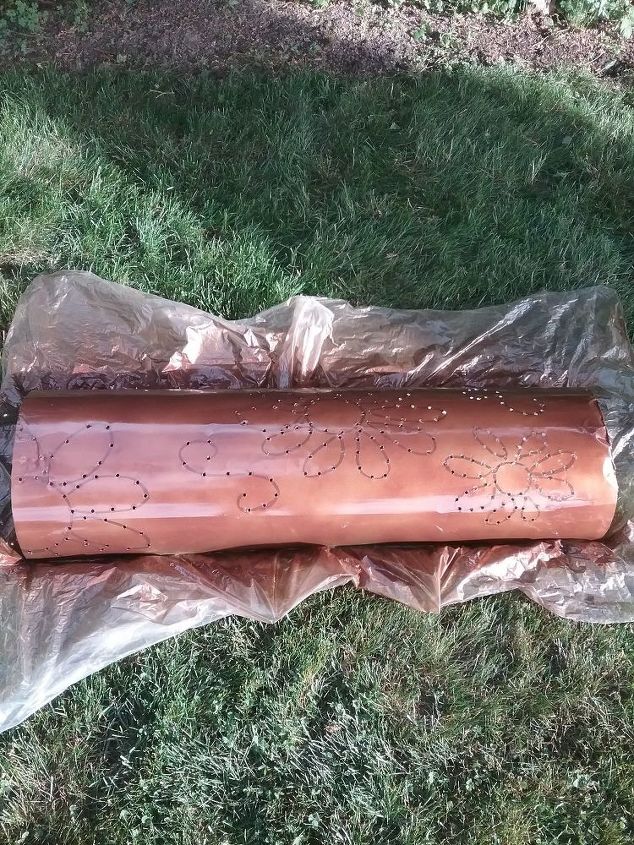
Here it is painted.
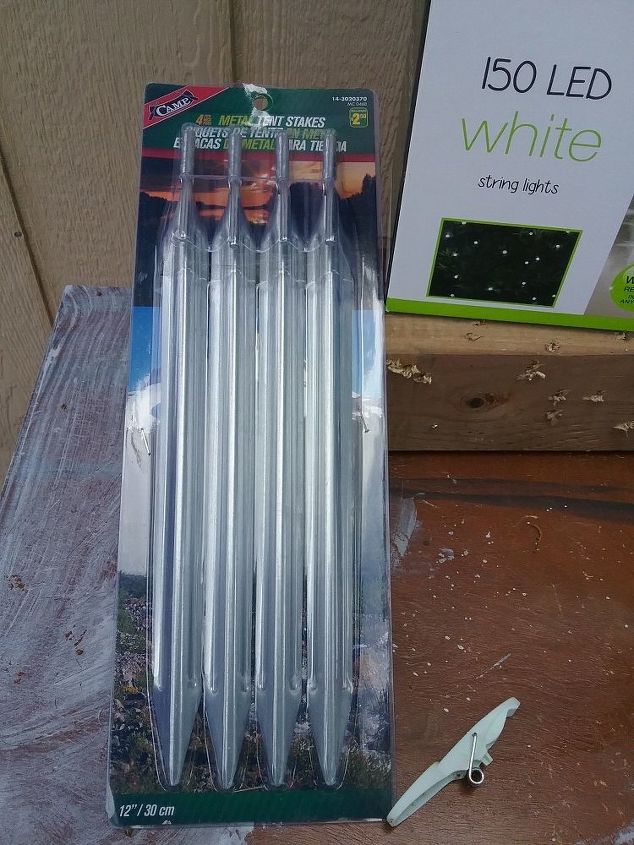
Using tent pegs you are going to attach them to the inside the bottom of the pipe so it will be able to go in the ground.
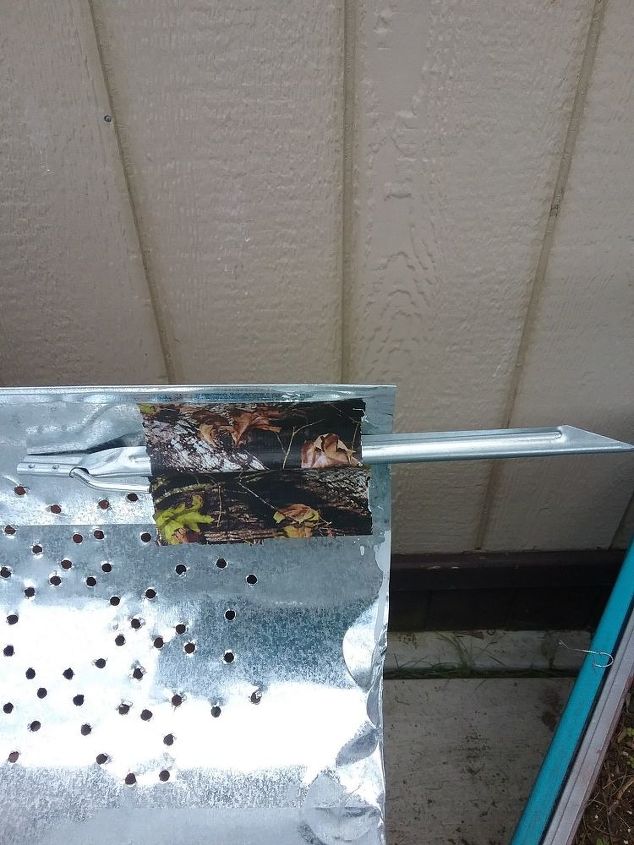
I attached using heavy duty outdoor duct tape. Put another peg on the other side of the pipe, so you have two.
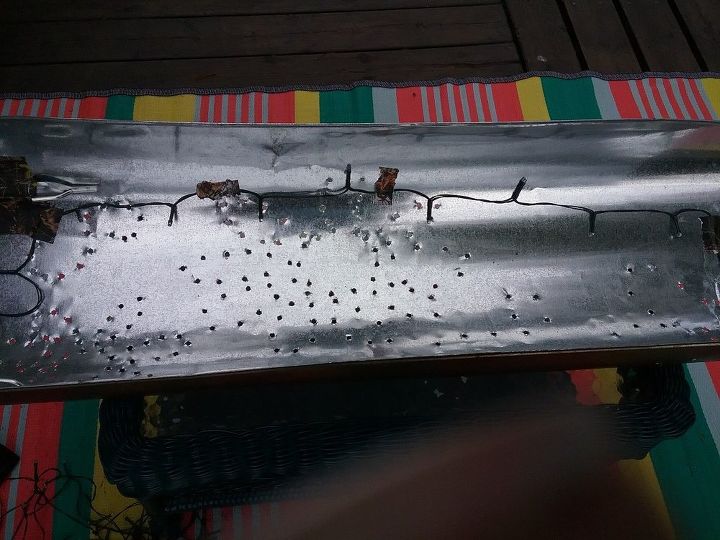
Now it is time to secure your lights. Start from the top use your tape and go from top to bottom over the holes until you have no lights left. Once done it is time to join your pipe back together.
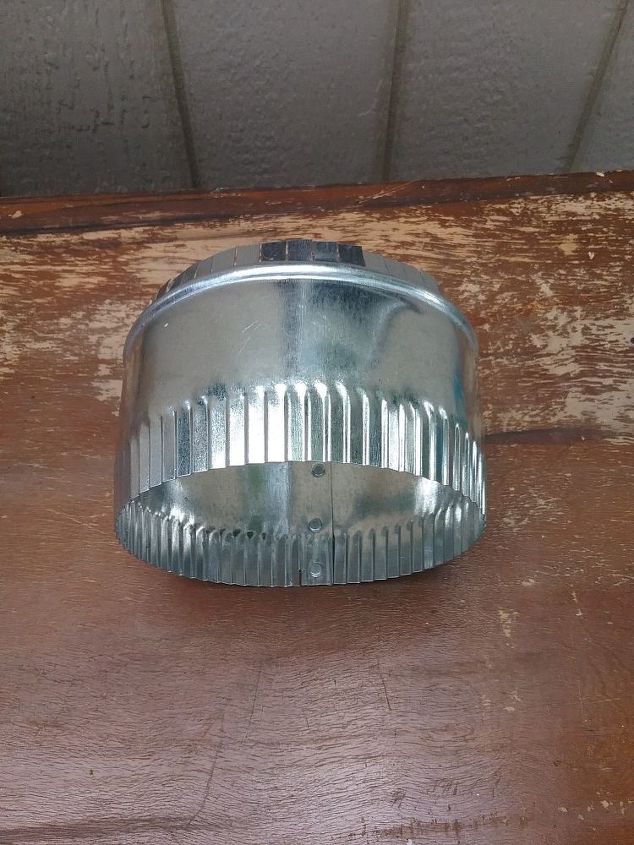
I bought a joiner at Restore to add to the top. You do not have to add this, you can leave as is, if you do add it, spray paint and add it to the top of your pipe.
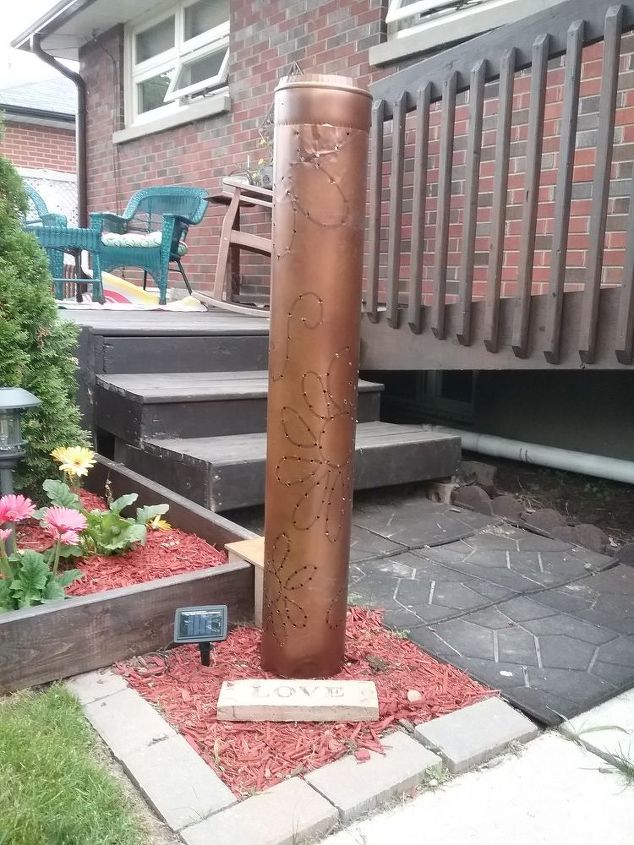
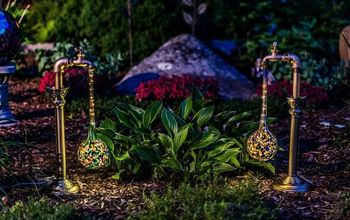
Secure in the ground, and adjust solar panel as needed. I love how this turned out.
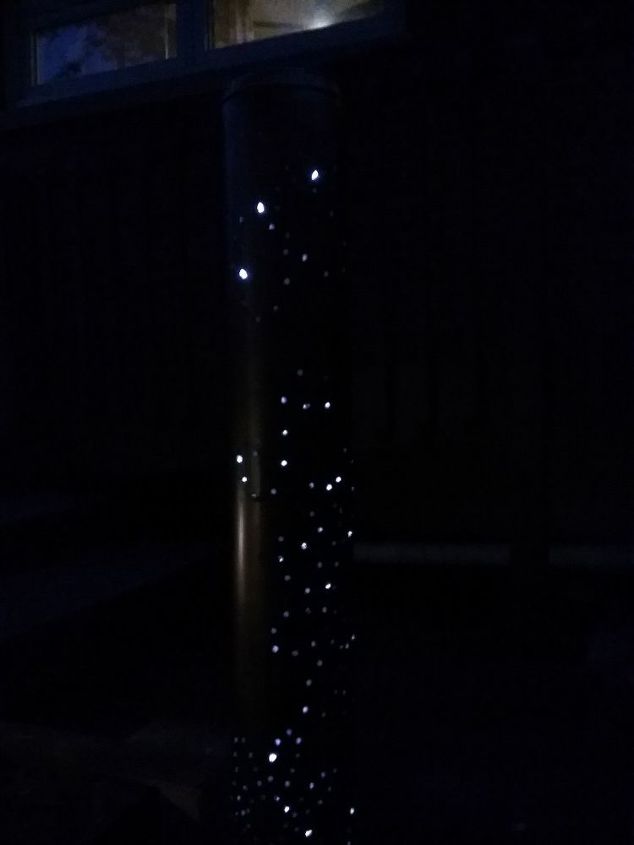
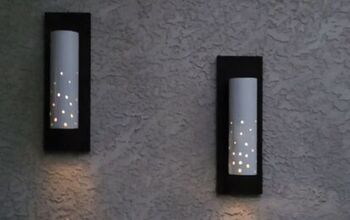
Here it is lit up, wasn't quite dark yet so the pic isn't that great, couldn't stay up to wait for it to be completely dark lol, but you get the idea.
Resources for this project:
See all materials


Any price and availability information displayed on [relevant Amazon Site(s), as applicable] at the time of purchase will apply to the purchase of this product.
Hometalk may collect a small share of sales from the links on this page.More info
Comments
Join the conversation
4 of 56 comments
-
i really like the look of your tube light.
-
using your idea as inspiration I changed up a couple things: I drilled holes large enough for lights to poke thru my design holes; I also screwed the pipe to a smaller diameter can filled with dirt and sunk that about 2 inches into the ground (it does not show because it is partly in ground and partly inside the tube) for stability; lastly I left the top off as you noted so the lights would shine out the top as well. It turned out just as nice as yours, but satisfied the pickiness I have for myself. thanks for the great idea.


Frequently asked questions
Have a question about this project?
Wouldn’t it look nice with lights thru the holes? And you said nothing about the solar panel. Where did you get it and where does it go?
Hi I love this I was wondering how do it do in the rain.
What a fantastic idea Melanie ❣️ I am confused, which happens often lol. What is at the top of the pipe if the power is staked in the ground ?? Do they automatically come on at dusk ?