


A Desk Upcycle Into a Small Island/cart Part 2

Part one was fixing the battered finish on my kids' old desk. Keep in mind that it was originally put together from a kit over 30 years ago. Add in some markers, glitter, pencils and "carvings" and you have the condition it was in. Plus, it was a little shaky here and there, one side had separated from the top a tiny bit, and I knew for a kitchen island, it meant some beefing up of the structure.
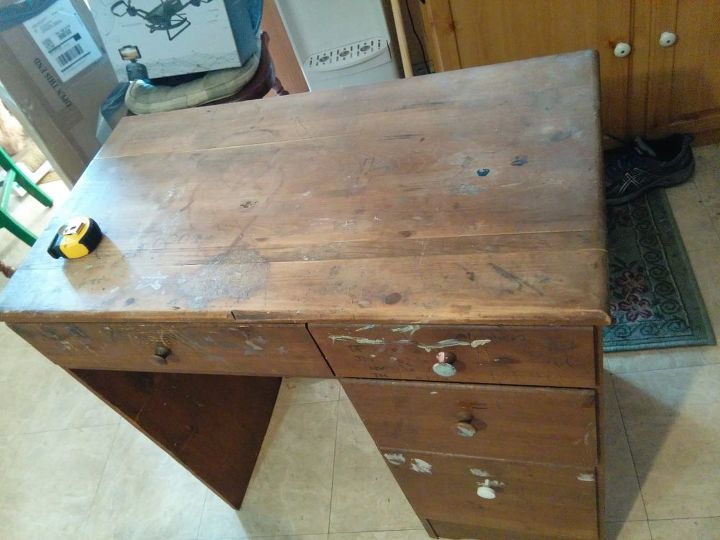
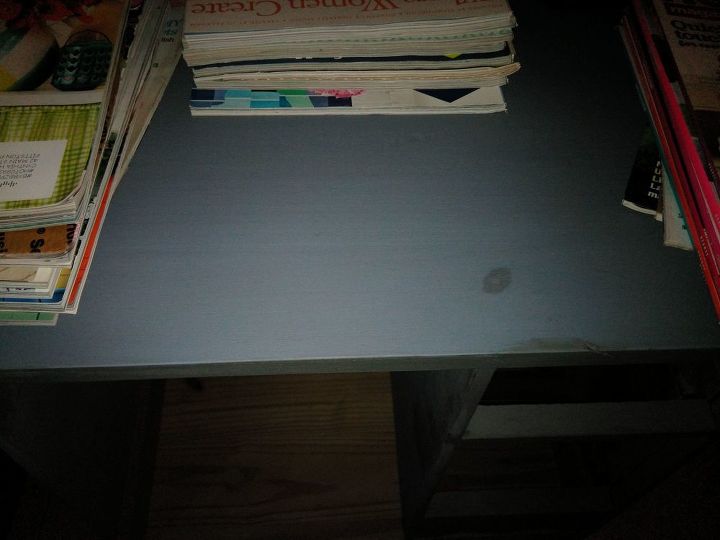
This is what I started with. Part one included my repairs to the finish and refinishing. First I stripped it, then sanded it. I started out with a paint that was too light for me, so I added gray paint to the sage green to deepen the color.
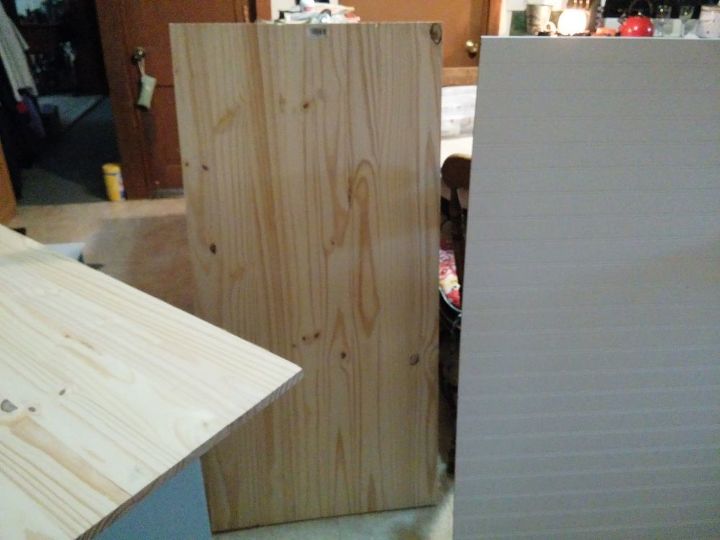
Here are my purchases for the top, bottom (to give me a sturdy base to attach wheels), and bead board. I bought a half sheet of bead board, which was in the cut pieces at the end of a row at Home Depot. The wood added to the cost, but not a lot.
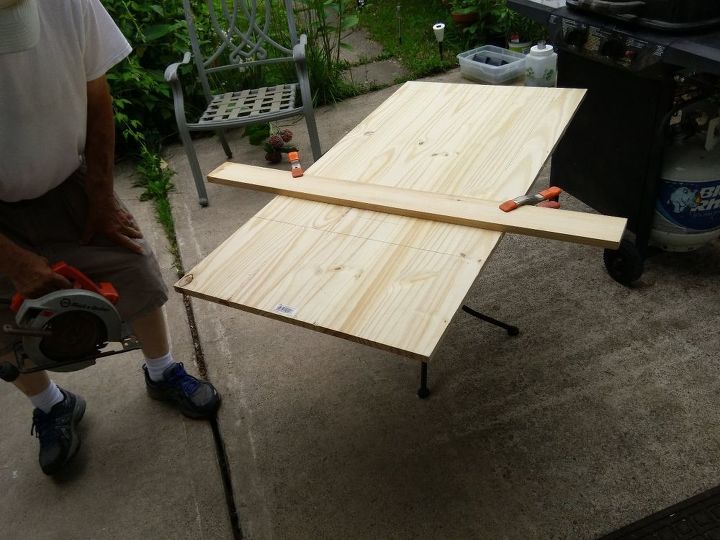
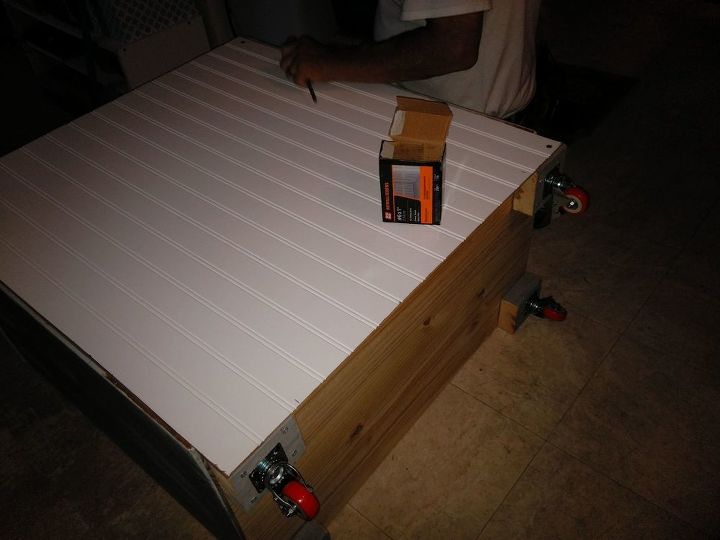
We measured the top and the bottom. The top was to have an overhang of three inches all the way around and the bottom would be flush to the edges of the cabinet. The wood clamped to the larger piece gives you a straight guide for the saw.
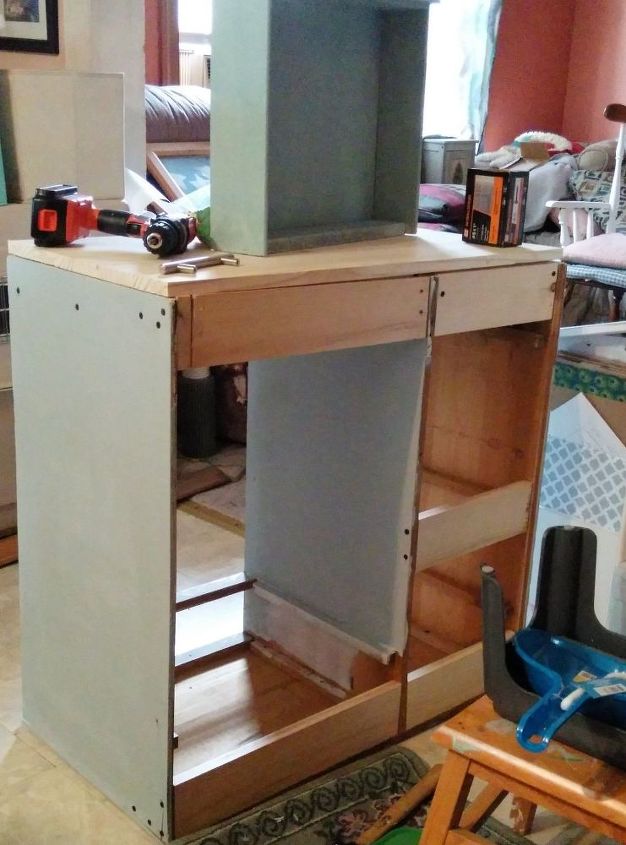
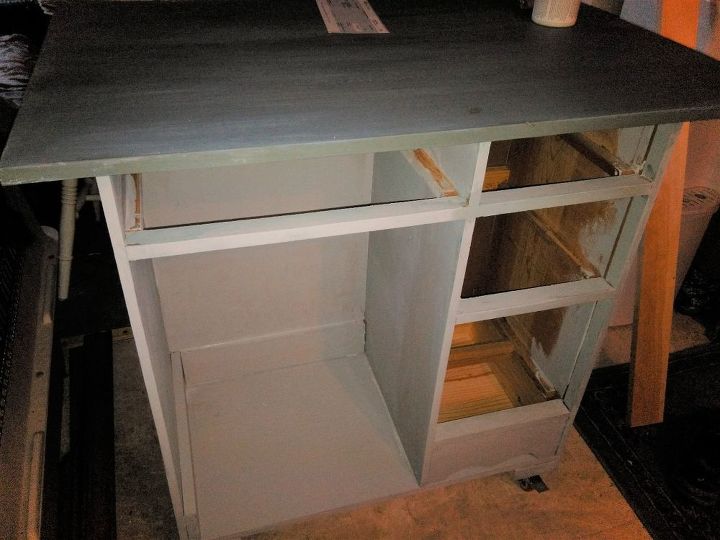
We reinforced the heck out of this on the inside and back to make it stronger and sturdy. I made a point of keeping it flush with the back edges of the old desk, so that the bead board would go on smoothly. If you don't do that, you would have an uneven surface to attach the back. Mostly this involved measuring, measuring again and then cutting.
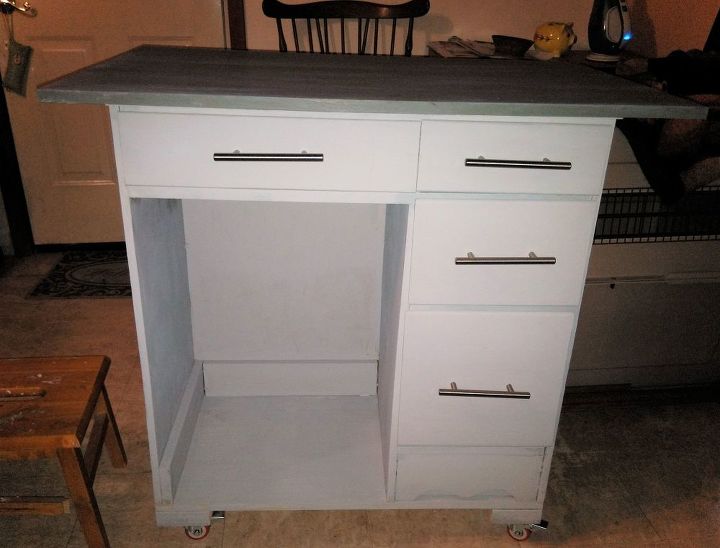
My husband drew the lines on the drawers to get the center and points where the new handles would screw on. The handles didn't come with a template. Fortunately, I had already put two coats of sealer over the paint, so all it took was a sponge to erase the pencil marks (he used a gentle touch when marking so as to not create grooves in the wood). In hindsight, I would have had less stress about this part of the project if I had drilled the holes before refinishing the drawers. If I hadn't sealed it with the finish I did, there would have been some more work on them. Lesson learned.
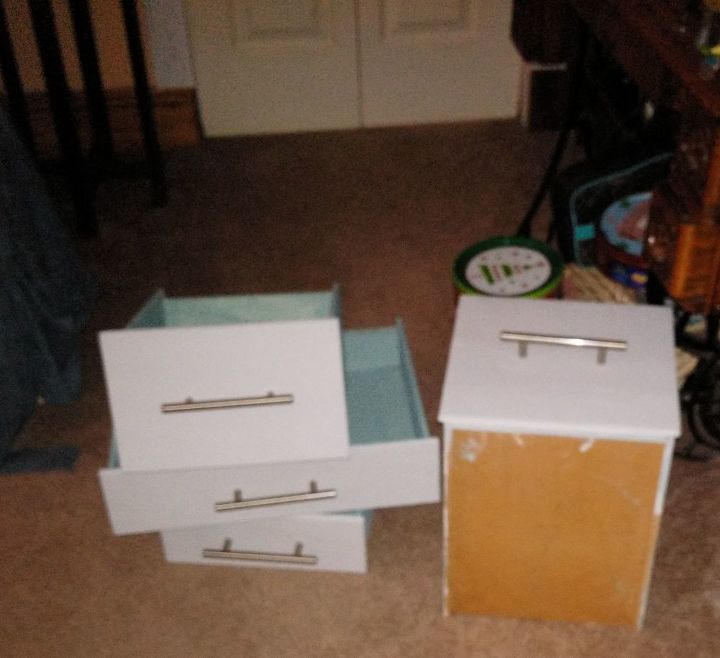
No pencil marks and pretty handles! My daughter has the same handles in her kitchen, which I loved, because it was a quick and attractive update for her old cabinets. They aren't expensive either! I bought them in a 10 pack because I have plans for the other handles. They are Amazon Basics Euro Bar 6.38 inch in satin nickel. By buying them in the package worked out to $1.90 each for this update. I included them in the approximately $24 I had already spent on this project, in Part one.
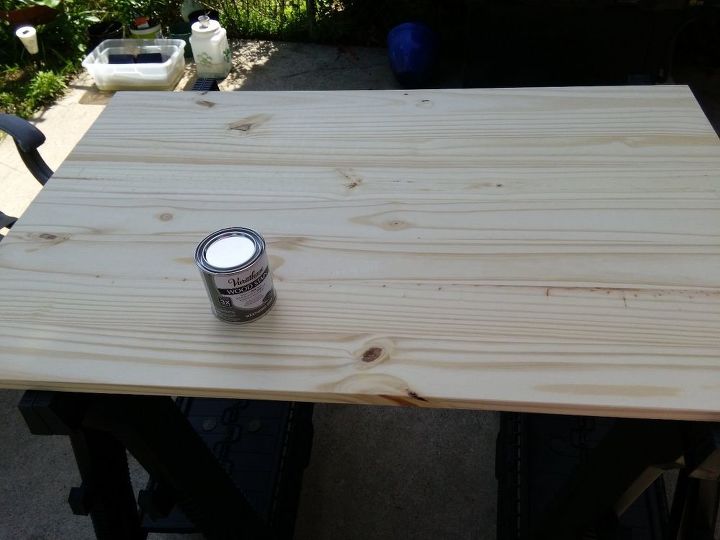
I sanded the wood for the top smoothing it out, getting rid of any splinters, etc. I wiped it down with a moist (not wet) microfiber cloth and then went over it with a clean magic sponge to get all the sawdust off. Then I went over it again (I didn't feel like going to the store for a new tack cloth, since mine had disappeared, but, that is a good method, too). When I was certain the sawdust was all off, I let it dry for awhile.

This is the gray stain I used. I brushed it on, and then rubbed it off, twice, before I got the look I wanted. I didn't seal it first, because I wanted the wood grain and knots to show. Then, a few hours apart, the next day, I applied two coats of finish (I like to use fine steel wool over each coat after it dries, then wipe it down before applying the next coat - something I learned in a refinishing class I took years ago). I planned on adding more after fixing/touching up any damages after attaching the top to the base. My husband encouraged me to buy stone or butcher block (or even laminate) for the top, but, I wanted to create my own. Saved some money that way, too! By the way, I switched to General Finishes Gel Coat since I wanted a durable finish for the top, plus it's oil base like the stain.
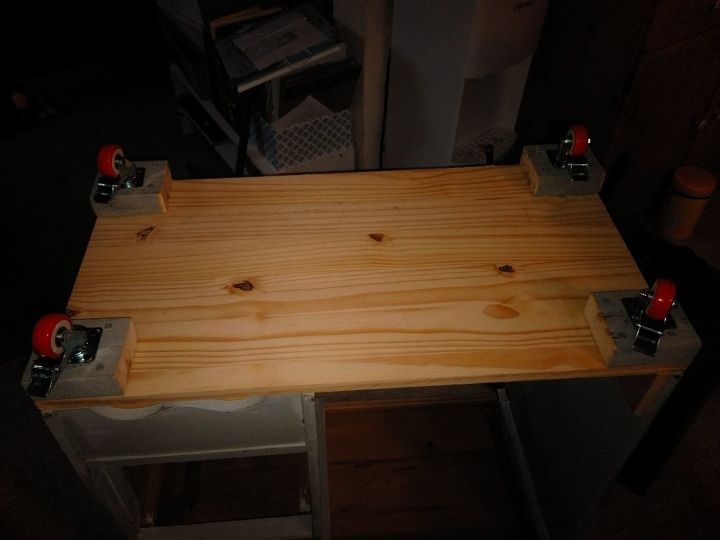
My husband has a new drill and loves to use it, so he cut some scrap wood into equal size blocks, screwed them to the new base he had screwed onto the bottom of the desk, and then attached my wheels.
The bead board was cut to be flush with the back of the old desk, and we used construction glue and screws to attach it. All of that reinforcing gave us good surfaces to glue and screw into. At my husband's suggestion, we made use of the small lip on each side to snug it in (it was where the old backing had been nailed on).
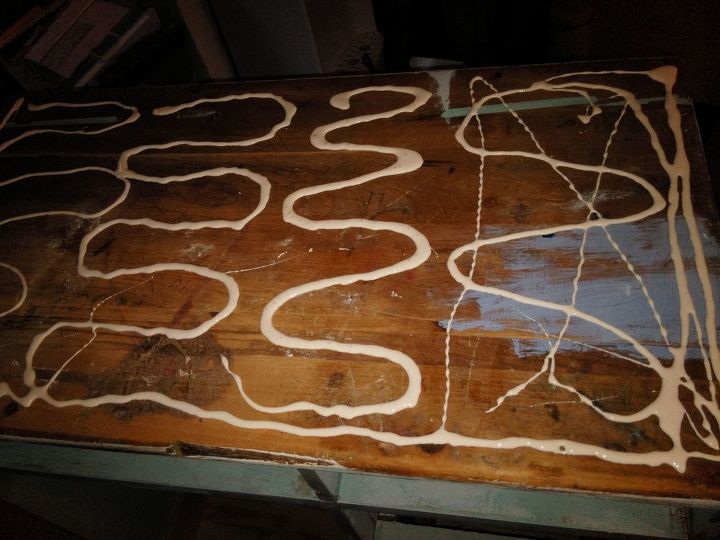
I didn't want to screw the top on, so I used Gorilla Wood Glue to adhere it to the old top. It's the first time I'm attaching a top this way (my husband wanted to screw it on, but, I figured we can screw it on later if the glue isn't strong enough. But, I've used this type of glue before, and it is super strong. Don't get too close to the edge (I did in one corner), or you will have to wipe off the wood glue before it gets dry. The stuff dries hard as a rock, so it is important to wipe up any drips or glue that pushes out with a damp paper towel. I have made the mistake of not doing that in the past, and it is not fun getting it off!
We clamped scrap wood to the new top to get the spacing right all the way around (it made a lip flush against the desk so the top wouldn't be crooked. Then, we carefully lined it up and sat the new top, on top of the old top. Gorilla Wood Glue takes a little time to set up so I sat some magazines and books on the top to weigh it down (looking underneath, I was able to wipe off any glue that pushed out, and made sure all the marks lined up. I could also see that there was no gaps between the old top and new top. I'll let it go until the next day, when I saw it dried tight. The next step was to do some more painting. With the additional height added from the new base, blocks for the wheels, the wheels and the new top, it is now just the right height for me to work on. I also looked on Amazon for slightly longer Euro bars to add on the sides for hanging towels. I found them for $2.65 each in a 10 pack at 15 inches, so will add them later . Isn't funny how a project evolves? I have a towel bar I was going to use (I've had it forever) but, decided these would look better. I'm only using two of them so just $5.30 added to the cost for bars that match my handles when I get them.
Next involved painting the bead board white so it looked nice and fresh, and painting all the rest with my Kilz paint on the bare wood, then a coat of Parisian Grey. Time to try the drawers back in once it's dry! It was too hot to paint outside, so I put a plastic sheet down on my kitchen floor.
This is after painting everything. I had accidentally gotten some paint on the drawer runners, so sanded them smooth and then lightly waxed them with paste wax so the drawers pull in and out smoothly.
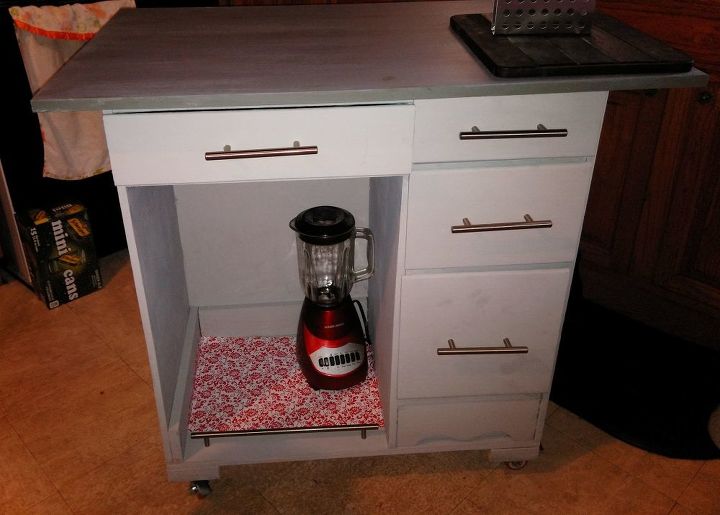
I put some non-stick shelf liner on the bottom shelf, so that things won't slide around. You can see the Euro bar that's 15", that is to keep anything from falling off the shelf. Later, I will probably install one on each end as towel bars. The dark area on top is a cutting board I found that has a weathered gray look to it. I plan on keeping mixing bowls, utensils, etc. in the drawers and on the shelf. It was a lot of work, but, hope you like it!


Frequently asked questions
Have a question about this project?