


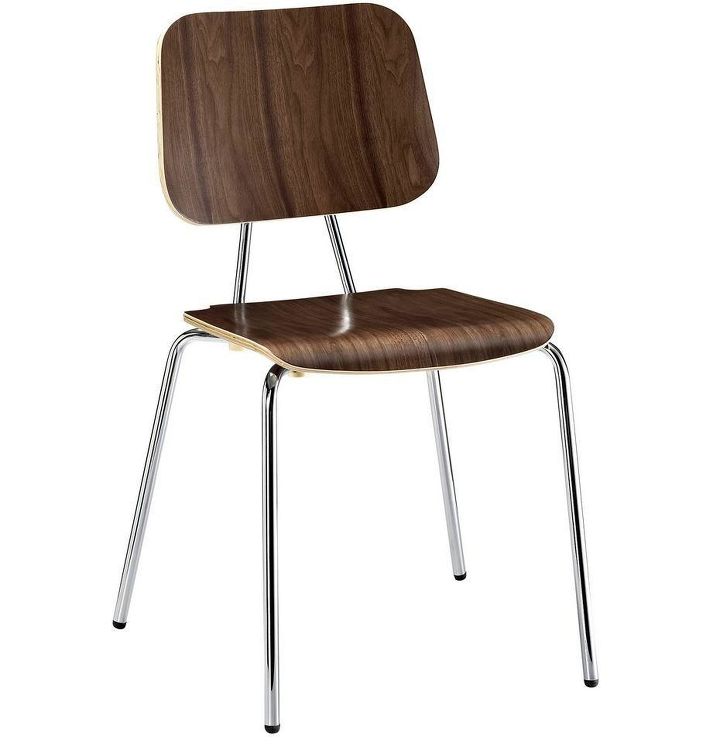
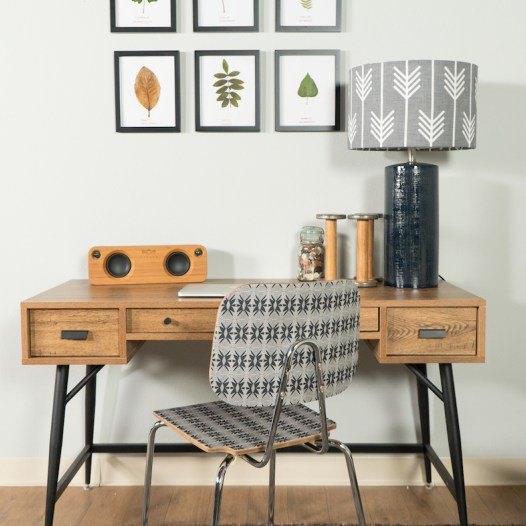
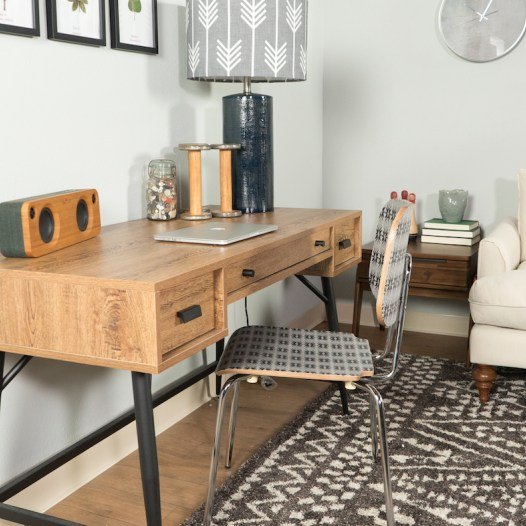
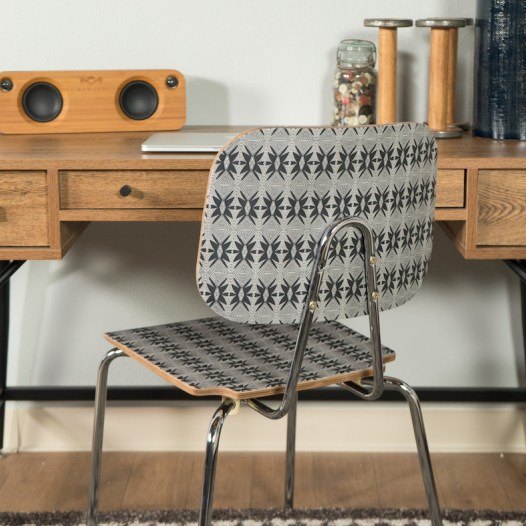
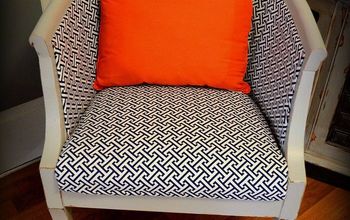
How To Make A Custom Fabric Chair

Kyle Schuneman is back with another brilliant 2BHack! In our newest DIY video, Kyle shows you how simple it is to give an old chair a fresh new look for less than $10!
Watch the video to see just how easy it is to transform a basic wooden chair into a beautiful, unique, and personalized work of art!
The Prep Step: Disassemble The Chair & Assemble Your Supplies
This project is easiest when your chair is broken down into smaller pieces. Go ahead and disassemble your chair so that it’s easier to work with! Not able to disassemble your chair? No problem! You can still follow along, but it might take a bit more fussing in the later stages of the process. Once you have your chair in its smallest components, you can assemble the rest of your supplies. You’ll need your fabric, Mod Podge, an X-Acto knife, scissors, and a foam brush! A 2″ wide foam brush is ideal, but you can use any size that best suits your needs (or whatever you happen to have handy from old projects!).
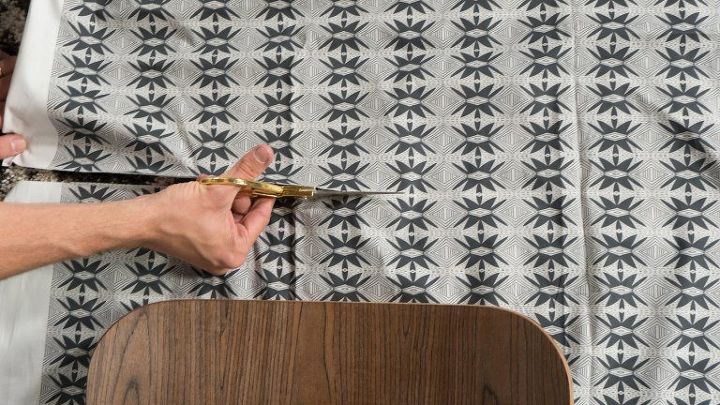
Step 1: Cut Your Fabric To Size
Take your fabric, lie it flat, and then place the first part of your chair on top of the fabric. This will show you how much of the fabric you’ll need for the first surface! Simply cut the fabric, leaving about 2″ of extra fabric on each edge. You’ll only need to cut the general shape of the surface so no need for perfection at this stage. Go ahead and cut out each piece of fabric you’ll be needing depending on how many individual surfaces you’ll be covering!
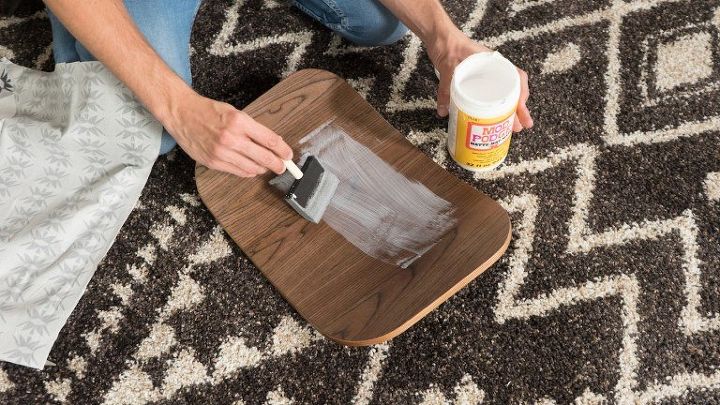
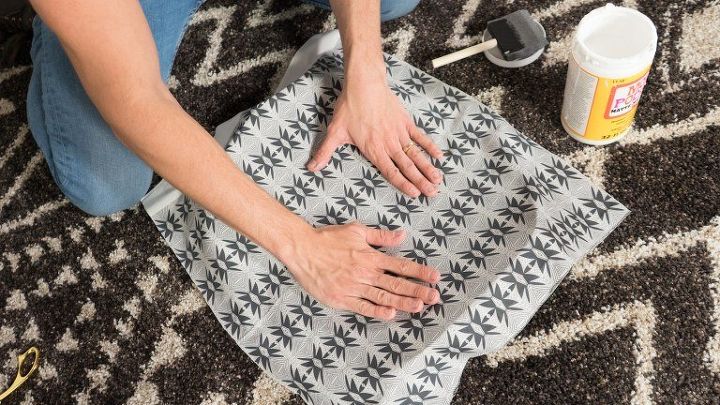
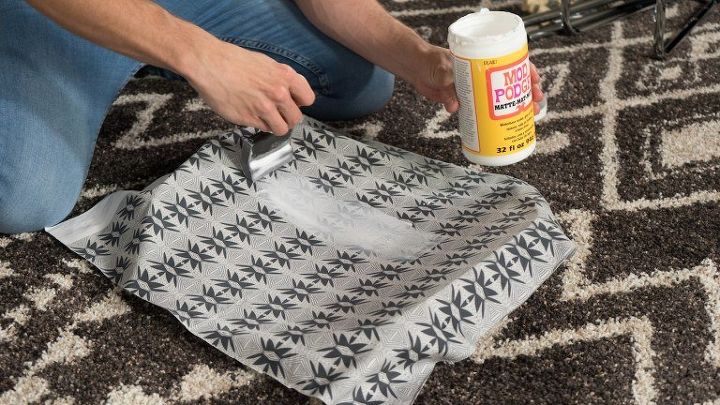
Step 2: Mod Podge and Mod Podge Some More!
Use your foam brush to apply a layer of Mod Podge to the first surface of your chair. While it’s still wet you’ll place your first sheet of fabric on the surface. Line up the fabric so that the pattern is facing the desired direction. Smooth out the fabric so that there are not any bubbles or wrinkles – this is essential for a flat look! When you have the fabric firmly positioned, it’s time for your next layer of Mod Podge! Use the foam brush to apply this second layer of Mod Podge directly to the surface of the fabric. This will seal the fabric to the chair.
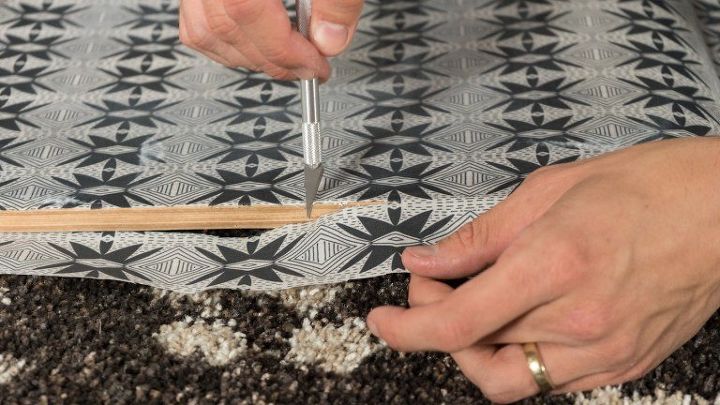
Step 3: Trim The Remaining Fabric
Give your fabric 30 minutes to dry after applying the Mod Podge. Once 30 minutes have elapsed you can use the X-Acto knife to carefully trim the excess fabric from the edge of the surface. Try to create as clean and sharp a line as possible!
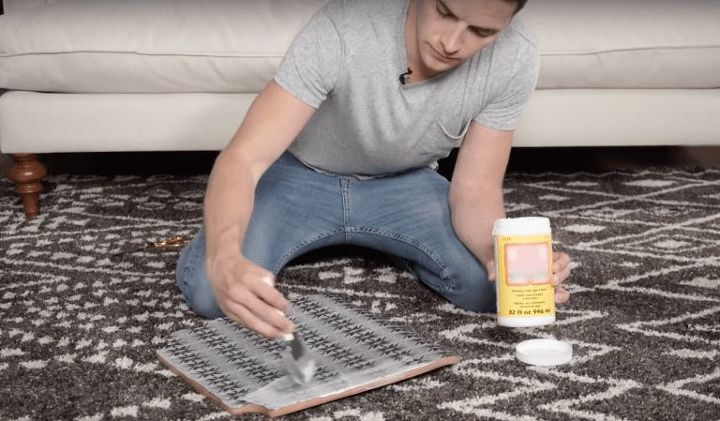
Step 4: More Mod Podge!
Thought you were finished with the Mod Podge? Guess again! It’s time to apply one final layer of Mod Podge to your fabric. This will truly and finally seal all the fabric to the surface of the chair. Make sure to get the new, clean edges as best you can! You’ll want full coverage for this final application.
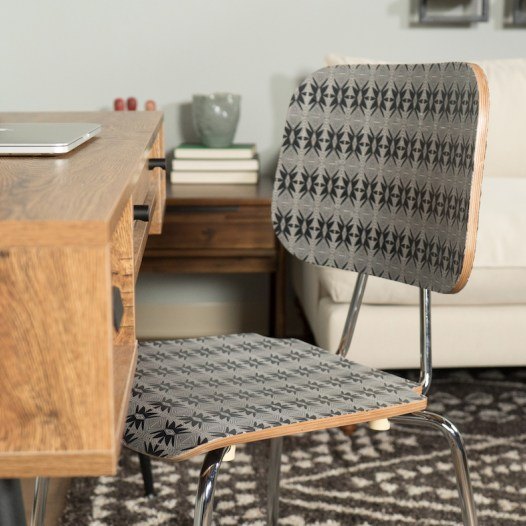
Step 5: Reassemble!
As soon as your Mod Podge is dry on each surface of the chair it’s time to reassemble the pieces! Didn’t need to disassemble in the first place? Then you’re all set!
Resources for this project:
See all materials


Comments
Join the conversation
-
Love it, I was just thinking it would look great if he used the same cloth on the drawer fronts of the desk. Then it would be a matched set.
-
You're absolutely right! That would look great

Kyle actually did a fun video about using temporary wallpaper to decorate the front of a dresser's drawers. You can see it here: https://www.youtube.com/watch?v=459OSMwOj78&t=1s
Thanks for watching


Frequently asked questions
Have a question about this project?
But it said he used Modge Podge in the instructions ? If he didn’t what was used.
My chairs are old school chairs with rivet construction. Help me on how to do this on them. I’ve wanted to do this to them for years.
Wouldn't using dishwasher safe Modge Podge be best? Because when it gets dirty you'll need to wash it and regular Modge Podge will come off...