


Wall Mural in My Studio
I wanted to paint my studio/sewing room black but thought my room was too small, I was going in all directions and nothing felt right …. not until I was on Amazon and saw this amazing wall mural "London Fog"
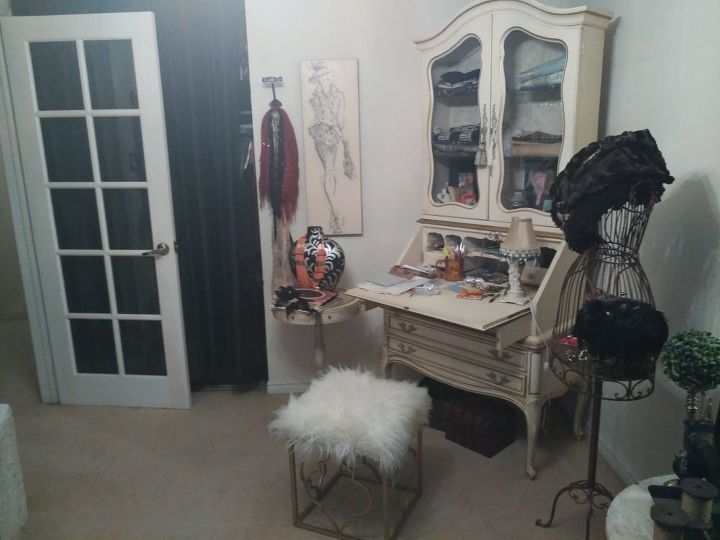
My room looked cluttered and everything just blended in
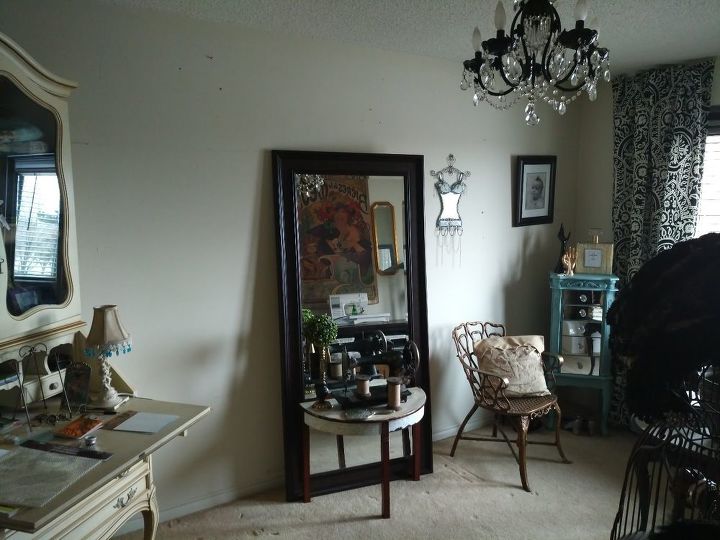
All my furnishings looked awkward and didn't have a place
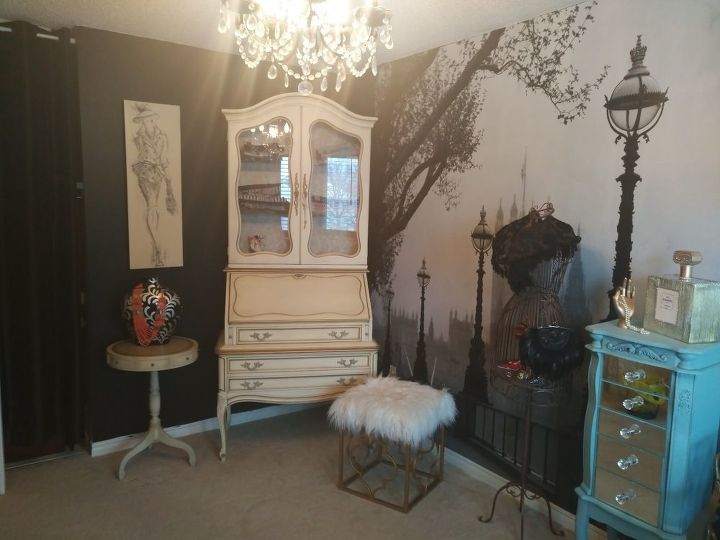
Once I ordered this mural I decided to paint just a few walls black to blend in with the mural to add contrast
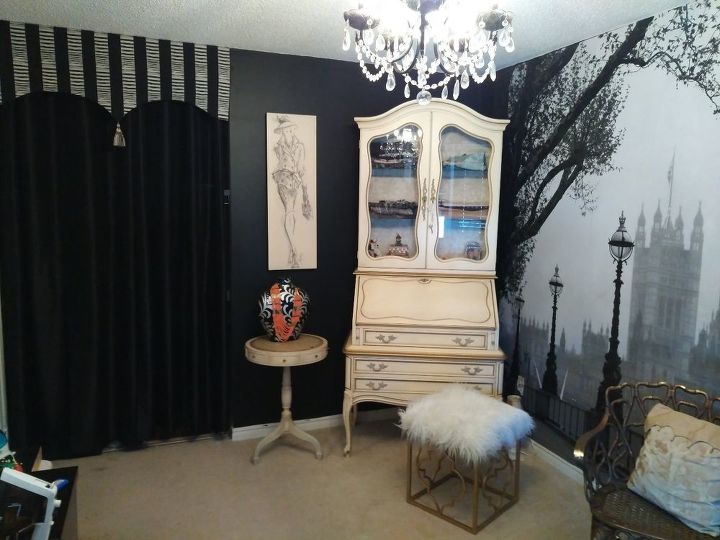
I love the black walls ….. I just had a tension rod on my closet, purchased plain black curtain panels $10 a panel … I then thought of making a small valance to cover the ugly dollar store tension rod, stapled the valence on a 1x2 and screwed to the wall, each side of my closet wall
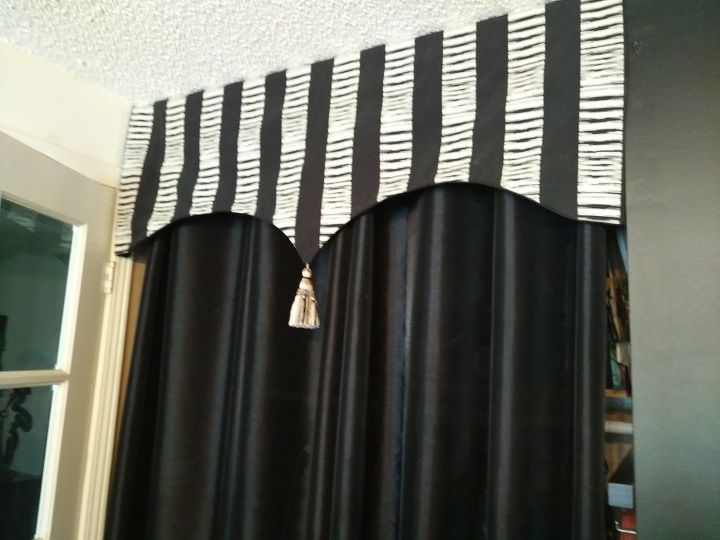
Again, it's just stapled on a piece of 1x2 …. sorry, I didn't think of making a tutorial as I was surprised at the results …. didn't think it would look this good actually … I surprised myself
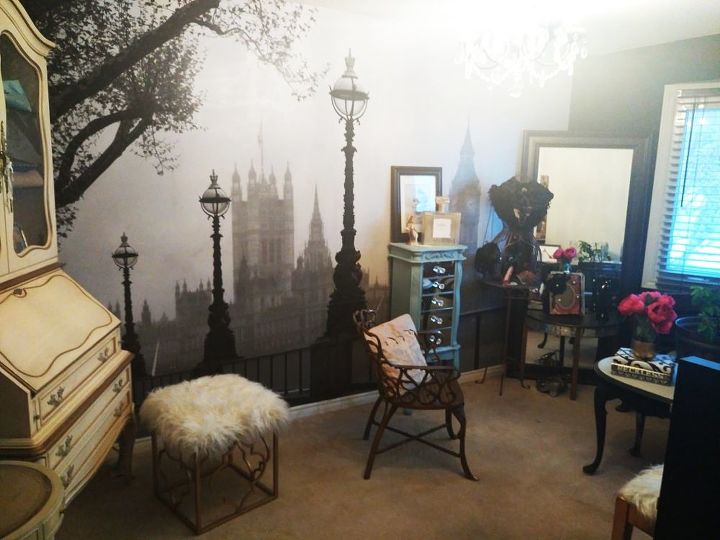
I was always scared to attempt a wall mural but it feels like I'm looking beyond and not blocked by a solid wall … makes my room feel much larger. Murals are so much easier than wall paper, no match-up, came in 8 sections that were already colour/pattern matched. Just applied the glue on the backing with a bush, hung and presto, all done and no artwork required …. it's a piece off art all on it's own. If you wish to try this on your wall just sand the wall to remove any previous blobs of paint. I wanted to start off with a nice smooth finish. I have very low ceilings too but it worked well … Love my London Fog and customer service was amazing.
Comments
Join the conversation
-
Yes, glue is supplied and I just used a paint brush to apply the glue but I found there were so many lumps in the glue, maybe I didn't add the glue to the water correctly so I used a strainer to separate the glue from the lumps. I was in panic mode by this point but after I made the glue lumpless it was easy, all the pieces are precut into sections, all you have to do is hang it. Just make sure you sand the wall before applying, it gives it a smoother look. If you are only doing one wall it will look amazing, take your time as the results are spectacular ! I hope I didn't scare you but it's just like regular wallpaper, if I was to do it again I would just keep this in mind it's no different to that technique. Oh yes, I used a wide scraper that I use for drywall mud, this really helped smoothing out any air bubbles .... feel free to ask any more questions, this was such a challenge for me, if I can do anyone can. Just a small suggestion, it helps to have a chair and another person by your side to hand you the pieces that have been glued. Any pieces that wasn't glued you can just touch it up with glue stick LOL
-
Oh yes, forgot to answer your question, I would have been able to preposition it as my room has very low ceilings but I rushed too much, I should have cut at lease 4" from the top, so yes, you can custom to your liking


Frequently asked questions
Have a question about this project?