


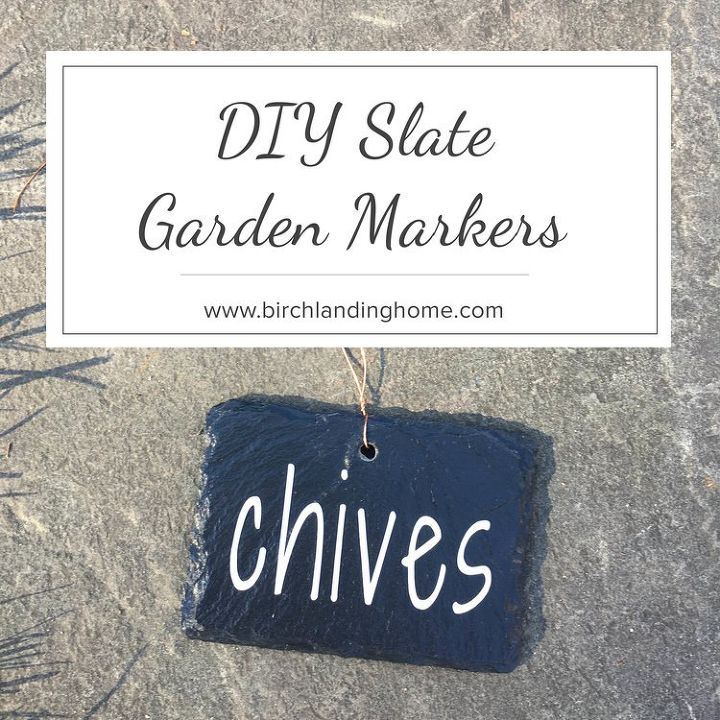
DIY Slate Garden Markers
I've been eyeing slate garden markers for our herb garden for awhile now, but buying pre-made ones are soooo expensive and they never have all the varieties I want. So I decided to take matters into my own hands and make my own. Because I have the world's worst handwriting (it's true, ask anyone) I used a Cricut to cut the text for me, but if you have half-decent handwriting you could easily do this project with a paint marker too. | This post contains affiliate links |
Materials:
- Blank Slate Markers
- Matte Spray Sealer
- Cricut Machine
- 651 Permanent Vinyl
- Contact Paper
- Dental Explorer (optional)
Alternatively
- White Paint Marker
How To:
1. If using your Cricut to make the text, measure your garden markers and make each "label" in Design Space the appropriate size. I chose a font with a handwritten feel, but you can use whatever font you prefer. You may need to play around with the scale of the lettering to get it to fit. Use 651 Permanent Vinyl to cut your text.
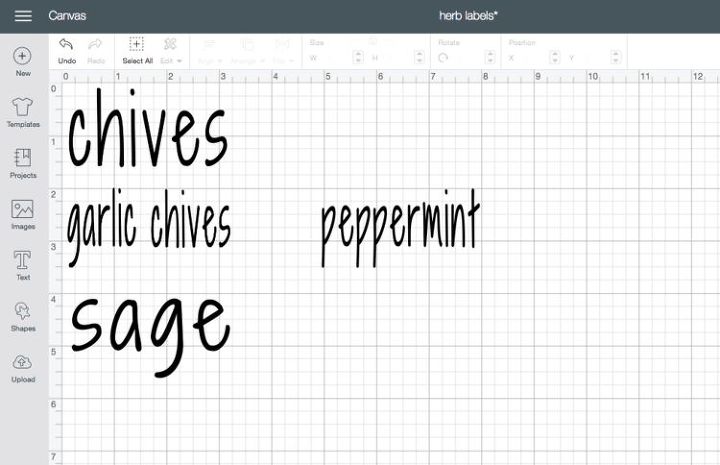
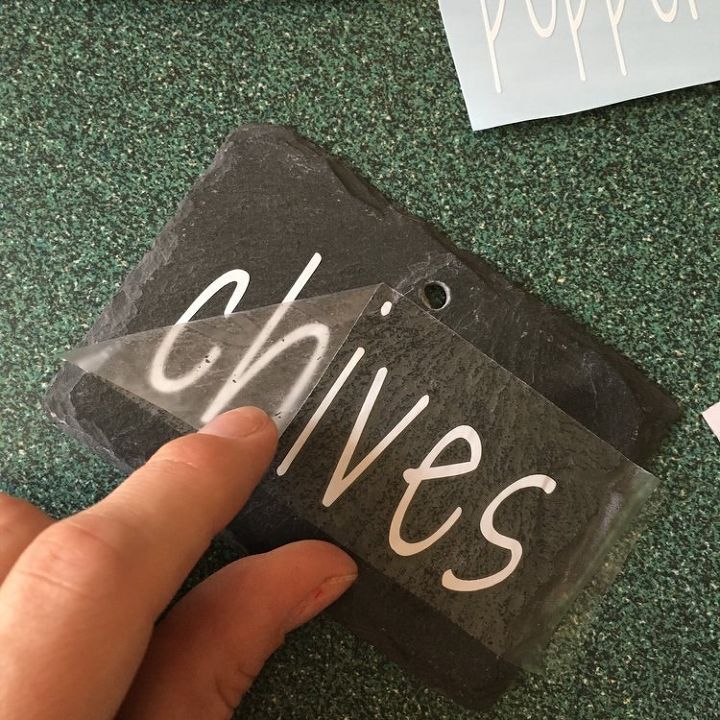
2. "Weed out" your text, removing any pieces of vinyl you don't want to be in your final design. I find a dental explorer to be super useful here to get rid of the pieces inside of letters, but it's not necessary. The finer-point text was definitely a lot harder to weed (which is why you'll notice the dot on the "i" in garlic chives isn't in the right place).
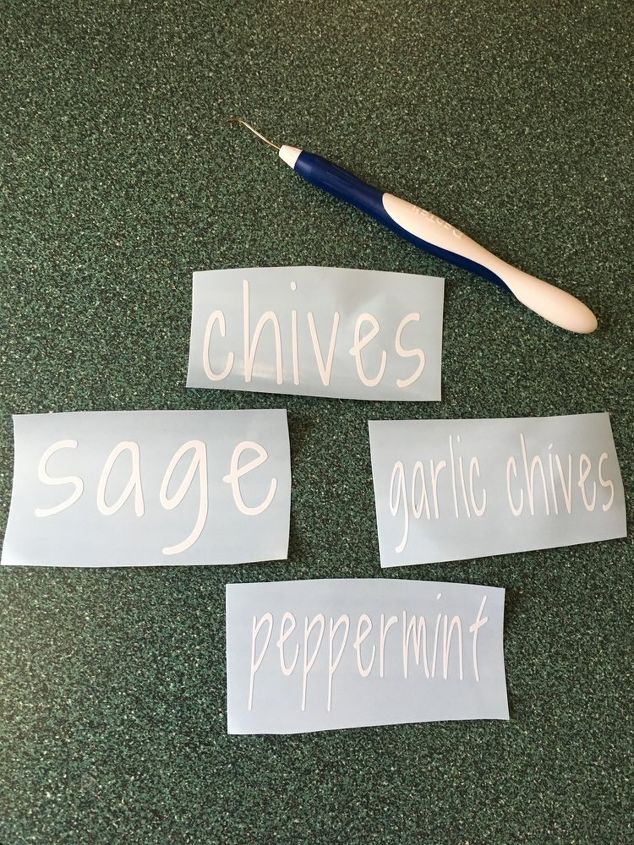
3. Next use contact paper or transfer tape to put over your final vinyl design and rub well to make sure it's on there good. This will "carry" the vinyl once the backing is removed.
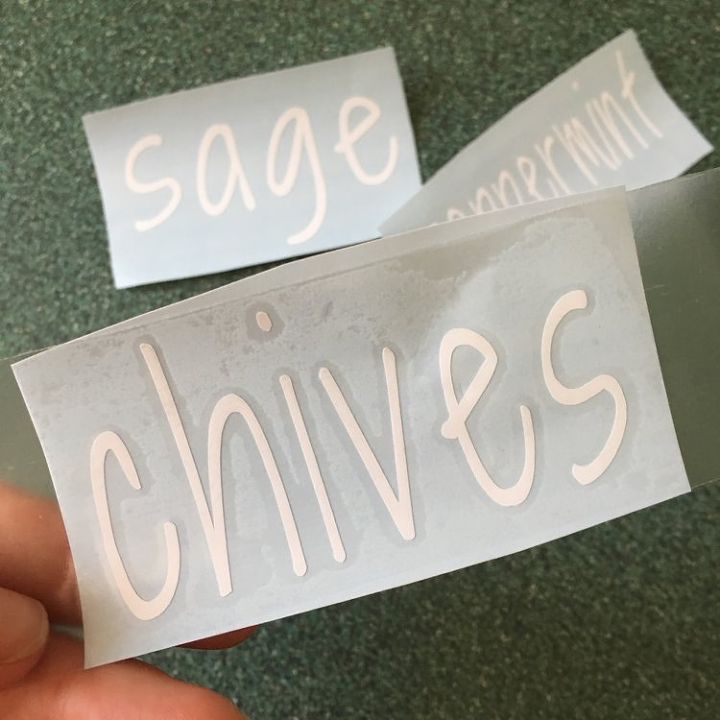
4. Carefully peel the backing off your design.. this can be tricky. My advice is to go slowly and have your dental explorer handy if you have one! It can help hold letters down as you peel off the back.
5. Once the backing is removed, carefully place on a clean and dry slate marker. Rub the design on well (I use an old gift card like a squeegee). Once it's on there good, carefully peel off the contact paper.
Alternatively: If you don't have a Cricut or want to do this project by hand, you can skip steps 1-5 and just write your text freehand with a white paint marker and allow to dry.
6. To make sure the vinyl doesn't peel or come loose, I use a spray acrylic sealer to seal them. Just put the markers on a scrap piece of cardboard, give a light coating of the spray sealer, and allow to dry (make sure you're in a well-ventilated area).
If you used a paint marker instead I would also suggest sealing them.

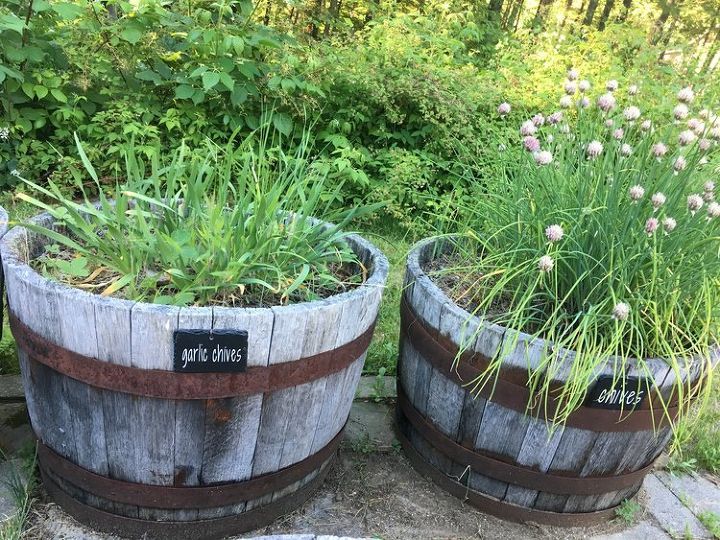
7. Hang your new garden markers! You can buy special hangers for them if you like, or use sticks and some twine or wire. In my case I wanted them on the barrels in our herb garden so I simply used some thin copper wire and "flossed" it through the slots in the barrel, tying it off with a large washer at the back so they don't pull through.
It has been SOOO abnormally hot in New England these past few weeks that my herb garden isn't looking too wonderful at the moment (hence the limited "after" pictures). We have six wine barrel planters on a small patio; four of the planters have perennial herbs (chives, garlic chives, sage, and peppermint) that come back each year and the other two planters I switch up each summer. Currently my poor plants are a bit sun-stressed and I'm far behind on weeding, but I hope you'll get the idea of the final install below. I think it really helps finish the space and I love that things are finally labeled.
For more photos and links, see the original project at: http://www.birchlandinghome.com/journal/2018/6/29/diy-slate-garden-markers
{Follow me on Instagram at: @birchlandinghome}
Resources for this project:
See all materials


Frequently asked questions
Have a question about this project?