


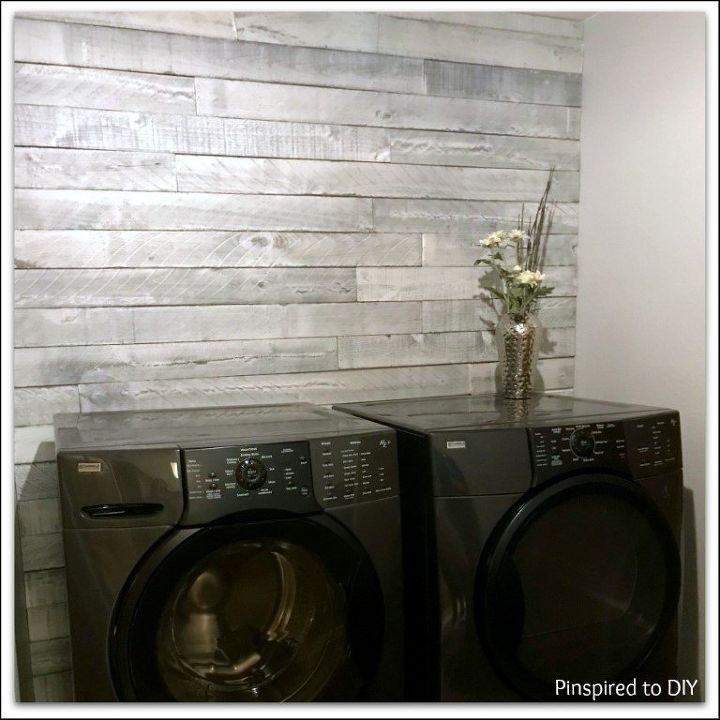
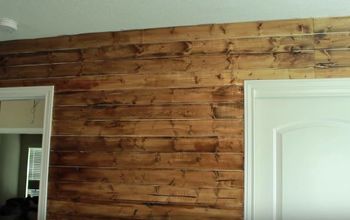
Weathered Wood Plank Wall - Laundry Room
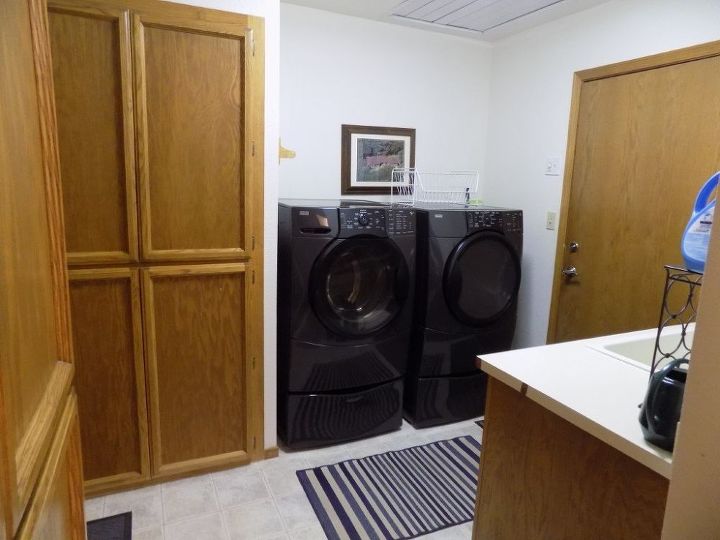
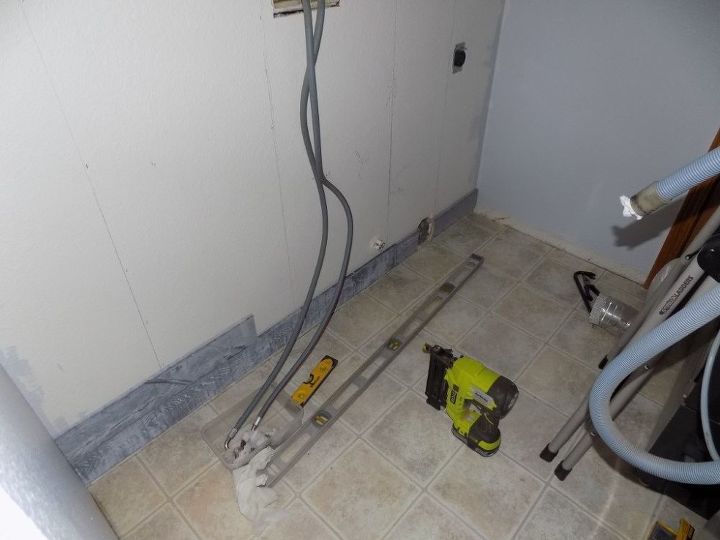
Over the course of the last two weekends, I gave my laundry room a mini-makeover. The room had been painted a flat off-white paint, and with our linoleum floors, plain brown wood doors and trim, and formica counters and sink, the room definitely needed a little pizzaz. We aren't ready to update the floors, doors, counters or sink yet, since those are all higher priced items and we'll replace those items as part of a larger kitchen remodel sometimes in the future when we have the time and funds, but I did make some smaller changes to update the look of the room. The first step in the makeover was to add a weathered wood plank wall behind my washer and dryer.
Here is what my personality-lacking laundry room looked like:
Here is an abbreviated post on how I completed my wood plank wall, for full instructions and more detailed pictures, please visit my blog at the link under this post.
First, I removed all outlet covers, light switch covers and baseboard from the wall.

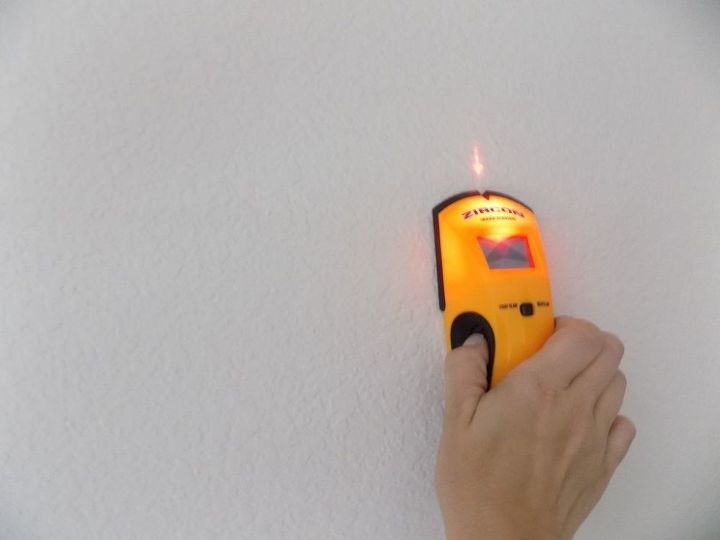
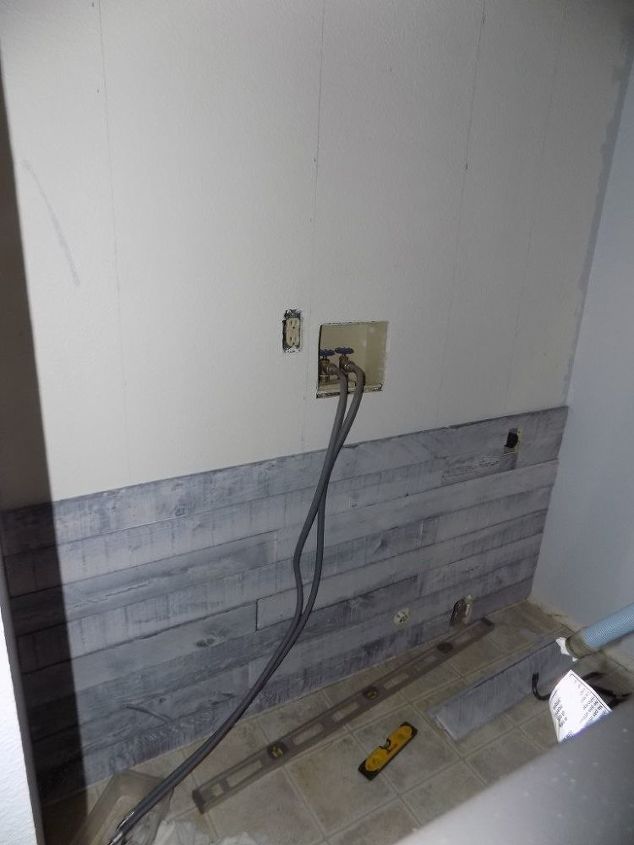
I painted the walls a light grey color and once dry, used a stud finder to find the locations of the studs in the wall.
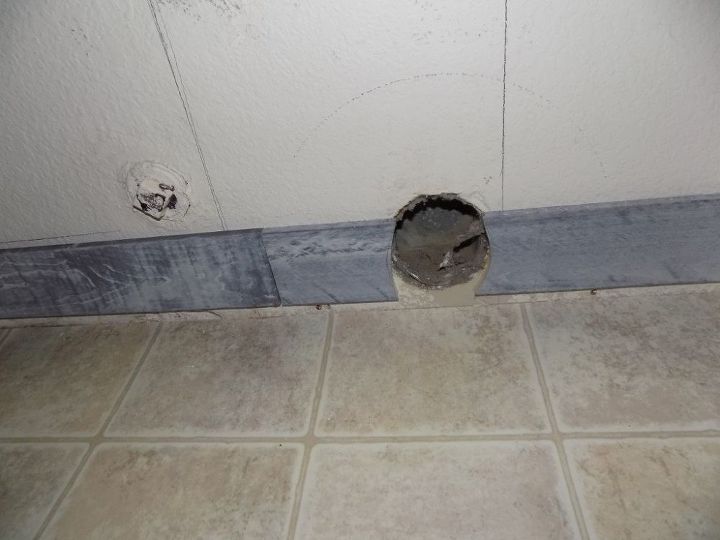
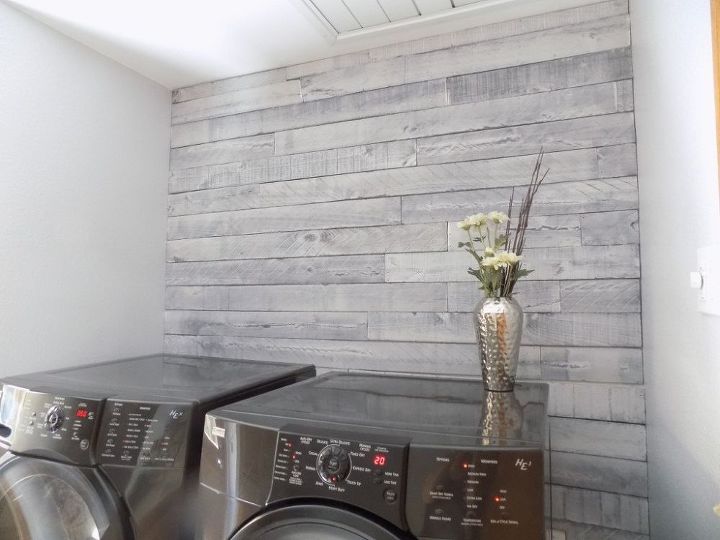
Once the studs were marked, I ended up putting up the weathered wood wall boards, which were purchased in boxes of 8 boards each at a local Home Improvement store.
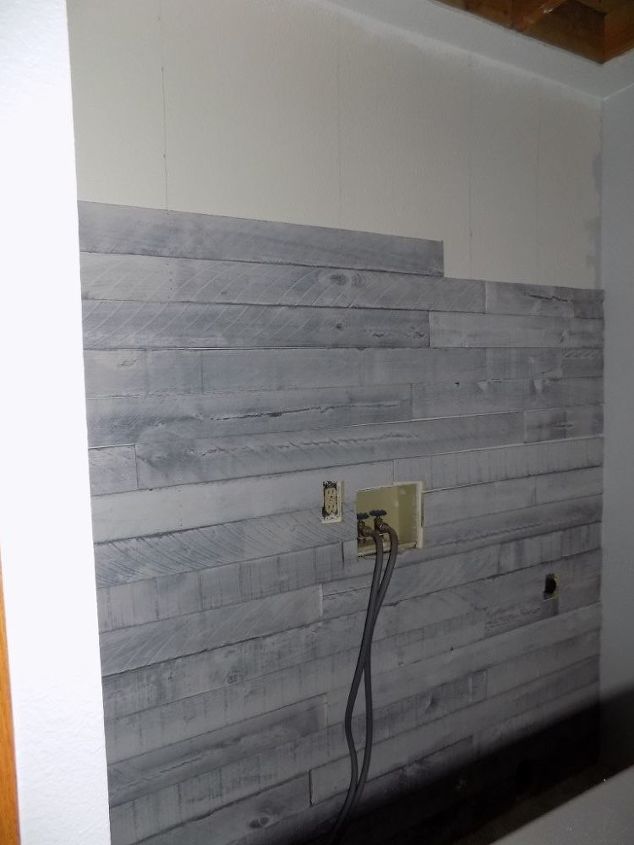
I started attaching the boards at the bottom left corner of the wall working my way up after each row was completed. I made sure to cut out sections of the board to make sure the dryer vent and any outlets were not blocked.
Kept working my way up the wall...
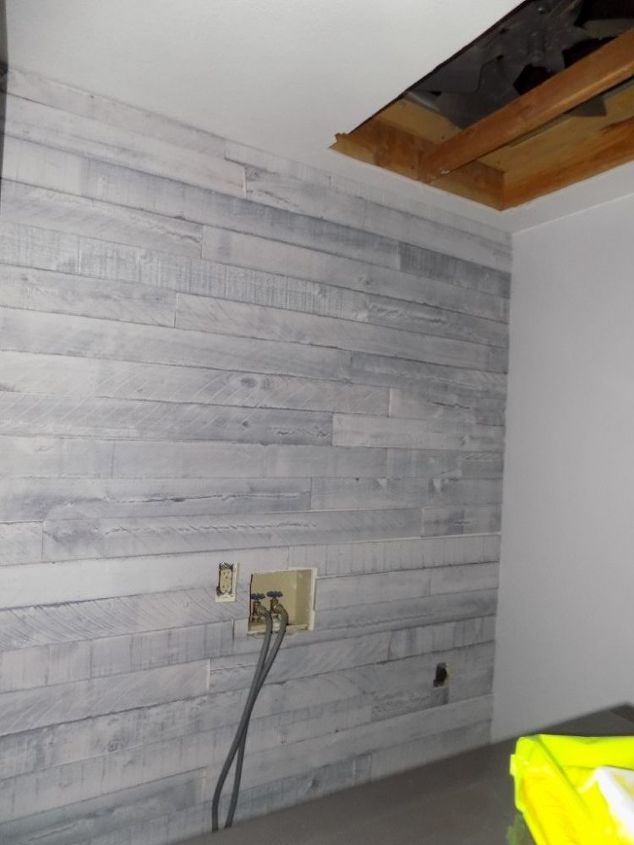
Once all the boards were up, I replaced the cover plates, and reattached the appliances, and then moved them into their proper location. Here are some pics of my completed plank wall.

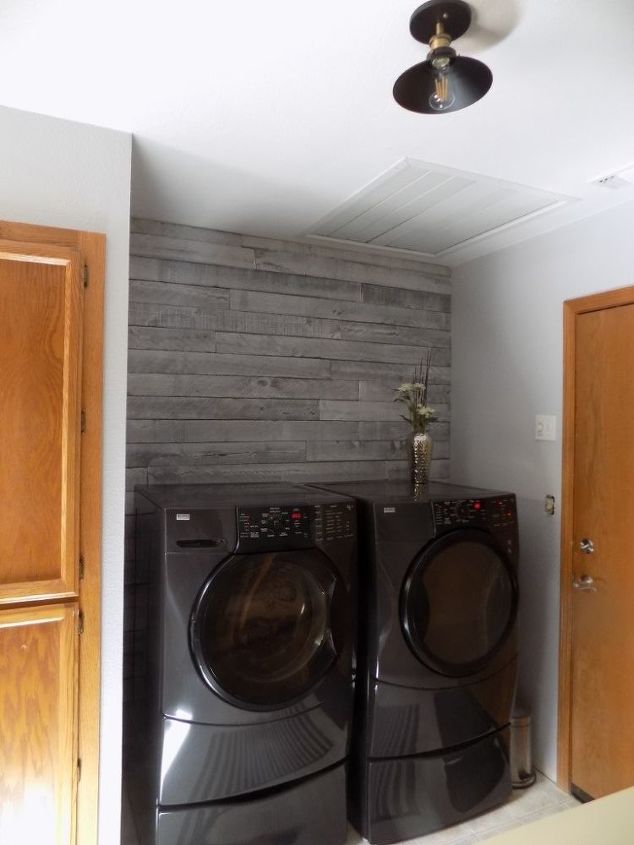
I have since added a floating shelf above the washer and dryer as well as created some artwork for the walls. Keep your eyes peeled for those projects which will be posted soon!
Resources for this project:
See all materials


Comments
Join the conversation
-
I love this, great job! I definitely want to do this in my small laundry room. Just not confident in cutting out the dryer vent.
-
I am definitely inspired to see yet another female doing home improvements! I want to try something like this myself. We have just "dried in" our laundry room/office/sun room and once they get the drywall up, it would be the perfect time for me to try my hand at something like this. Thanks for much for the idea, love it! It's beautiful!!


Frequently asked questions
Have a question about this project?
How did you adjust the receptacles and face plates to account for the additional thickness added by the planks?
My laundry room is in the basement and the walls are cinder blocks. How would I attach the wood to that kind of surface?