


Skylight Window to Stained Glass Look Table (Part 2)

by
Amanda
5 Materials
$15
1 Day
Easy
Here is part 2 of my skylight-to-table tutorial. This is how we made the skylight into a table. Part 1, painting the skylight to look like stained glass, can be found here.
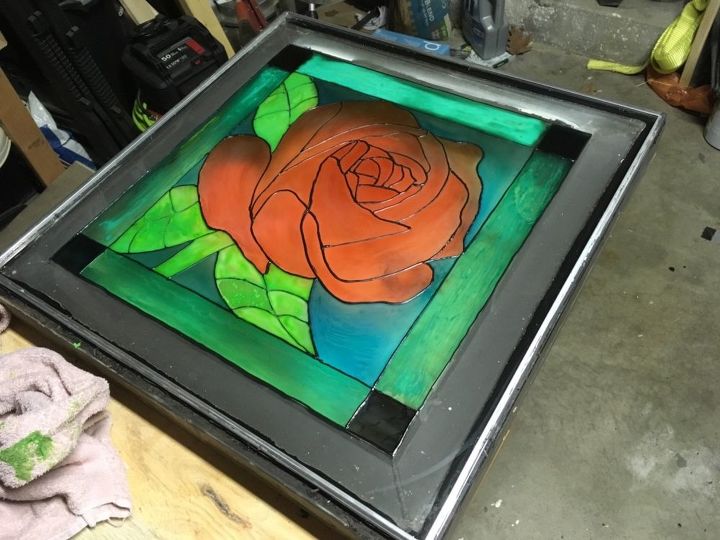
Here is where we left off with part 1. The humidity here in Oklahoma has been through the roof all summer, so I wanted to give everything plenty of time to dry before resealing the panes and frame. I also meantioned in part 1 that I would have to paint a solid color around the edge of my stained glass painting in order to hide the faded frame on the underside of the glass, so I painted a blue and purple border. With the metal frame being black, I wanted to add a bright pop of color.
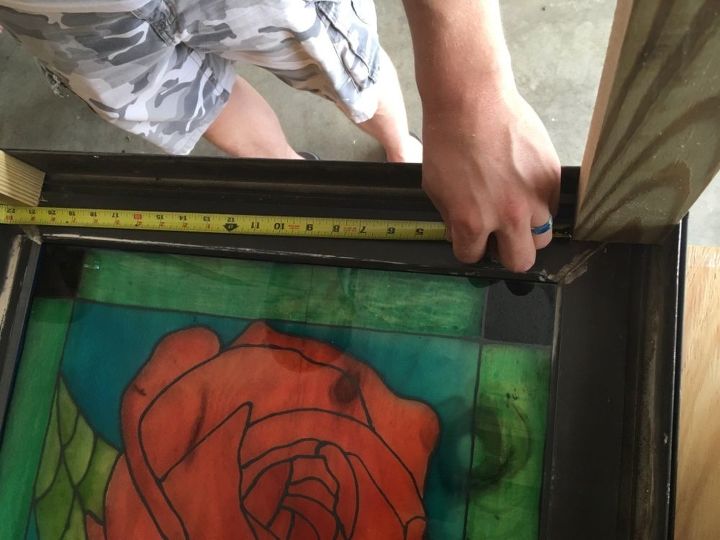
To make the table legs and frame, we used pressure treated 2x3s (which are actually just under 3” wide), so they would fit flush against the metal frame without hanging over the edge. First, we decided how tall we wanted the table and cut the table legs about 1” shorter (the thickness of the window with everything back together. Then we measured how long the frame needed to be and cut pieces to fit.
Once the two opposite sides were cut and inserted, we measured and cut the other two sides.
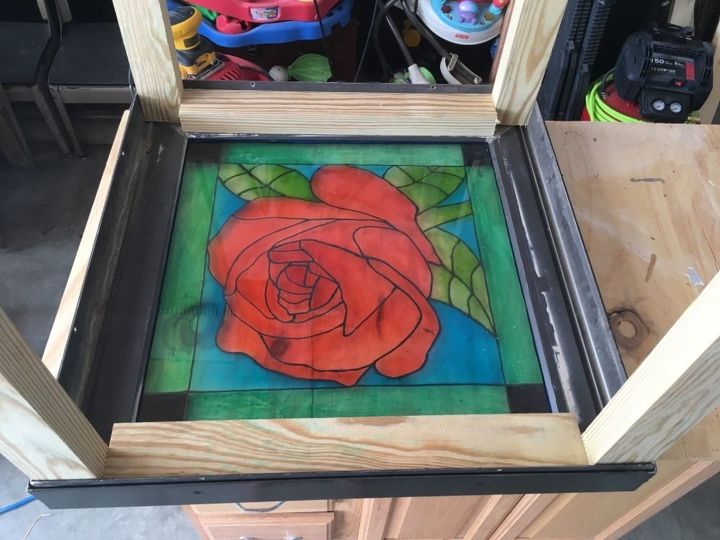
It all was pretty tightly wedged into the metal window frame, but you still want to make sure everything is square. (Sorry, there was some sawdust on my phone lens and I didn’t realize it until later, so the next few photos look a little weird.)
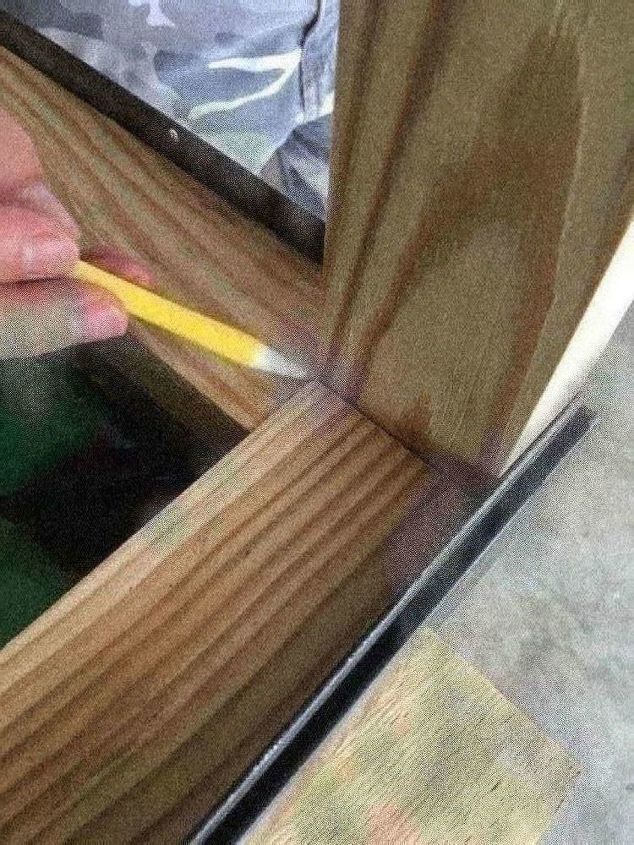
Next, we marked and labeled the pieces so we could take them out of the frame and screw them together.
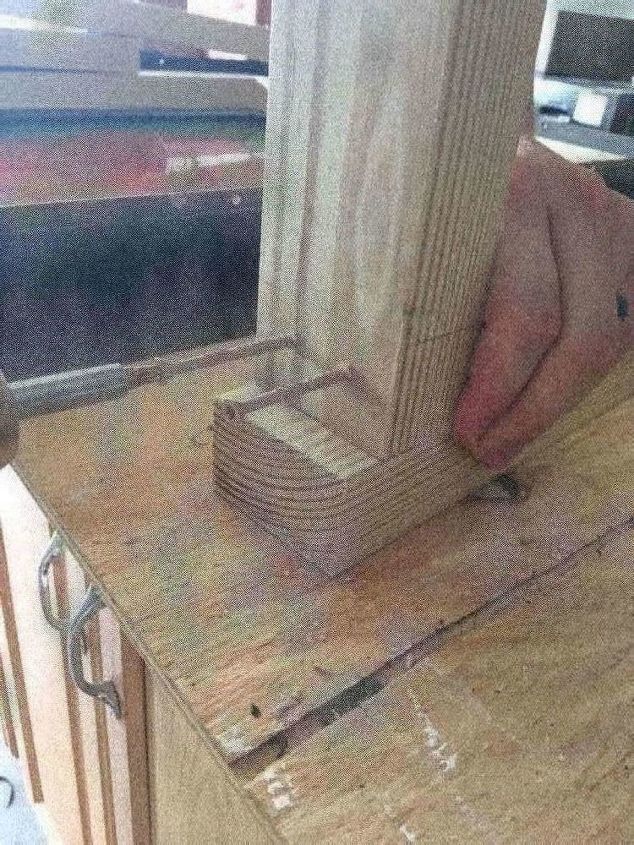
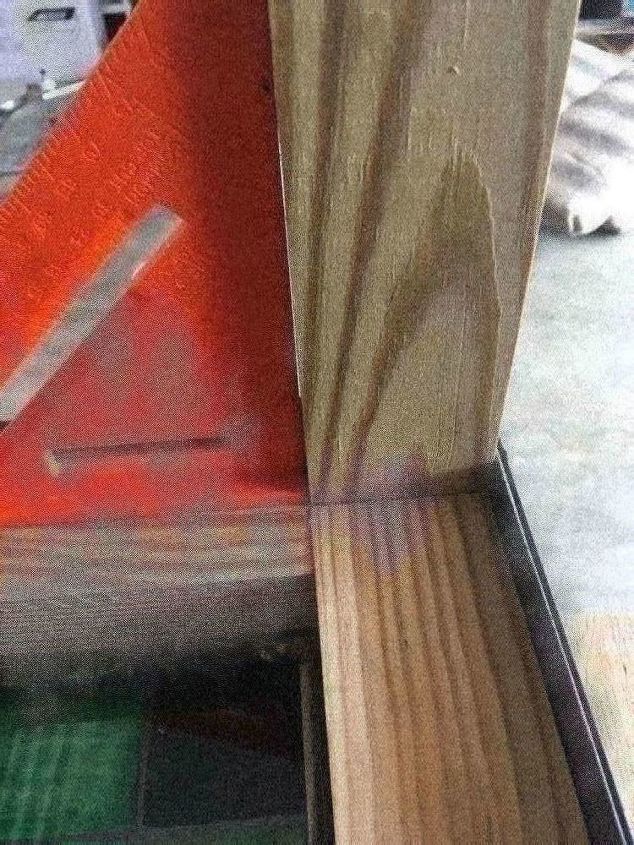
Start your screws in the first board (the leg), and then line it up the the board you are attaching it to. We used self-taping screws, but if you are not or are concerned about the wood splitting, you should pilot your holes.
After all of the boards were attached, we test fitted it back into the skylight frame, then took it out, sanded lightly, and primed it with an outdoor primer.
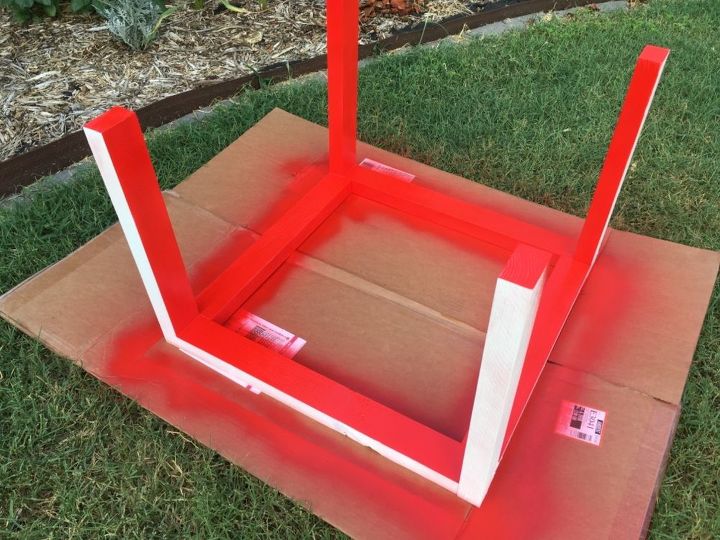
I wanted the base to have a pop of color also, so I painted the insides of the legs and frame red.
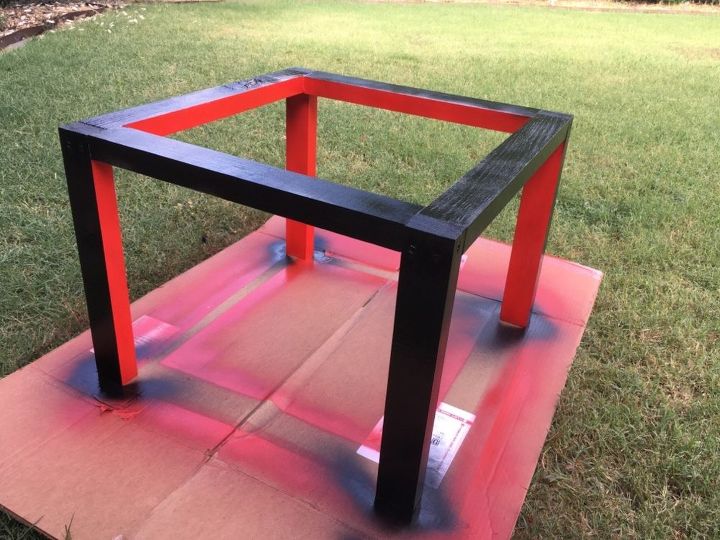
When the red had dried, I flipped it over and painted the outside of the frame black, being careful to spray it at such an angle that I did not get overspray onto the red paint.

The bottom/interior section of the metal skylight frame will be exposed about half an inch, so I carefully sprayed around the bottoms so you will see a red stripe around the frame.

Time to put everything back together! The top pane of glass was very carefully cleaned, and then reattached to the other glass using silicone caulk. Then the top metal frame was placed back on top. The whole thing was set on top of the legs and screwed together using the exsisting holes where the screws held the two metal frame pieces together at the beginning.
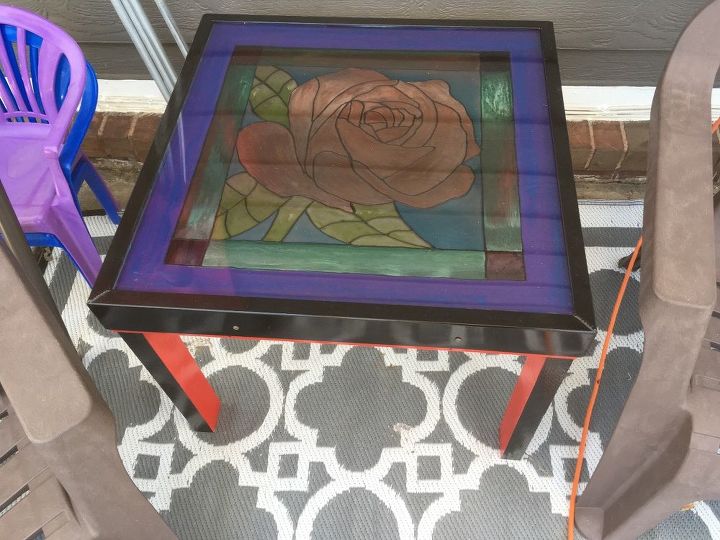
Finally out on the patio! I’m not in love with the black with red legs, so I may end up repainting those, but for now, this is my final table!


Frequently asked questions
Have a question about this project?