


Resin Table Top

by
Alicia W
4 Materials
$25
2 Days
Easy
I've always wanted to try to work with resin and I found this table at a thrift store for $1.50 so I figured if it didn't work, I wouldn't be out too much money and if it did...whoo hoo.
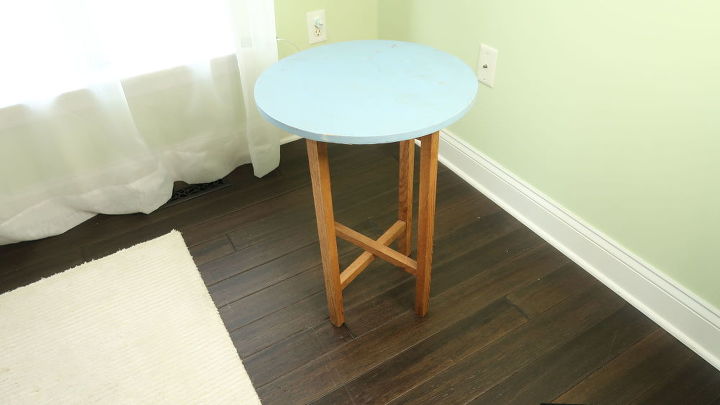
It's a cute little wooden table that actually folds down.
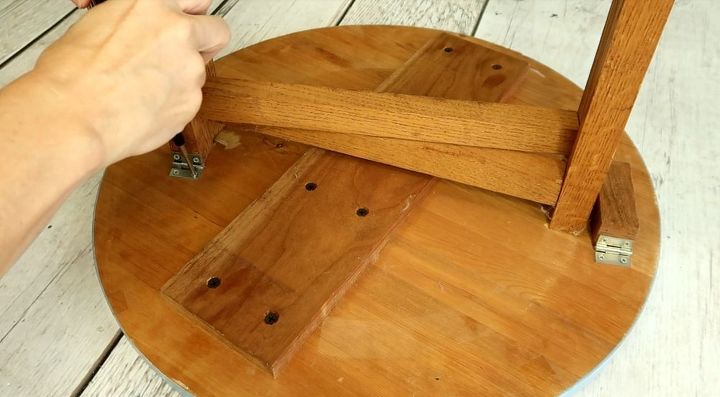
The first thing I did was take the table off of the legs. There were little hinges and I just unscrewed them from the top.
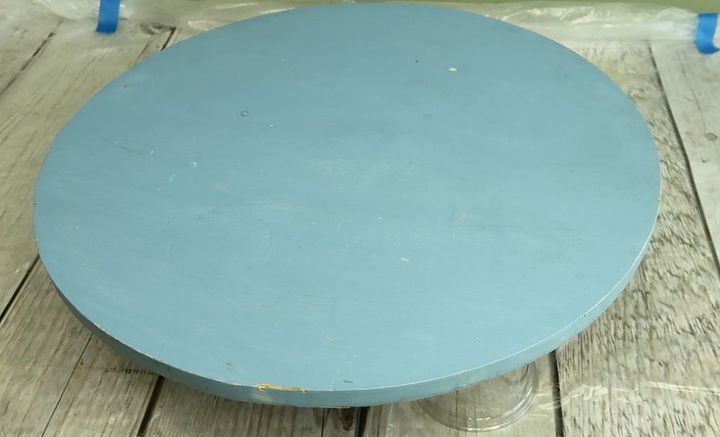
The table was really dirty so I cleaned it with blue Dawn and water. Because the table was wood, there were a few rough edges so I sanded those down with fine grit sand paper.
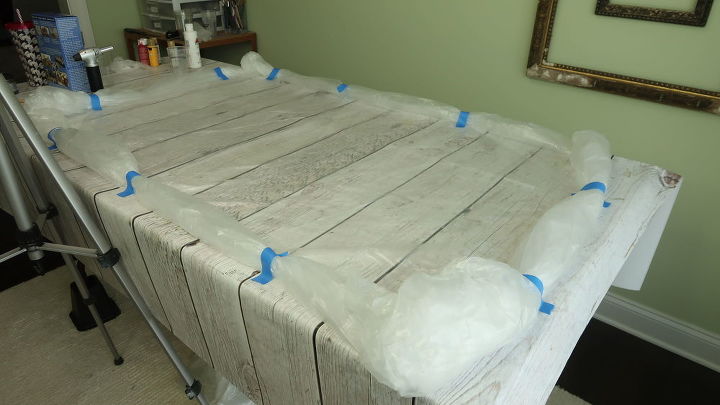
I covered my work space with a plastic drop cloth. I rolled the edges up and used painter's tape to secure them. I did this so the resin/paint wouldn't run onto the floor. Resin is really hard to remove so make sure you protect all of your surfaces and wear gloves when using it.
According to the Amazing Clear Cast resign directions, I had to seal my wooden table top with a coat of clear resin before I added paint. Make sure you read all the directions first.
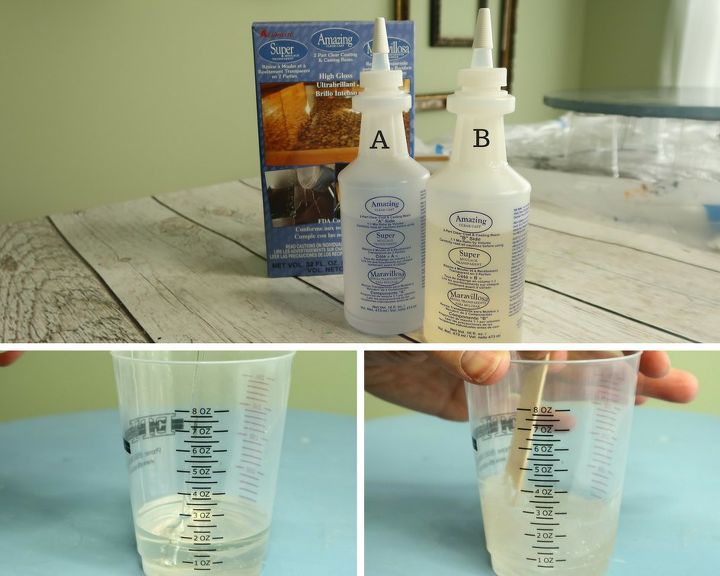
The resin comes in two parts (as I believe most resin does). You mix equal parts of A and B.
For the sealing coat, I added 1 ounce of A and 1 ounce of B to a measuring cup and then mixed it thoroughly together.
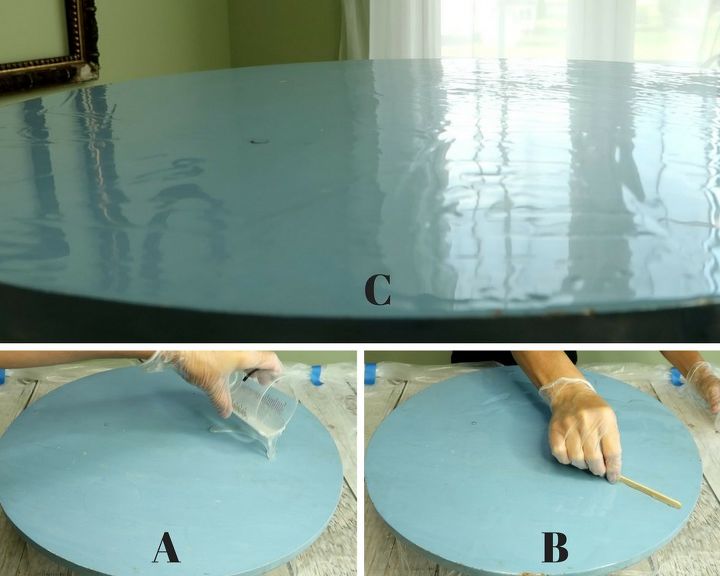
A - I poured the clear mixed resin onto the table top
B - Using a wooden pop stick, I smoothed the resign over the table top
C - I allowed it to dry a bit while I mixed up the paint colors
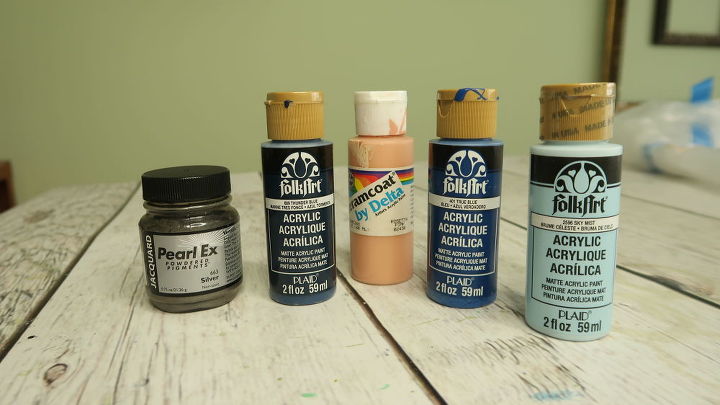
I decided to use five different colors of acrylic craft paint and a silver pigment power.
The colors are from left to right:
Pearl Ex - Silver pigment powder
FolkArt - Thunder Blue acrylic paint
Creamcoat - Rosetta Pink acrylic paint
FolkArt - True Blue acrylic paint
FolkArt - Sky Mist acrylic paint
and I also used white but forgot to add it to the picture.
For the colors:
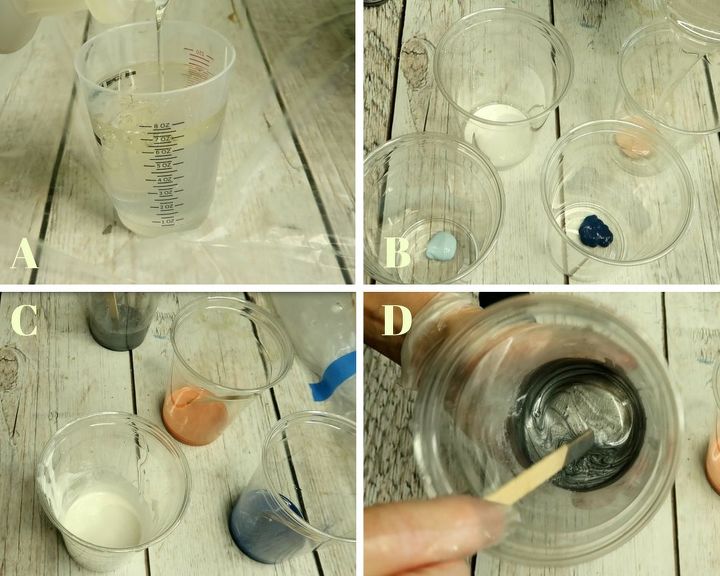
A - I mixed 4 ounces of part A and 4 ounces of part B together to give me 8 ounces of resign
B - I added about 1 teaspoon of each acrylic paint into a separate cup
C - I added about 1-1/2 ounces of resin to each paint cup and mixed it well
D - For the pigment powder, I poured about 1/4 teaspoon of powder into the resign and mixed it well
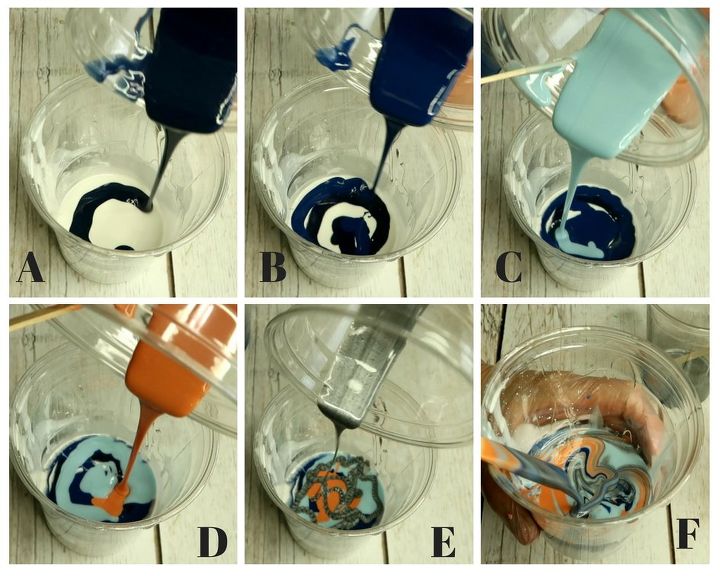
I wanted to do something called a "dirty pour" - where you put all of the colors into one cup and then pour it on to your table top. Or you could pour each color, one at a time, onto your table top.
A - starting with white, I poured in half of Thunder Blue
B - then half True Blue
C - then half Sky Mist
D - then half Rosetta Pink
E - then half Silver
I then started again and poured the remaining half of each color in the same order except for the Silver.
F - Using a wooden pop stick, I gently swirled the paint clockwise then counter clockwise one time.
You don't want to mix your paints too harshly or the colors won't come out separate.
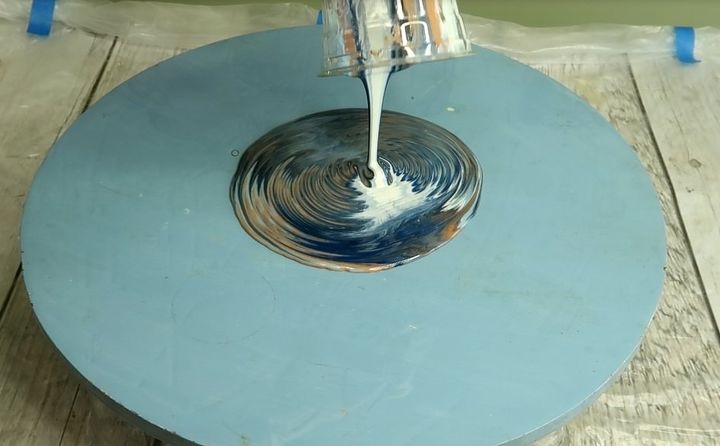
I pour the entire cup of paint onto the middle of the table top.
I gently tilted the table top back and forth until the paint ran over each edge.
Using the extra paint that had dripped off of the top and my finger, I made sure the edges of the table top were coated with paint.

I used the extra silver and carefully poured it onto the table top in a swirled pattern.
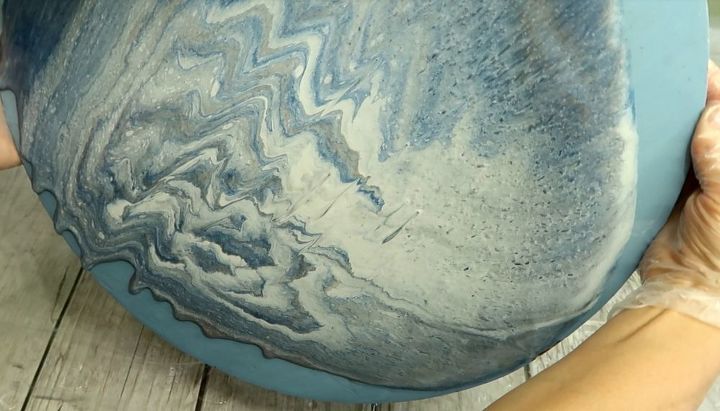
All of the research that I had done before this project, said that I would need a butane torch to pop any bubbles. I don't know if it was the type of resin I used but I didn't have any bubbles. I did use the torch to move the paint around a little bit to create different patterns but you don't necessarily need a one.
This was so much fun, I had to stop myself from continuing to poke at it.
I left the table top dry for 24 hours.
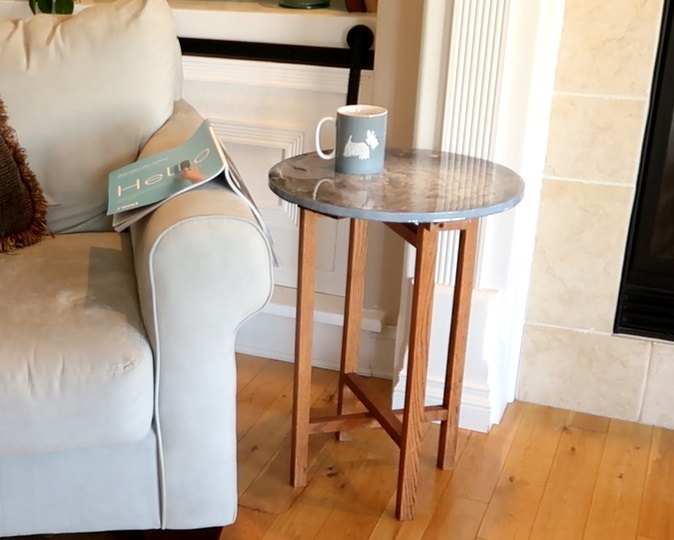
I love my table and I can use it inside or out since the top is water resistant. I will definitely do another resign project soon. This is one of those addictive projects - DIYers you know what I mean ;)
{
"id": "5034065",
"alt": "",
"title": "",
"video_library_id": "6384",
"thumbnail": "https://cdn-fastly.hometalk.com/media/2018/08/13/5034065/resin-table-top.jpg"
}
{
"width": 634,
"height": 357,
"showRelated": true,
"noautoplay": ""
}
Resources for this project:
See all materials


Any price and availability information displayed on [relevant Amazon Site(s), as applicable] at the time of purchase will apply to the purchase of this product.
Hometalk may collect a small share of sales from the links on this page.More info
Comments
Join the conversation
2 of 30 comments
-
I am going to go find something to paint tomorrow! Love this idea. It looks like an agate slab table! Great idea...thanks for posting!

-
After 3 weeks, I still have one small round spot (size of a quarter) that is tacky to the touch
is there a solution to this


Frequently asked questions
Have a question about this project?
Where is the finish product ?
I absolutely LOVE LOVE LOVE this!!! Am a bit nervous to give it a try though! So I understand that you had to seal the table with clear resin first before painting... but what about after you painted it? Did you have to seal it again with clear resin so nothing would happen to the paint like it get dinged or scratched from having things dropped on the table? Thank you so much! You definitely give me inspiration to tackle such a project! :)
Can I use nail polish instead of acrylic paint?