


PARTICLEBOARD BED-FRAME MAKEOVER

After a couple of months sleeping on a mattress on the floor, I was desperate for a bed-frame! I was limited by budget, as well as distance. I finally found a frame that met both these criteria…but is was particleboard!! And didn’t match my other bedroom furniture. But I really liked the headboard (and the idea of finally sleeping in a big girl bed again) so after some deliberation – I decided why not?! So I brought it home and spent the next 4 days working on it…and this is how it went.
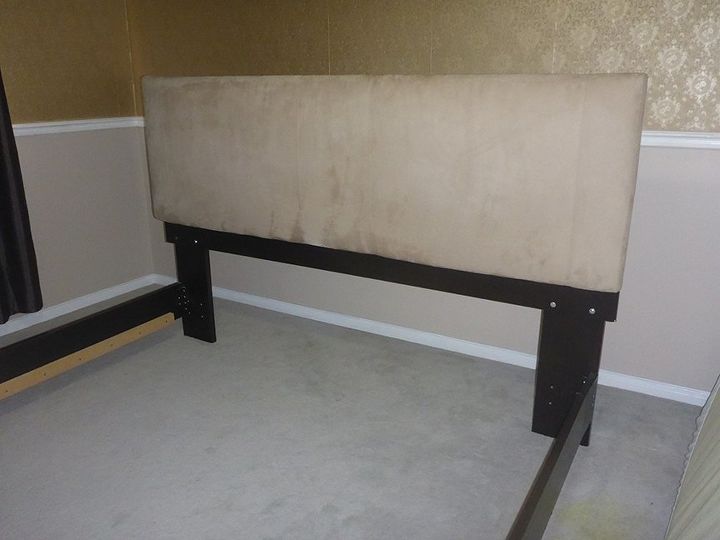
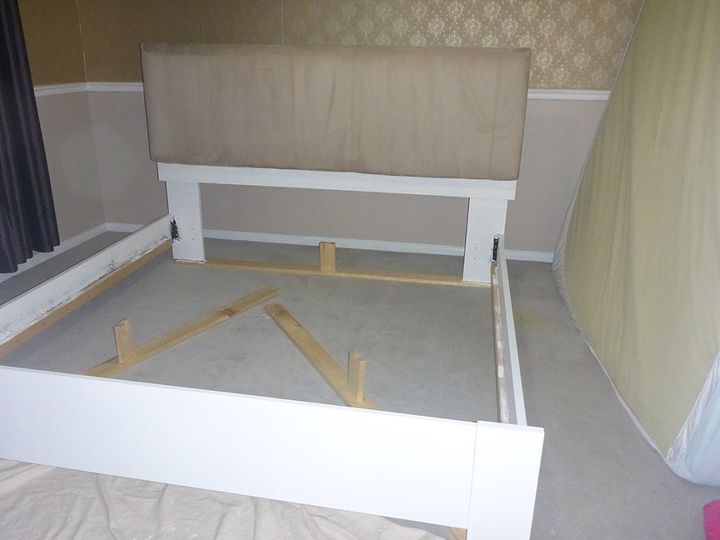
Step 1: I assembled the bed
Step 2: Reinforcements
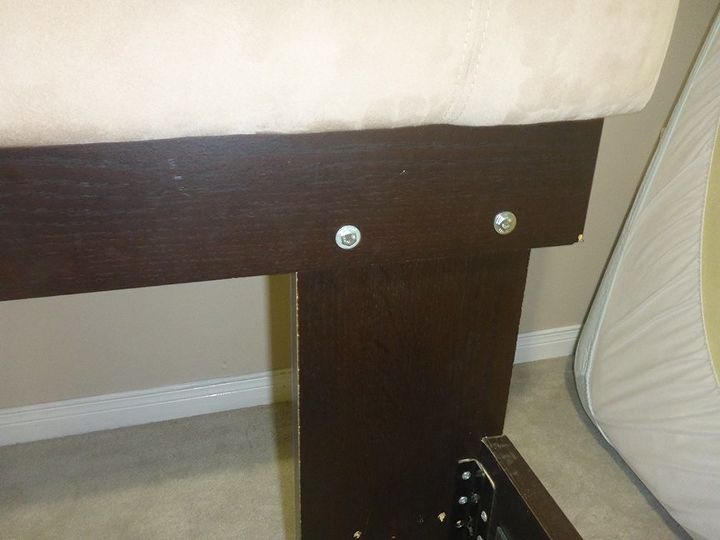
The headboard was much heavier than I expected, so I drilled holes through the headboard and the legs – and placed 4 lag bolts, washers and hex nuts for added support.
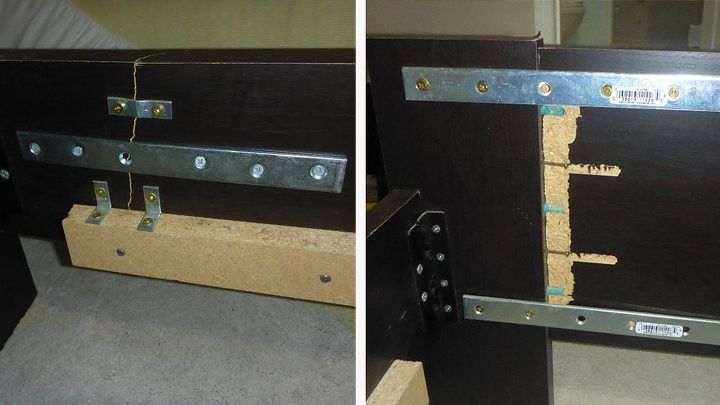
There were some weak spots on the side and foot rails, so I reinforced those areas using metal plates & wood screws.
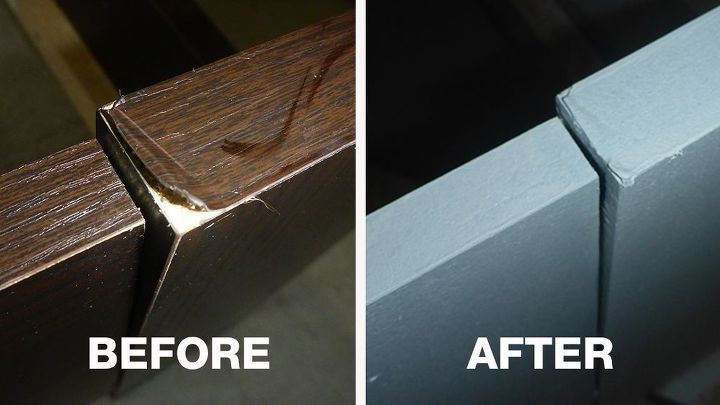
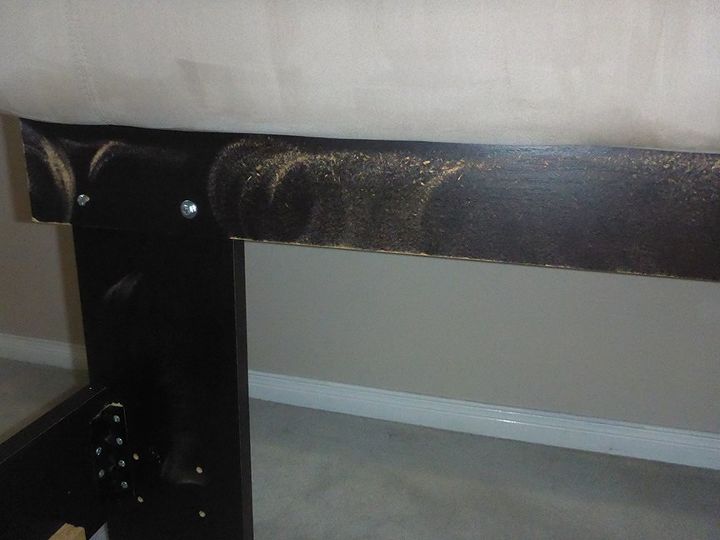
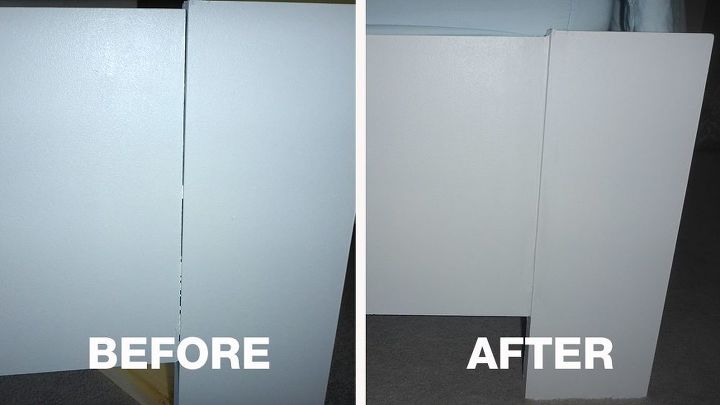
Step 3: Fixing the veneer
There was one spot where the veneer was lifting – so I glued that down using Lepage Ultra Gel glue and placed my tool-box on it until it was dry. The other lifted areas were very tiny so I just used an exacto knife to trim those areas off.
Step 4: Cleaning
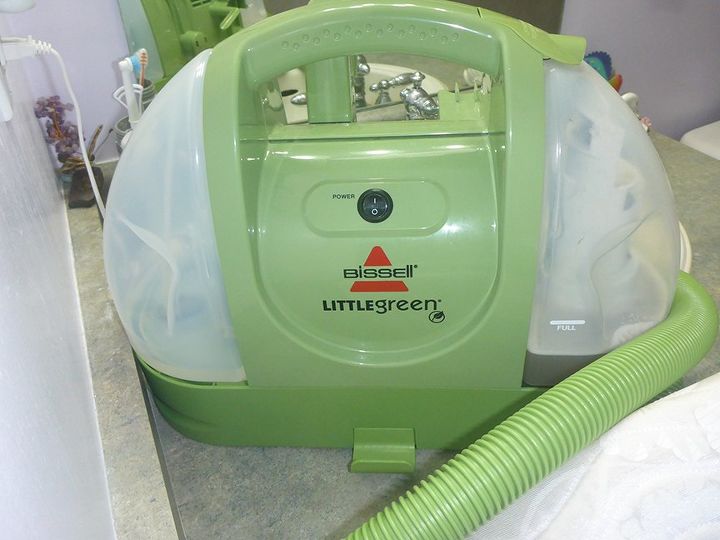
I cleaned the microfiber headboard and the box springs using my Bissell Littlegreen with a cap full of febreze Oxy carpet cleaning formula.
The foot & side rails I cleaned using TSP all purpose heavy duty cleaner.
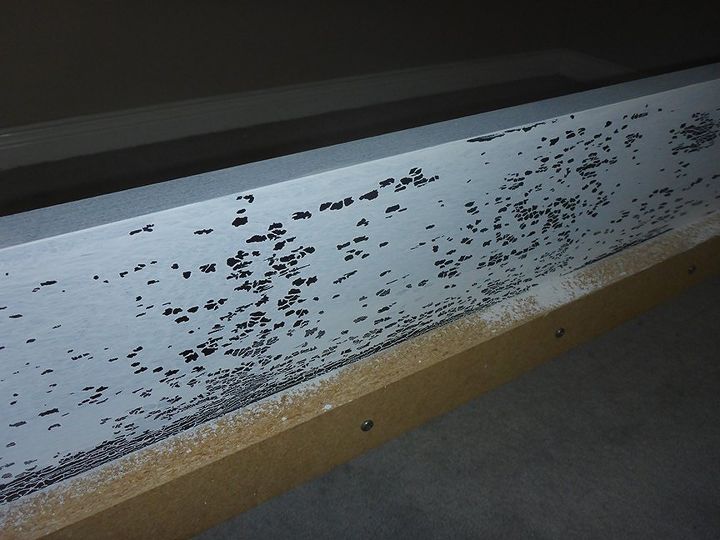
Step 5: Sanding
I went about this the same way I would a solid wood piece, by sanding with my Bosch orbital sander. I quickly realized that the finish was coming off way too easily and concluded that this piece required a very light handed approach! So I gently went over the rest just enough to rough up the finish ever so lightly.
Step 6: Painting
I started painting – using fusion mineral paint in picket fence colour. I’m not gonna lie, at this point I started to panic a little, some areas the paint just didn’t want to adhere to the finish! I started to think that I should have used a primer!
But since I didn’t have primer, and was attempting to keep costs low, I continued on with the paint I had. I did 4 light coats in all. At this stage it had full coverage.
Step 7: Sealing the paint
I used Fusion mineral paint clear tough coat matte wipe-on poly (2 coats) and let dry completely.

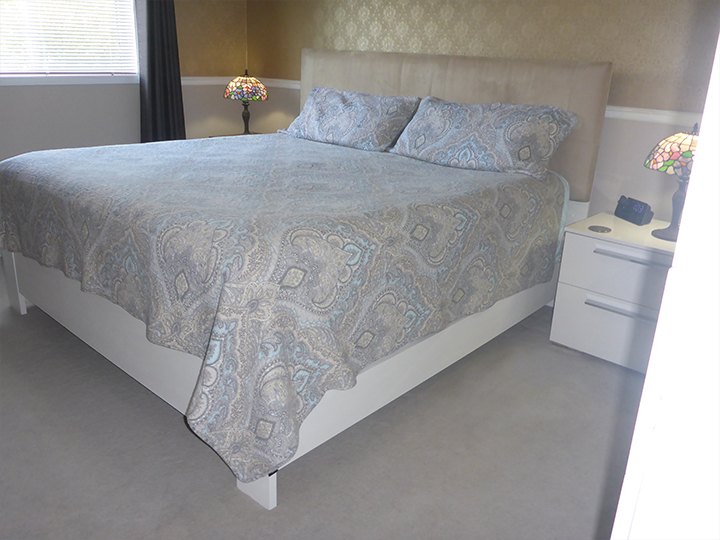
Step 8: The moment of truth
At this stage I was ready to place the box-springs inside the frame. Since I was not strong enough to lift them over the side rails I had to basically drag them across the freshly painted rails. I was worried! But, it didn’t scratch – not one speck!!! Yeah!
Once the mattress was added, I bounced around on the bed and made sure it was secure. I basically flopped around heavily like a fish out of water. I have an 8 year old and a dog who often like to jump and play on my bed, so I wanted to be sure it was safe. And it is. :)
Step 9: final touch up
I could see the original espresso colour in the seams of the foot rail, not a big deal but knew it would bug me, so I applied a small bead of Dap using my finger and a damp cloth. Worked great.
Step 10: Nap time!
Turned out pretty good for my first attempt. And so happy to have a bed-frame! I’ve been sleeping in it for the past 4 nights and it’s sturdy with no creaks or sounds. I think this frame will do just fine for the next few years.
Final thought and future project: The bed is super high with the box springs. I plan to build a slat base in the near future to swap out the box-springs, so my dog doesn’t break a hip jumping in and out!

Resources for this project:
See all materials


Comments
Join the conversation
-
Nice job. Your room looks so pretty and calm. I think I'd keep my box spring and add a bench to the foot of the bed for a step down.
-
Looks nice, thanks for sharing the whole process.


Frequently asked questions
Have a question about this project?