


Vintage Sewing Cabinet Gets Shabby Chic Makeover
13 Materials
$50
2 Hours
Medium
I was super excited to find this vintage sewing machine cabinet for sale while scrolling through the Facebook Marketplace. It caught my eye because it was in the same small town I was, right down the road, can you say happy dance!
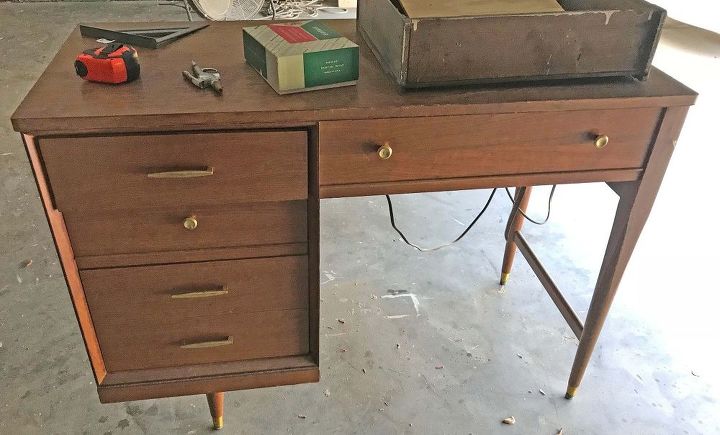
Vintage Sewing Cabinet
The cabinet was in excellent condition. I knew this would make a great entryway piece. I know, I know the norm is to use it for a desk, but I like to think outside the norm! My mom wanted the sewing machine. I wasn't sure if it even worked, but she loves old machines. (Note: She called me the next day after cleaning the sewing machine up and it worked! She said it even worked better than a newer one she had. I was so happy to hear it worked, and it would be put to good use!
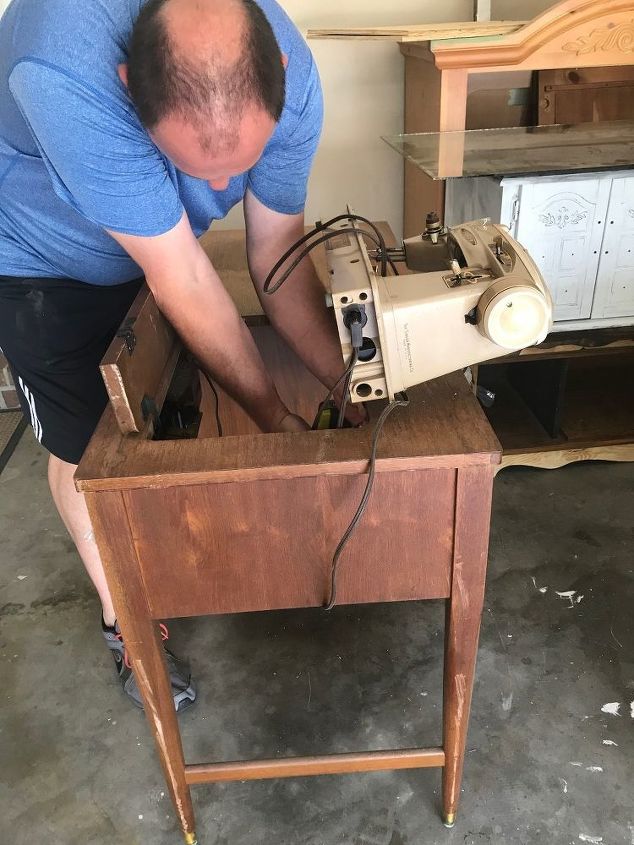
Vintage Sewing Machine
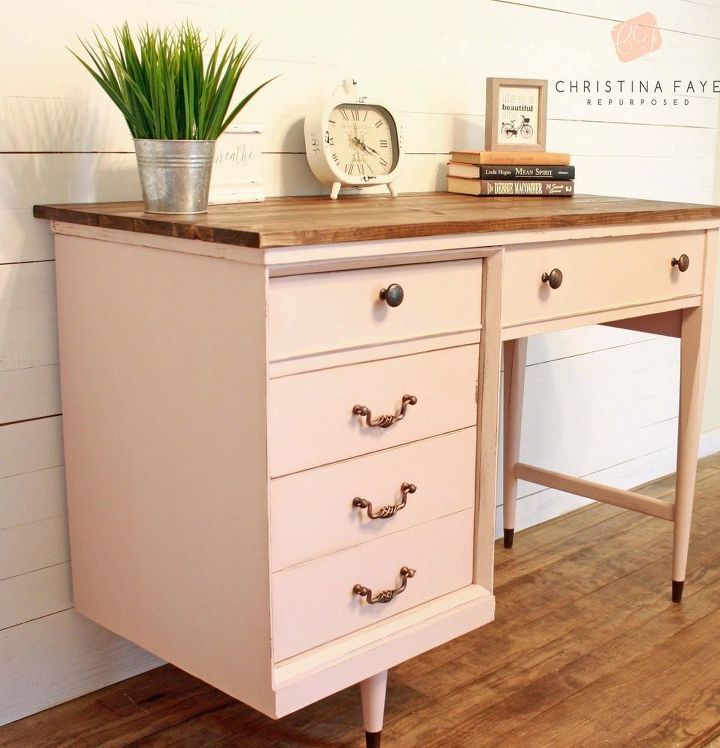
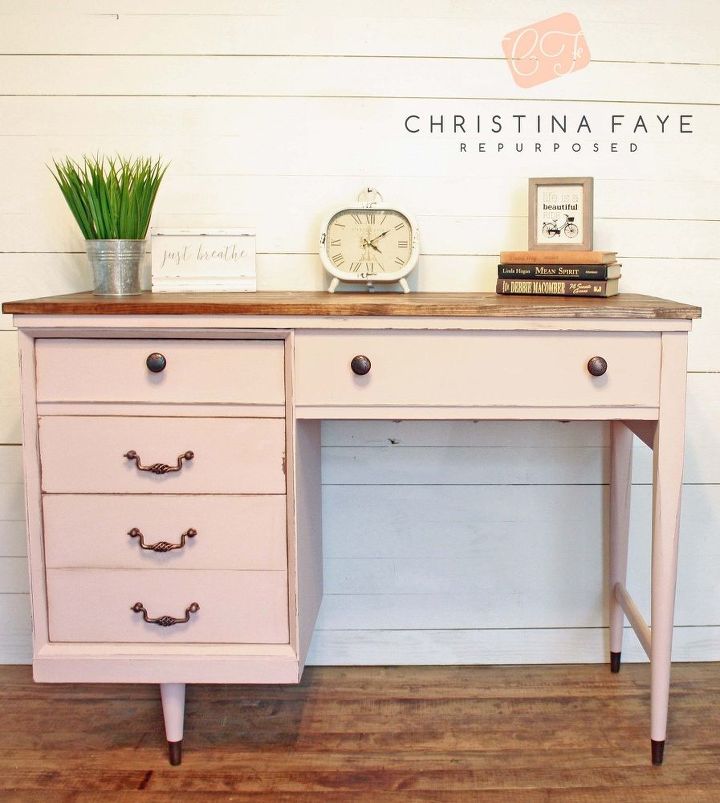
After the sewing machine was removed, we were left with this ugly, huge hole. The Hubs and I decided (well, more like I decided 😊) to build a plank top in order to cover up the huge hole. He constructed the top out of spruce from our local Lowe’s. He cut the boards to 44 ½” long so that there would be a slight overhang. He used his Kreg Jig ( found here) to add pocket holes to the bottom and screwed the top together. He attached it to the top of the sewing machine cabinet using nails.
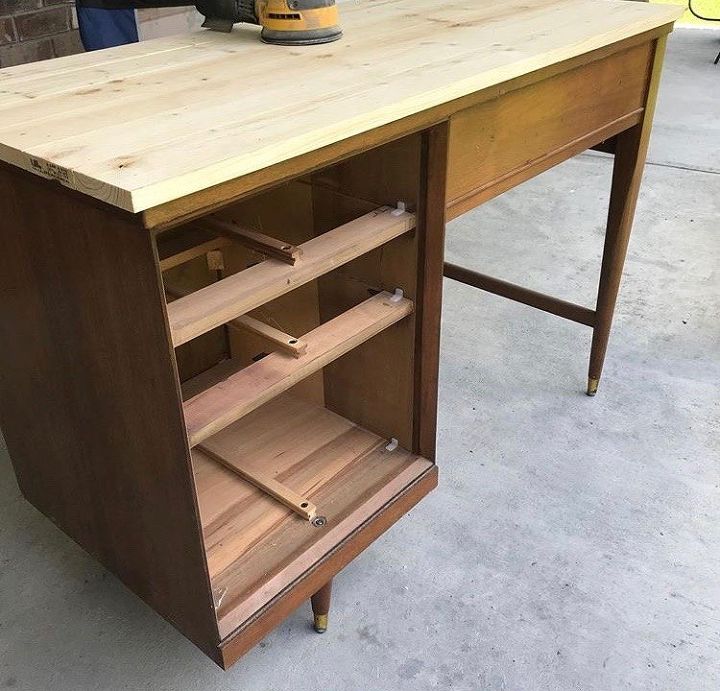
Plank Wood Top
I decided to use Minwax Stain, in the color Dark Walnut on the top. I love their water-based stain because it allows the wood grain to be seen. I sanded the top with 220 grit sandpaper, and then used a piece of tack cloth to remove any dust. I applied one coat of the stain, using a chip brush and wiping any excess stain off with a lint-free cloth. The chip brush is great to use when applying stain because it will get the stain in all the nooks and crannies, unlike just wiping. After letting the top dry for 24 hours (yes here in Georgia the humidity is 100%, so stain takes a bit longer to dry than other areas), I applied a coat of Polyacrylic. Note: To test that the stain is completely dry, run your hand across the finish. If you feel any sticky or tacky places, then its not completely dry. Isn't it beautiful!?
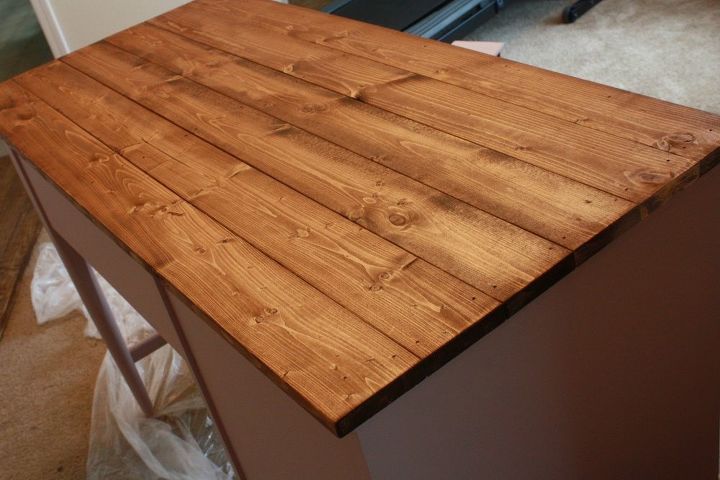
Minwax Dark Walnut
Once I was finished with the top, I cleaned the cabinet entirely with TSP ( a degreaser you can find here), making sure to remove all the grease and dirt that may have accumulated. After a lot of pondering about color, I decided to use Dixie Belle Tea Rose. This color is so pretty and shabby chic!
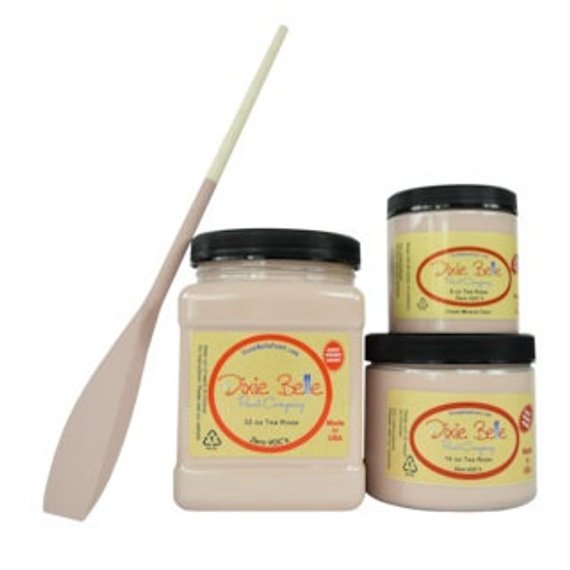
Dixie Belle Tea Rose
I applied two coats of Tea Rose, allowing 24 hours dry time in-between coats. Once the final coat was completely dry, I gave the cabinet a very light sanding using 220 grit sandpaper, just to knock down any raised brush strokes and give it a smooth finish. I also distressed around the edges.
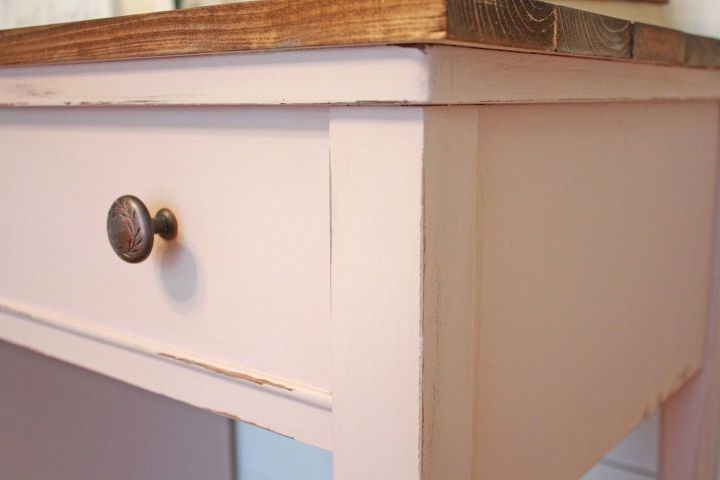
Distressed Edges
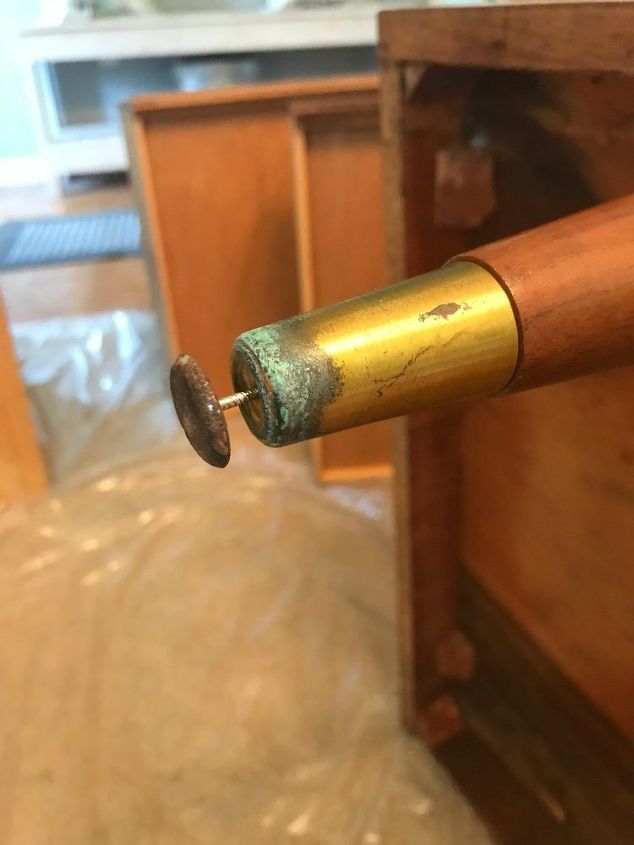
I decided to use clear wax to seal the cabinet. I cleaned any remaining sanding particles with my tack cloth. I then applied one coat of Dixie Belle’s Best Dang Wax. It’s very simple to use and goes on like butter! You apply the wax in a very thin coat with a wax brush or a lint-free cloth. Allow to dry for 15-20 minutes, and buff with a clean, lint-free white cloth. Now, for the brass furniture tips on the bottom of the legs. I had thought about purchasing new ones to replace the original ones. But boy, how expensive these little thingies were and HARD to find! I found a set of four on Ebay for $53.00! That was way more than I wanted to spend. I took a much less expensive route and decided to paint them a dark brown since the top was stained dark. I gave them two coats of Rust-oleum Expresso Brown, allowing the first coat to dry overnight, then applying the second coat. After they dried for 24 hours, I sprayed them with Polyacrylic. Ebay for $53.00! That was way more than I wanted to spend. I took a much less expensive route and decided to paint them a dark brown since the top was stained dark. I gave them two coats of Rust-oleum Expresso Brown, allowing the first coat to dry overnight, then applying the second coat. After they dried for 24 hours, I sprayed them with Polyacrylic.
I chose to change out the hardware completely. The vintage brass pulls, and knobs were not coordinating with the overall feel I wanted the cabinet to have. I went over to www.Dlawlesshardware.com. Their selection is one of the best that I have found! You can also search by pull size which is a plus for me because it saves so much time! I found the perfect pulls and knobs that coordinated perfectly together. You can find them here Bird Cage Bell Pull and Oil Bronzed Leaf Knob.
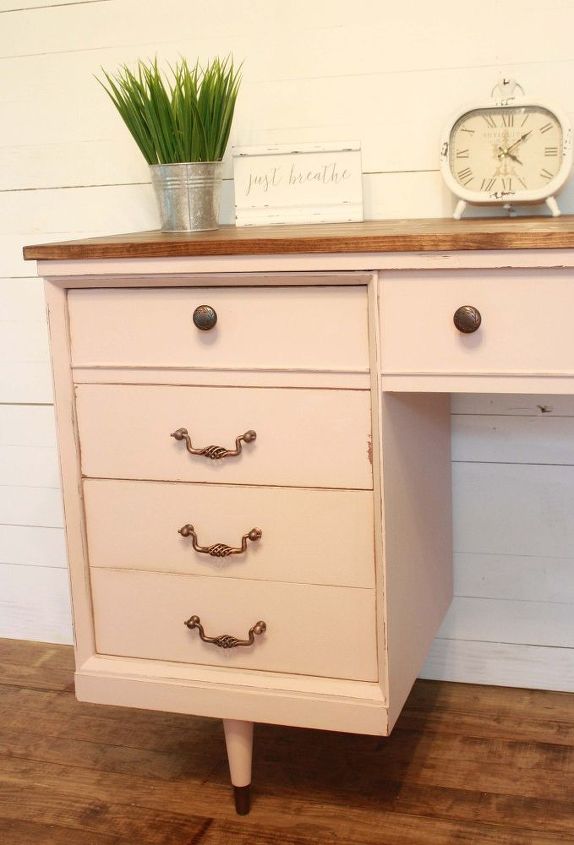
I think she turned out beautiful. This piece sold the first day I posted it. The client uses it in her entryway! What a lovely way to greet visitors. Used furniture can always be rescued, redone, and reloved
Resources for this project:
See all materials


Any price and availability information displayed on [relevant Amazon Site(s), as applicable] at the time of purchase will apply to the purchase of this product.
Hometalk may collect a small share of sales from the links on this page.More info

Want more details about this and other DIY projects? Check out my blog post!
Comments
Join the conversation
2 of 62 comments
-
I love it. I redid one too but I think it will be refinished again.
-
beautiful!


Frequently asked questions
Have a question about this project?
Still have big empty space. Why didn’t you add a shelf or two matching the top? And a basket.
How much did u sell it for?
This is beautiful and very creative! I have the same cabinet and am missing the round pull and leg caps. If you kept them, is there a chance you'll let me buy them from you?