


Flea Market Painting to Mod Podge Masterpiece
5 Materials
$30
2 Hours
Easy
Let me just start by saying, I love to change up my decor. If you’ve followed my blog for any amount of time, you have probably noticed this small obsession that I have with changing things up. But, I don’t have a ton of money to always buy new decor so I’m always looking for budget-friendly ways that I can do this. An excellent budget-saving tip to change up your home decor is to use printables.
I am a member of the Home Love Printables Club. For just $5/month (first month is FREE), you get access to so many lovely home decor prints, stationary, note cards and much more. It’s a great way to add lots of new pieces to your home without spending a lot of money. Make sure you give them a follow on Instagram to see all the great ways that others have styled their printables. I absolutely love the vintage vibes of their March printables, which is what I used for this project.
The first thing I did was download and print my printable from Home Love. The posters download as an 8×10 size, but you can scale them as large or small as you wish. I had mine scaled and printed as an 18×24. You can have this size printed at Staples for just a couple of bucks.
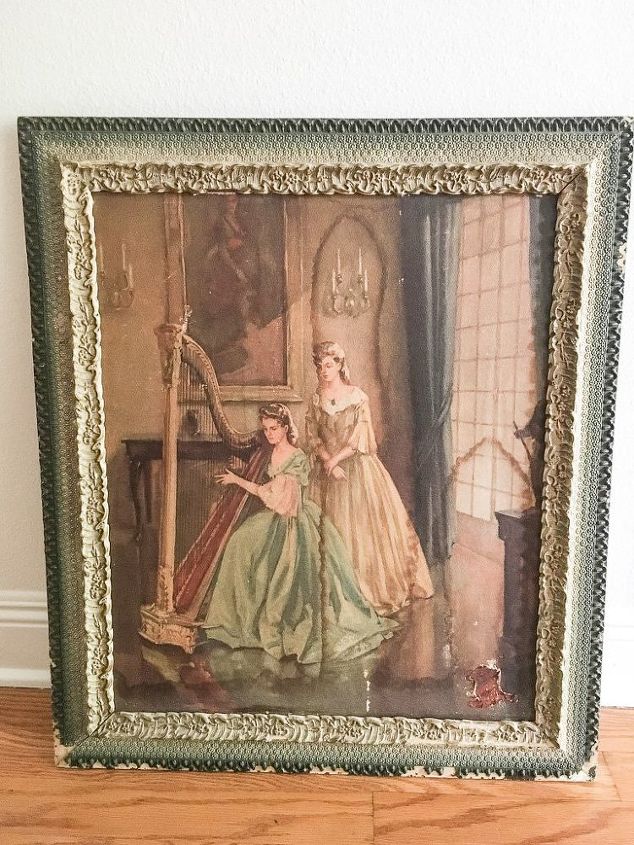
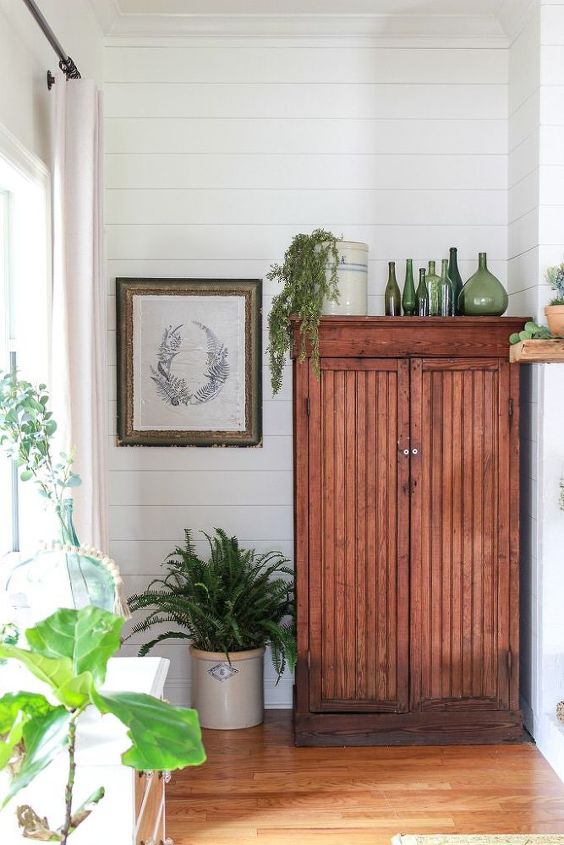
Several months ago, I found this old oil painting at a flea market for a steal of $10! The frame alone was worth more than that! I secretly hoped it was a famous painting that was worth thousands, but I was not that fortunate. I’ve held on to it for a while because I just wasn’t sure what to do with it. The style of the painting didn’t really fit with my decor. And then the thought hit me to paint over it.
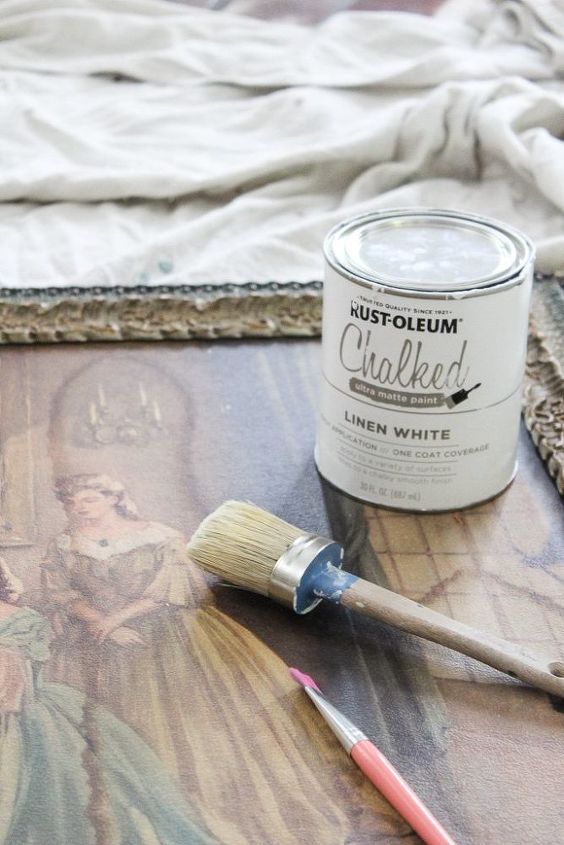
So I painted over the oil painting with chalk paint. I used Rust-Oleum in Linen White. It took a total of 2 coats to completely cover the painting. That little area on the bottom right of the picture, that it looks like someone tried to touch up, was very difficult to cover with the paint. I even tried Kilz on that spot and whatever it was that they used kept bleeding through the paint. But I just went with it because I knew I wanted this to have an imperfect, vintage vibe anyway.
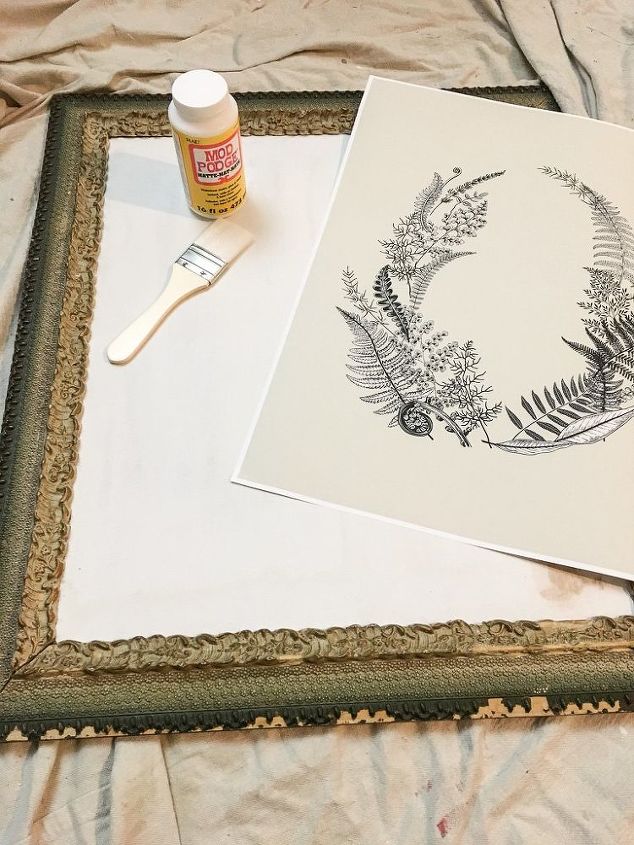
After the chalk paint was dry, I applied Mod Podge Matte Finish to the area where my printable was going to be placed. One tip that I learned while doing this is that you should apply the Mod Podge to the back of the poster also. Mine had a few bubbles in it in places that it didn’t fully adhere to the Mod Podge. Applying the Mod Podge to your surface AND the back of your poster will help it stick better.
After you get your poster placed on your surface, apply another coat of the Mod Podge on top. If you’ve never used Mod Podge, you will notice that it looks like a white glue when it goes on, but it dries clear. After the Mod Podge dries, apply a second coat. I applied a total of 3 coats on top of my poster because I wanted to sand it to give it a distressed, vintage look.
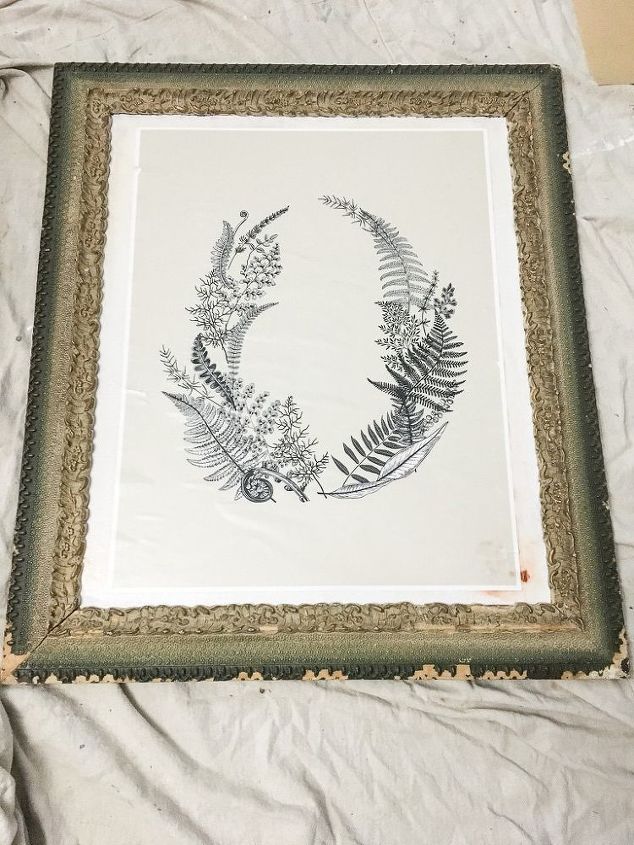
Once the Mod Podge was completely dry, I used an electric sander with a fine sandpaper to distress the poster. As I said, I was going for a vintage look to go with the vintage frame, so I actually wanted a little distressing to the print. I let the poster rip in a few places and get a few scuff marks from the sander to add a little character.
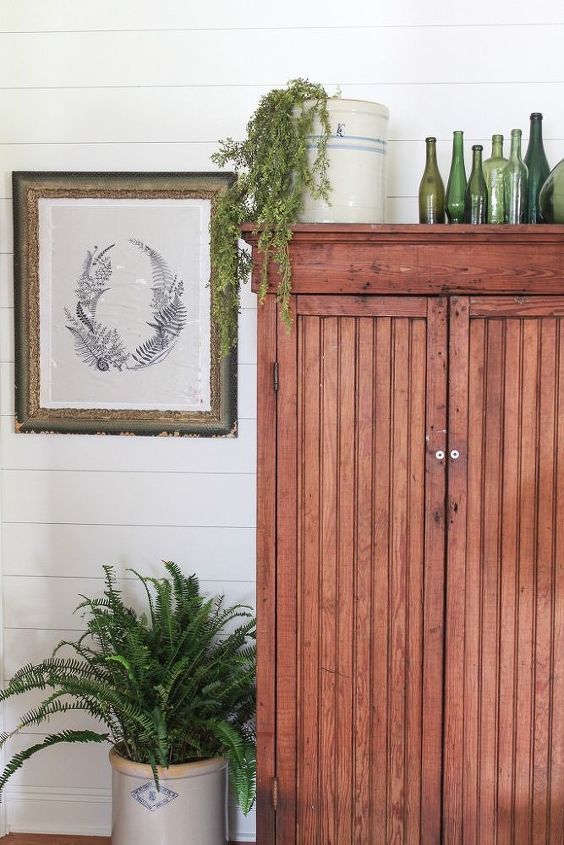
I’m loving the way this turned out and I feel like the vintage inspired look goes perfectly with my decor in this space. I have so many ideas for some of the other printables and I can’t wait to get started with them and share them with all of you!
Resources for this project:
See all materials


Any price and availability information displayed on [relevant Amazon Site(s), as applicable] at the time of purchase will apply to the purchase of this product.
Hometalk may collect a small share of sales from the links on this page.More info

Want more details about this and other DIY projects? Check out my blog post!


Frequently asked questions
Have a question about this project?