


Adding Curves and Opening the Vista: Major Remodel Overview

by
Adele Kurtz
4 Materials
$15000
1 Month
Advanced
This is not really a step-by-step DIY... but rather an overview of a major remodeling project that DIYers offered input on -- here at Hometalk.
18 months ago I posted a Hometalk Challenge on the Discussion page.
I was searching for ideas about how to open the vista... I posted my concepts and shared past projects. It's been a long time in development, using contractors for the heavy lifting and specialized expertise, and me overseeing and handling finish details.
I hope some of the details will inspire other Hometalkers as much as you all have inspired me.
Here's the capsule story:
2016 Looking for inspiration...
Here's where we were in 2016.
I had already developed a new design motif by utilizing curves in our decking alterations. You can see them in Hometalk posts like from Woe to Wow Deck transformation
https://www.hometalk.com/diy/build/decks/woe-to-wow-smart-deck-transformation-22396521?r=2
also shown in sample below.
Introducing the CURVE
Around our property, we make changes slowly, in a "Triage Method" tackling Worst Things First. We always have something in motion.
We started with the back deck with it's small concrete patio ...
Here's where I first adapted swooping floating curves that you see...
And first experimented with iron sucker rods that I bought from an oil industry salvage yard.
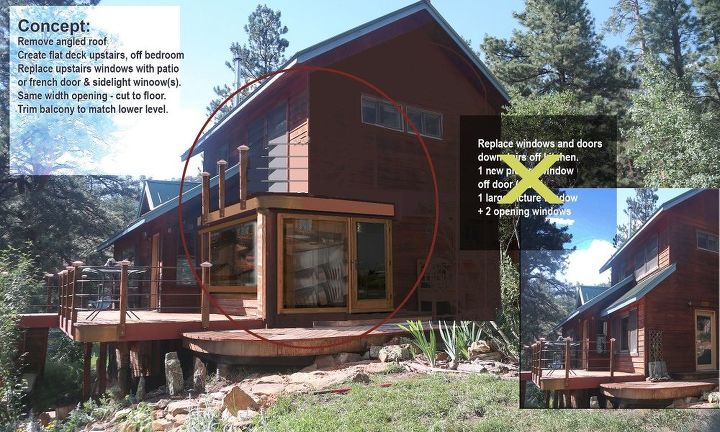
Concept after Hometalk Discussion
After living with this for awhile and putting a lot of work into the landscaping, I worked on some ideas for opening up that corner to take advantage of the vistas we were creating.
I started a discussion on Hometalk:
http://www.hometalk.com/diy/home-tours/q-how-... there I developed the concepts above and below and started showing them to contractors to get their input and cost estimates.
I use Photoshop to cut, paste, stretch and overlay my ideas over actual photographs until I have something worth discussing.
Phase 1: Downstairs Concept
Of course many of my ideas were "over the top" and needed plenty of practical revisions.
So we decided to break it into phases.
I continued to refine the concepts...
find contractors to help in stages...
and DIY the details in between.
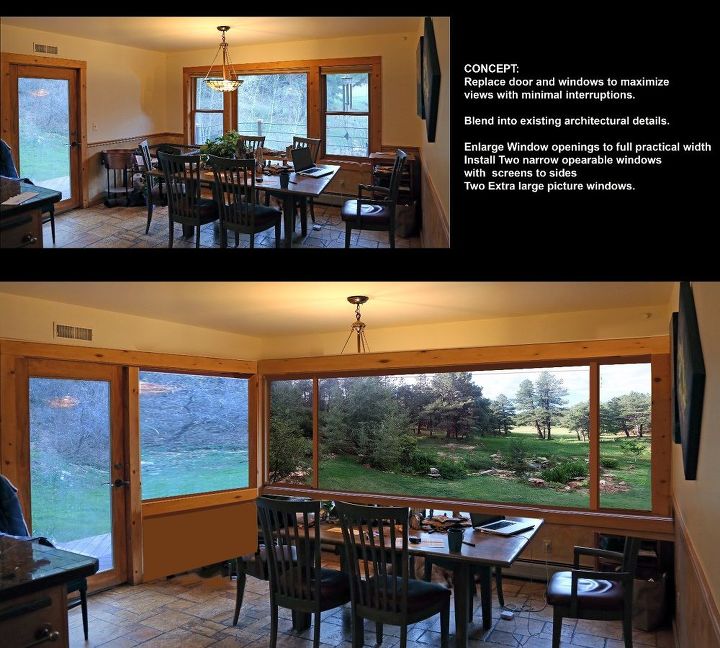
AFTER with DIY detailing Downstairs
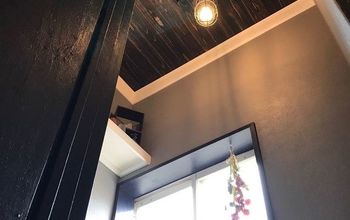
The first year we did the downstairs dining area.
We took the Phase 1 concept and improved it by adding as much window area as possible. I decided to lighten up the woodwork (rather than match old pine look) when I detailed it by using whitewashes and adding a DIY window seat.
https://www.hometalk.com/diy/entryway/bench/opening-views-with-a-built-in-leather-window-seat-31343283?r=2
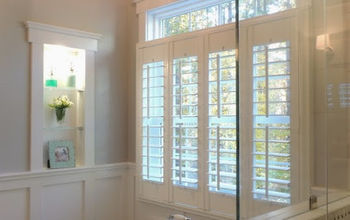
This lightening led to other adventures within the house as you can see in other posts for other rooms.
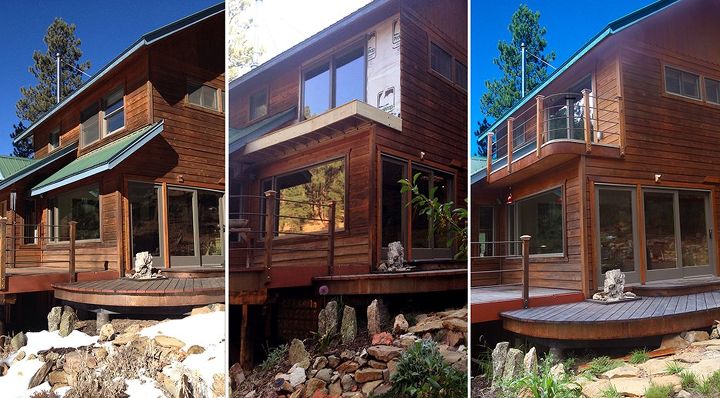
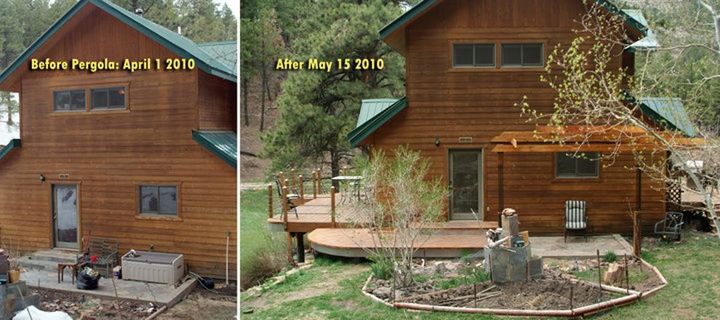
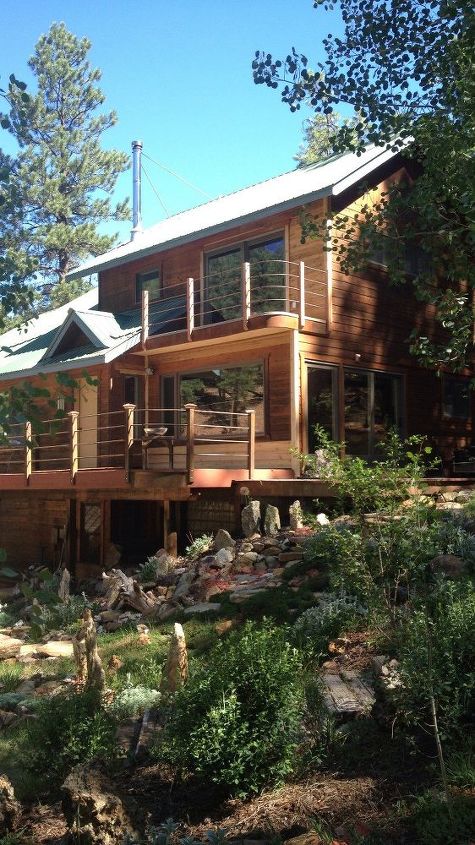
Before... during... after UPSTAIRS
This year we remodeled upstairs.
Signature Renovators added an 8' sliding glass door and balcony off the bedroom.
Durango Roofing added vinyl membrane.
We'd need to work to combine expertise on details together -- such as metal fascia, corner rounding, posts and rods.
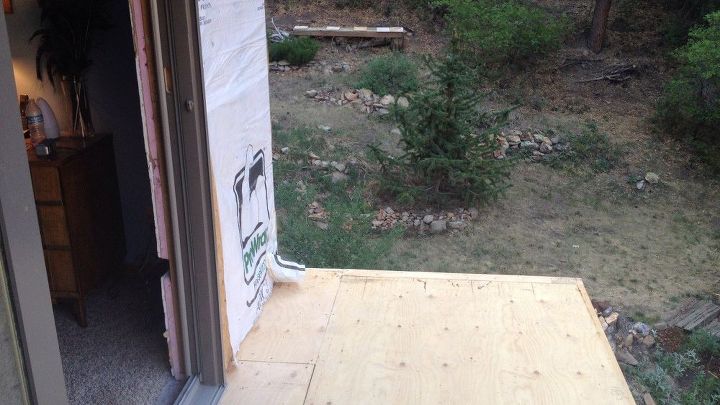
Balcony in process straight corner
As the Homeowner with a STRONG VISION of what I wanted, as well as a strong design background to back this up... I needed to stress the importance of the CURVE at the corner...
integrate into existing architecture
... and how we need to gently overlap and interrupt an existing feature to create a proper flow.
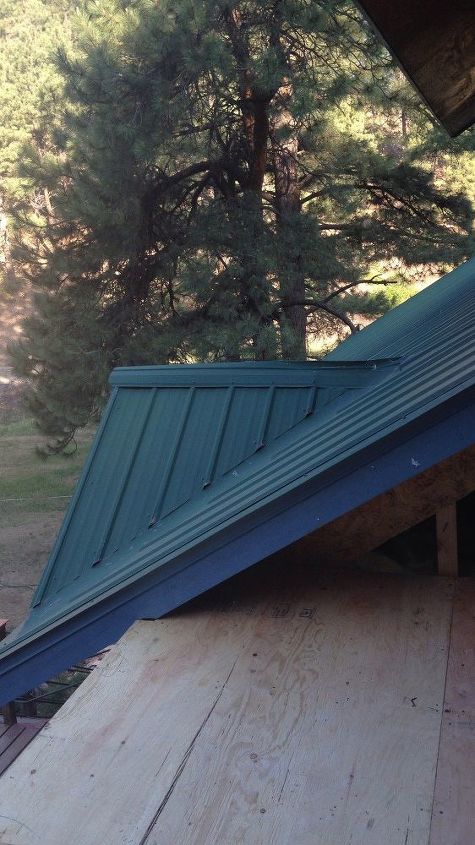
Such as shown in this detail: Notching into the roofline and back, extending balcony OVER a bit to overhang roofline, makes it look as though it is INTENTIONAL: as if it has always been there, not a clumsy add-on.
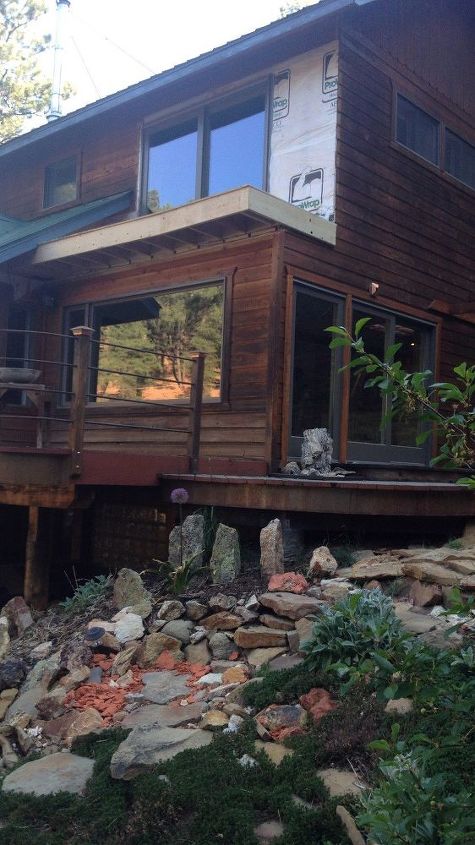
Details needing refining
Compare this pic with the one below and you will see how DETAILS really MAKE this design WORK.
Beginning with my design education at IIT I learned the following rules. Practice these and you'll save > $100,000:
1: Form Follows Function
2: God is in The Details
3: Less is More
4: Don't ask Why, ask Why Not...?
5: Reduce, Reuse, Recycle, Repeat
DETAILS:
1: CURVE the edge
2: Rusted metal edging/fascia (mimics and accentuates previous metal detail used to curve edges)
3: Iron Sucker Rods drilled and bent to match
4: Integrate into existing architecture by overlapping and overhanging gracefully

Completed redesign overlooking pond
You can get an idea of the landscaping we've done, (hubby gets kudos for all those rocks) and WHY we wanted to get a better view of our work!
See other posts for more on how we created these.
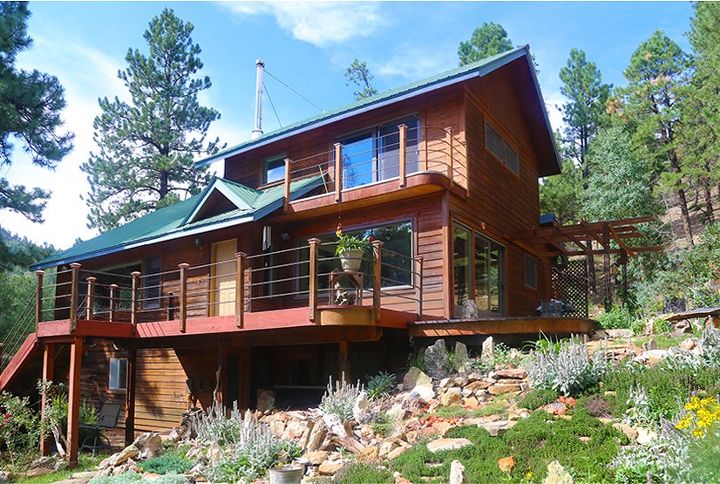
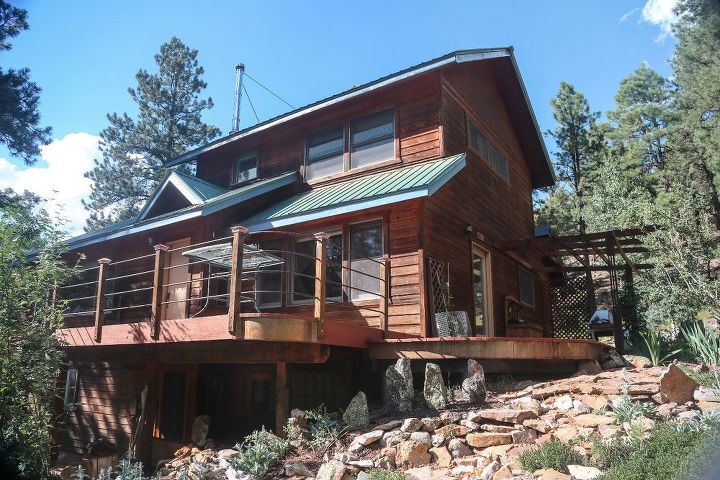
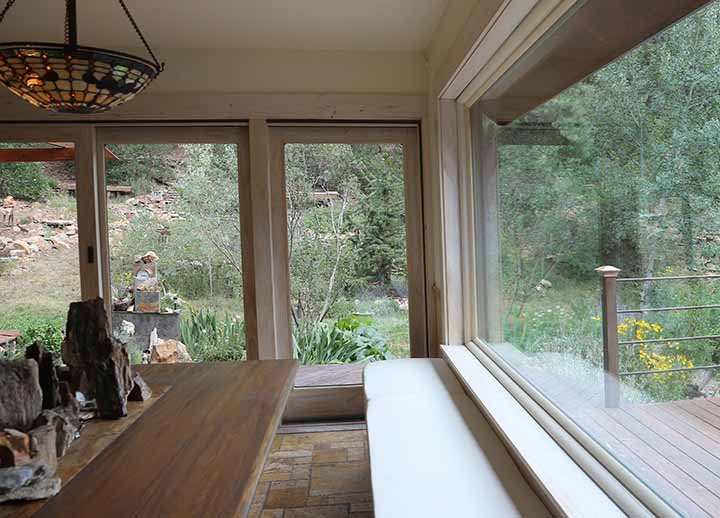
After remodel and detailing 2018
Here's the same view as the first pic with the remodel after I stained and finished detailing.
It is interesting to note how we developed and worked together with the concepts and details to get a practical and graceful solution.
Thanks to other Hometalkers for your input along the way!
Comments
Join the conversation
2 of 21 comments
-
Stunning! Yes, hard work, but it paid off. Love the outdoor space and all those wonderful windows! Enjoy for years to come. 🌞
-
No, wish I could, though


Frequently asked questions
Have a question about this project?
I am trying to look at your pics and advertising is coming up on top of your pics, which I can't see? Why is this? Marilynn Gilles[oie
The next question is: Where do we go from here? Answer below.