Sequin Peacock Chair! (Really!)

WhatAmberLoves
by WhatAmberLoves
Watch us transform a tattered Victorian parlor chair into a funky, fun Peacock Chair for our 9 year old daughter to use at her homework table!
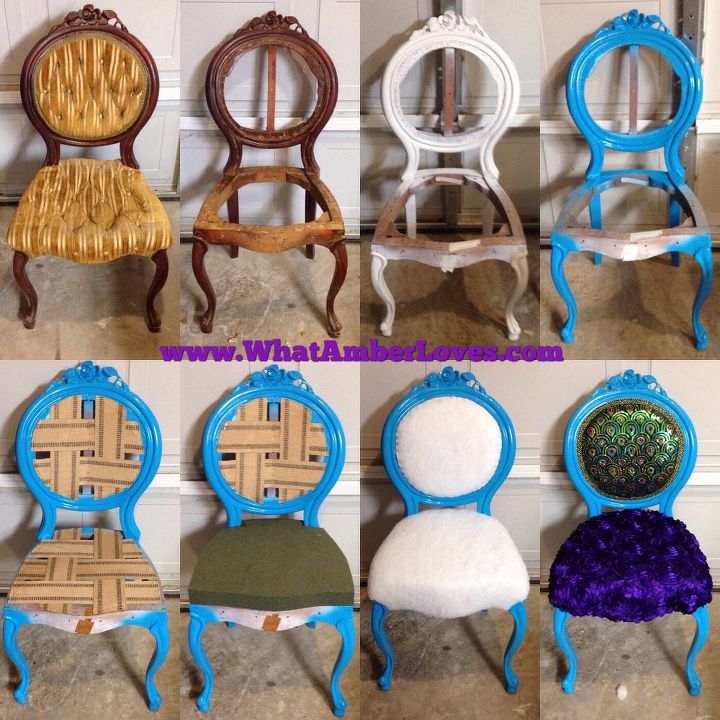
We picked up this old, tattered antique chair for $20. The upholstery was stained and ripped, the seat and cushion were completely failing, but the frame was sturdy. The carving detail and the overall shape of the chair made it too cute to pass by.


My middle daughter, age 9, asked if we could re-do the chair for her room. She said, "I like it, and if you fix it, I can sit in it while I do my homework." I needed no further convincing that the chair should be hers!


Her room is painted a bright purple, and she has lots of hot pink accessories and colorful artwork. A restoration of the chair to its former design just wouldn't make sense for her room. We needed it to be bright, fun, and youthful in fit into her space! On that note, she and I dove into Pinterest looking for inspiration. What idea did we come up with as inspiration to her chair renovation? Peacocks! We decided to make it a vivid, shimmering PEACOCK themed chair!
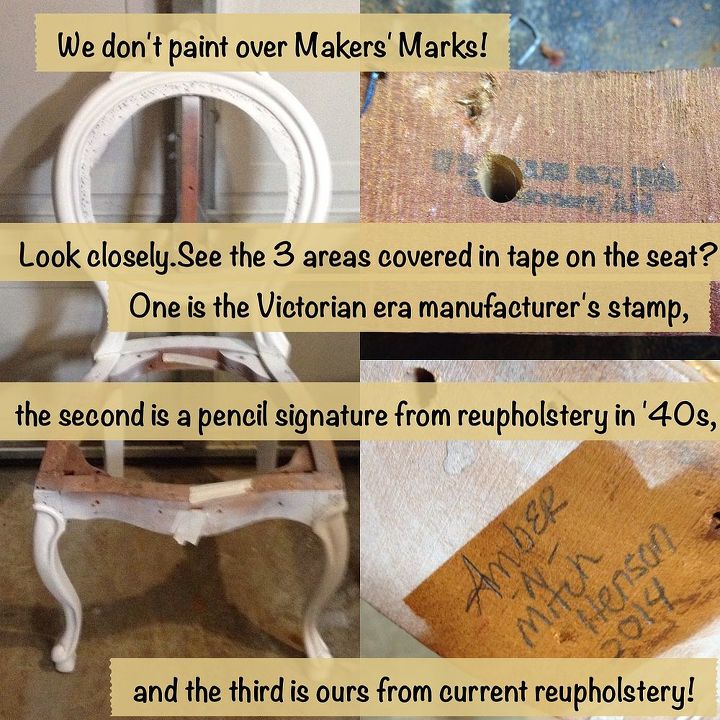
First, we stripped the chair. Mitch pried it apart and Abigail helped pull staples!


Second, we primed, then painted the frame, taking special care not to paint over original makers' marks! The original Victorian era maker's stamp is on the frame, a pencil signature from its re-upholstery in the '40s, and our pencil signature from current reupholstery. That way, if it's ever re-upholstered 20 or 50 years from now, the history is preserved!:


(Photos)


Third, we added new webbing for the seat (stapling and trimming excess,) a thick layer of foam for the seat, and a thin layer of foam for the back. Finally, the whole thing was wrapped in polyester fiber (stapling and trimming excess.)


Lastly, we upholstered the back and seat, and stapling all pieces into position, then stapling cardboard tack strip around all of the edges in order to create a smooth surface to adhere finishing trim!
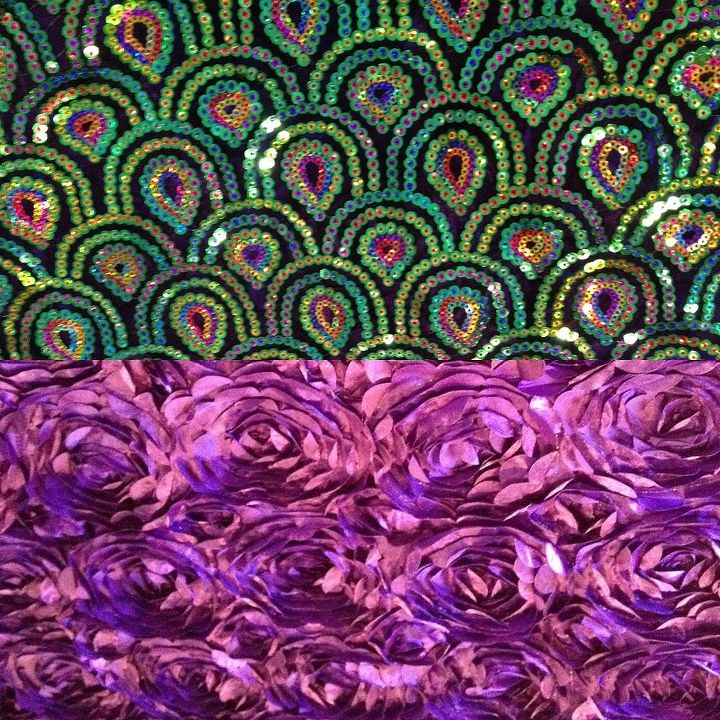
Now, she's proud as a peacock of her new chair, and I'm expecting continued straight 'A's from all the homework and studying she'll do while sitting in her Peacock Chair! (There are LOADS more step by step photos and fun pictures on the blog link!)
WhatAmberLoves
Want more details about this and other DIY projects? Check out my blog post!
Go
Frequently asked questions
Have a question about this project?
Comments
Join the conversation
3 of 11 comments
Next