


Sofa Bed Redo

4 Materials
$50
2 Weeks
Medium
I had this old sofa bed out in the garage. I used to love to lay on it to read it is one of the most comfortable couches I have ever sat on. But as my crafts have slowly taken over the garage it got pushed to the side and became the cats couch. In the living room my 15 year old couch had seen better days. The springs were breaking and it was killing my sciatica. Time for a make over. That old couch will get put to use in an upcoming post. Stay tuned.
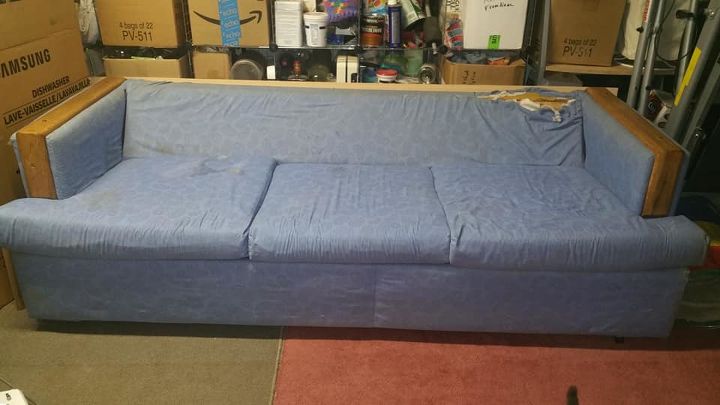
When I first got this couch I stripped it and used sheets from Wal-mart to reupholster it. That was about 13 years ago. You can see the cats tore it up pretty good. I didn't take a picture of the back, there was a huge hole . Also the cushions were starting to break down and had a weird rubber smell to them. Time to renovate.
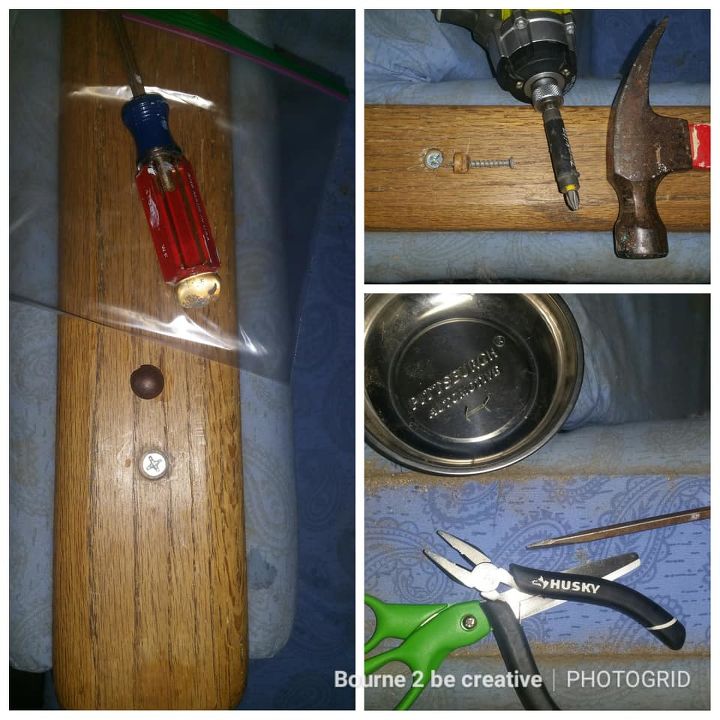
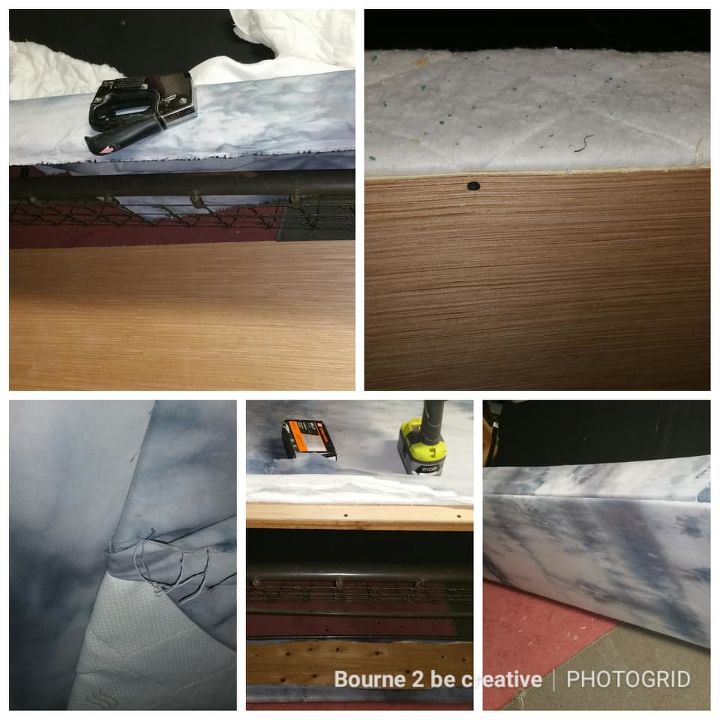
I started by removing the wood parts off the arms. Five of the six wood button screw covers popped off no problem one was stubborn. To remove that I used a drill to insert a screw then pulled it out with the hammers claw. That button was ruined so off to the hardware store for more. They are fairly cheap maybe $2 for a dozen.
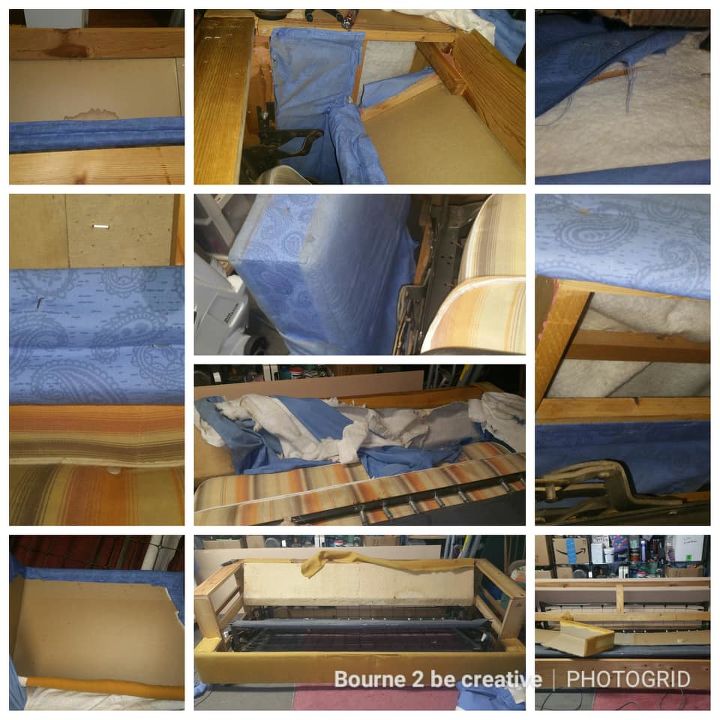
Then start removing fabric. First off with the arms, Those are made of cardboard covered in rubbery foam. Then I flipped it over and pulled all the bottom staples out. After that you just have to see what piece looks like it should come off next. Eventually you will have a naked couch.

I got this couch second hand to begin with. The cushions were stained which is why I recovered it in the first place. That blue fabric eventually got stained too. What ever was spilled on the cushions had been absorbed into the foam and who ever had owned it just flipped them over and that stained the mattress base. Back then I used the little green cleaning machine to clean it but now I see that didn't work. Hopefully painting it will fix the issue. I used Apple barrel brand black craft paint mixed with fabric medium and a tad bit of water. I misted the fabric with water and brushed on the paint. If you are out in the garage or patio like I was you don't need to be worried about being sloppy but if you are in the house and are klutzy like me you might want to put down some protection. That carpet I spilled on is out in the garage.
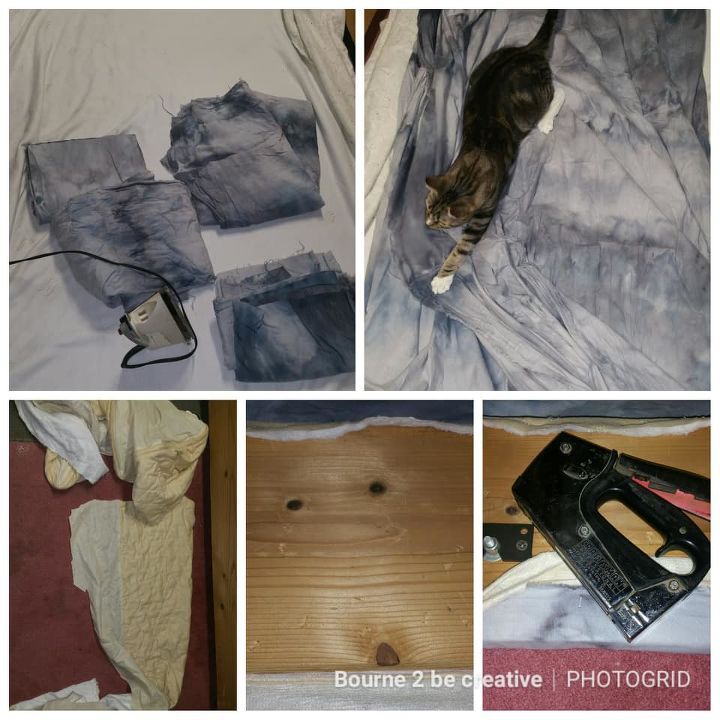
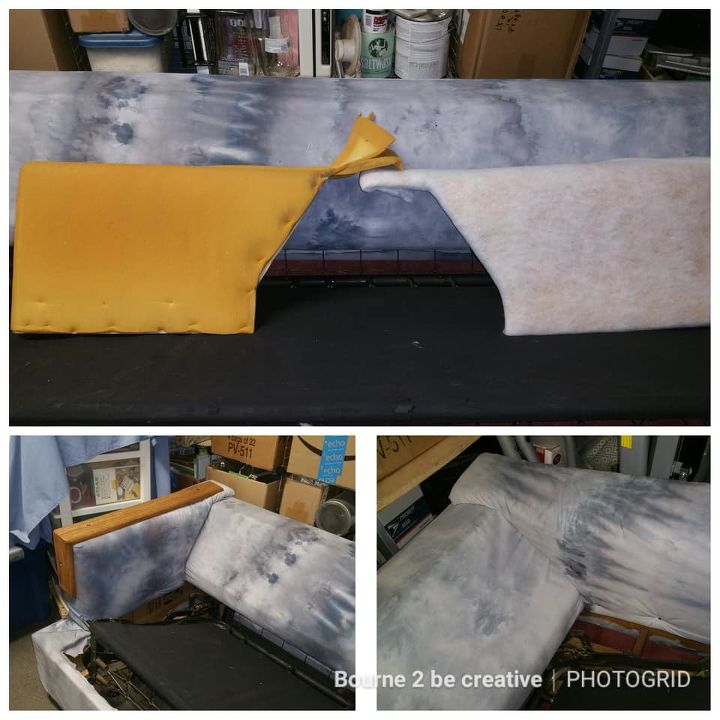
That fabric I used I dyed myself you can see the how to here. http://www.hometalk.com/diy/decorate/large-sc... used an old queen size memory foam mattress for part of the redo. I took apart the cover. The padded top will get used for the seat back, the padded sides will get used for the front strip (It was the perfect width) and the thin underside will be used to glue two pieces of wood and enable it to bend a little. I stapled on the padding, then I ironed the fabric and stapled that on. I had the fan going as this was July and I was in the garage The fan was blowing the fabric and the kitty thought that made a great toy to pounce on.
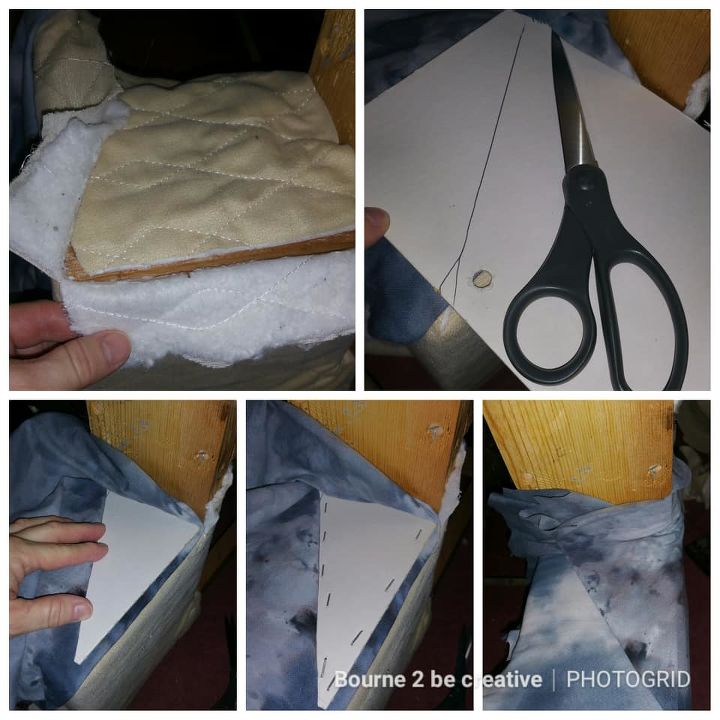
This couch is shaped weird last time I sewed this part by hand and honestly it didn't look great. The cushion kind of hides it but I could still see it. This time I decided to use staples. I put on the padding and played with the fabric until I figured out what worked. And that was creating a corner fold. So the fabric didn't pull weird I cut a piece of cardboard put the staples through that then laid the fabric back over it. It creates a crisp seam. Then pull the left overs to the bottom side and staple in place
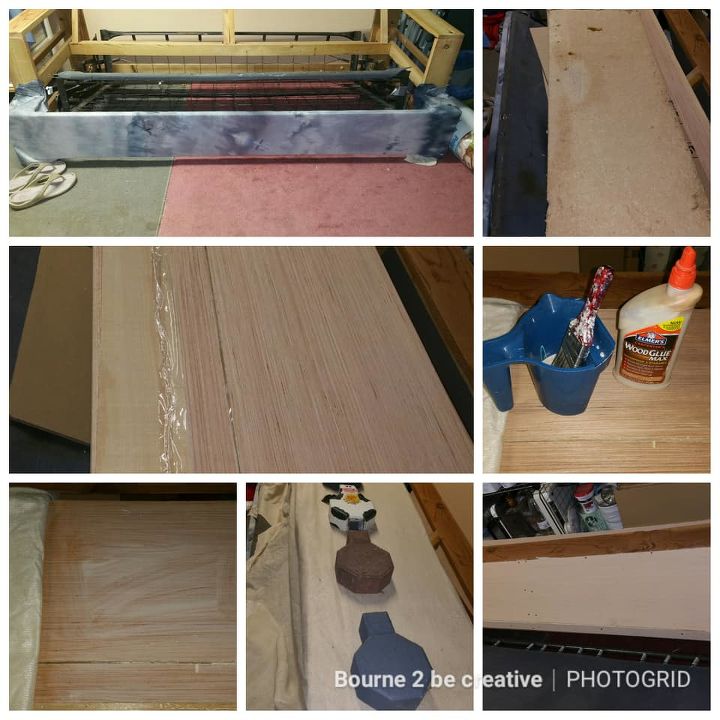
The back of this couch is cardboard covered with padding. It was warped and needed to be replaced. I bought a thin piece of paneling at Lowe's for $12 I had them cut it in half lengthwise so I could fit it in my car. Once at home I took my circular saw and cut it to the length and width I needed. The back had this angle piece to it that I needed to recreate. So I laid plastic wrap the length of my work surface to protect it. I then laid my cut wood strips I left a slight gap so that it could be bent to the needed shape. I used more scrap fabric from that mattress cover, I painted thinned wood glue on and laid the fabric. Once I got that all on I laid patio pavers on to keep it from warping. I let that dry over night, and cut off the excess fabric the next day. I used screws to attach the panel to the back of the couch.
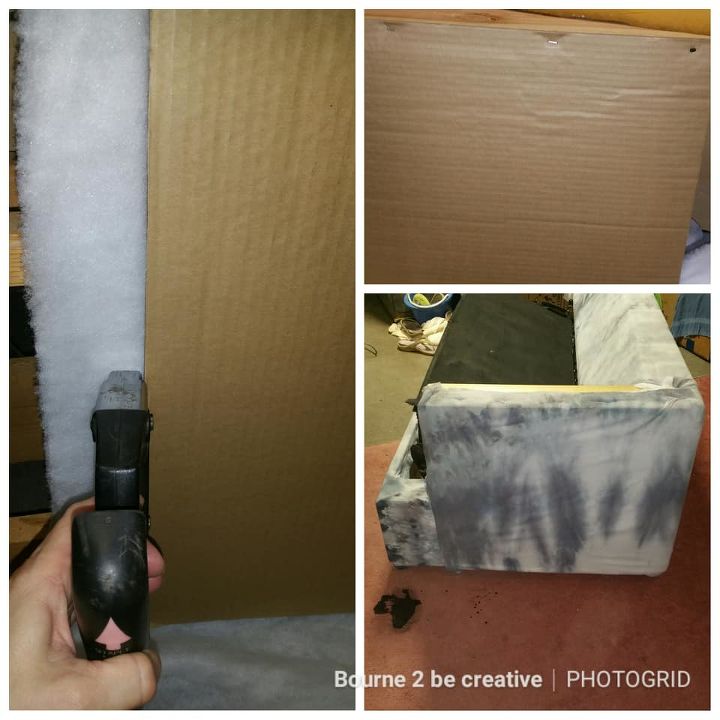
For the sides, all but the front is covered by something else or tucked under. I held a sheet of cardboard so I had a straight edge to follow and stapled the fabric and batting to just the front line. I then used carpet tacks to hold the cardboard to the whole side of the arm. The original construction didn't have this, but I wanted something a little more solid than just a covering of floppy fabric. I used the heavy duty cardboard that my dishwasher came in.
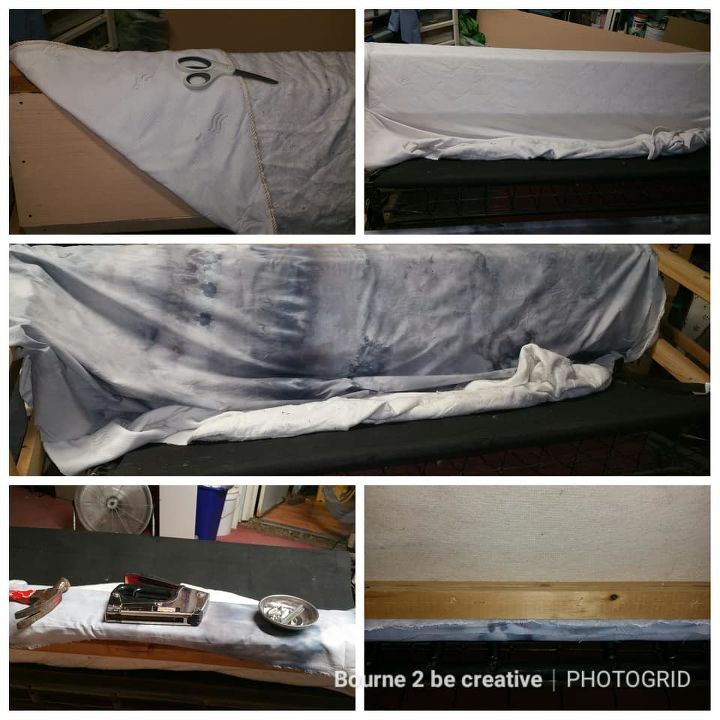
Now it's time to work on the seat back. I used the padded part of the mattress protector and my dyed fabric. I first stapled it along the top of the back. I then straightened it over the front and pulled it through to the under side of the back and stapled it in place
For the back I used the left over piece of thin wood panel cut to fit. I laid the fabric along the top wrong side up, and laid what was left of the padded Mattress cover. I stapled that along the edge. I then screwed the wood panel along the top edge and the bottom edge. I then used a screwdriver to tuck in the sides of the padding and fabric to create a nice finished edge.
This is the cardboard arms. I forgot to take pictures but it's easy to explain. I cut quilt batting and fabric to fit and used my hot glue gun to attach it to the underside. I then screwed the arms in place. I test fitted the wood arm covers and decided I didn't like the brown wood against my cloudy skies fabric.
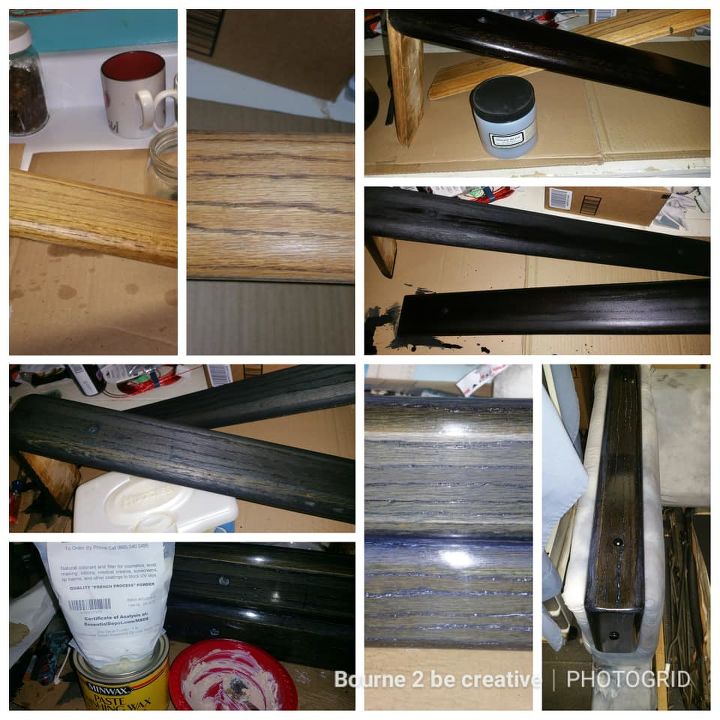
I used acetone to remove the wood finish I then did a little sanding to make the wood smooth. I used some of the left over dye from dying the fabric and painted it on the wood. I let it dry then wiped it with baby wipes. I used Minwax oil based varnish that I had left over from my metal garden flowers and applied that in 3 coats sanding each coat. I then decided I wanted the grain to stand out a bit so I took some zinc oxide powder from my soap supplies and mixed that with a bit of Minwax natural wax and applied it with a paper towel let dry then buffed it. I then screwed on the arms and popped back in the buttons. Almost done now
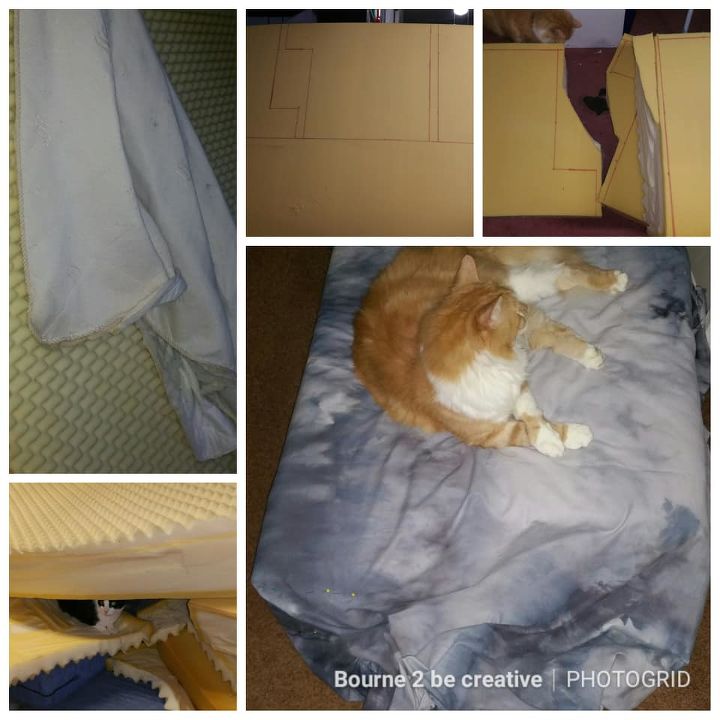
I measured the old cushions and with a sharpie marker I drew them on the old memory foam mattress. I then used a kitchen electric carving knife and cut out the cushions. This was not as easy as I was led to believe. Memory foam is very dense and this mattress is thicker than the length of the knife blades. The motor heated quickly and started to burn my hand. I finished up after lunch by then it had cooled enough. I also sliced off the egg crate foam. I then pinned on the fabric to create the cushion fabric and sewed that putting in the old blue zippers but no one will see those right. I also didn't take pictures of the back cushions. I stole those off the old living room couch and sewed covers for those. I won't go into that as there are already tons of how to's.
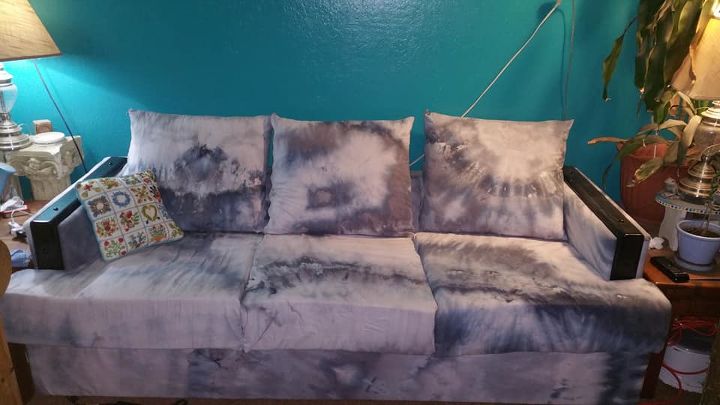
Here it is all done. Nice and comfy. I even took a nap on it once. I think the black wood looks so much nicer than the brown. I am considering dying my coffee and end tables to match.
Comments
Join the conversation
4 comments
-
Looking great! Cool redo!
-
Wow this looks great! Love the black finish you put over the wood and the tie-dye!


Frequently asked questions
Have a question about this project?