


How to Easily Bleach Pine Cones at Home
9 Materials
$4
60 Minutes
Easy
I am a huge fan of Pinterest! Every visit, I find something new and different that inspires me; whether it be a craft project, recipe, fantastic nail art or a beautiful holiday destination.
It’s like the perfect, endless, glossy magazine full of amazing images. I am aware, of course, that some of these glorious images must have teams of designers behind them, and that not everything that we see on there has been thrown together on a kitchen table, in the way you and I might!
There are a few pins that I come across again and again, and each time a little voice in my head says ‘I wonder if that really works?’ Well, there is only one way to find out! Welcome to the first investigation in our series of Pin-Tested; where Craft Invaders try out crafty pins that inspire us and find out how easy it is to recreate that pin at home.
Our first Pin-tested investigation was inspired by a pin showing a beautiful jar of bleached white pine cones. We wanted to know whether you can get the same results at home and how simple (or hard) the process really was!
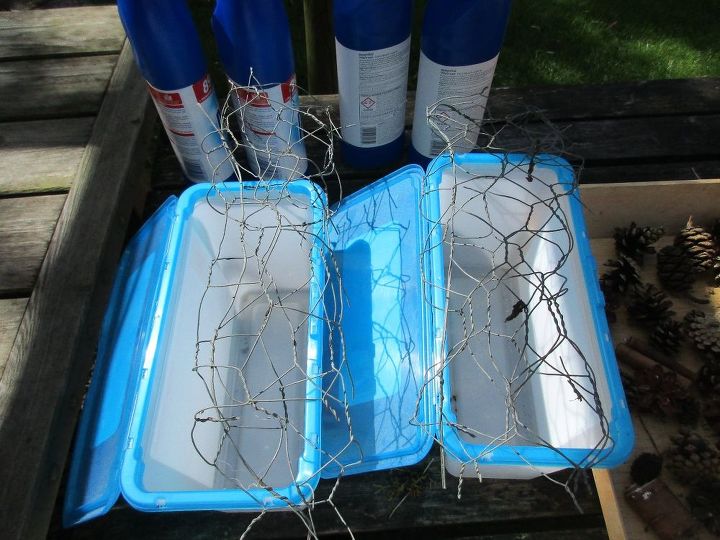
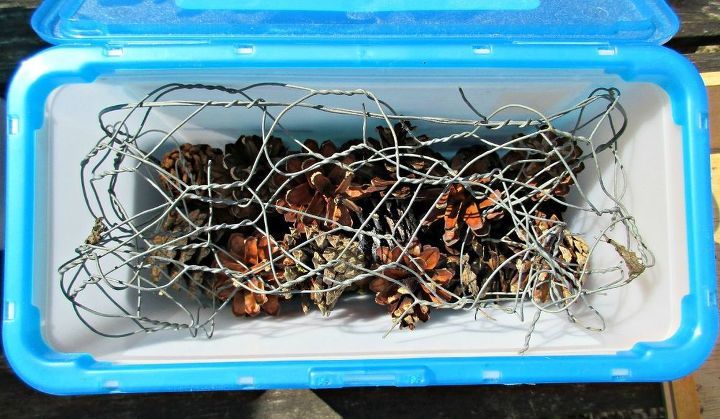
We took a mixture of dry pine cones which originated for a selection of pine and fir trees, plus a couple of pieces of bark for good measure, and divided them equally into two. The plan was to treat both groups in exactly the same way but to leave one sample of cones in the bleach for 24hrs and the other for a few days. We used what I would describe as a good quality, thick bleach, and used it neat. To help keep the pine cones submerged under the bleach, we used chicken wire.
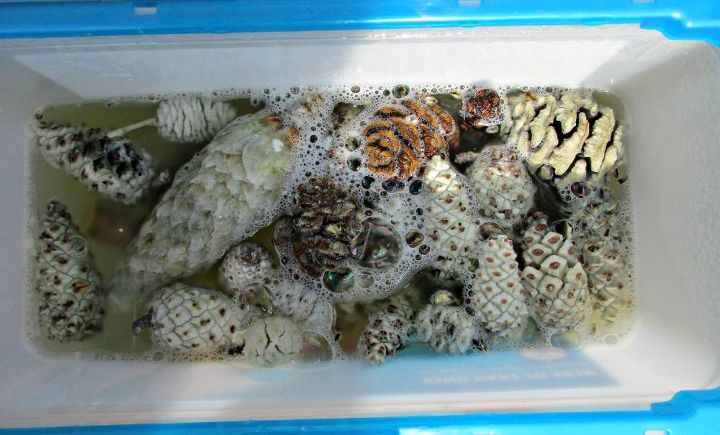
24 hrs after we started our investigation, I tipped one lot of the pine cones out of the bleach and left them on newspaper outside in a covered area to begin to dry. The second sample was left for a full five days before being drained in precisely the same way. The picture below shows the 24hr pine cones in their bleach, just before I tipped them out.
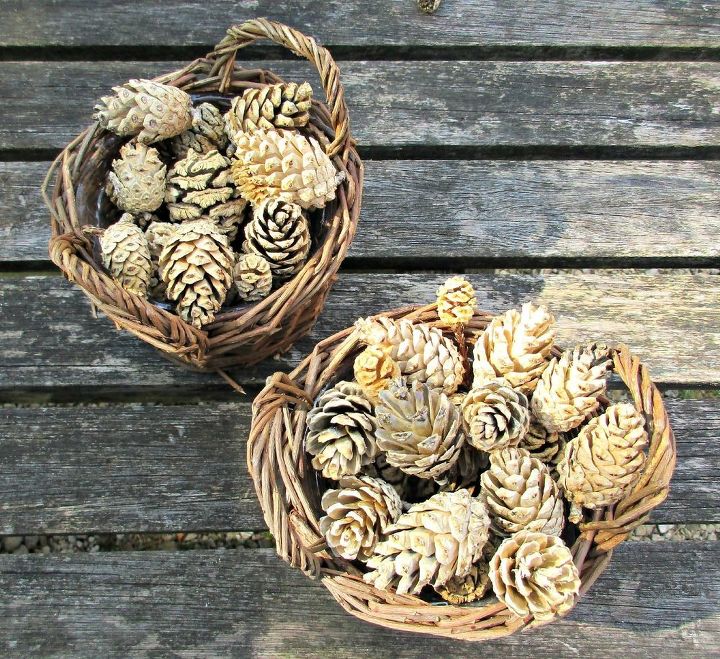
And here are the 2 groups of pine cones two weeks after the second batch also came out of the bleach. The group on the right is the batch that spent 5 days in the bleach (the long odd shaped cone is our marker). As you can see leaving the cones the extra time made no real difference to the final results.
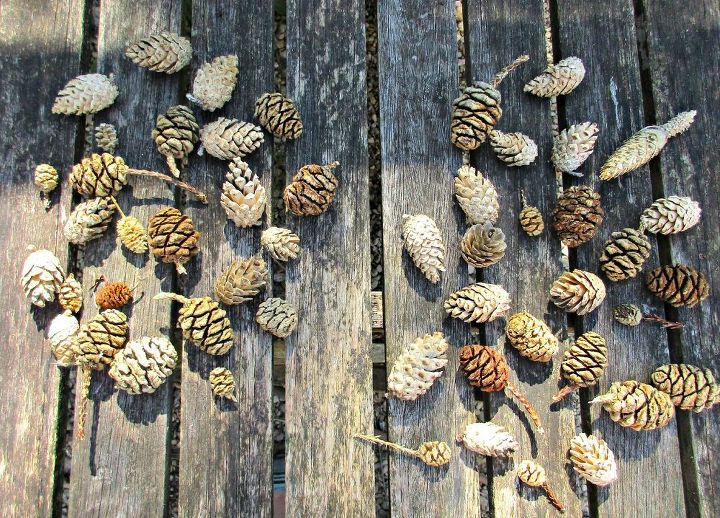
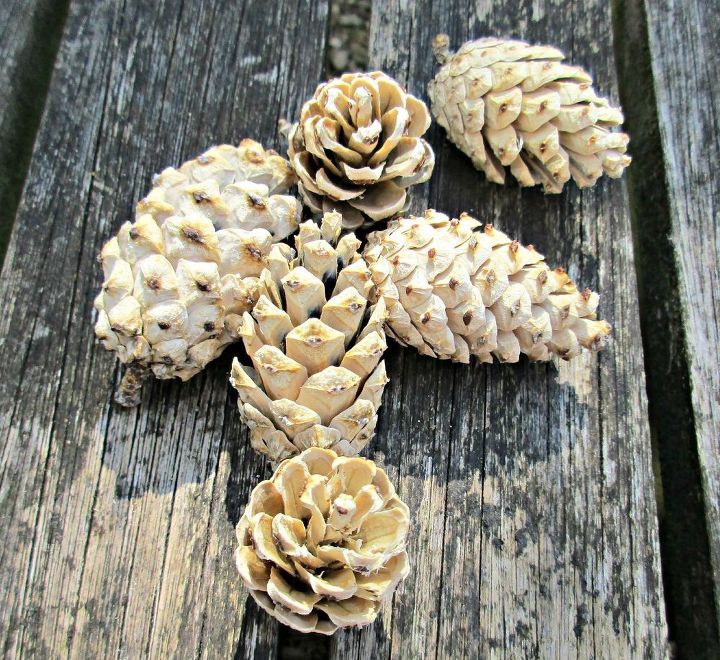
So it’s true, you really can bleach pine cones at home quickly and easily! The traditionally shaped pine cones were the ones that responded best to the bleach, and it appears that any colour loss that is going to happen, takes place in the first 24hrs. I will be honest and admit that I am delighted with the results we achieved, I was a little sceptical that this was going to work, but as you can see from the photos, the pine cones look really rather pretty.
Now that we have all these beautiful, bleached cones, we wanted to start making things with them straight away!
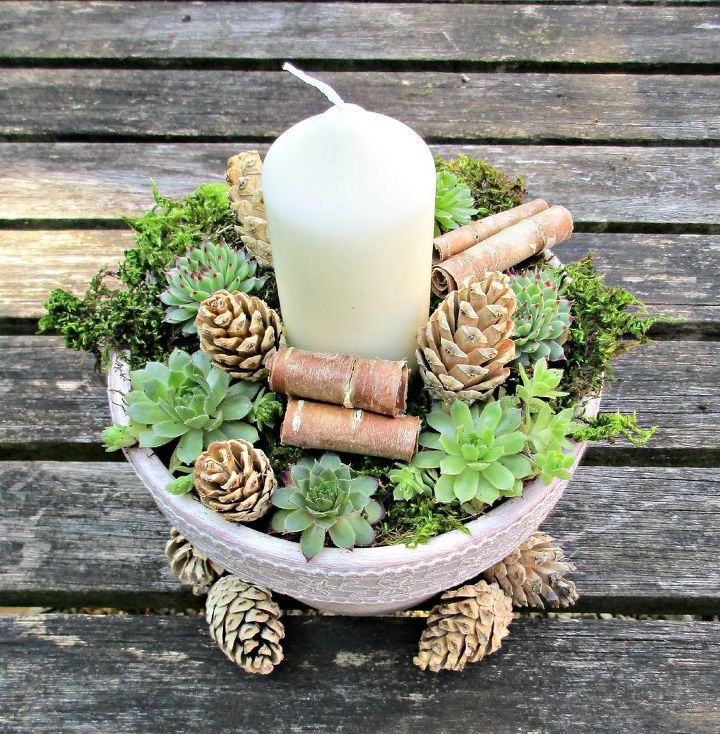
So here is our first project using home-bleached pine cones. We painted a terracotta pot with cream acrylic paint, stuck a lace ribbon around the rim, and planted it with a candle, pretty little succulents, moss and our beautiful cream pine cones. I think this would be perfect for a winter table centre-piece!
If you have enjoyed this Pin-tested Post, why not check out our Pin-Tested! Homemade Vanilla Extract and our Pin-Tested! Homemade Firelighters Posts. We have a couple more pins ear-marked to be tested in the future, but if you have any ideas you’d like to put forward we would love to hear them – the kids and I love a challenge!
Resources for this project:
See all materials


Any price and availability information displayed on [relevant Amazon Site(s), as applicable] at the time of purchase will apply to the purchase of this product.
Hometalk may collect a small share of sales from the links on this page.More info

Want more details about this and other DIY projects? Check out my blog post!
Comments
Join the conversation
3 of 39 comments
-
YES YES I have hundreds that have fallen I can’t wait to try this... I pup and put in baskets just the way I find them this is a Fabulous Idea for a more Beachy APPEAL>>> GENIOUS!!!!!
-
YES I JUST ANSWERED I WILL YODAY!!!!!!


Frequently asked questions
Have a question about this project?
Did you use straight bleach or diluted ? Thx! These look great!
I know this was posted a while ago but I've only just seen it, so hope it's not too late to ask a question: What was the reason that you didn't rinse them? Lovely effect and I'm going to do some, but I'd prefer to rinse them afterwards and was wondering if you didn't rinse because it would spoil them in some way?
So very pretty. I'm going to do this for the thanksgiving table. But, please, what are the 'rolls' in the flower pot? They seem to be tree bark. Did you make these or purchase them? Thanks for the great idea!