


Bookcase + DIY = Ottoman

I had this bookcase and was no longer using it but I didn't want to throw it away. It was missing one leg and had some damage to the corner so I didn't want to give it away either.
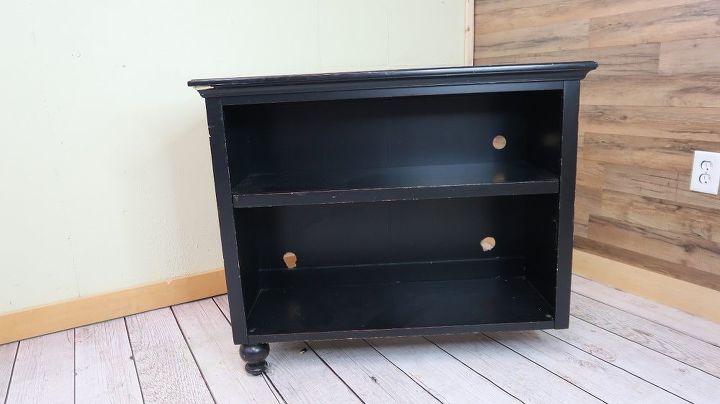
That's when I had an idea.
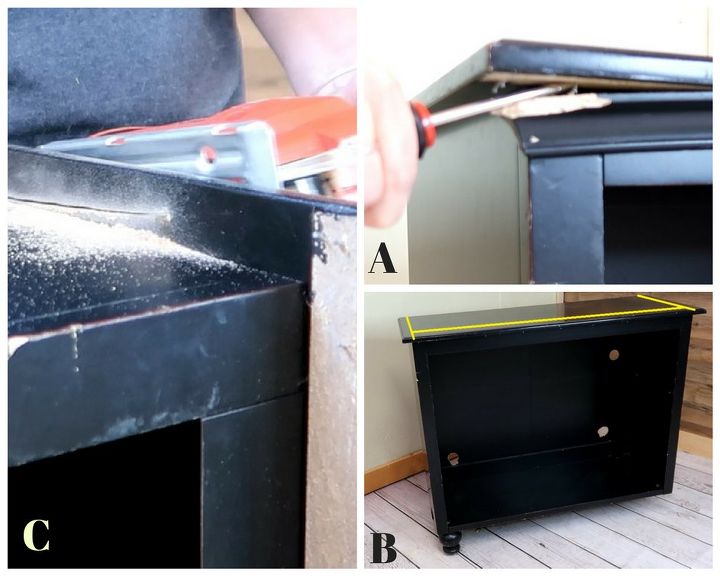
Step 1:
A - There was trim underneath the top at the front of the bookcase. I pride it off with a flat head screwdriver and a hammer.
B - The top of the is bookcase was larger than the rest of the case so I had to cut off the edges that hung over (yellow lines)
C - I cut the overhanging edges with a jigsaw.
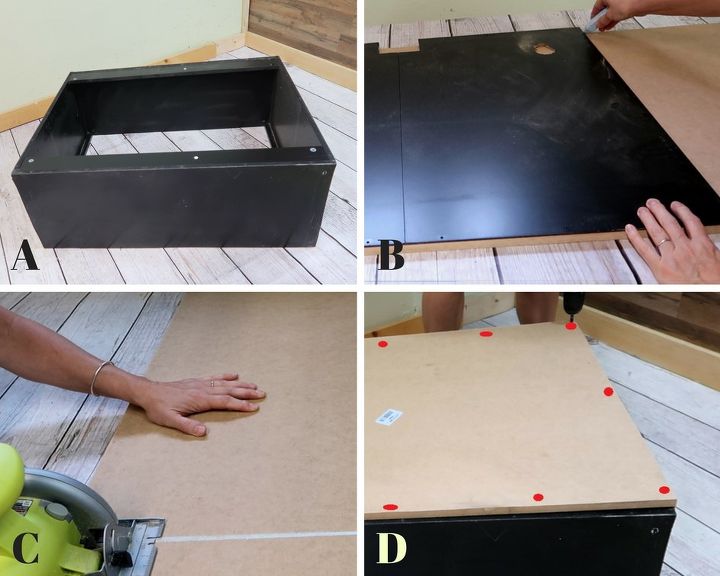
Step 2:
A - I removed the back of the bookcase which was cardboard.
B - I placed a piece of MDF on the work space. Using the backing that I removed as a template, I draw a line down the MDF.
C - I cut the MDF to size.
D - and screw the MDF to the back of the bookcase.
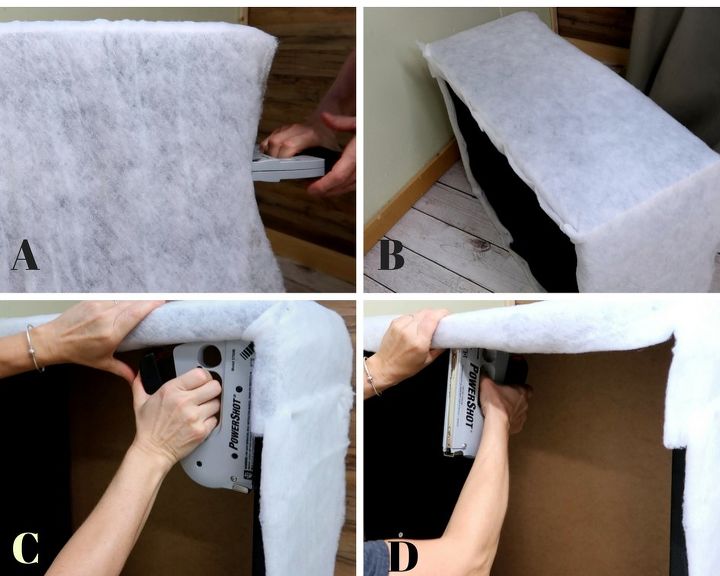
Step 3:
A & B - I wrapped the entire outside of the bookcase with batting and staple it in place.
C & D - Once the sides are stapled in place, I wrap it around the lip of the bookcase and staple it in place.
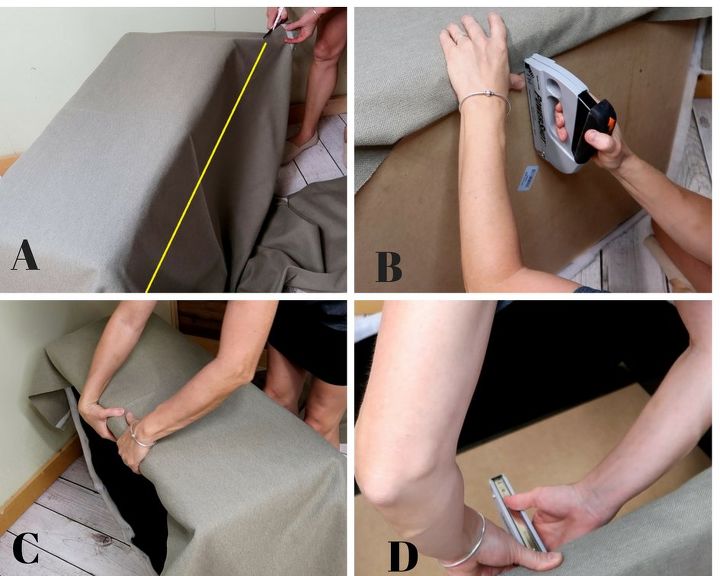
Step 4:
A - I draped fabric over the longer side and cut to size (yellow line)
B - I folded the fabric under and stapled to the bottom of the bookcase.
C - Pulling the fabric tight, I folded the fabric under the lip of the bookcase
D - and stapled in place.
I flipped the bookcase around and did the same steps on the other side.
Step 5:
A - The fabric on the longer sides are wrapped around to the shorter sides; however, it doesn't meet and there is gap.
B - I placed a piece of fabric that is a little bigger than the gap. I fold the edges under and measure from the right side
C - And then the left
D - I pull the fabric down the front and fold the corners in
E - then staple the fabric underneath the lip.
F - Pulling the fabric tight, I fold and staple the fabric to the bottom of the bookcase.
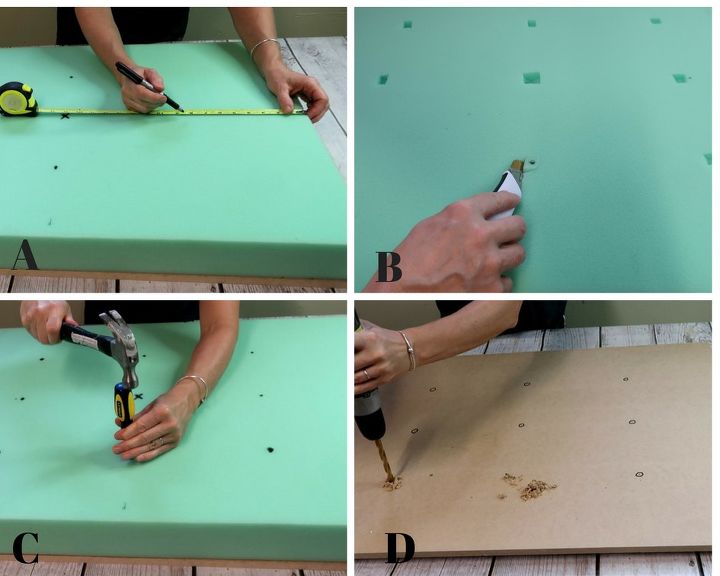
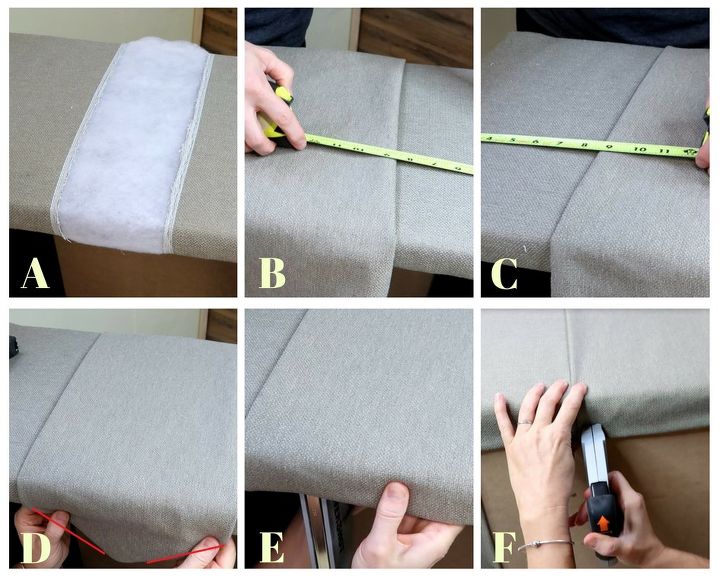
Step 6:
For the top of the ottoman, I cut MDF to size.
A - Placing a 3" foam pad on top of the MDF, I measured and marked six spaces that would be used for buttons.
B - I used a utility knife to cut shallow holes on the six spaces
C - I pushed a phillips head screwdriver through the foam to the MDF underneath. Using a hammer, I tapped the screwdriver to make a mark on the MDF.
D - After I removed the foam, I drilled holes on the screwdriver marks.
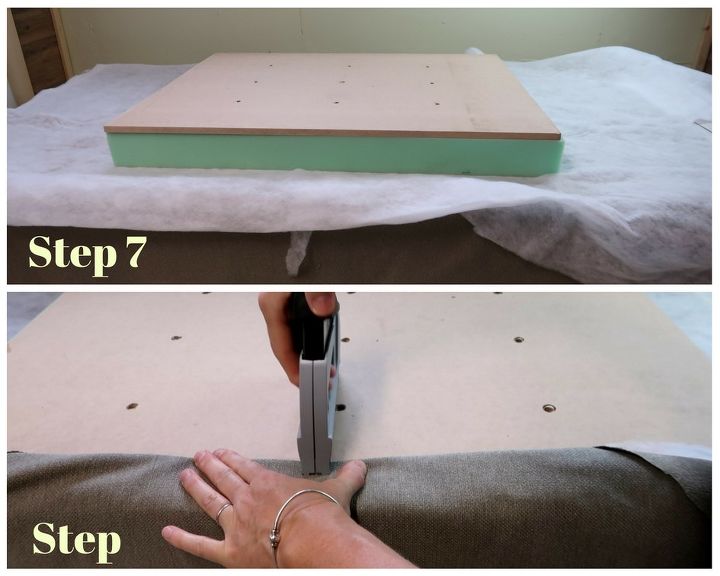
Step 7:
On the work space I placed -
Fabric
Batting
3" foam padding
MDF
Step 8:
Beginning on one long side, I pull the fabric and batting up and over to the back. I fold the fabric and staple into place. Once this side is complete, I complete the other short side pulling the fabric tight as I staple
Once the short sides are complete, I move to the long sides and complete them.

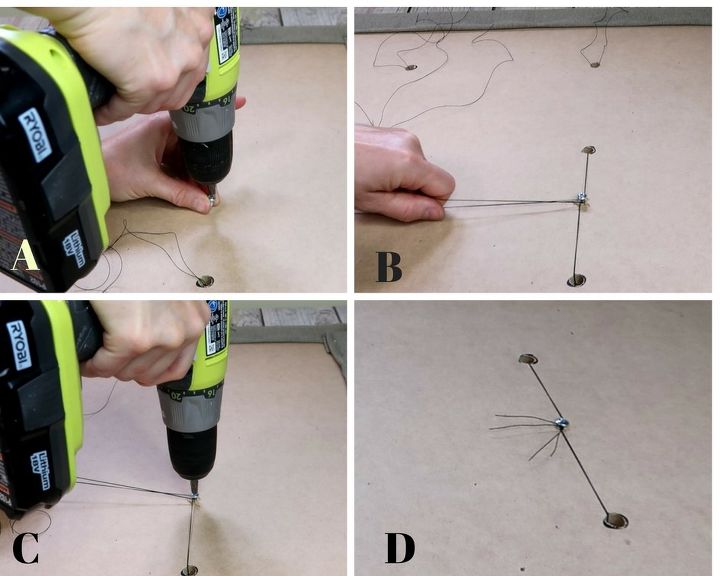
Step 9: To add buttons,
A - I cut a long piece of upholstery thread and loop it in half
B - I thread the loop through the shank of the button
C - then I tie a slip knot so the button is secure
D - Because the padding is too thick for a sewing needle, I cut a slit in a bamboo skewer and attach the thread into the slit

Step 10: To attach the buttons,
A - Using a metal skewer, I inserted into a hole in the MDF and
B - pushed it through the 3" foam and out the other side
C - I inserted the bamboo skewer into the hole made by the metal skewer
D - and pushed it through the 3" foam
E - and out the hole in the MDF. I removed the metal skewer
F - I pulled the bamboo skewer out and pulled the thread free
Step 11: To secure the buttons,
A - I placed a small screw between two of the holes in the MDF
B - and wrapped the thread around the screw
C - I screwed the screw tightly which pulled the thread tightly
D - Then I tied both threads around the screw.
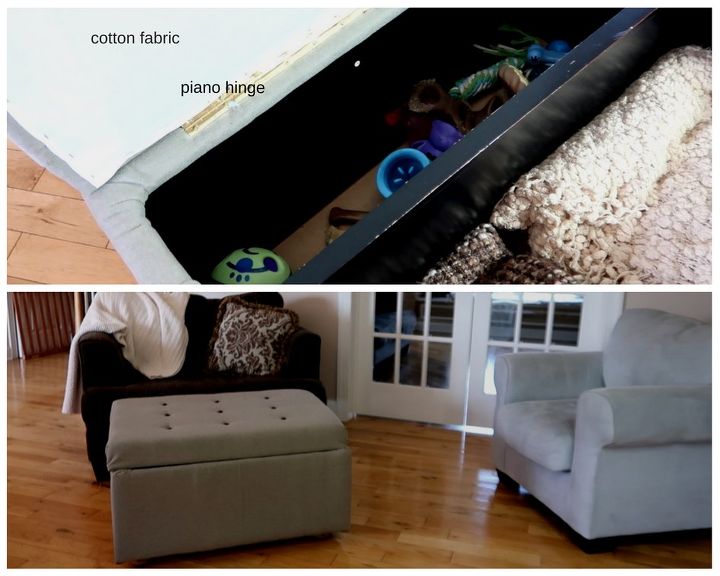
I added cotton fabric inside the lid and on the bottom.
I used a piano hinge to attach the lid to the bookcase.
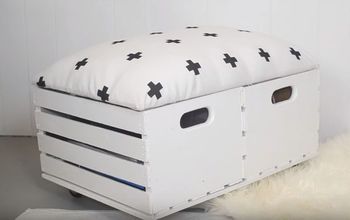
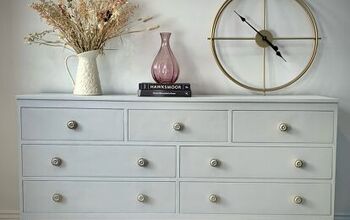
And here is our new storage ottoman! I love the classic look and the storage is a plus. I didn't fasten the shelf inside so I can move the divider to make either side bigger or smaller or remove the shelf all together.
Resources for this project:
See all materials


Comments
Join the conversation
-
Fabulous!! Great idea and execution!!! Love it!
-
😇 you are amazing I love to recycle, just about everything, I never thought of this.


Frequently asked questions
Have a question about this project?
Great idea! Looks very nice. Did you add legs or casters?
So smart and clever!
It is BEAUTIFUL. You could also leave the bottom. cut off the other legs and just add the upholstered top?