


Farmhouse Pendant Lighting
2 Materials
$10
10 Minutes
Easy
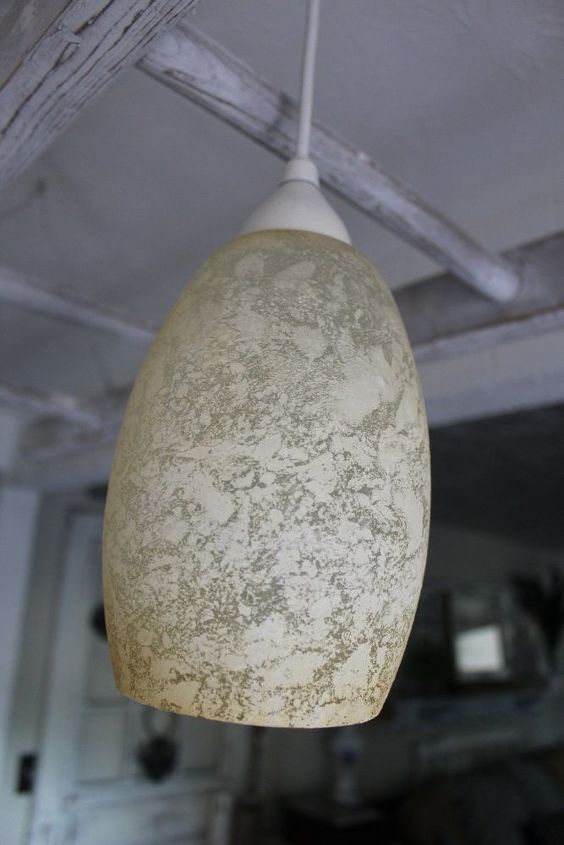
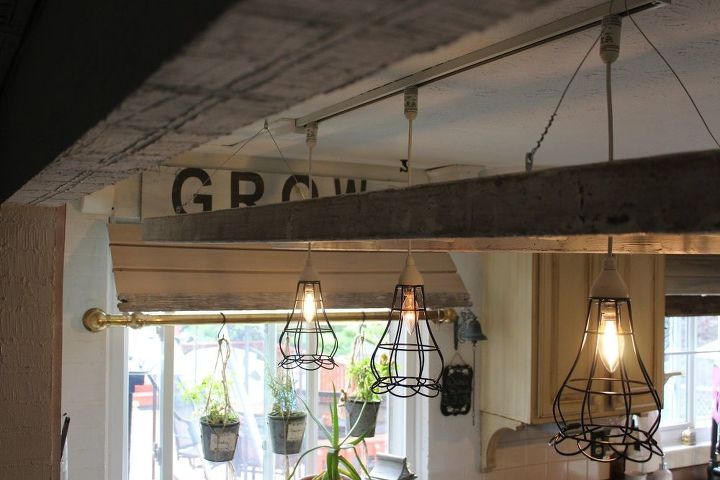
When we bought our house, the kitchen had been somewhat updated. One of the additions to the kitchen was the Pendant Light Strip above the breakfast bar. Although it wasn't horrible, it's never really been my favorite thing.

But, when you live in a house with a small tribe (8 kids, 1 husband, 2 dogs @perfectlydestressed), things like this aren't a priority.
You learn to deal.
And if necessary, to disguise them until the time comes you can fix it.
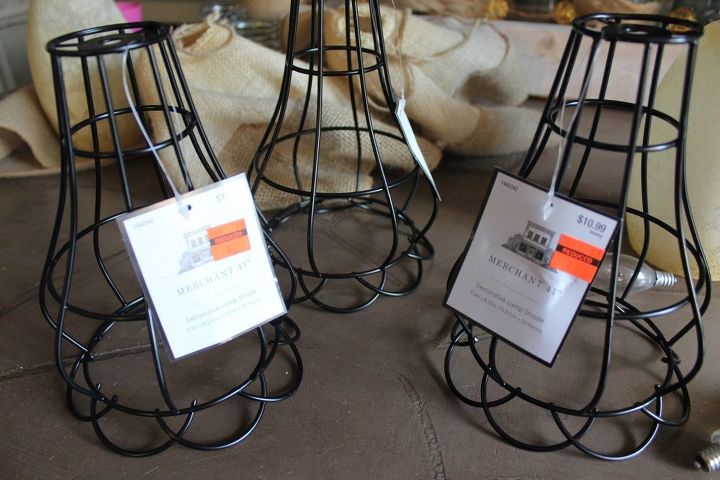
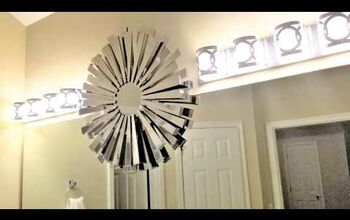
While at Hobby Lobby, I came across these pendant light covers on clearance and I *think* I may have squealed! $2 and change?! I can definitely do that! I guess good things do come to those who wait?! Seriously though, usually I am entirely too impatient to see if this holds true!
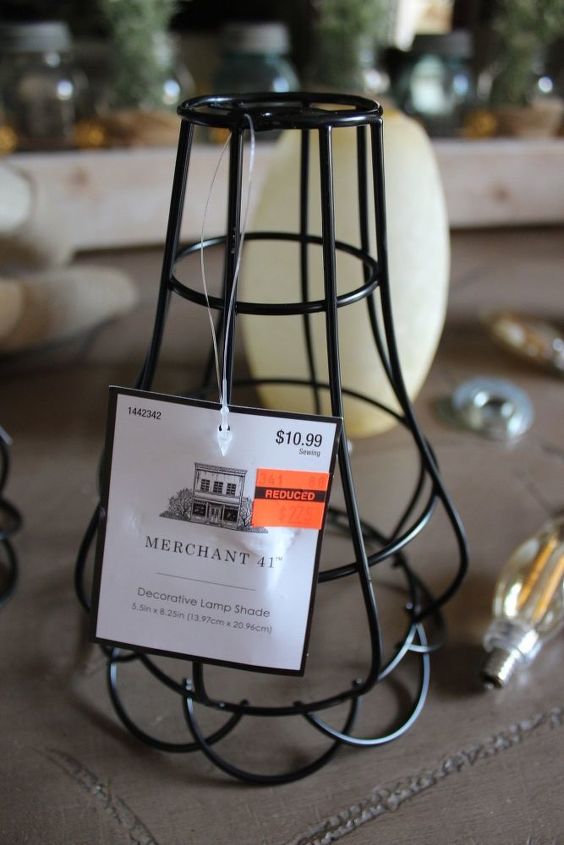
These pendants were made to go on the corded light swags you see all over Pinterest right now so I knew I would have to modify them a bit.
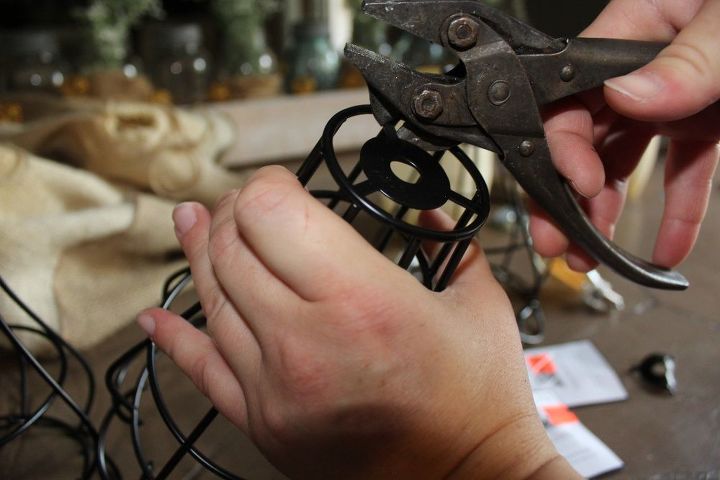
Using metal pliers, I broke off the 3 metal strips and circle in the middle of each pendant. This was very simple and only took a few minutes.

With metal pliers, I broke off the 3 metal strips and circle in the middle of each pendant. This was very simple and only took a few minutes.
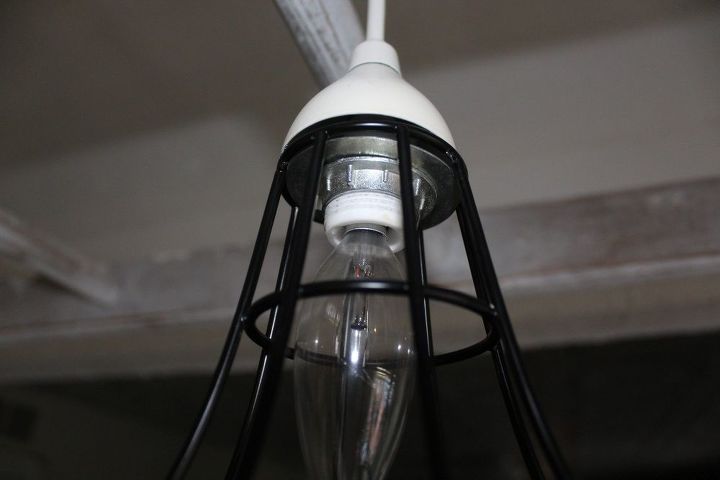
Using the hardware from the glass shades I removed, I attached the new metal shades to the light cords.
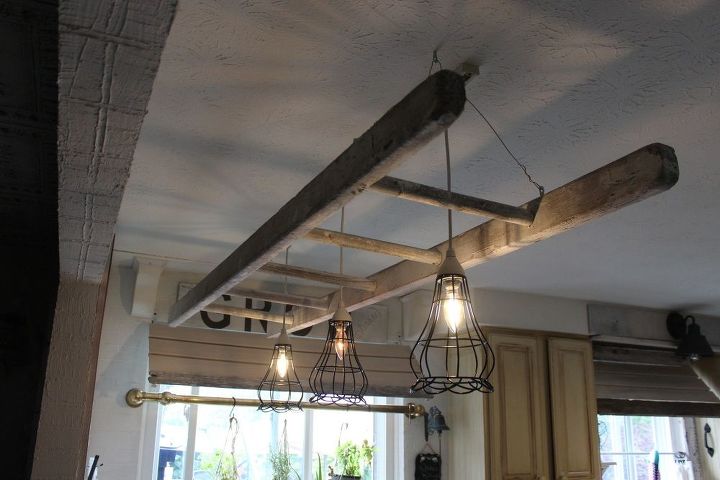
In less than 15 minutes I updated my lights for under $9!


Any price and availability information displayed on [relevant Amazon Site(s), as applicable] at the time of purchase will apply to the purchase of this product.
Hometalk may collect a small share of sales from the links on this page.More info

Want more details about this and other DIY projects? Check out my blog post!
Comments
Join the conversation
2 of 75 comments
-
❤️❤️❤️
-
Beautiful, and from pics your house looks charming. You are amazing.


Frequently asked questions
Have a question about this project?
This is great. I have a fluorescent light in my kitchen that I despise. This might be the answer!
How Re you supporting the beam ?
Hi there! New subbie here :) I have a question: I've got 2 of the old, ivory pendulum lights with the ol' '70s 'gold & white daisies' or possibly marigolds painted on them, hanging in my bathroom. My question is, if I strip off this horrid floral design (that's SO dating them right now), is it possible to either repaint them, or just leave them clear? Or will I utterly destroy them, once I strip off the old design? They need to be updated TERRIBLY BAD, but I also don't wanna ruin them either. Any ideas??