


Bird Feeder Cafe

by
Cmoonlitwolf
7 Materials
$60
1 Week
Medium
Our old feeder was falling apart. It was no longer safe for birds and squirrels to even be on it. So it became an immediate project. Starting out, I had no idea how I was going to do this. The old one was very non conventional. It came together as the materials for it showed up. I imagined the new one would be the same. Requirements were that the new one be stronger, last longer and be pretty.
This was the old one. Nothing fancy. Stool from thrift store and I cut out one leg to get feeder inside. Mounted to post we picked up from roadside. It had a piece of rubber around the outside to keep seed shells contained. Had an opening that led down to a metal bird bath.
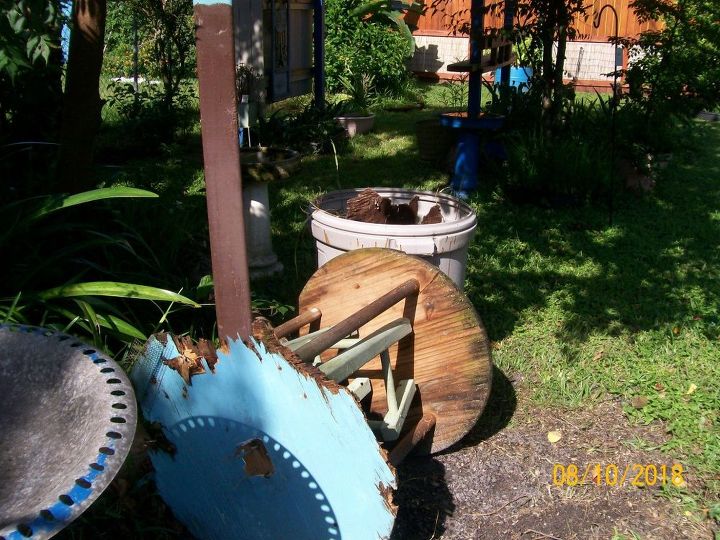
The metal bird bath I got from a neighbor which was broken. I drilled several 'weep' holes into it and placed it under feeder. The feeder was set up so rain would wash the seeds and shells off to one side and down to the metal bath where the water would drain. This eliminated that horrible smell from seeds and shells rotting on the ground. It contained the seeds, eliminated any smells, and made it an easy quick daily clean-up. This worked for a long time.
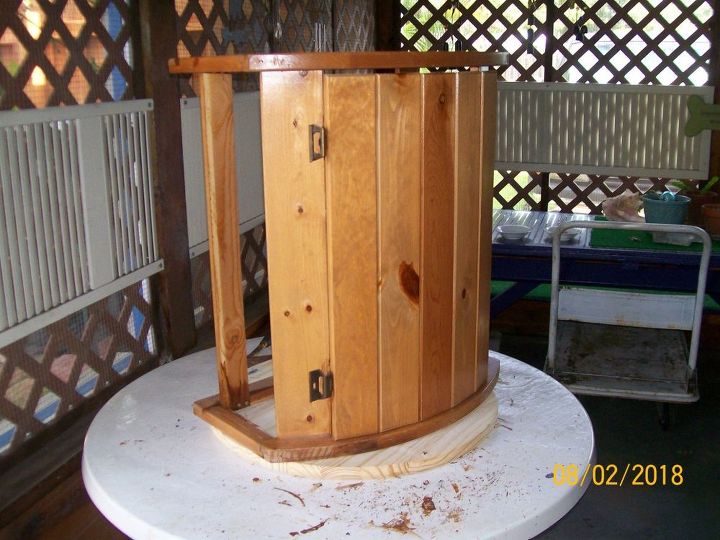
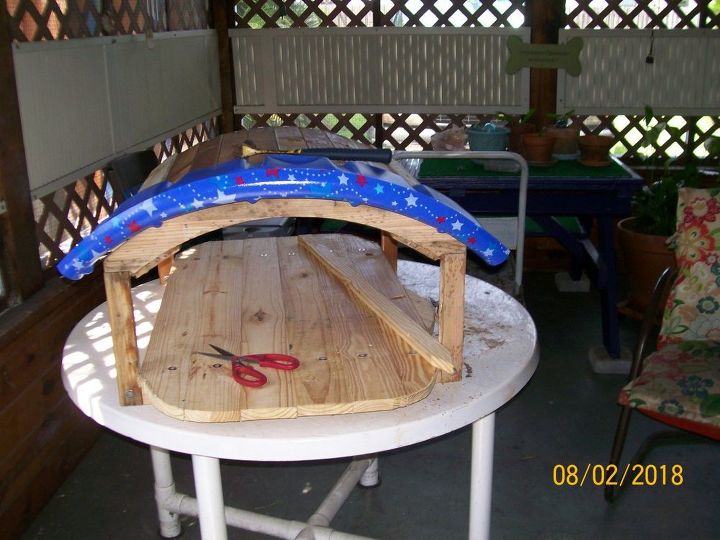
The materials showed up quickly. My cousin threw out this aquarium with stand. Someone picked up the tank so I went and got the bottom part. At first I was going to use it in it's upright position as shown in picture. But after seeing it laying on it's backside, I knew that made more sense. Took the cheap back cover off, removed the door, removed the sides and used them to make a new roof, re-enforced the joints.
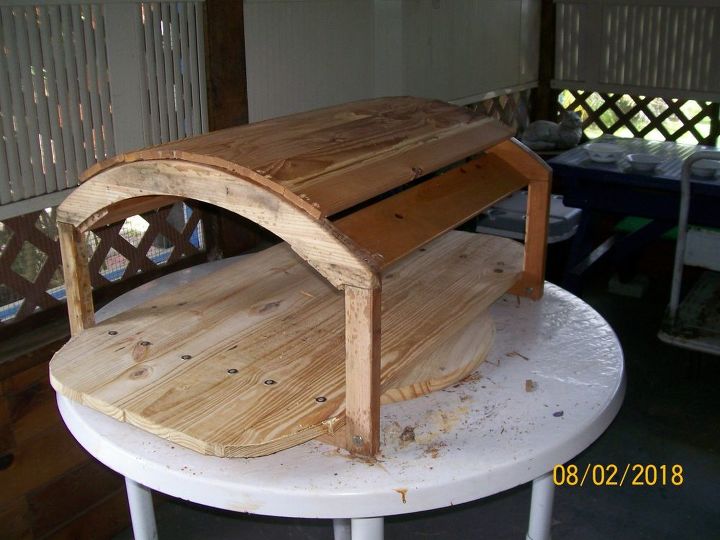
Here I am almost done with the new roof, and already have a new floor in place. I live in Florida so anchoring everything is a must. Every floor board got anchored to the frame board underneath, at both ends. Roof anchored in. Screws also a must.
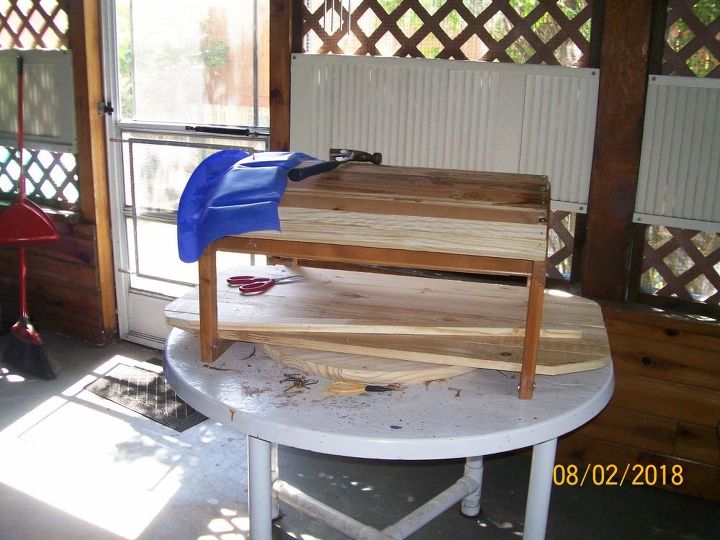
Next I water proofed the roof. An old kids pool. I am always picking these up off the roadside. And I always have 2 or 3 back behind the shed. It's amazing all the things you can do with them. I used the rims of the pool for each end of the stand. This would act as spouting and would run roof water off to the sides instead of down onto the small 'landing' deck at each end. A lot of thought went into this feeder.
Here is a front view with 'spouting' installed.
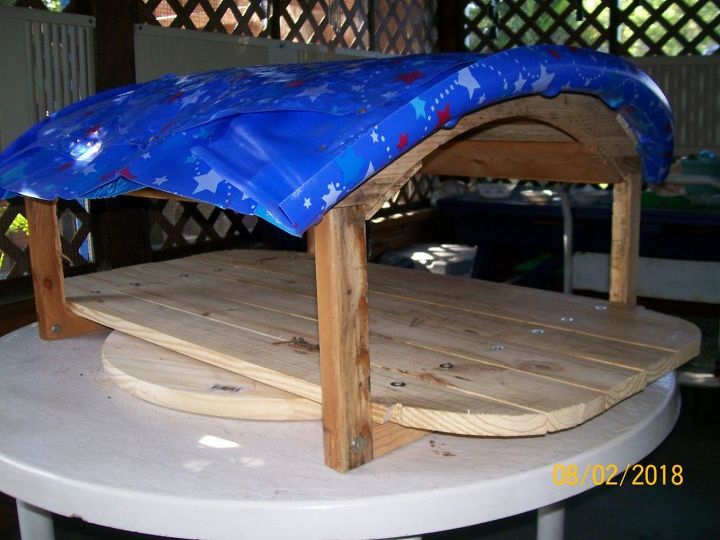
Water proof roof is finished here.
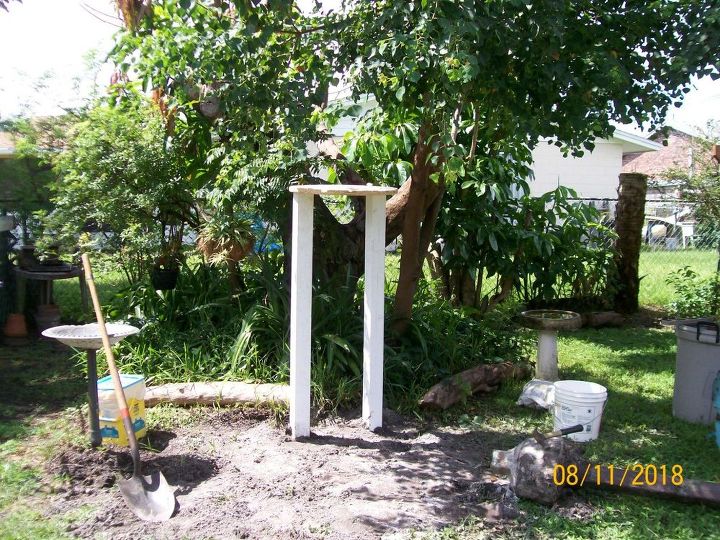
The posts were left over from our yearly fixing of the fence, another Florida tradition. Now we are ready to mount our feeder and paint everything.
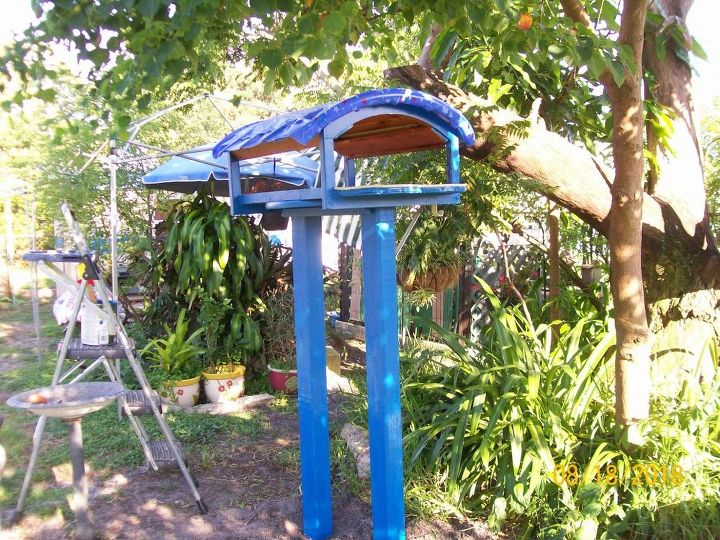
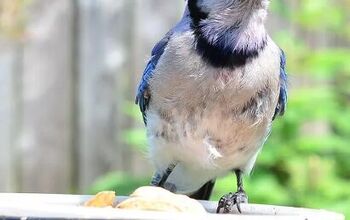
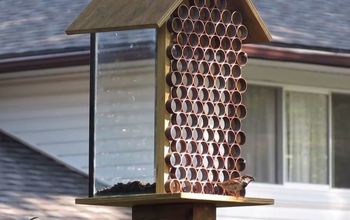
Here is the finished bird feeder. Of course, our old feeder was too tall to fit inside it so that required new feeders. : ) It took a few days before the squirrels were brave enough to venture into it. Birds soon followed. We get a LOT of birds here, especially during the winter. A second feeder site is planned around the corner from this one.
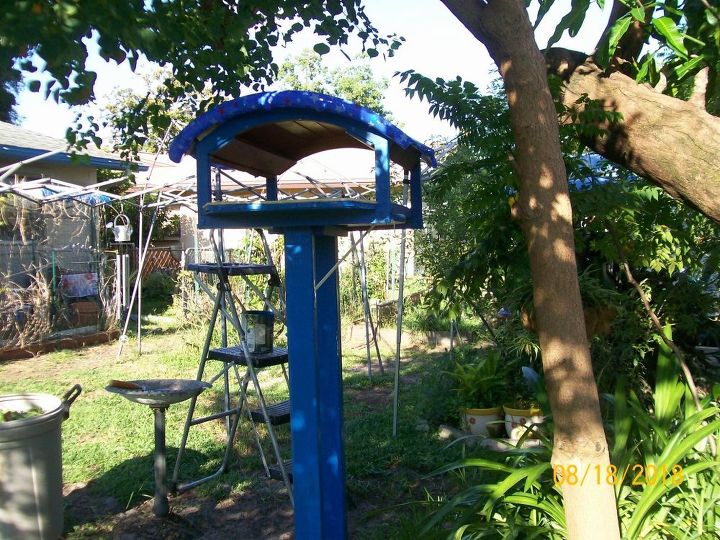
And I am always searching for new places to put brackets to hold hanging plants. I did manage to squeeze one on one of the posts here. : ) Hope this gives someone a smile. We love spoiling our critters!
Comments
Join the conversation
3 of 4 comments
-
Thank you, Wendy.
-
This is amazing. Very creative. Looks great.


Frequently asked questions
Have a question about this project?
How do that keep squirrels out ?