


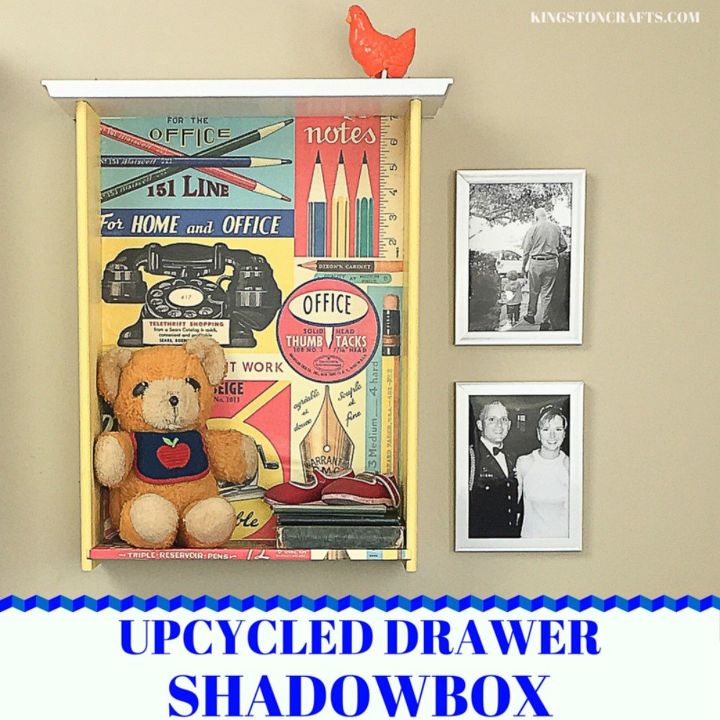
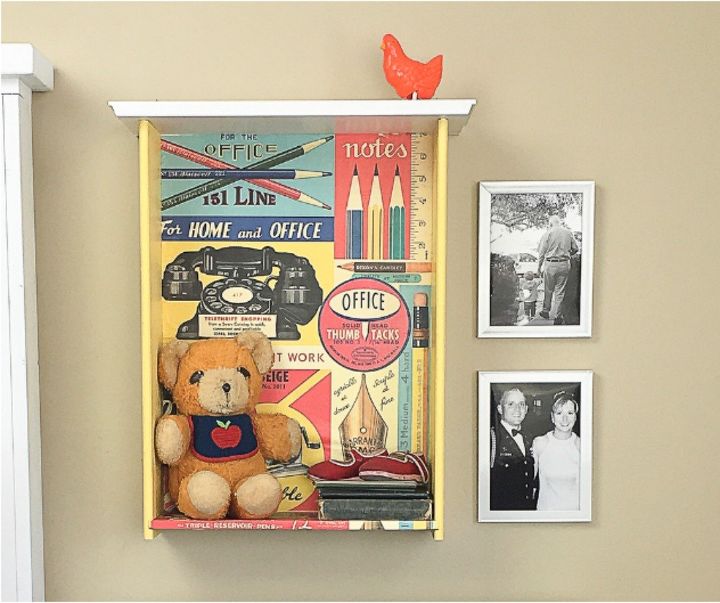
Upcycled Drawer Shadowbox
Learn how to transform a plain drawer into the perfect shadowbox with some spray paint and decorative paper!
Who doesn't love a unique piece of home decor?
Home decor that is unique (as well as handmade) can easily become a conversation piece in your home and add that extra ''punch'' to a room.
Case in point, turning a drawer into a shadowbox!
This simple shadowbox project is a great way to recycle an old drawer that you may already own or one that you may see on your next trip to the flea market. Plus, besides this project being simple to make, it can also be customized in a variety of ways!
For example, we (my husband and I) went with a cute retro theme but you could turn this into a wedding, kids, or even a pet theme shadowbox.
Learn how to make your own drawer shadowbox by following the tutorial below!
Here are the supplies you will need:
- Old Drawer - Again we scored at the Re-Store
- 220 Grit Sandpaper
- Summer Squash Spray Paint
- White Spray Paint
- Mod Podge - Satin Furniture
- Painter's Tape
- A piece of your favorite paper (big enough to cover the drawer bottom)
- Mod Podge Decoupage Tools
- Foam Brush

Step 1: Clean and Prep:
Lightly sand the entire drawer and then clean off all of the dust. Use a lintless rag and a cleaner, like denatured alcohol, to wipe down the entire drawer and make sure there is no dust left behind.
Step 2: Paint:
Spray the inside and outside sides of the drawer with the Summer Squash paint (which is yellow). Once it's dry, mask off the yellow areas with paper and tape, then spray the drawer's face (which will become the top) with the white paint. When the paint is dry, mask off the interior areas with tape to prevent getting glue on your fresh coat of paint.
Step 3: Paper:
Measure the area of the drawer you want to cover with the paper and then cut those dimensions from your favorite paper. Just like wallpapering, spread Mod Podge on the back of the paper, lay the paper in the drawer and use a tool (like a brayer) to ensure it is smooth and no bubbles are underneath.
Let the paper dry for an hour and then paint over the paper with Mod Podge. We used 2 top coats allowing for an hour of drying time in between each coat.
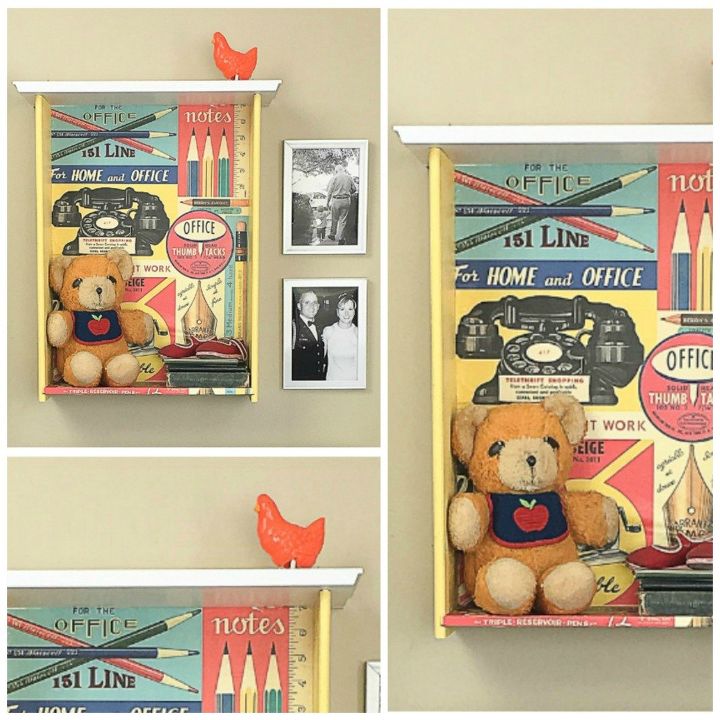
And voila! With a few coats of spray paint and some decorative paper, you can easily transform a plain drawer into the perfect shadowbox!
To get more project inspiration for your home and to learn more about the products used in this project, stop by my blog!


Frequently asked questions
Have a question about this project?