


DIY Embroidery Hoop Decor - Less Than $10!
7 Materials
$8
45 Minutes
Easy
Learn how to make beautiful and unique embroidery hoop wall decor. It's super simple, taking less than an hour to make and hang up. Also, it's super inexpensive! It cost me less than $10 and depending on what you have in your craft closet, it could cost you even less. My favorite projects are unique, simple to make and inexpensive. Want to see more projects like this one? Check them out here: http://www.thehandcraftedhaven.com/category/decor/

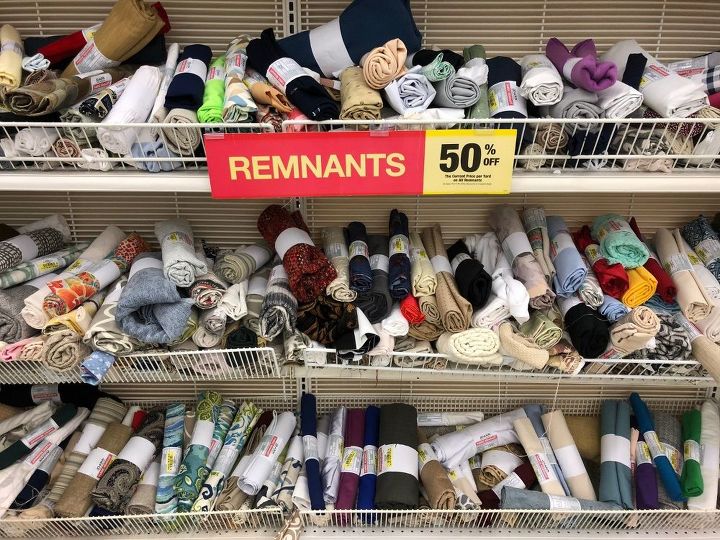
1. Gather your supplies: Drive to your local craft store and gather the supplies. You'll need some embroidery hoops and a few different types of fabric/material. The fabric/material depends completely on what style you want for your finished product. I raided the remnants bins at JoAnn Fabrics and found some material I loved for really cheap.
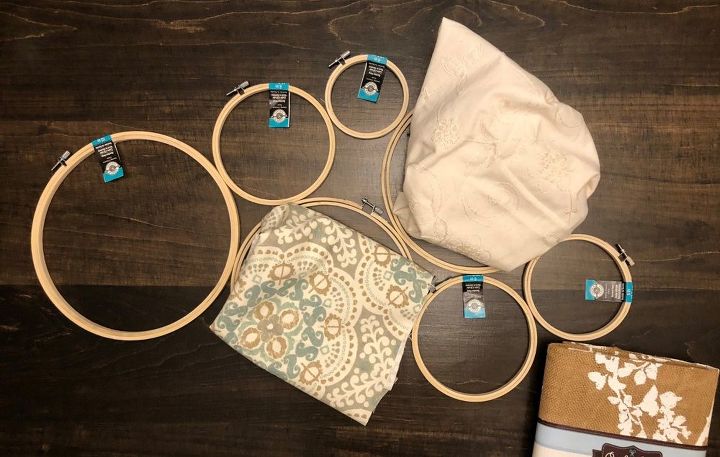
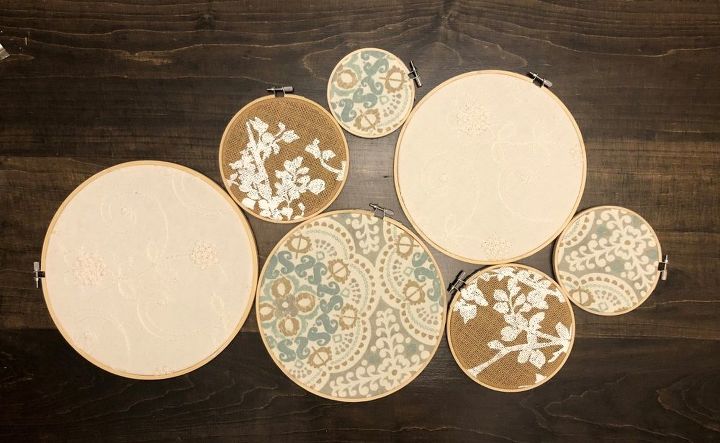
2. Plan out your design: Basically before jumping into crafting you want to make sure that you have a plan so you don't end up with an end-product that doesn't really fit together well. In the above photo you can see how I laid out the hoops next to one another and figured out what material I wanted to put in what hoop. I wanted to have an idea - but you'll see that I gave myself freedom to change my plans throughout the process.

3. Place fabric in a hoop: Start with whatever hoop you want. Take off the sticker price tags. Separate the two hoops (inner and outer) and place the smaller hoop underneath the fabric and the larger one over the fabric. Press down the larger hoop over the smaller one. You'll want to make sure the fabric is as tight as possible without looking strained. This will ensure a clean, wrinkle-free look. When you are happy with how it looks, turn the screw at the top of the hoop to tighten it in.
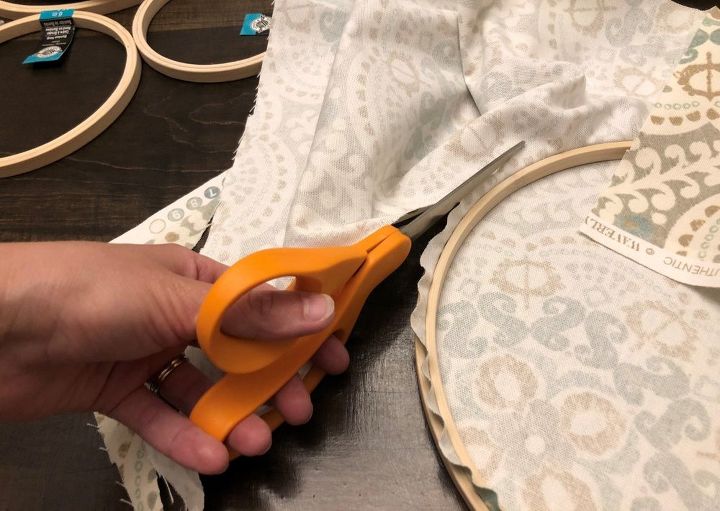
4. Cut off excess fabric: Turn the hoop over and cut off the excess fabric, leaving about 1/2 inch excess. You'll need enough fabric to glue it down but not so much that it's bulky and won't hang flat against the wall.
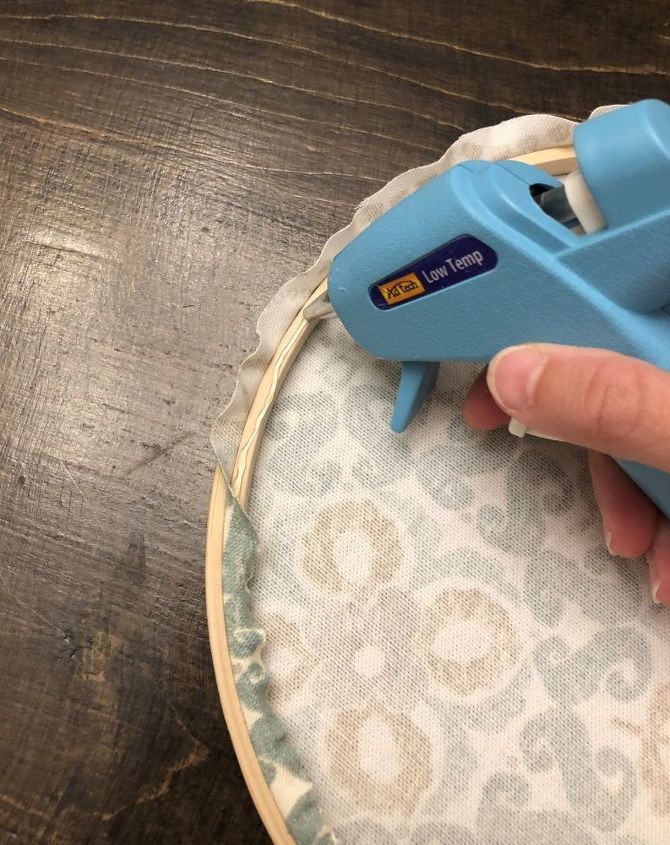
5. Glue down excess fabric: Use a glue gun to secure the fabric ends to the hoop. Press down as you go until you have the entire hoop fabric securely glued down. While this step could be considered optional, it will ensure that your hoops hang nicely against your wall.
6. Follow Steps 3-5 for all hoops: You will now have all of the hoops completed.
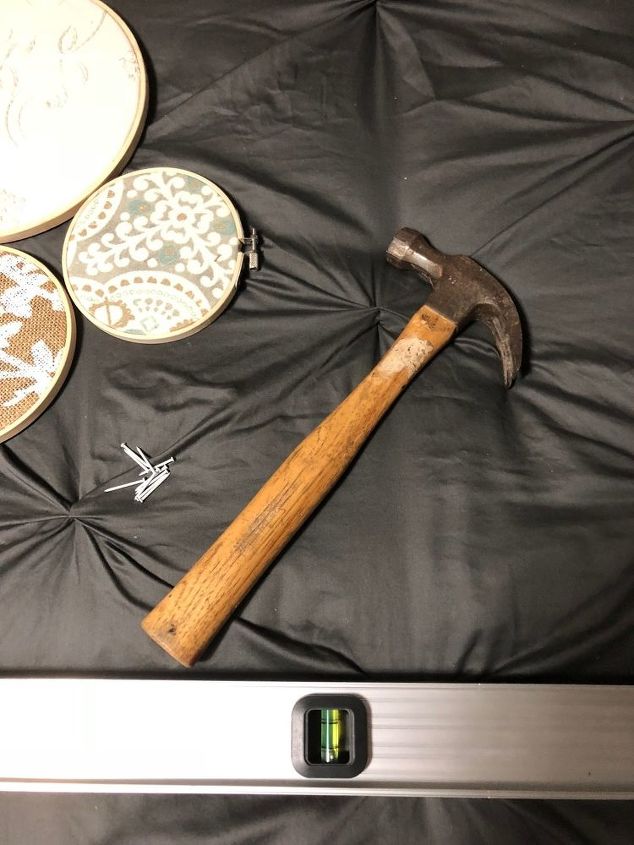
7. Hang them on your wall: You could try to connect all the hoops together before hanging them on the wall but I preferred not to for two reasons. 1) I wanted the flexibility to be able to change my layout/design at the last minute if I wanted to and 2) It was simply more steps in the process that weren't necessary! Therefore, I simply got a level, a hammer and some nails. Use a level to ensure that you hang them up in the design you prefer. Hammer nails into the wall and hang a hoop on each nail.
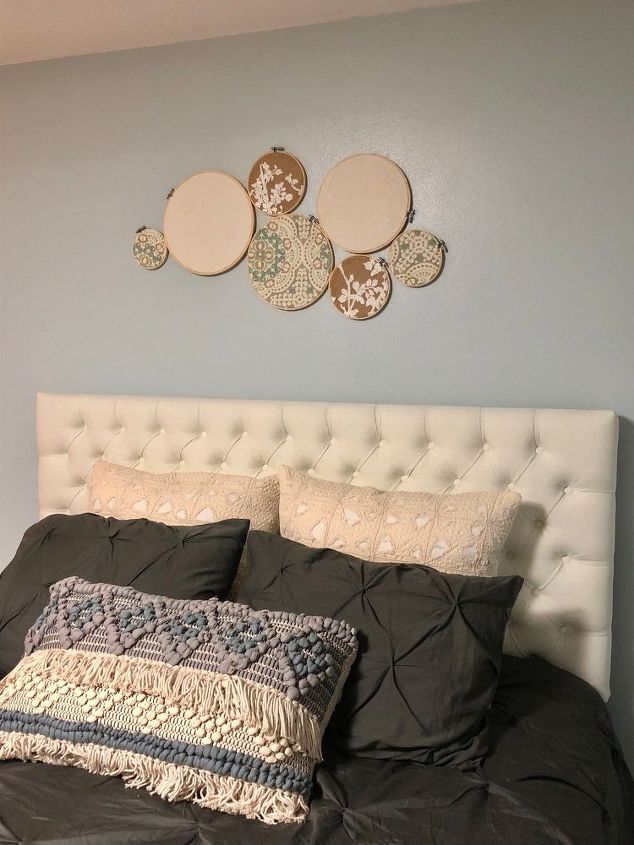
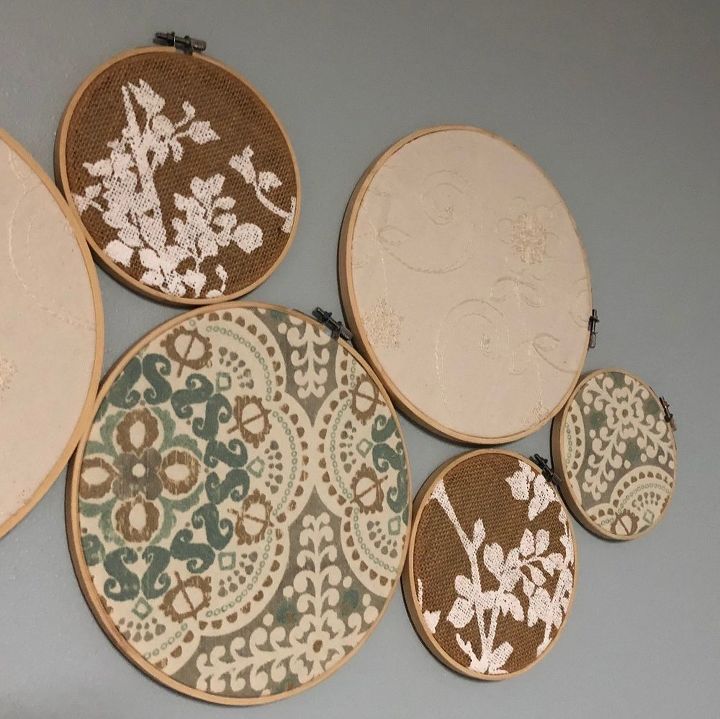
Now you're done! You have a unique, beautiful piece of wall decor that was simple and inexpensive to make. If you're interested in other projects that are simple and inexpensive to make, I encourage you to check out my Rustic DIY Coat Rack tutorial: http://www.thehandcraftedhaven.com/diy-rustic-wood-coat-key-rack/ and my Removable Wallpaper tutorial: http://www.thehandcraftedhaven.com/how-to-transform-a-room-with-removable-wallpaper/. Have a great day!
Resources for this project:
See all materials


Any price and availability information displayed on [relevant Amazon Site(s), as applicable] at the time of purchase will apply to the purchase of this product.
Hometalk may collect a small share of sales from the links on this page.More info

Want more details about this and other DIY projects? Check out my blog post!
Comments
Join the conversation
2 of 123 comments
-
Very Pretty. I love the fabric choices.
-
You could even glue photos on them.


Frequently asked questions
Have a question about this project?
What size hoops did you use for this project?
I made 6 wall/door hangers for my girls for Christmas using fabric, ribbon and embellishing each one. They came out great, and attached "string" at top around metal for hanging...(see sample) but in the case of a wall arrangement, the metal part that is used to tighten the frame is distracting. Any way to remove and still keep all in tact? Thank you!
Super cute and so many possibilities !❤️