


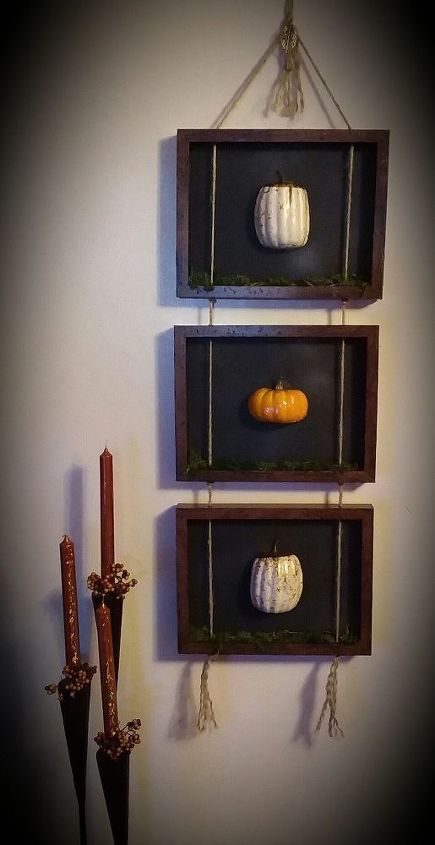
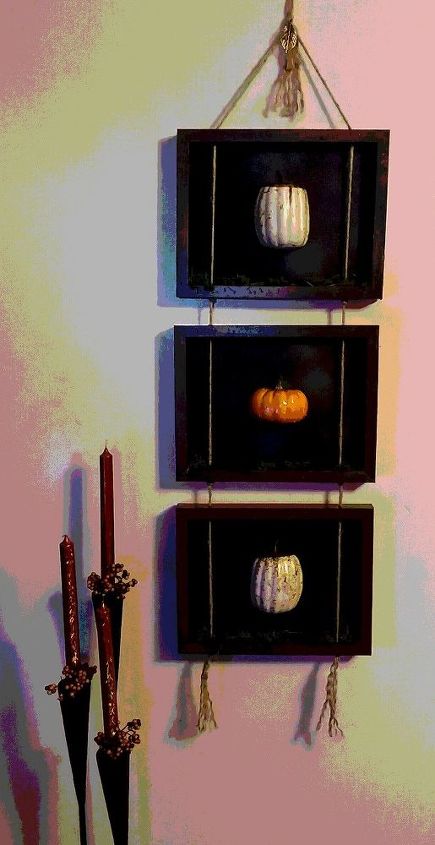
Autumn Hanging Wall Decor

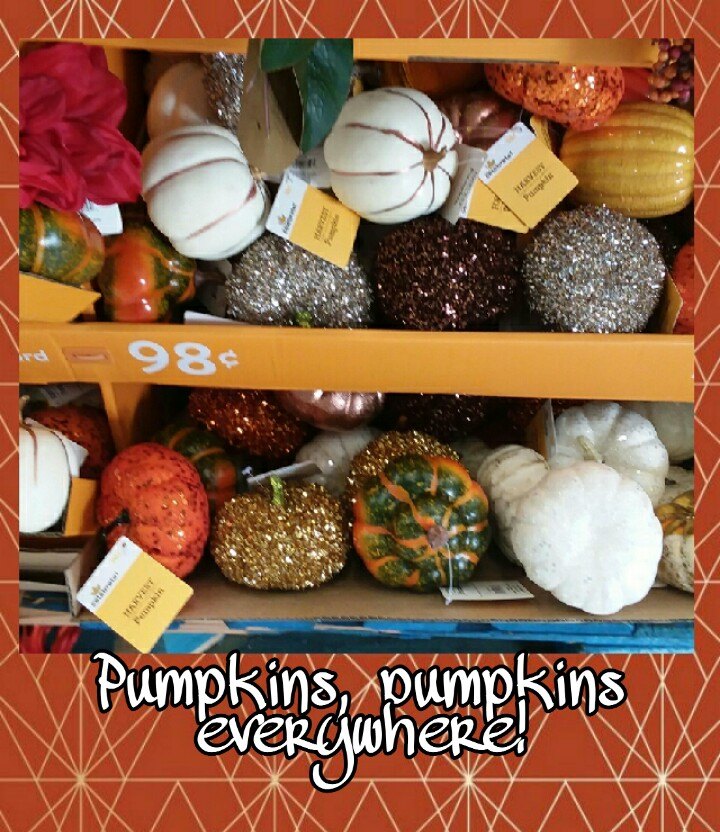
From Styrofoam pumpkins into a beautiful wall hanging! It's that time of the year where pumpkins are EVERYWHERE ! In all shapes, sizes, prices, flavors...(pumpkin latte, anyone?😊) I found these little Styrofoam pumpkins at Wal-Mart for $.98 and decided to transform 'em into wall decor for Autumn. With jute twine running through the frames, it really turned out stunning! I needed something to donate to a local charity which was having an amateur art auction fundraiser. This may be it!
I absolutely love the fall season (Pumpkins included!) So this project was super fun! You may also like my Spooky Owl on a Perch I made for Halloween. 🎃 ... [url=https://www.hometalk.com/diy/craft/holiday-crafts/spooky-owl-on-a-perch-for-halloween-38696041
I'm listing exactly what I used, however some of the items can be swapped out to fit your liking (the frames, backing, etc..)
Styrofoam pumpkins
3 shadow box frames
Jute twine or rope
Black foam board
Copper spray paint
Craft paper
Double sided tape
Tacky glue
Embellishments for the hanger
Floral moss
Drill, craft knife, hammer, nail, small hacksaw, a ruler and a black marker
First we'll get the frames ready...
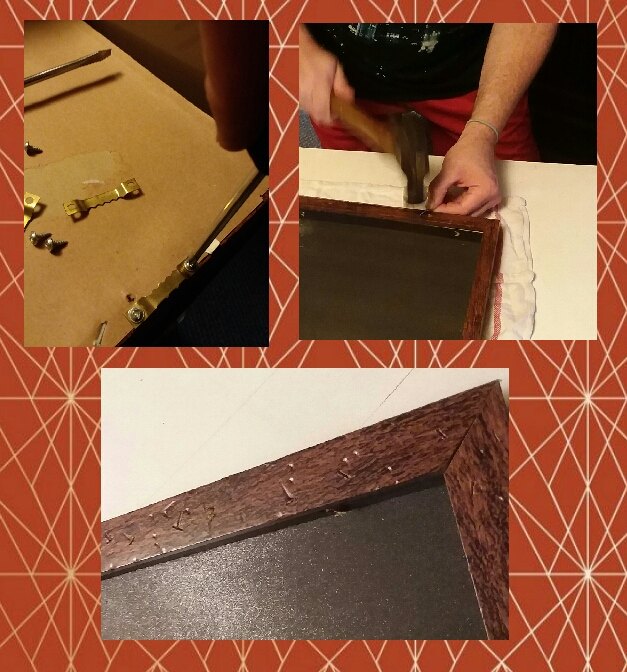
I used three 1" shadow box frames, 8 1/2 × 11. Remove all hardware from the frames, the hanger, staples, nails, backing and glass, we won't be using any of it.
Now we'll distress the frames. Using the head of a nail and a hammer, gently add distressed marks over the frames. Create nicks using just the hammer too. If you'd like the marks to be more pronounced, use a black Sharpie and quickly wipe away.
Next it's time to drill the holes...
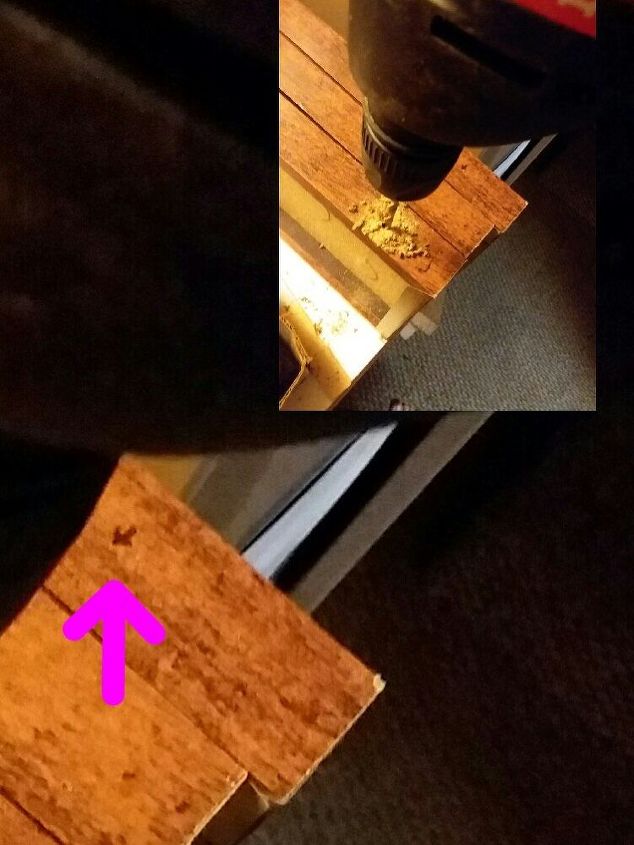
You'll need to drill two holes on the top and bottom of each frame, even on all frames. I measured in 1/2 inch from the front and 2 inches in from the sides and made a mark with a Sharpie, 12 marks in all. Drill holes, just large enough for the twine to fit through, where the marks are. Brush away the sawdust!
Now for the backing...
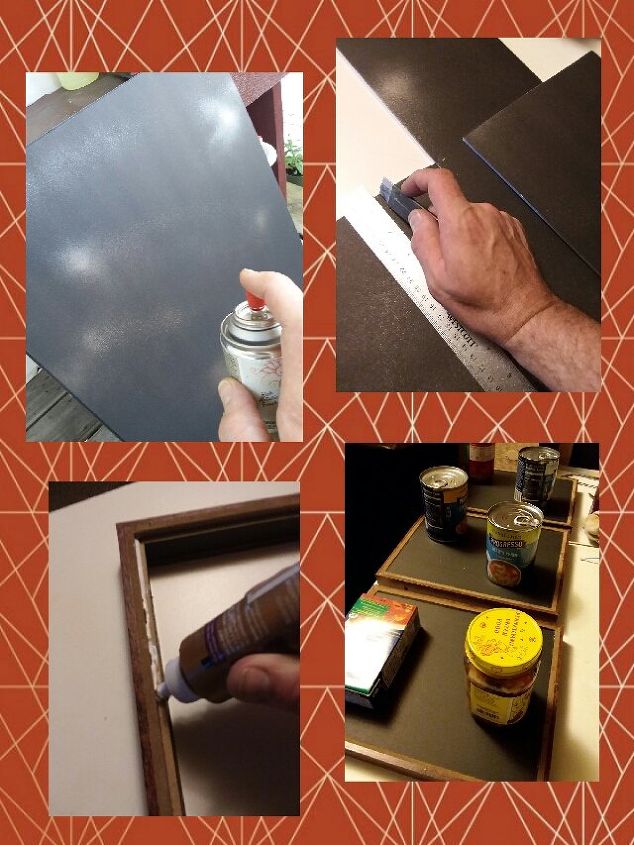
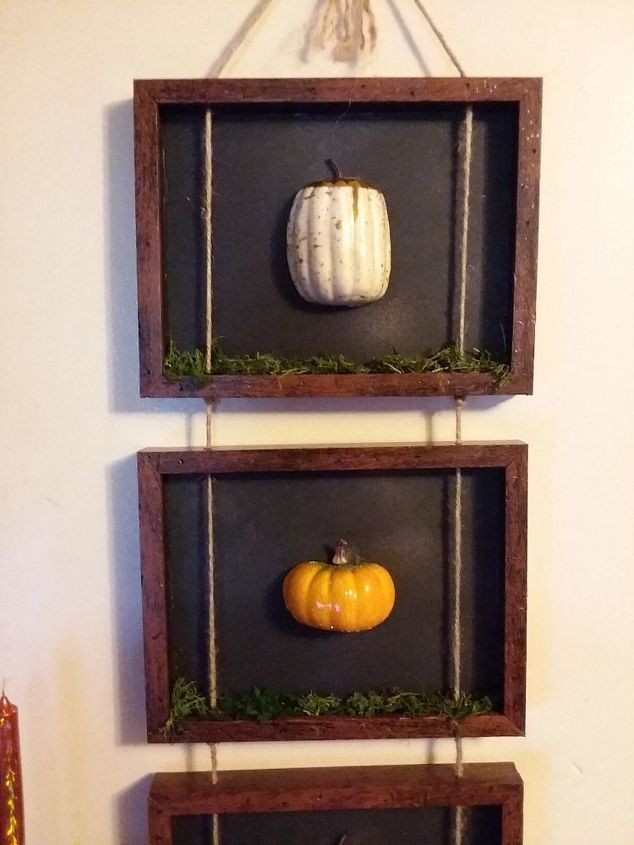
Take the black foam board and give it a very light spray with copper or gold spray paint. Just enough to give it a little shimmer and texture. Let it dry.
Using a craft knife and ruler, cut three pieces to fit into the frames. Mine were 8 1/2 × 11.
Line the inside edge of the frames with tacky glue and place the cut foam boards in, so the painted side faces the front. Weight it down a bit and allow to dry completely. (Use some canned goods!)
Now we'll do the backs of the frames...
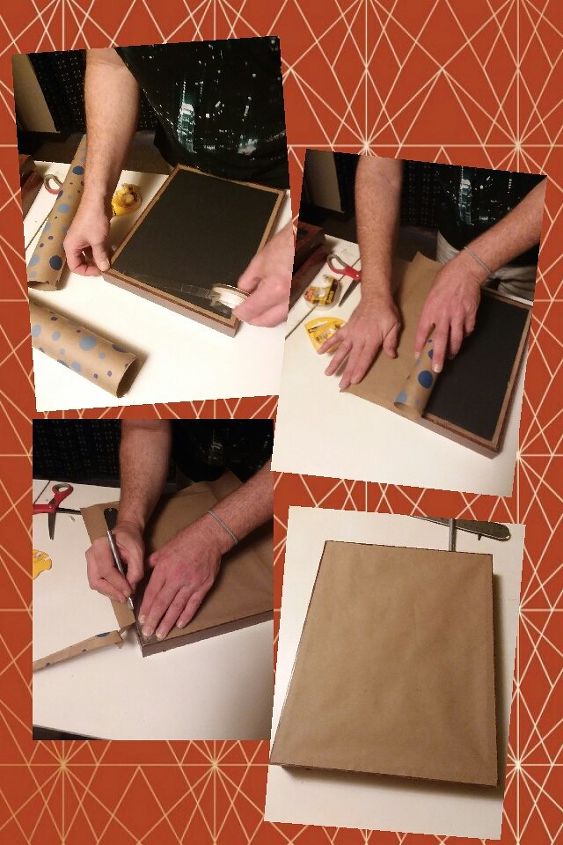
Grab your double sided tape, craft paper & knife, and ruler. Line the edges of the back side of the frame with the tape. Cut a piece of craft paper slightly larger than the frame. Roll the paper up, gently secure one end by pressing onto the tape and unroll, smoothing the paper over the tape as you unroll. Then trim using a craft knife and ruler... now we have a nice, finished back! Do this to all three frames.
Now for the rope...
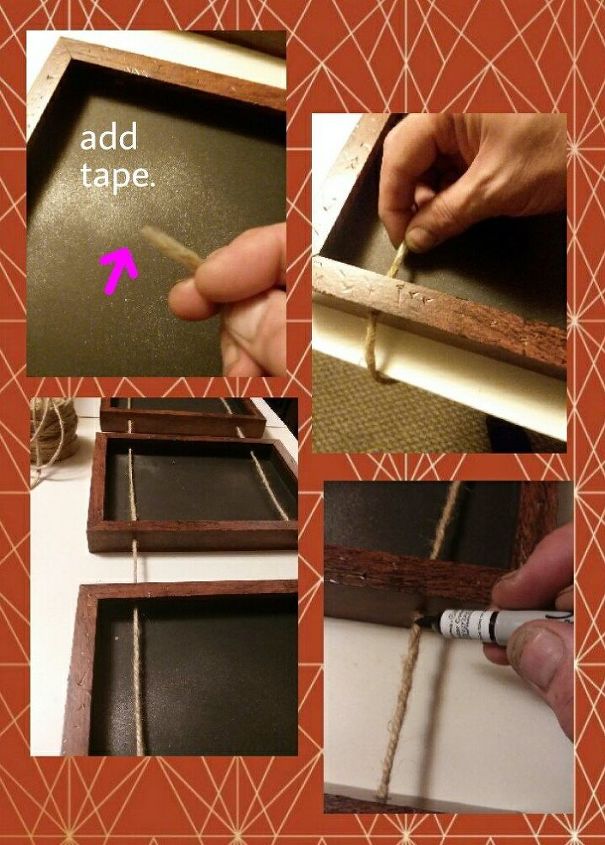
For this step, we'll be stringing the rope through the holes we drilled. To make it easier, wrap scotch tape around one end of the rope. This makes it easier for the rope to pass through the holes. Place the frames right side up, on a large surface. Begin threading the rope through each of the holes, beginning with the bottom left hole, up through to top left hole of each of the frames. Now thread the rope through the top right hole, down through the bottom right hole of each of the frames. This is one continuous length of rope, as you can see in the picture. Now, using a ruler, Evenly space the frames apart, with about 3 inches between. Make sure you have enough rope at the top for hanging and some at the bottom to hang down. Use a black Sharpie to mark the rope at each of the outside bottom holes, it helps if you hold the rope taunt, but be careful to keep everything even!
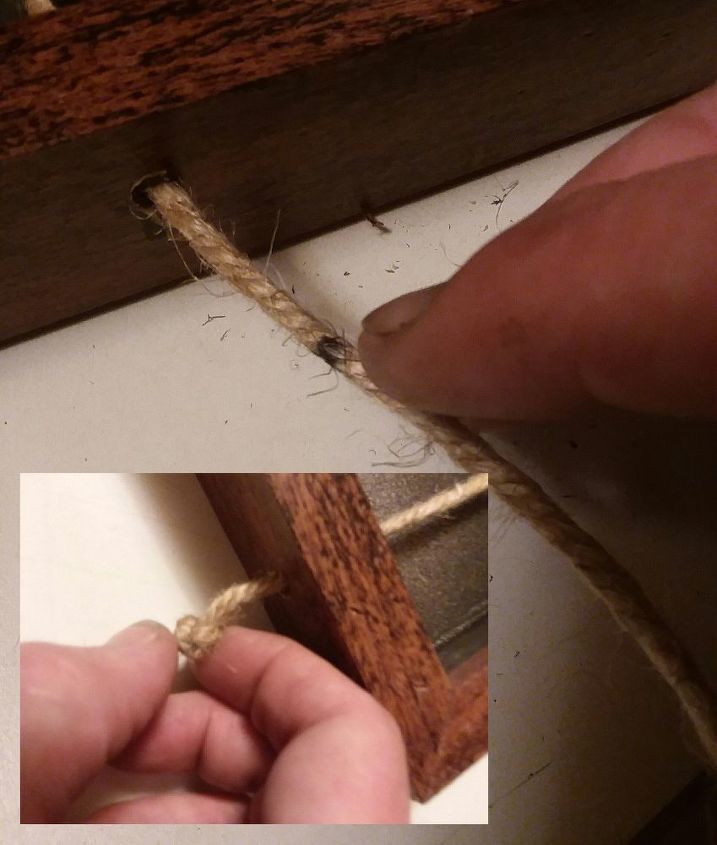
Now remove the rope. Begin to rethread again, the same as before , except... only thread through the first hole, up to your last black mark. Tie a knot. Thread through the top hole. Tie a knot at the next black mark and thread through the bottom hole of the next frame. Continue threading and knotting, all the way up and back down the frames, you should have six knots in all, two each at the bottoms. If you measured correctly, you can pick the frames up from the top and they'll hang evenly! If not, no worries! It's pretty easy to adjust the knots.
Next it's pumpkin carving time...
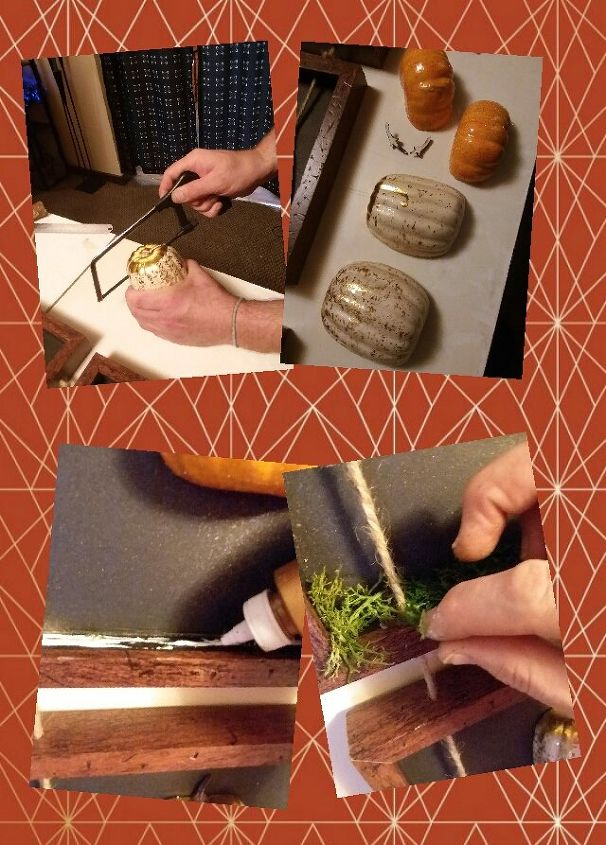
Take your pumpkins and saw them in half using a small hand-saw (I found this one at the dollar store!) Cut the stem in half as well, using scissors. Glue the pumpkins to the center of each of the frames (don't forget the stems, I almost did😊) Glue some moss to the bottoms of the frames. Allow to dry.
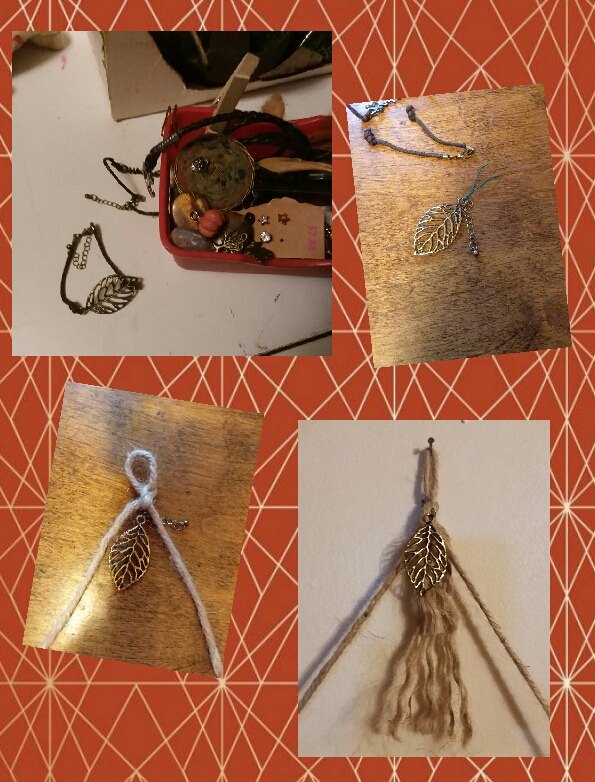
I made a cute little hanger with additional rope and a braclet pendant I found in my trinket stash, attached it to the top part of the threaded rope, frayed the rope hanging down from the frames...and done!

I'm really pleased with how it turned out!
As I mentioned before, you can definitely change it up by using different frames, a different backing and different trinkets!
Thank you for viewing this project! I hope you enjoyed it and are excited for the Fall season!!🍁🎃
Happy Fall, Y'all!
Resources for this project:
See all materials


Comments
Join the conversation
-
I bet this wall art would cost a lot more in a fancy shop than what you paid to create it. I don't think I've ever seen a project that uses pumpkins cut in half!👍️
-
Love this idea! Will definitely give it a try. Thanks for sharing.


Frequently asked questions
Have a question about this project?