


Pouring Acrylic Paint Part 2- Texture

by
Jennifer
8 Materials
$6
2 Hours
Easy
Hi there Hometalkers! I love to make art and using texture while pouring paint will make beautiful designs, it is also very easy to do ! I made two different types of textured art (there are many types) so you could see how easy it is along with the results.
! I made two different types of textured art (there are many types) so you could see how easy it is along with the results. 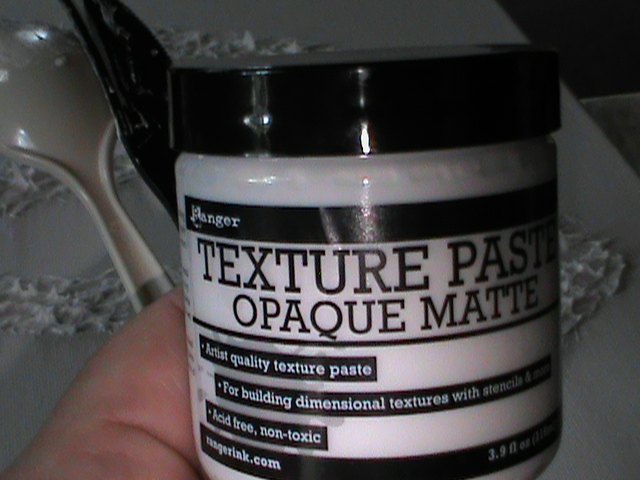
I picked up some 11x14" canvases at Walmart for $5.50, the paste was a gifted from Hometalk.com! I have used a paste recipe in the past and it was hard to get the right consistency if you didn't make enough for the project but with this stuff it is always the same! This is great for me! Very easy to use in both of the canvas art pieces I made !
!
! 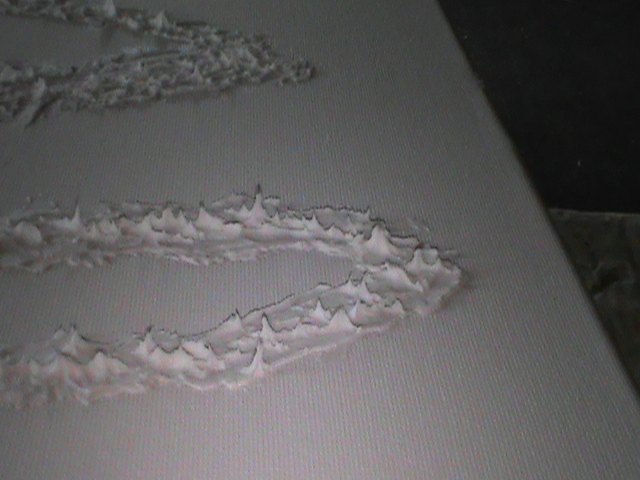
The first piece is just a wavy line of the paste. I could have smoothed it out more but wanted the little spikes for a reason.
It was as thick as soft frosting so that is how I used it, like frosting a cake! I used a plastic knife to spread then used a plastic spoon to make the spikes. By pressing the spoon into the paste lightly then pulling up you will get this look.
! I used a plastic knife to spread then used a plastic spoon to make the spikes. By pressing the spoon into the paste lightly then pulling up you will get this look.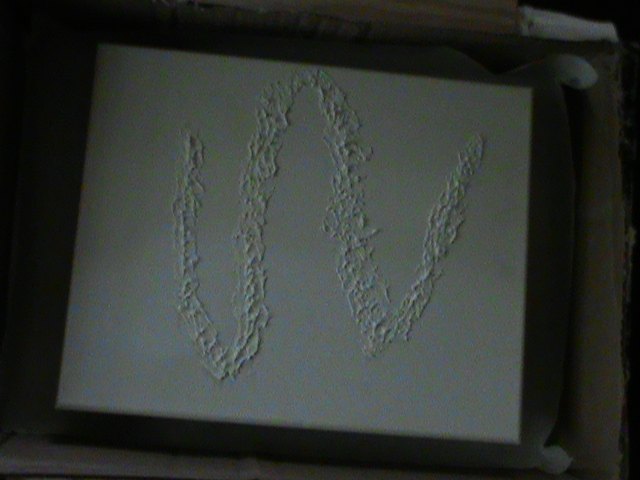
I let this dry overnight just because it was getting late. This only took ten minutes to do! Super quick and easy! Of course you can make any design you like !
!
!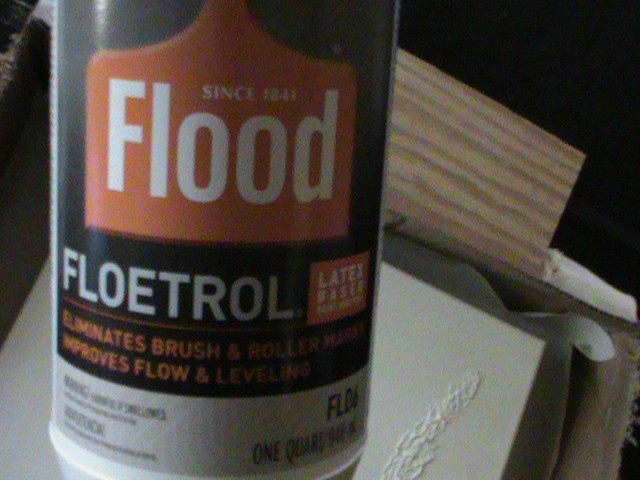
This is the medium I use when pouring paint! I get it at Walmart for $6.97 for a quart. I love the price, quality and quantity you get with Flood! There are many other good medium products out there to use with this type of art, Flood is just my personal preference.
! There are many other good medium products out there to use with this type of art, Flood is just my personal preference. 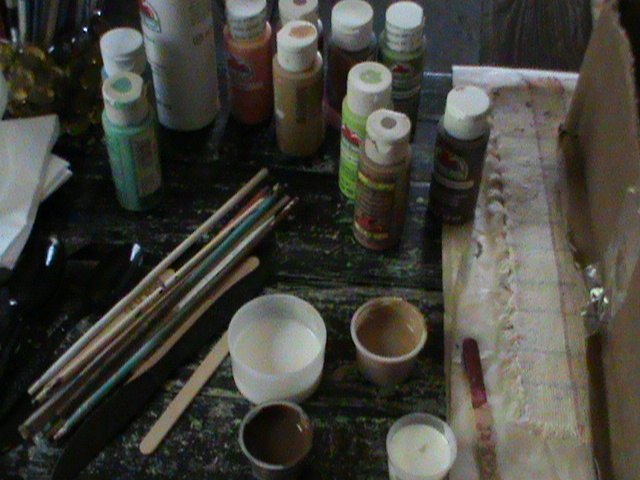
I start with some medium in a small plastic cup then add the acrylic paint. There's not really a recipe for this because it can be a slow run by not adding so much medium or a very fast run by adding more medium.

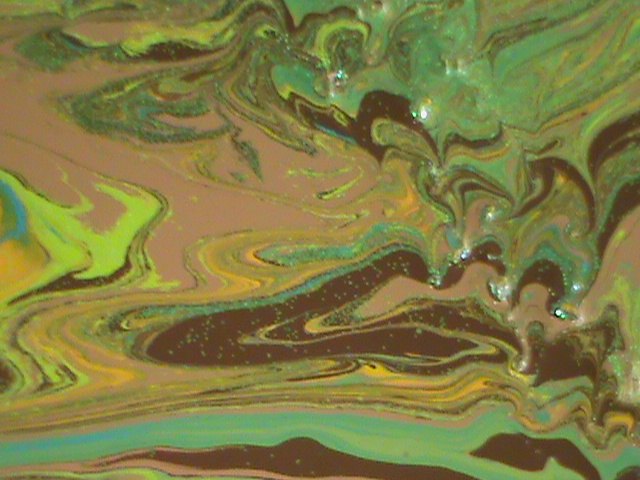
Where you pour the mix and what colors you use are your choice ! I poured over the paste with some colors and around the paste with the others as in the picture here. As you can see the pour on the paste is not as runny as the pour around the paste. I also added some glitter dust to the chocolate layer after I added the color to the texture so the dust would stay mostly with that color!
! I poured over the paste with some colors and around the paste with the others as in the picture here. As you can see the pour on the paste is not as runny as the pour around the paste. I also added some glitter dust to the chocolate layer after I added the color to the texture so the dust would stay mostly with that color! 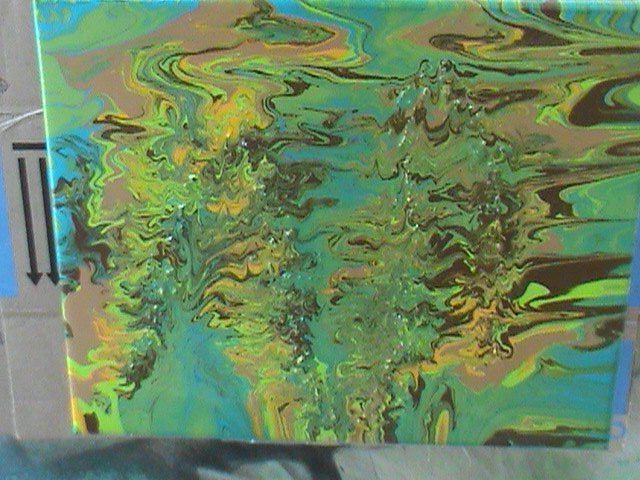
I tilted the canvas from side to side and up and down. This is also a choice of how you want the painting to look. If you want all the paint running one way that is fine, just remember the way you tilt the canvas is the way the paint will flow unless you have some texture blocking the way! My little spikes interrupted the flow and the paint had to go around which makes the art more interesting ! I think I spent a total of one hour to make this art!
! I think I spent a total of one hour to make this art!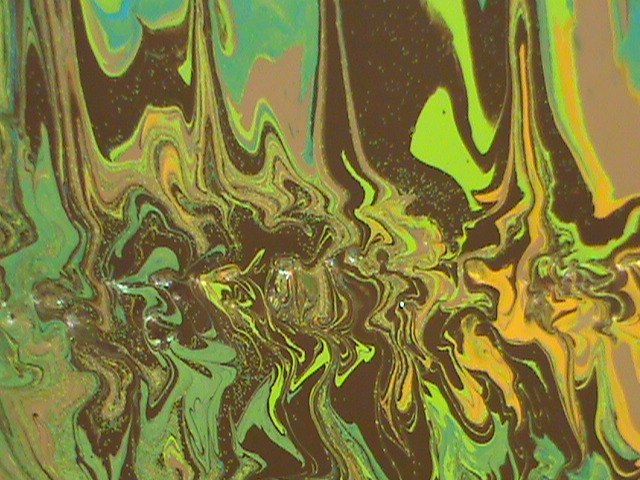
Crazy zig zags, swirls and puddles of color!

This picture shows the glitter dust in the chocolate mix with a little in the lime green ! I'm fine with it but there are tools you can use to get very accurate with dust.
! I'm fine with it but there are tools you can use to get very accurate with dust.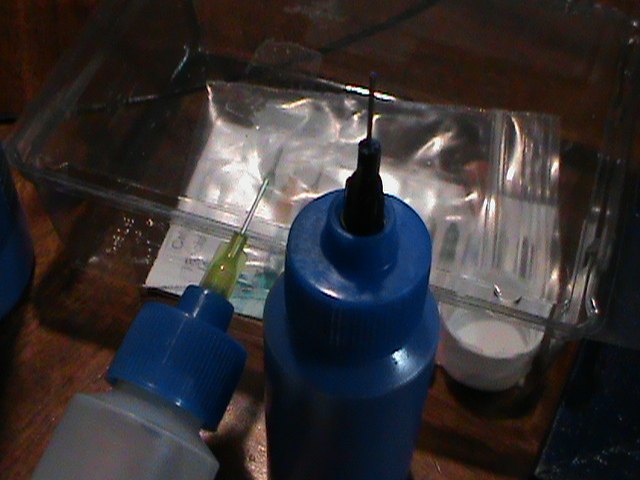
To get this part more exact I would use a tool like the Precision Tool pictured above. You can get really accurate with this tool and use the dust exactly where you want!
I love the swirls and the way the layers will zig zag! It sparkles just enough! Finished! It's just fluid color on a canvas!
Finished! It's just fluid color on a canvas!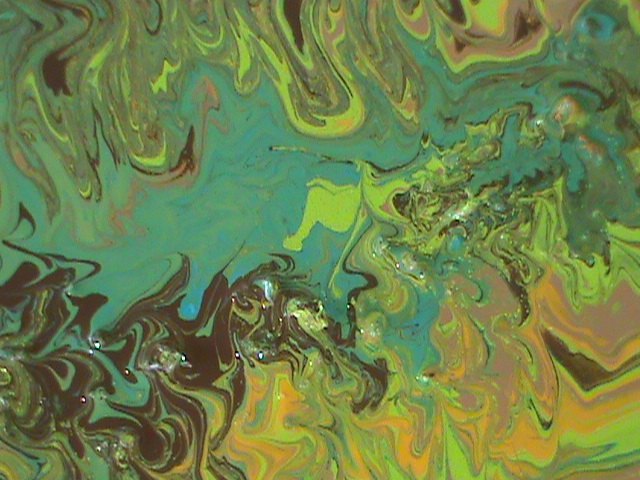
It sparkles just enough! Finished!
Finished!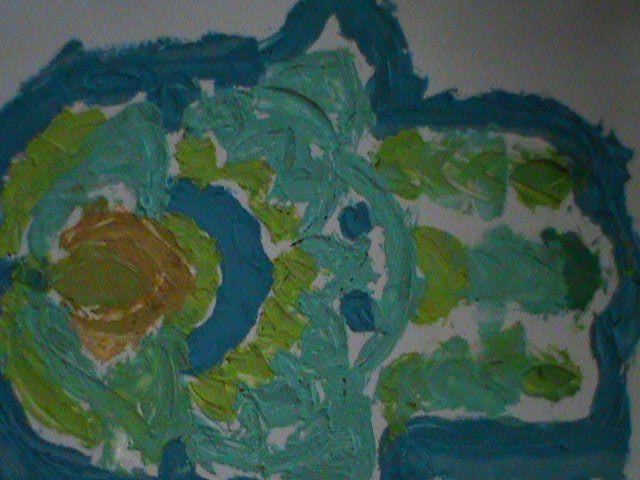
This is the second textured art on canvas with a stencil!
I mixed acrylic paint directly with the paste for this one! I put a few drops of paint on a plastic lid added a small scoop of the paste and mixed it well. I painted the whole canvas with chocolate first, let it dry a few minutes then taped down the stencil using painter's tape so the stencil wouldn't move. Next I spread the paste colors, I didn't race through this part because the paste is pliable and doesn't dry that quick. I had a little time to work still only took about half an hour to do!
I pulled off the stencil carefully! Let it dry overnight with the other one!
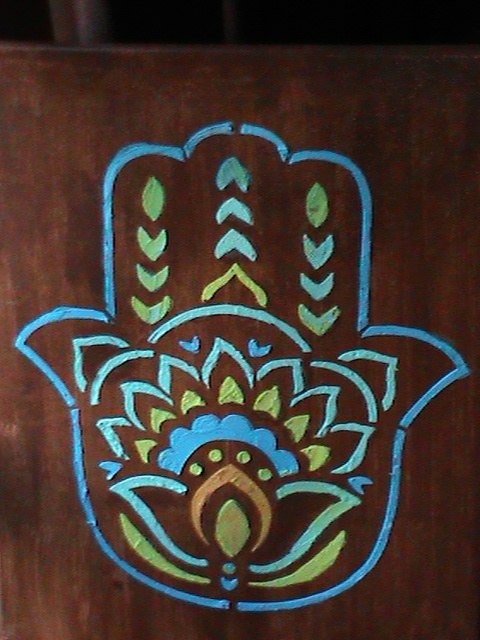
Pretty cool looking if I do say so myself ! I love this one too!
! I love this one too! Now where to hang my new art pieces!! I already had everything to make these except for some canvases so it would be hard to price but you can purchase everything to make this type of art at Walmart!
!! I already had everything to make these except for some canvases so it would be hard to price but you can purchase everything to make this type of art at Walmart!Part 3 is next week! That will be epoxy pouring art with really cool neon colors and a strainer as a tool!
And as always all comments and questions are welcomed! Thank you for looking at my new art pieces!
UPDATE- Part 3 will be next week. I've been too busy getting ready for hurricane Florence, seems I'm in the bullseye for this one ! Hopefully will be back next week!
! Hopefully will be back next week!Comments
Join the conversation
4 comments
-
Love it!
-
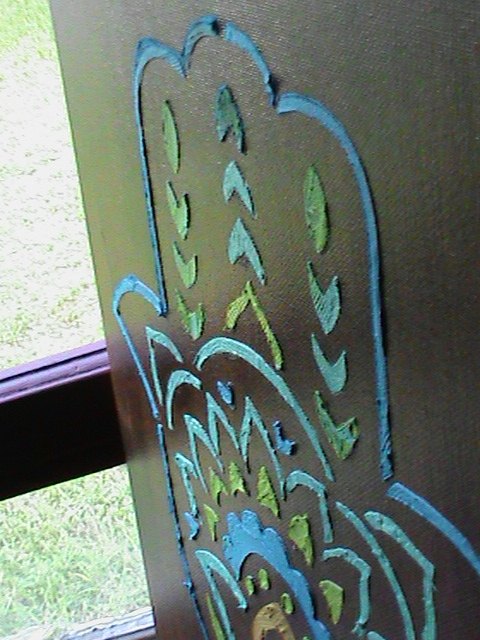
I love your hamsa
 !
!
 !
! !
!


Frequently asked questions
Have a question about this project?
I can’t find part 3. Did you do part 3?