


Scrap Wood Scarecrow DIY

by
Beth Eaton
4 Materials
$5
20 Minutes
Medium
Every year I try to create a new scarecrow and this Scarp Wood Scarecrow is perfect!! They are versatile and can be created to be scary or fun! I usually opt for fun – and this one fit the bill perfectly!
He was so easy to put together with scrap wood and some old clothes!
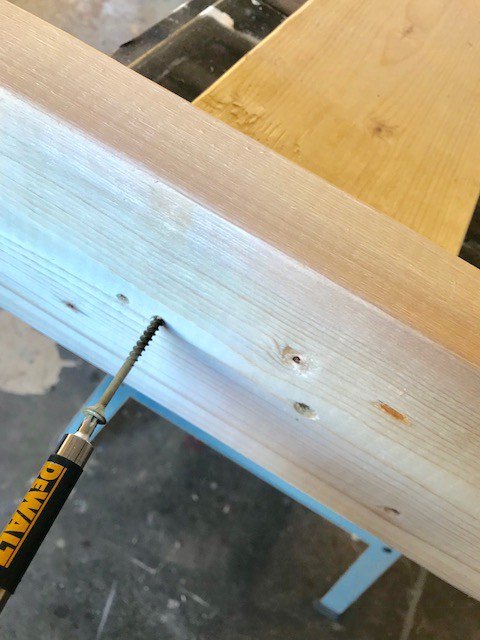
You’re going to need some scrap wood. Cut a 2×6 at 42″, a 2×6 at 8″, a 1×2 at 18″, and a 1×2 at 8″.
Screw the smaller 2×6 onto the bottom of the larger 2×6. I also used wood glue to make it more secure since it is going to be outdoors.
Take a pair of old jeans (I used a kids size 10) and cut one leg off leaving the seam in the middle where the zipper is. Slide is over the top of the 2×6 and secure it with heavy-duty staples.
Screw the small 1×2 to the front of the larger 2×6 roughly 18″ down from the top or whatever position makes the shirt look good with the jeans. Screw it in at an angle to give it a little more character. Put on the shirt with the wood piece going through the arm holes.
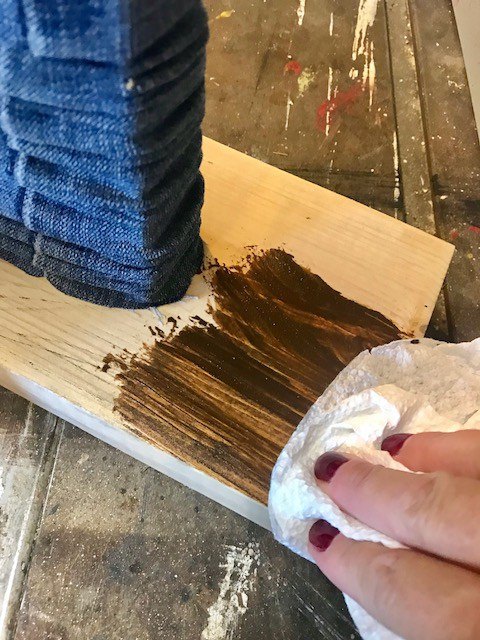
Next up, you’re going to want to stain the base in your favorite color stain. Waverly wax goes on so smooth and pretty AND it’s water based so it’s easy to cleanup!! After you stain the base, stain the top portion of the head which is where his “hat” will be. I went down about 4-5″ from the top.
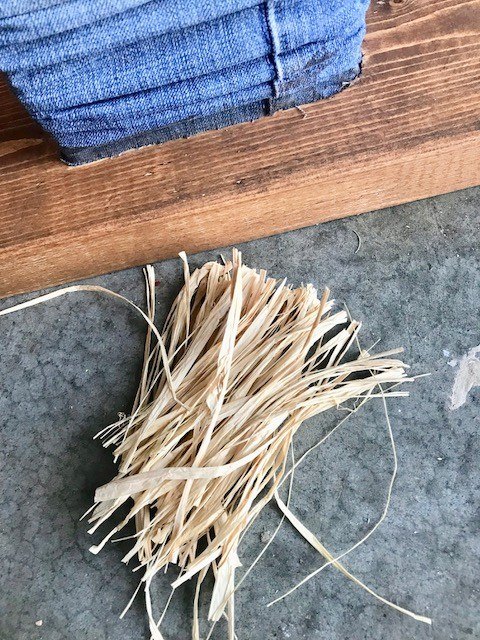
Create a small line of wood glue at the bottom of the stained piece on the head. Lay some raffia and attach the smaller 1×2 with an air nailer.
Take some raffia cut into smaller sizes and hot glue along the bottom of the pants line.
Now for some simple hand painting! Add two ovals for the black eyes. Create some small curved lines above (like pictured) to create eyebrows. The triangle is a simple orange triangle outlined in black with “stitch” marks. The mouth can be a simple smile or a curved line with “stitch” marks. It’s all personal preference at this point. You can make the face as whimsical or scary as you want. For the cheeks, I dry brushed some pink. To “dry-brush” you simply add paint to you paint brush and wipe off all excess on a paper towel and paint with the minimal amount that is left on the brush.
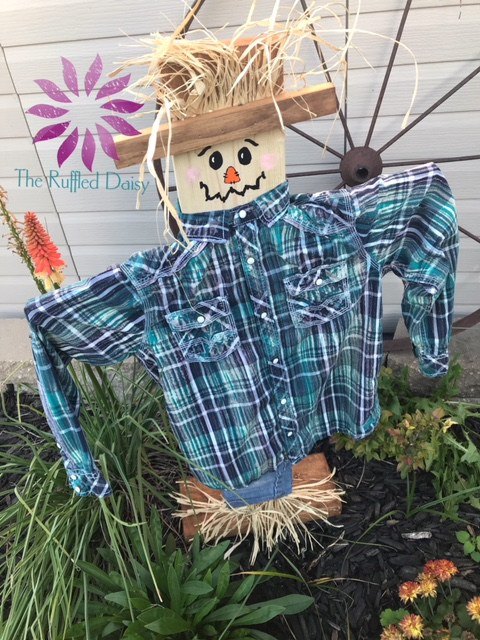
Just look at how cute he is!! Scarecrows always bring whimsy to any decor!
This would be adorable greeting all your visitors through the autumn season on your porch or peeking out through your garden.
Do you decorate with scarecrows for the holiday season? They seem to bring a sort of whimsy and fit into any decor!
Check out my blog post for more detailed pics and how-to's on this project!
http://theruffleddaisy.org/scrap-wood-scarecrow-diy/
Want more details about this and other DIY projects? Check out my blog post!


Frequently asked questions
Have a question about this project?