


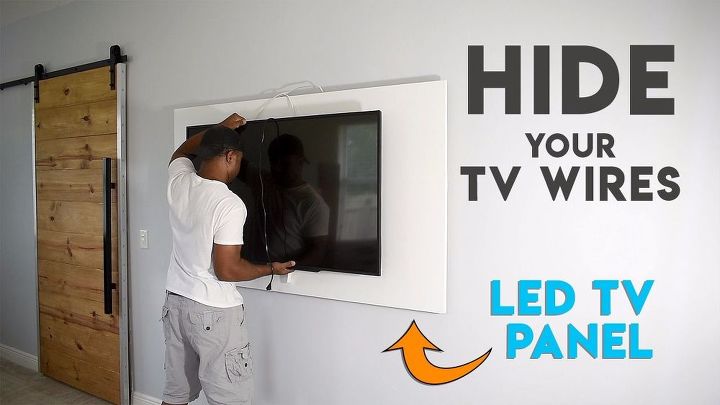
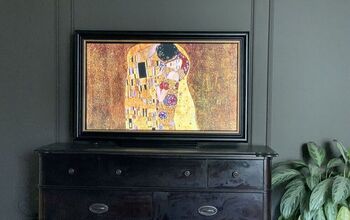
How to Hide TV Cables With a DIY LED TV Panel

I have been asked hundreds of time to do a room tour. I would love to make one but I need to address a few things first. I have made a bed, a sliding barn door, a Mirror and a sofa bed for this room. Well, I’m finally getting around to the TV area. This will be a two-part thing. For this post, I made the LED TV panel and relocated the wires to make sure nothing was visible. There is a lot to cover in this post. Overall I couldn’t be happier with the outcome. The wall panel is a breath of fresh air in the space.
I am also excited and looking forward to seeing what challenges I will run into creating the remainder of pieces for this room.
For feature updates stay tuned to diycreators.com
Getting Started
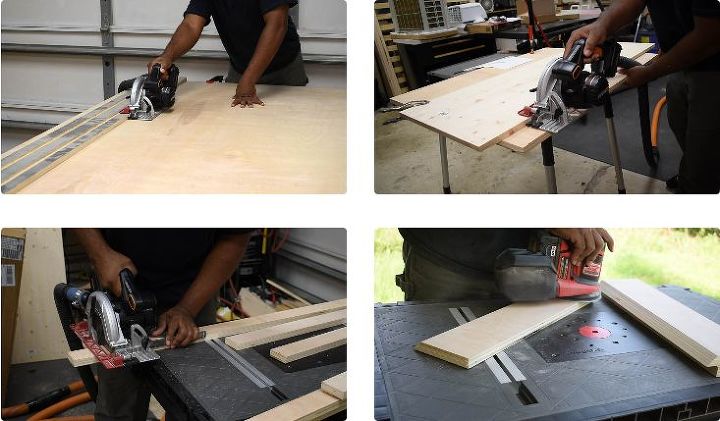
Refer to the tabs above for all the tools and materials. For this Project, you will only need one sheet of 4 x 8 plywood. I cut out the large panel first and then used the remaining parts for the frame and the French cleat. With everything cut down to size I then sanded all the parts down.
Attaching The Frame
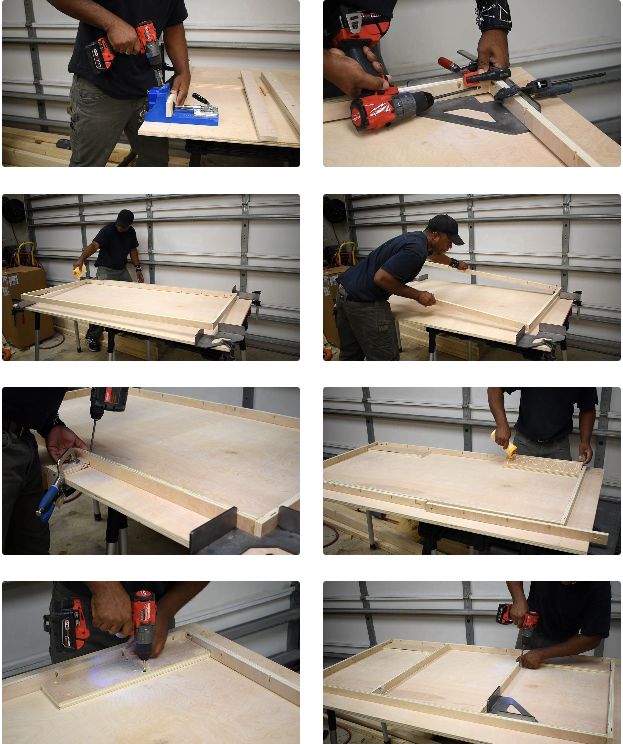
The entire frame was put together using pocket hole screws. I kept all the holes on the inside of the frame, this way none of the holes are visible along the side. After assembling the frame turn the frame upside down then apply wood glue.
Next, flip the frame over and secure it to the panel. I made sure the frame had the same spacing on all sides. For this, you can make a quick jig or an “L shape piece” for this as a gauge.
Although pocket hole screws were my go-to choice for this build, you can certainly use regular wood screws and wood glue for this setup.
Pick a side as your top. Then place the French Cleat spacers in each corner. Glue and screw this down. Be sure the screw head is below the surface of the plywood. You can also install the French cleats now.
Adding Edge Banding
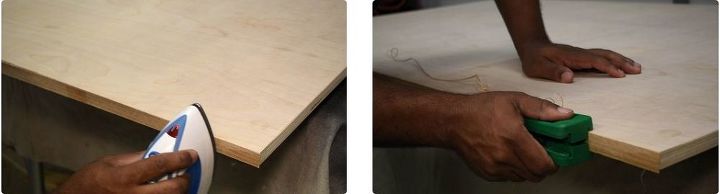
To cover the ends of the plywood I used iron-on edge banding. There are a few options you can explore like using wood filler and wrapping it with wood. For me, the easiest way is applying edge banding.
Mounting the Panel
When mounting a TV there is a lot to consider. It all depends on how you use the space. In my opinion, the height of a TV is a personal preference. When I was a technician most clients were happy with their TV around 60 inches to center from the floor in their living room. I always look to center the TV up with something in a room. It could be anything from a bed, sofa, door, or even a wall you get the point. Now that we are somewhat clear  let us move on.
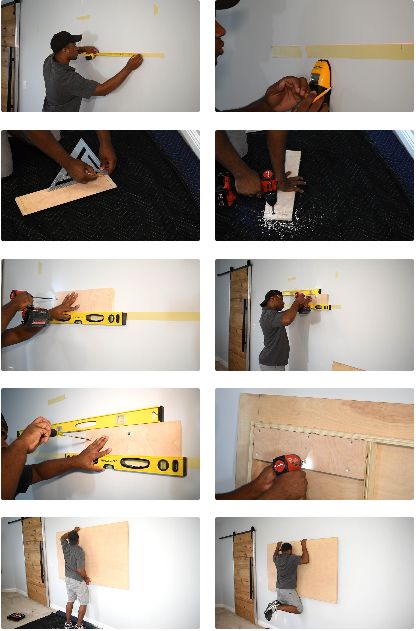
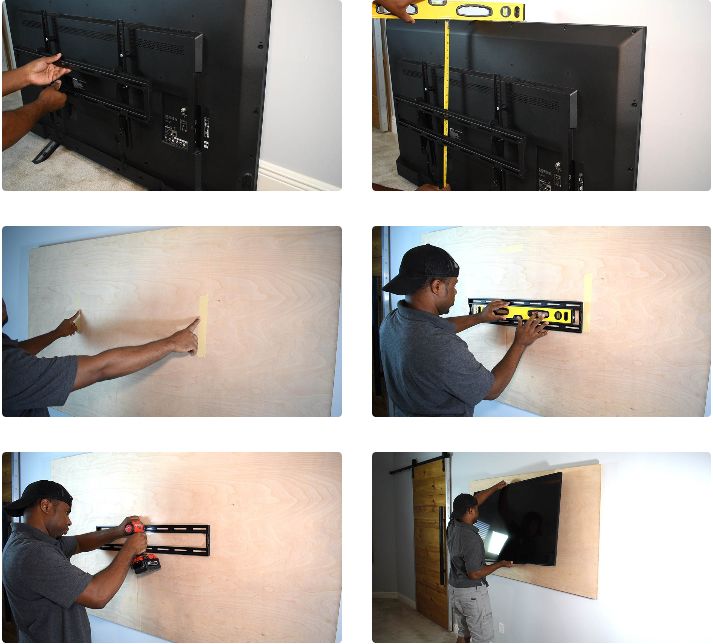
I have the top of the panel mounted just over 75in from the floor and the TV centered within. After picking my location in the room “centered with the bed”. I then stretched out masking tape so I have something to write on instead of the wall. I used a Bosch Laser line to help me lay this out, and get a visual.
I located the studs in the wall using a stud finder. There are a total of two French cleat attachments. I mounted the first one on two studs, this kept things straightforward. Next, I measured the panel to find the distance between the French cleats and then transferred the spacing from that to the wall. The second French cleat only crossed one stud. In this case, I had to address things differently. I have used these toggle bolts a lot in the past so this was my go-to option for the side that didn’t have a stud. These bolts are heavy duty and work well for mounting large objects.
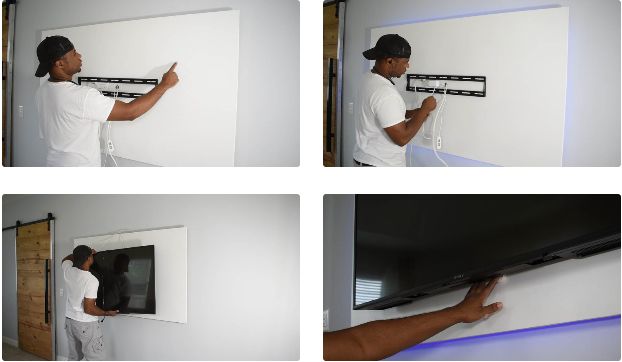
If you have not already, go ahead and installed the French Cleat to the panel. Then place to panel on the wall and see if everything lines up. I gave it a quick hanging test to make sure it’s properly secured to the wall.
Mounting the TV
I took off the handle and the stand from the TV. Then, I installed the brackets to the TV mounting holes. Next, install the bracket on. Measure down from the top of the TV to the bracket.
I placed two pieces of tape on the panel. The tape is an indication of where the bracket will be mounted. The TV can always be nudged side to side after installation for fine-tuning.
To set the height of the bracket I used this method. I take the measurement of the panel and the TV then I subtract the two. For example, panel =39in and TV 28in subtract the two that will give you 11in. Then divide that by 2 that’s 5.5in, place a mark 5.5in from the top of the panel down. Now, take the measurement from the top of the TV to the bracket. Take this measurement and measure from the 5.5in mark on down. This is where the top of the bracket will be.
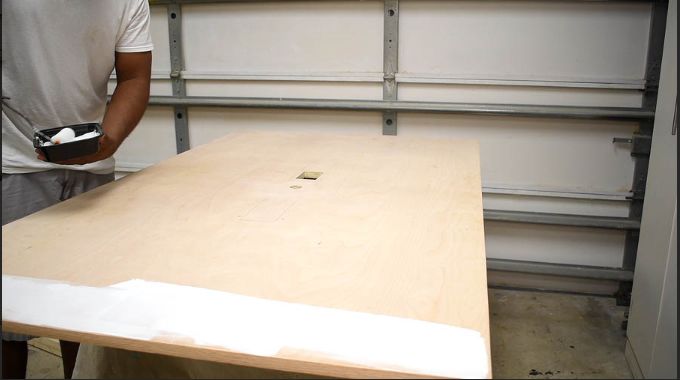
Painting
I painted the panel white mainly to blend it into the space rather than to be a focal point and demand attention all the time. With the LED’s it will become the features piece but only when the lights are off. In this scenario, I wouldn’t mind.
Adding an Outlet
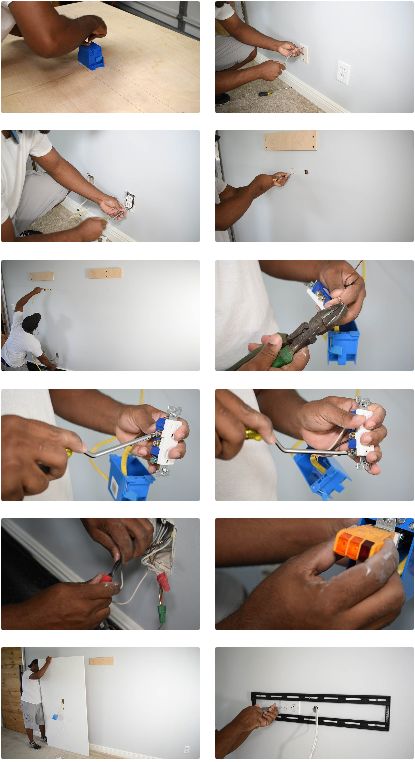
The outlet can be placed anywhere behind the TV that gives you clearance. What works for my setup may not work for yours. I cut out an opening for the electrical junction box in the panel.
Relocating the coax cable:
I lucked out here, I was able to cut a hole above the coax cable wall plate and hook the cable with my fish tape then pulled it out. These wires are usually strapped in the wall but gladly this one was not. If you don’t have this kind of luck you could barrel the coax behind the wall plate to extend the cable to the TV.
Adding Power:
I recommend turning off the breaker to this room or plug before you begin. After removing the plate cover I pulled out the outlet. Then, fish a new electrical wire up the wall. Wire up the new outlet first then address the other end next. Make sure you have enough slack in the wire so you don’t have to much trouble when you need to remove the panel. Wire to the new outlet (connect back to the gold terminal, white to the silver and copper to the green terminal). Tie the new outlet to the existing outlet (connect black to the group of black wires, White to the group of white wires and copper to the green or bare copper)
Test:
Make sure you test the outlet using a tester prior to plugging in any of your devices. This tester is inexpensive and it’s great for letting you know if you did a great job on the first try.
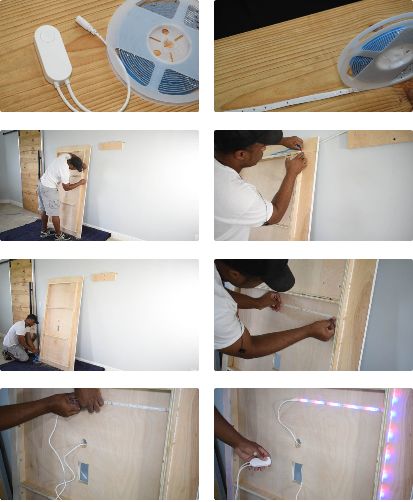
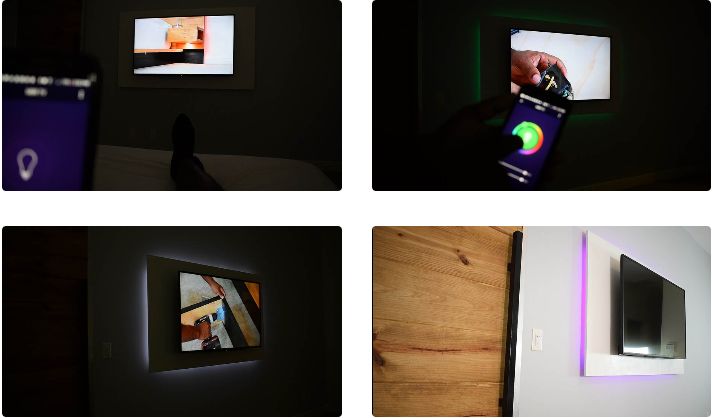
Adding the LED Strip
With all the LED projects I have made. This is the first time I am using WIFI LED. I must say they are quite nice. The control has one button. By pressing the controller button you can cycle through the different settings or you can check out the “Smart Life” phone App. Grabbing the app unleash even more controls. I won’t go into too many details maybe in a future post. For example; you can do things like selecting the color you want and the intensity, setting a timer, an operating scheduled, voice controls and much more.
Finishing Touches
The French cleat is a great design and I’ll be sure to use this in more of my builds. With Kids, you may want to add some safety to this. A great way to add security is by driving a screw through the panel and in the part of the French cleat that’s attached to the wall.
Plug in all the devices, install the TV and strap the wires.
Final
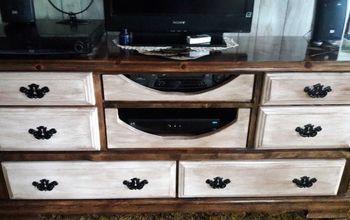
I love the way this came out. It truly adds a different feel to the space. I was finally able to get rid of a small cabinet I had in the room. It’s so nice to not see any wires.
Connect with me here:
Youtube: Subscribe for weekly Videos
Instagram: Follow for Daily Post
Resources for this project:
See all materials


Comments
Join the conversation
-
Love this! I love the lights around the box also! Very unique. Great work!
-
Omgoodness, in my gigantic photo, I nearly forgot two of the greatest… Maybelle Carter aka Ma Carter, also June and Johnny Cash.


Frequently asked questions
Have a question about this project?
Why the Plywood?????
Its completely unnecessary, you could have relocated the cable outlet and electricity right inside the dry wall!
I like the way you work. Where are you located?
Love it. Can I borow you?