


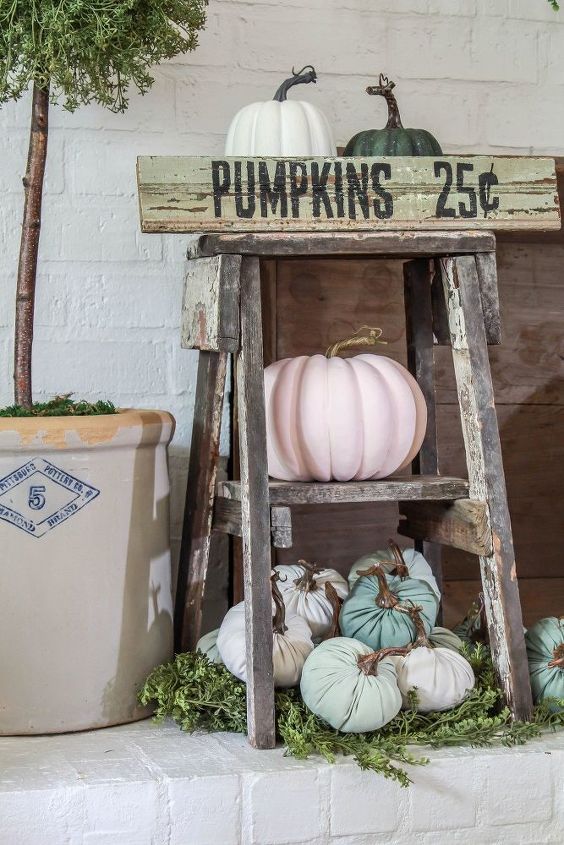
DIY Fall Decor: Pumpkin Sign
8 Materials
$5
30 Minutes
Easy
Who’s ready for fall? Y’all, this is my absolute favorite time of the year and I couldn’t be more excited!!! I’ve been working on some DIY fall decor and today I’m going to share with you the easiest project ever! No joke!
When I was pulling out my fall decor, I realized that I didn’t have any fall signs. What better way to remedy that than to create a little DIY fall decor!
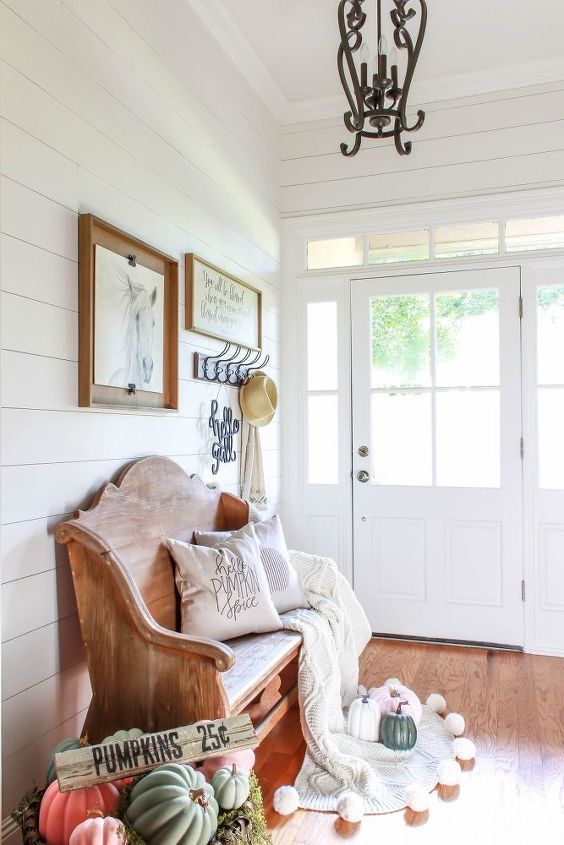
I picked up an old chippy tongue and groove board at an antique store a while back. The chippiness stole my heart and it was only about $3! I figured it would be a good project piece, but I wasn’t quite sure what to do with it at the time.
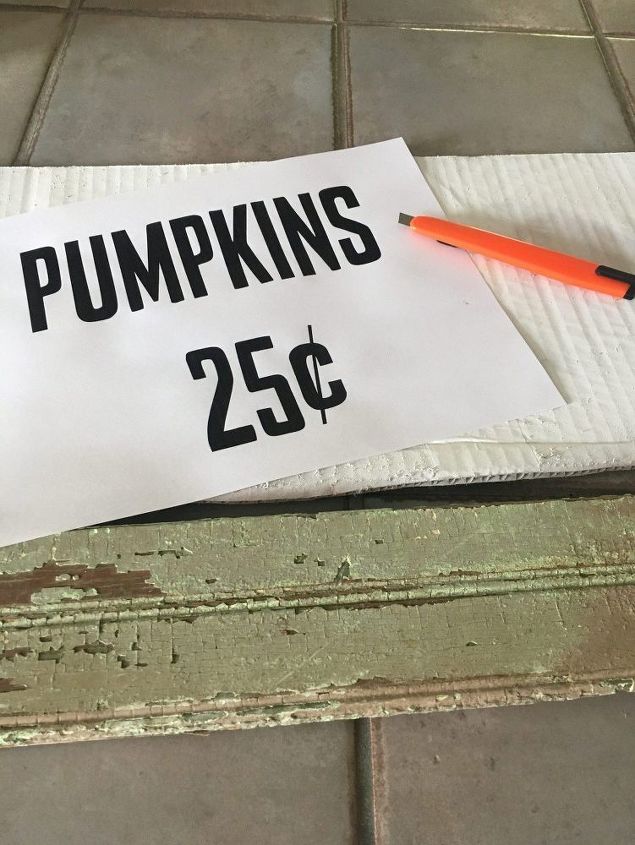
The first thing you will do is print the Pumpkin Template (you can download the template by visiting my website listed below) either cardstock or computer paper. Cardstock will be a littler sturdier and make it easier to use as a stencil, however regular computer paper will work if that’s all you have.
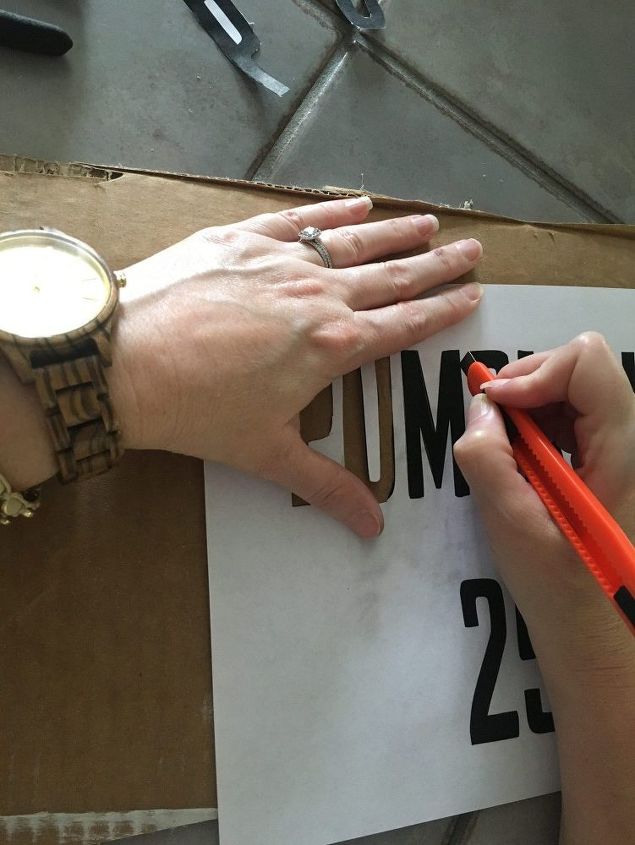
After you have this printed, you are going to use the Xacto knife to cut out the letters and create your stencil. They do not have to be perfect cuts because we are going to distress the sign and you will never be able to tell.
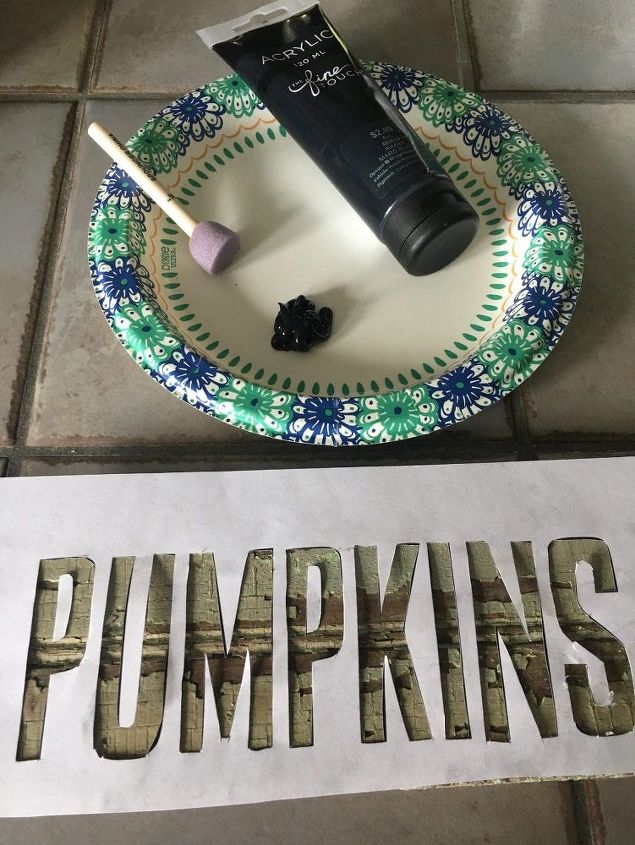
Now that you have your stencil cut out, you are going to place it where you’d like it on your board and start painting. You can tape the stencil down in a few places to hold it in place, or you can just hold down it as I did. Squirt a little of the black acrylic paint on a flat surface, such as a paper plate. Then dab your spouncer into the paint and apply it over the stencil in an up and down motion. It’s best to use a dabbing motion when painting stencils so that your paint does not go outside of the lines of the stencil. If you use a brushing motion, it will very likely go underneath the stencil.
Once you are done “dabbing” all of the letters, remove your stencil. Then take a small paint brush and touch up any areas that may need it. Once your paint dries, take a piece of fine sandpaper and lightly sand the letters to give them a bit of a distressed look.
That’s it! Is that not the easiest DIY ever! This literally took me less than 15 minutes. The hardest part was cutting out the stencil.
If you’d like to see a video demonstration of the DIY, you can head over to my Instagram and watch my saved story, “Fall Decor.”

Want more details about this and other DIY projects? Check out my blog post!
Comments
Join the conversation
1 comment
-
Thank you for the stencil idea! Love how your sign turned out and how it looks inside and outside settings.


Frequently asked questions
Have a question about this project?