


Corner Crown Moulding Cheat
2 Materials
$100
2 Hours
Medium
Our lovely period home had very small mouldings. We wanted to add something more dramatic, but we didn't want to remove the old mouldings or make difficult corner cuts. Here's our super simple cheat.

We live in a 1920's beach cottage and while it's super charming, it needed a lot of work when we moved in. You can peek at some before and afters here.
The ceiling molding in my daughter's room was nothing exciting, but the prospect of removing it and making special corner cuts were not going to happen, especially since the walls were brittle and easily damaged.
Instead, we purchased corner moulding blocks at the local hardware store.
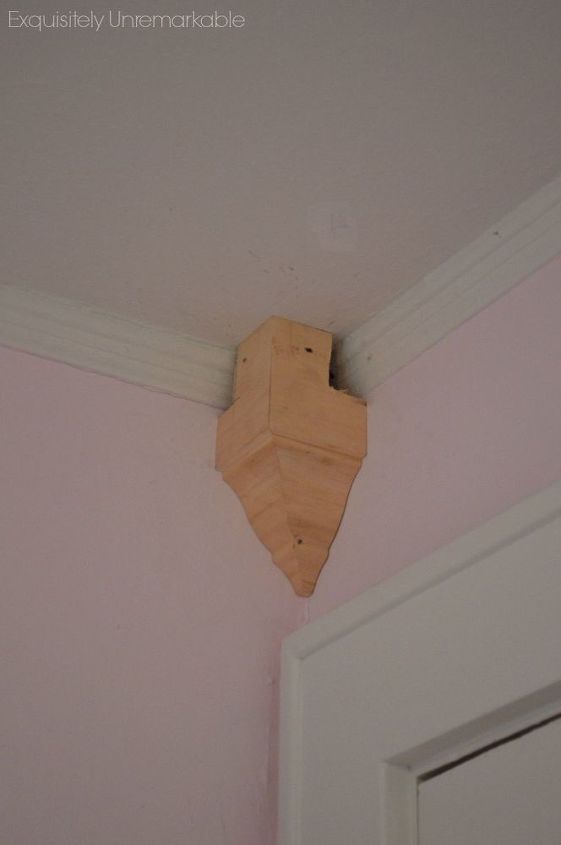
My husband notched them using a hand saw, so that they'd fit right over the existing moulding. He then made pilot nail holes in them and secured them to the wall by nailing them into the existing moulding.
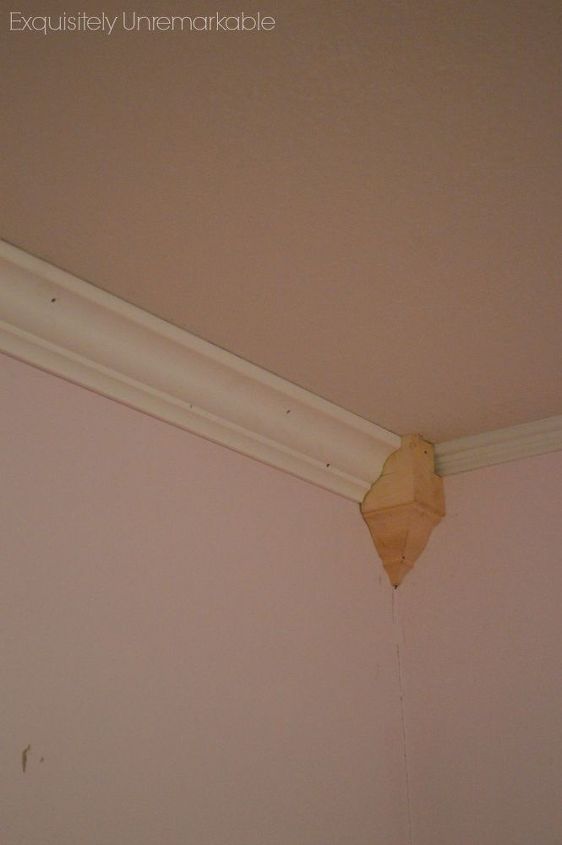
We then bought decorative moulding in a pattern of our choice and added it over the old. It projected enough to cover the notches on the corner block and my husband only needed to make very simple cuts.
He's very good at woodworking, like the time he cut back our windowsill to make room for our new kitchen faucet, but corner joint cuts are a different story. We were happy to avoid them.
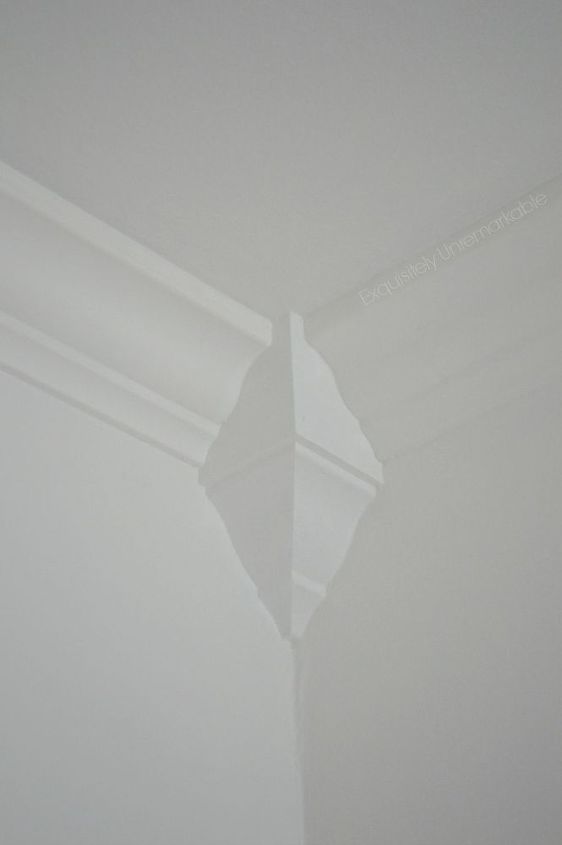
When done, we painted the trim and the walls in a pure white color and the results were super dramatic!
To see the entire room, read more about this DIY or check out a few more simple projects, you can visit my site.

Want more details about this and other DIY projects? Check out my blog post!
Comments
Join the conversation
3 comments
-
Great tip for the average DIY! I have made my own corner blocks as a decorative accent otherwise I do cut mitres.
On the window sill your hubby use a back saw and a coping saw. Neither the proper saw for the job. That's why it took so long for a short cut and not a perfect cut. But still it came out great. Just a little more sweat.
-
I love the look. You have inspired me to think about doing it in my guest room.


Frequently asked questions
Have a question about this project?