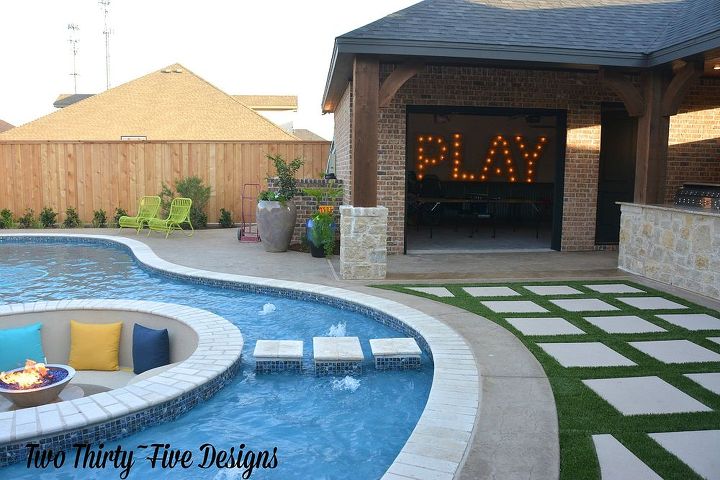
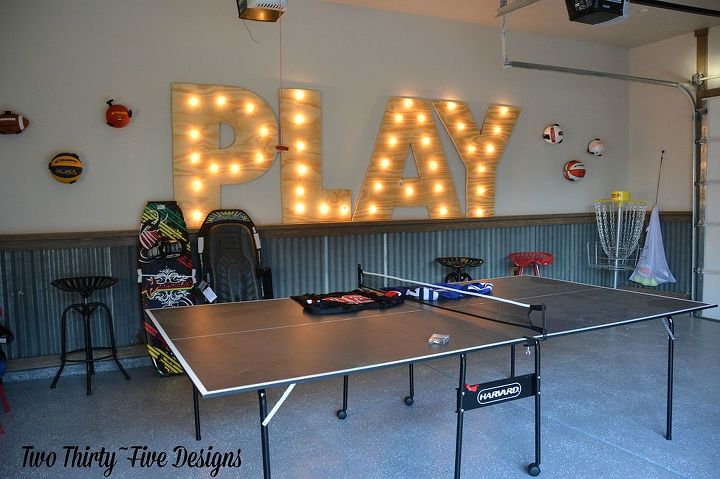
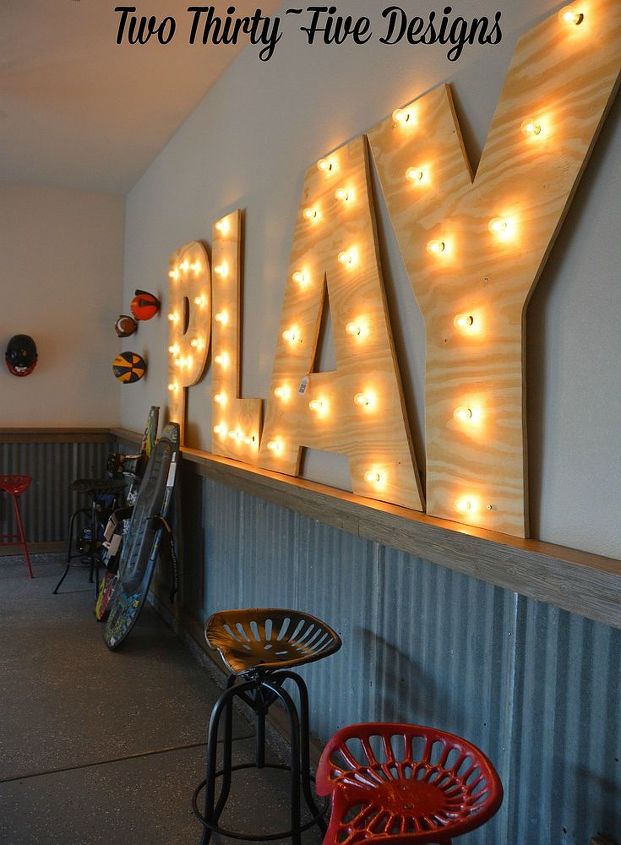
Large DIY Marquee Letters

When we walked through the backyard of the Parade Home in it’s final stages, the builders said they wanted something with impact. Something large, fun and eye-catching. We tossed around a few ideas and she mentioned how much she loved my Illuminated Letters from my Little’s Room post.
And I’m pretty sure we were both thinking the same thing at that point.
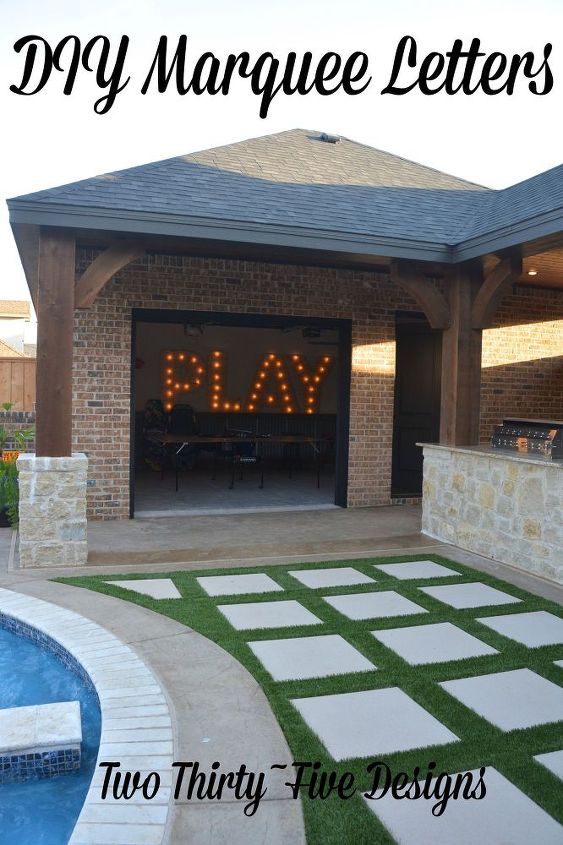
She wanted large, as big as we could go for the back porch and we were pretty close to making the letters eight foot and lean them against the wall.
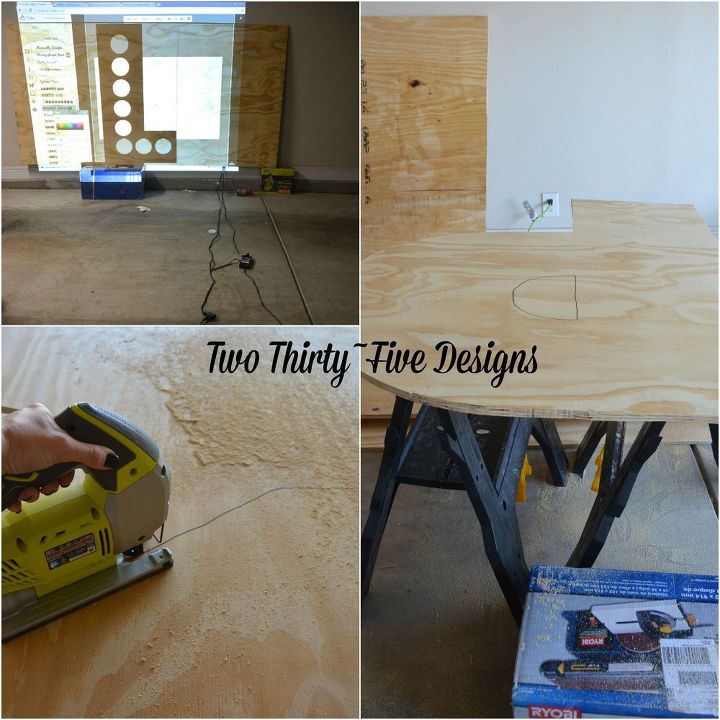

But we opted to put them in the extra garage with the glass garage door in the back yard area. Its essentially an extra room, since we decided to make it a game area for the show, and all agreed they would be perfect in there. I dropped the size down to four foot in height so we could mount them above the galvanized steel panels.
Materials:


Couple sheets of Plywood found at Home Depot. Thickness depends on if you are going to attach it to the wall or lean it. This was pretty darn thick.


Strand of Outdoor Light Bulbs per letter, found at Target.


Ryobi Jigsaw. Seriously guys….if you don’t already have one, run and grab one now. It seriously cut through this crazy think plywood like butter, like butter people.


Ryobi Corner Cat Sander. We wanted a rustic look, so I didn’t sand a ton, just the edges so they were crazy jagged.


Ryobi Drill. Use a drill bit about the same size as the bulb attachment on the strand of outdoor lights.


Screws if needed to attach to the wall.


Ryobi Impact Driver to mount the letters.


1. I set up a projector and used a photo editing software to trace my letters, according to the size that I needed.


2. After tracing, I cut out each letter with my Jigsaw, sanding any rough edges quickly with my hand sander.


3. I measured out the strand of lights on each letter, marking exactly where I wanted all the lights to be, making sure the cord was not pulled to tightly. Also, plan beforehand how you will make each plug attach to the next plug/letter.


4. Using my drill and drill bit, I drilled out a hole per light for every mark I made on each letter.


5. Carefully unscrew each bulb and run the base through the backside of the letter/each hole, and screw back in each bulb as you go.


6. Depending on if you mount your letter, lean or whatever your preference is, you can tuck and/or tape the extra cord behind the letters. I mounted mine with 2 1/2″ anchor screws into a stud and tucked the excess cord behind the letters.
Head over to the blog for more details and pictures of this project!
Two Thirty~Five Designs
Want more details about this and other DIY projects? Check out my blog post!
Go
Frequently asked questions
Have a question about this project?
Comments
Join the conversation
 2 comments
Next