


Fireplace Refacing
This tutorial demonstrates how I refaced my 1962 brick fireplace and added shiplap to the walls of my living room. This is actually my second attempt to reface this fireplace corner. I first tried to remedy the outdated brick fireplace shortly after we bought the house in 2008, but it was just a bandaid. You'll see the layers in the post and video below.
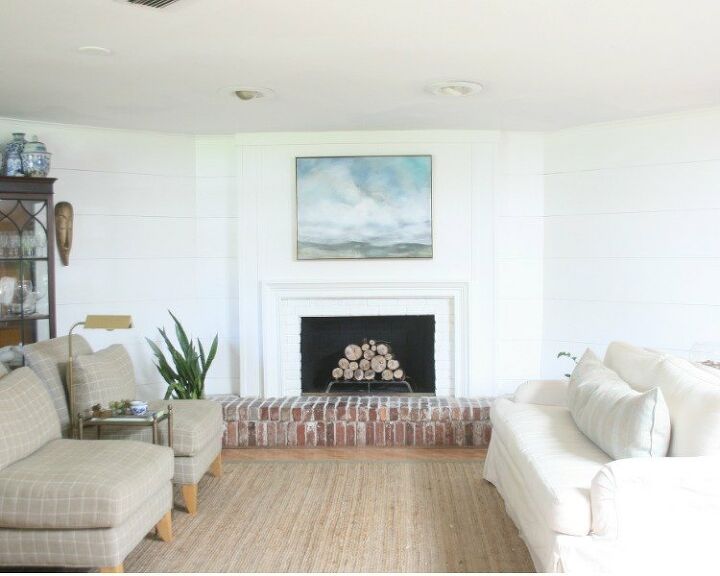
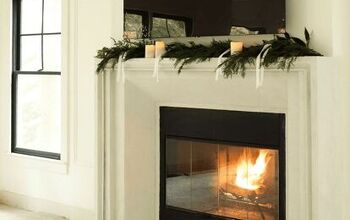
This is my finished living room and fireplace wall. At first glance it doesn't look that different, but it went through a huge makeover.
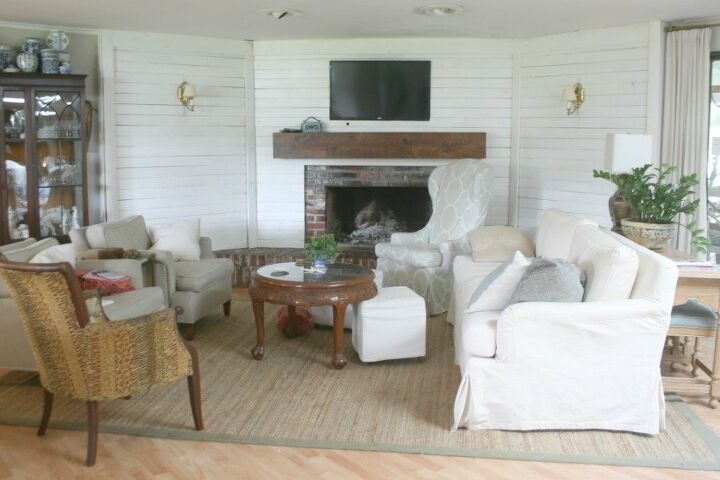
This is the before of my living room and fireplace wall. It isn't horrible but it's not good either.

First, I took down the old lumber I installed to cover/hide the original brick.
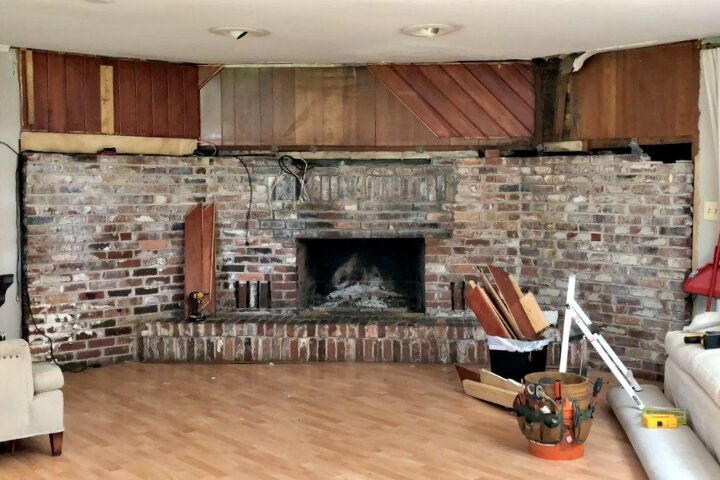
This is basically the way the wall looked when we bought our house 10 years ago. I quickly covered it with 1x4's (the picture above). My version of shiplap 10 years ago.
This is after I removed all the brick from the side walls of my fireplace. I hauled away tons of brick and rubble. The brick I plan to reuse in another project in my house. It was surprising how much cement rubble I had to throw away though.
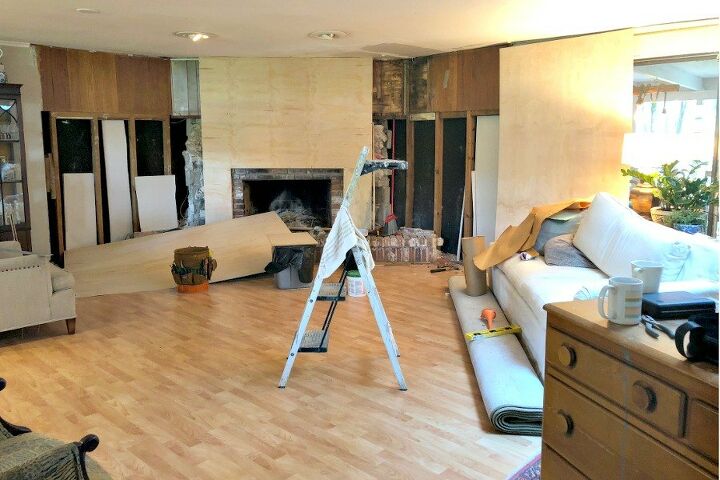
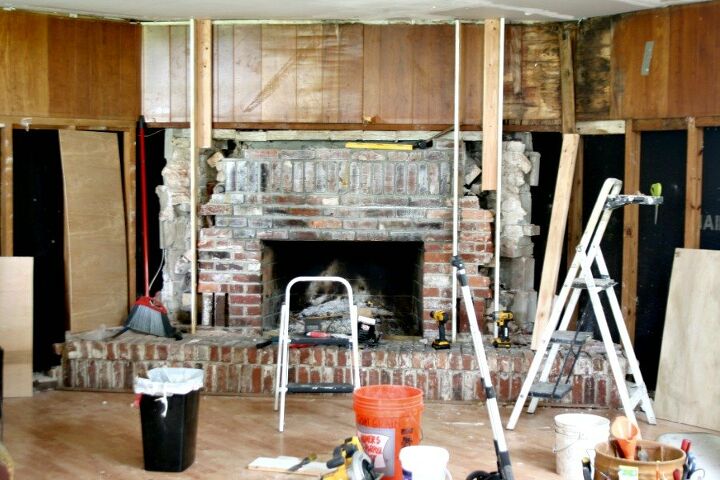
I removed all the brick from the side walls and then closed up the walls with 4 x 8 sheets of thin plywood(underlayment) to match up with the existing paneling on the rest of my living room walls.

I created the small mantle piece around the firebox with trim moulding. I then cut the same thin plywood into 12" wide strips and applied them to the walls shiplap style.
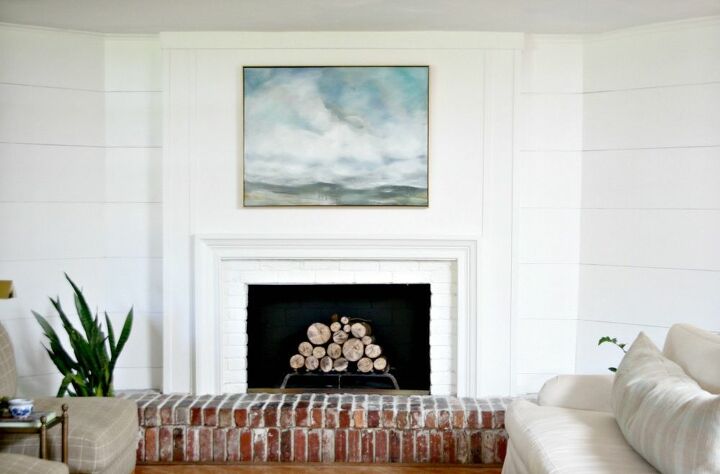
The center of the fireplace is not shiplap. I only applied the shiplap treatment to the walls on each side of my fireplace and all the way around my living room.
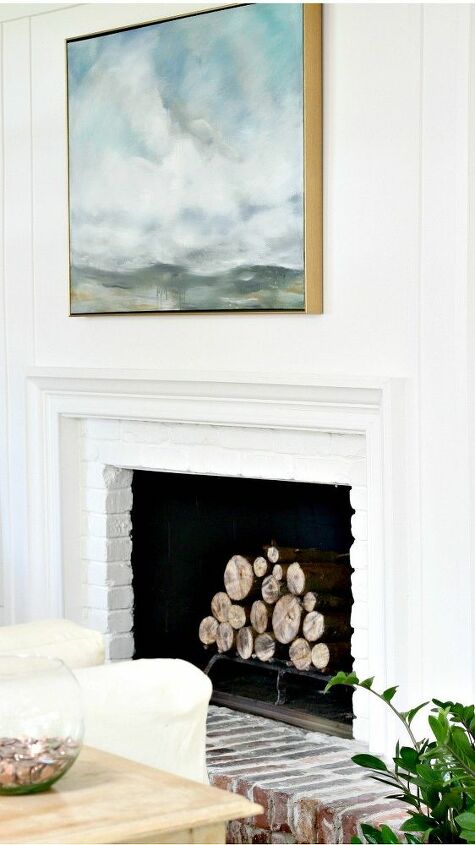
A close-up sideview of my fireplace.
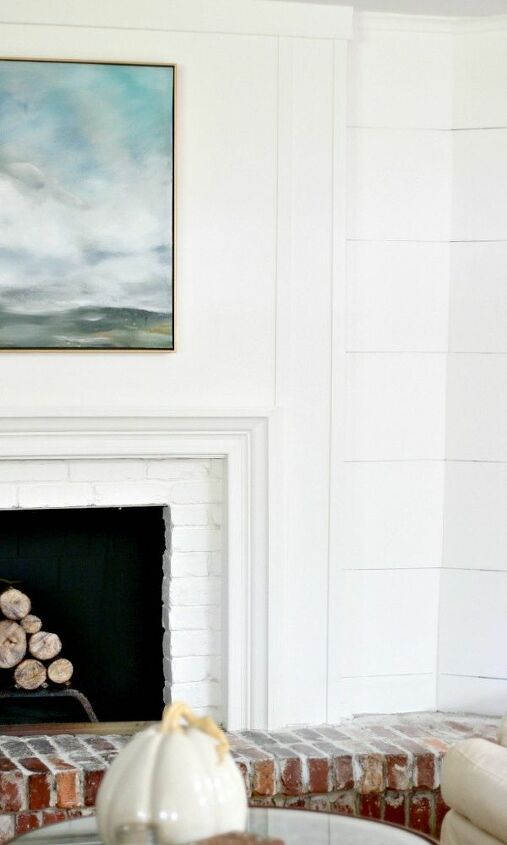
Another detail view of the fireplace.
The transformation is tremendous in person. The job was pretty simple but it did take a lot of hard work and elbow grease, but totally worth it in the end.
A time-lapse video...but stay tuned because I do stop in the middle a few times and explain the method to my madness.
Resources for this project:
See all materials


Comments
Join the conversation
-
Thank you Lisa.
-
You guys did an amazing job. We had a fireplace completely removed back in the 1990's by a professional, no easy feat. The difference in your room is like night and day, bet you wonder why you didn't do it sooner. Your room now looks magazine worthy.


Frequently asked questions
Have a question about this project?
Great job! Love what you did. Was there any insulation behind the brick, or were they interior walls?
Great inspiration for my own fam room fireplace.
Here is a before and after of my recent fireplace project.
was your ceiling grey? Beautiful. If you did the art you are really a gifted artist
What will you do with the left over brick?