


Fresh Flower Market Sign DIY
7 Materials
$10
3 Hours
Easy
Hello my favorite friends. I hope you all had a wonderful weekend!! I shared with you all last week that I’ve been anxious to spruce up my outdoor space. The weather in Louisiana has been absolutely gorgeous the last several weeks and this past weekend it was terrible. I thought we were back into winter. It was cold and rainy and just plain yucky. That pretty much ruined my plans for getting anything done outside. So instead, I decided to work on some of my outdoor projects inside. That’s where the Fresh Flower Market Sign comes in.
I knew that I wanted to make a sign for my potting table, so that was the perfect indoor project for a rainy weekend. I just cleared my island and laid a cloth across it and starting painting away. This Fresh Flower Market Sign has been one of my favorite DIYs yet. It came out even better than I anticipated.
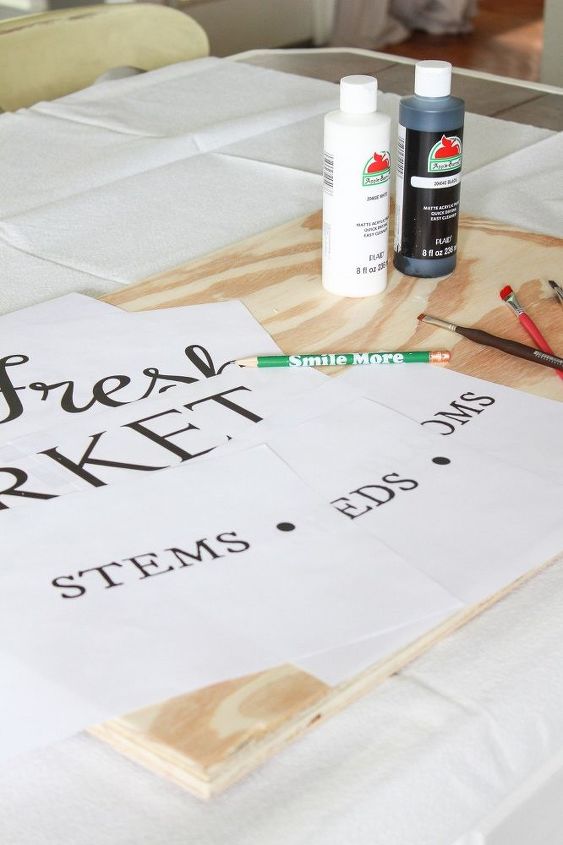
The first thing you will do is cut a piece of 3/4″ plywood to the size of 18″ x 28.” I sanded mine a little so it would be easier to paint. Then apply 2 coats of white acrylic paint, letting it dry between each coat. I used a medium sized paint brush for this.
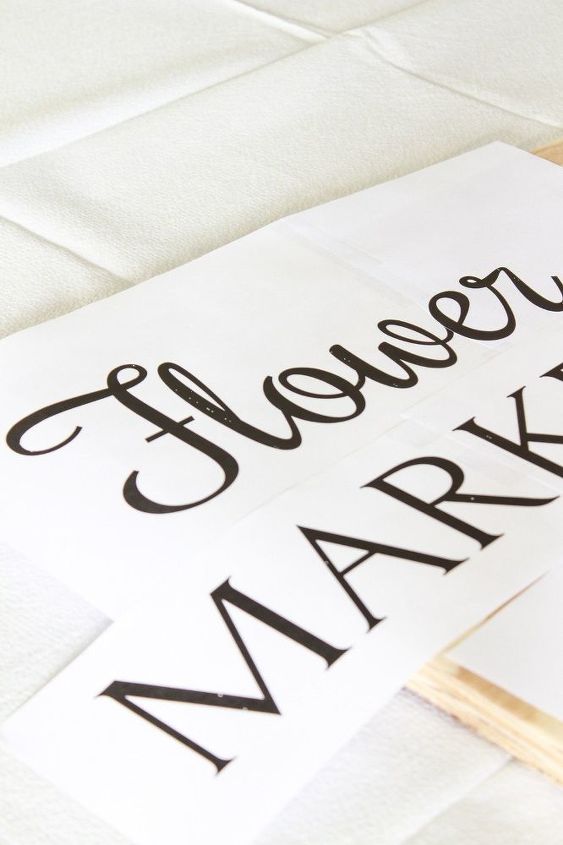
While your paint is drying, you can print out your Fresh Flower Market words and get them ready. A few of the words are too long to fit on one piece of paper, so you will just cut and tape the words together. You can see below how I taped the words Flower and Market together.
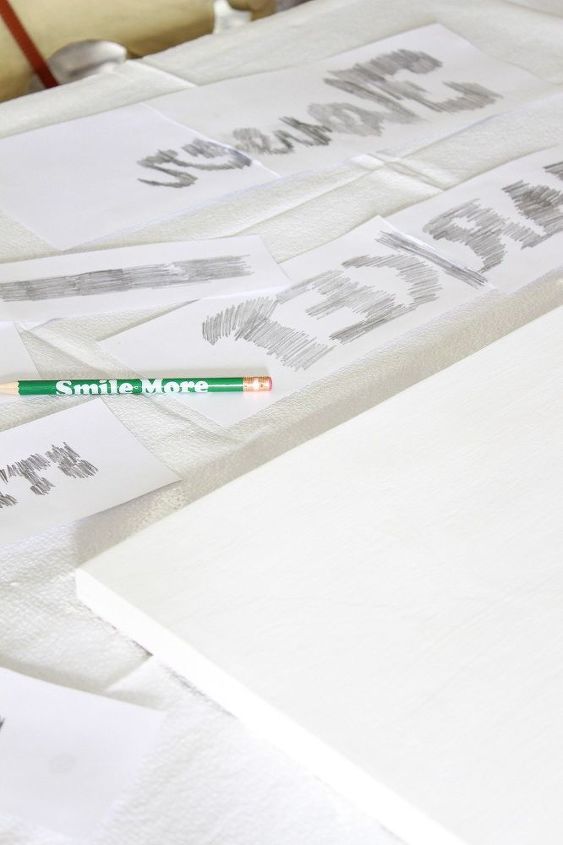
Once you have your words printed, you are going to turn the sheets over so the letters are face down and scribble over the letters with a pencil. This will create sort of like a carbon for you to be able to trace the letters on to the wood. It’s the same concept as using carbon paper, but you can’t hardly find carbon paper these days.
Alrighty, by now your paint should be dry so let’s get started. Oh, and let me just say that if you are OCD, a perfectionist, or lack patience this project will probably totally stress you out. Sooooo, you have been warned. Haha. Seriously though, this project is super easy, it’s just a little time consuming and it probably won’t be perfect.
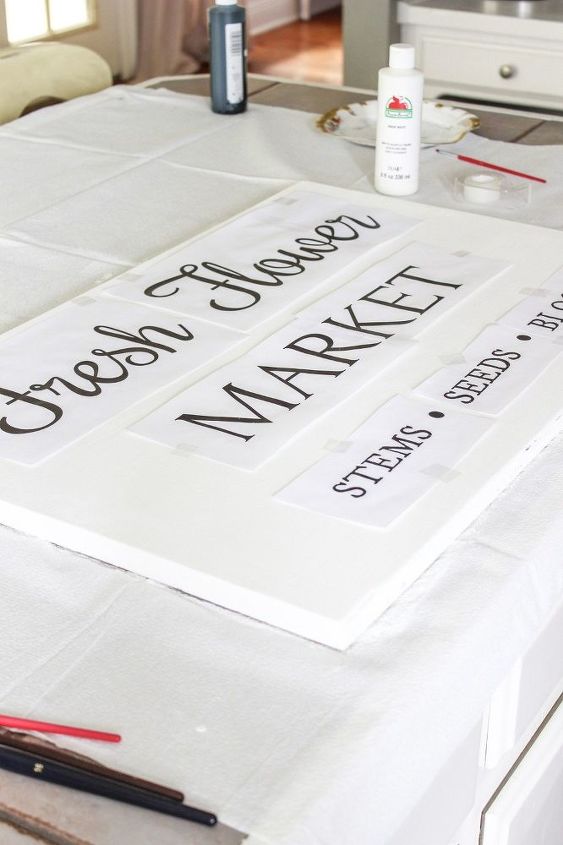
Now you are going to place your words on to the sign and try to center them the best you can. You can use a tape measure if you are OCD, but I just eyed it. I’m going to distress this sign to make it look old so I don’t mind if it’s not perfect.
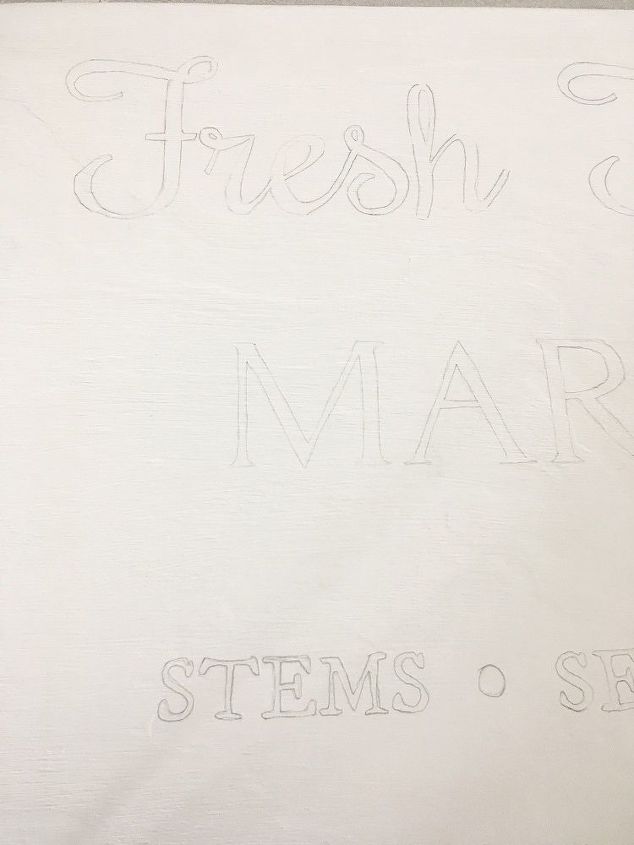
Once you have it taped down, you are going to trace the perimeter of the letters with a pencil. After you trace all of the words you can pull the paper off and you should be able to see the words on your board. Some areas may be a little light and you can just go over it with your pencil so it’s easier to see the line when you are painting.
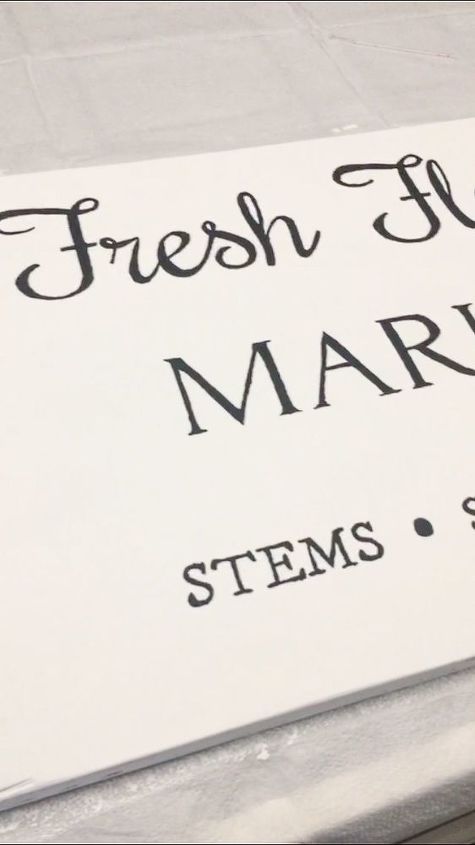
Now it’s ready to start painting. Using your black acrylic paint and a tiny paint brush, start painting your letters. Coloring outside of the lines is accepted. Remember, don’t stress because we will distress. ha. This is the time consuming part. It takes a while to paint inside of all of those letters.
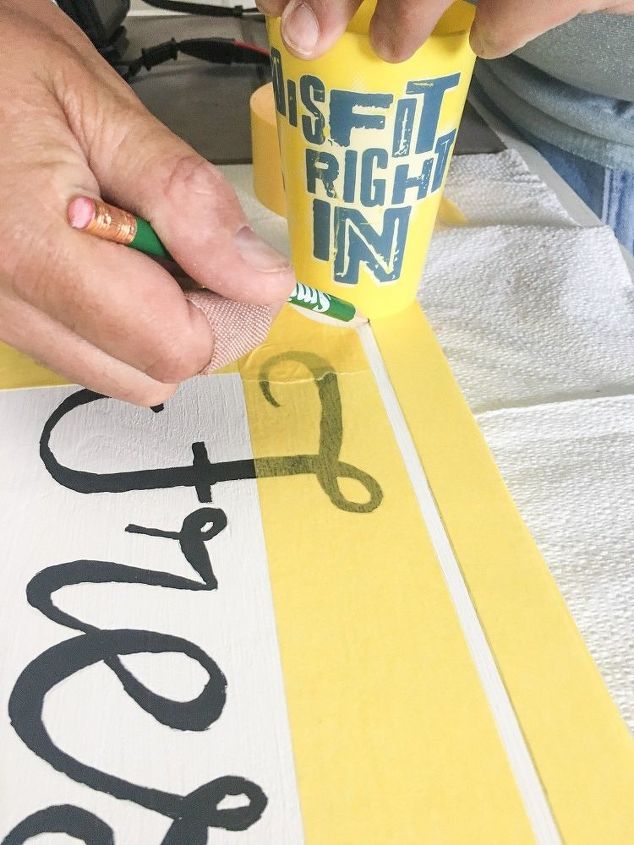
Finally. Done with the letters. Whew. Next, I decided that I wanted to add a boarder. To do this, I used a ruler and drew two lines around the perimeter of my sign, about 0.5 cm between the two lines. Then I placed painters tape above and below the lines. I used a cup to create a rounded edge at each corner (I had the hubs do this while I snapped a pic). On the rounded parts, you can overlap the tape then use a utility knife to cut away the tape.
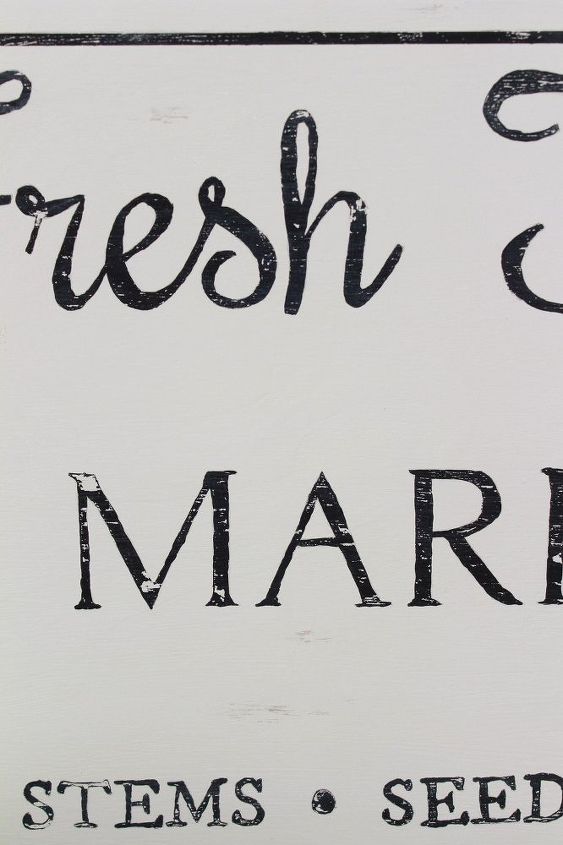
Once I had all of the tape in place, I painted the border with the black acrylic paint. I let it dry for a few minutes then I pulled away the tape. As I pulled away the tape, the tape that was covering some of the letters pulled some of the paint off of the letters. I actually really liked the way that looked so I decided to put tape on all of the letters and pull it off to give them a distressed look.
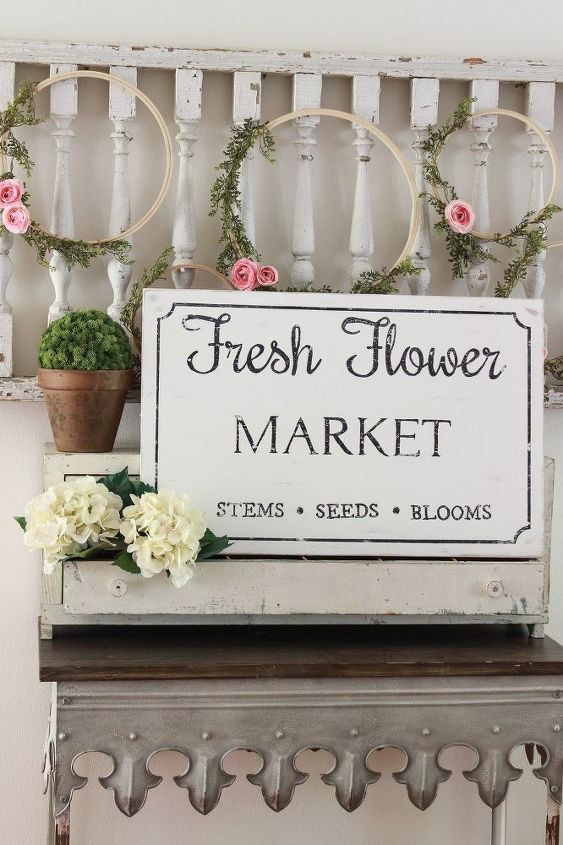
See, I told you that it would be okay if you painted outside of the lines.  I also used a piece of sandpaper to distress the edges and other random areas of the board.
I also used a piece of sandpaper to distress the edges and other random areas of the board.I hope you enjoyed this tutorial for the Fresh Flower Market Sign and maybe it inspired you to create your own sign. If you’d like to see the video tutorial of this DIY, you can head over to my Instagram and click on DIY in my saved stories.

Want more details about this and other DIY projects? Check out my blog post!


Frequently asked questions
Have a question about this project?