


How to Get the Vintage Corbel Look
9 Materials
$40
1 Hour
Easy
Hello friends. I hope today finds you doing fabulous. I must be honest, I am struggling with this time change. Don’t get me wrong, I love the extra daylight hour. It gives me more time to work on my projects. But let’s just pick a time and go with it, right? This back and forth is too much on this girl. Oh well, I guess it is what it is and eventually I’ll get used to it (right before it changes again). Anyhoo, today I’m going to show you how you can get the look of a vintage corbel using a brand new store bought corbel (without paying hundreds of dollars). Ready? Okay, let’s do this!
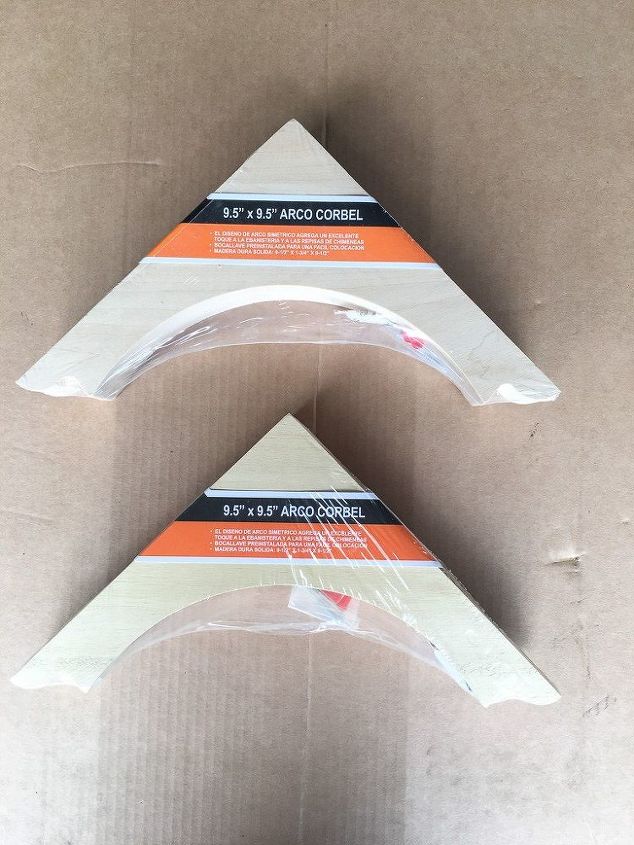
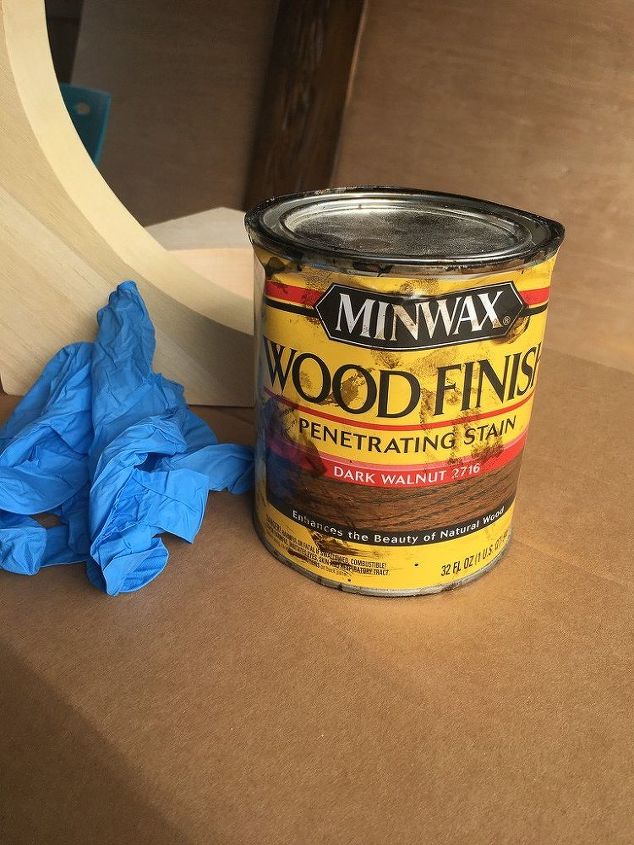
he first thing you are going to do is stain your corbel(s). I picked my corbels up at my local Home Depot, but there are many on Amazon to chose from as well. You can use an old t-shirt or a paint brush to apply the stain. I used Minwax in Dark Walnut to stain mine, but you can use anything you have on hand. The reason for staining is so that when you distress it, the dark wood shows through. You can even use a black paint, if that’s what you have on hand.

Go ahead and mix up your milk paint now and set it to the side. I used Miss Mustard Seed’s Milk Paint in Ironstone. You will want to give it another good stir right before you use it. If you’ve never worked with Milk Paint, you can check out some of my tips for using it { HERE}.
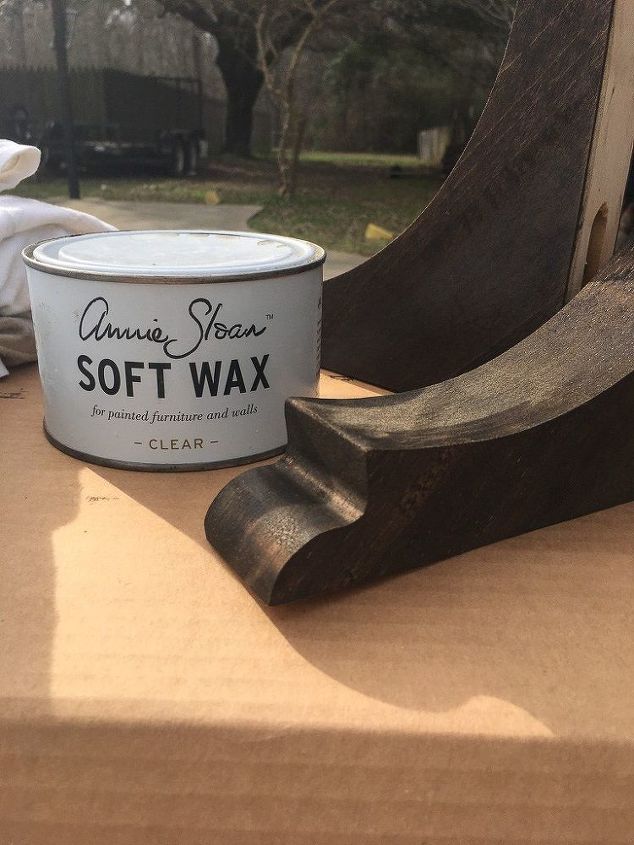
Once the stain is dry, you are going to apply a resisting agent, such as a wax or oil. I used Annie Sloan clear wax, because again, that’s what I had. I applied mine all over the corbels, because I wanted them really chippy to create a vintage corbel look. You can apply it to certain areas, if you prefer it not to be as chippy.
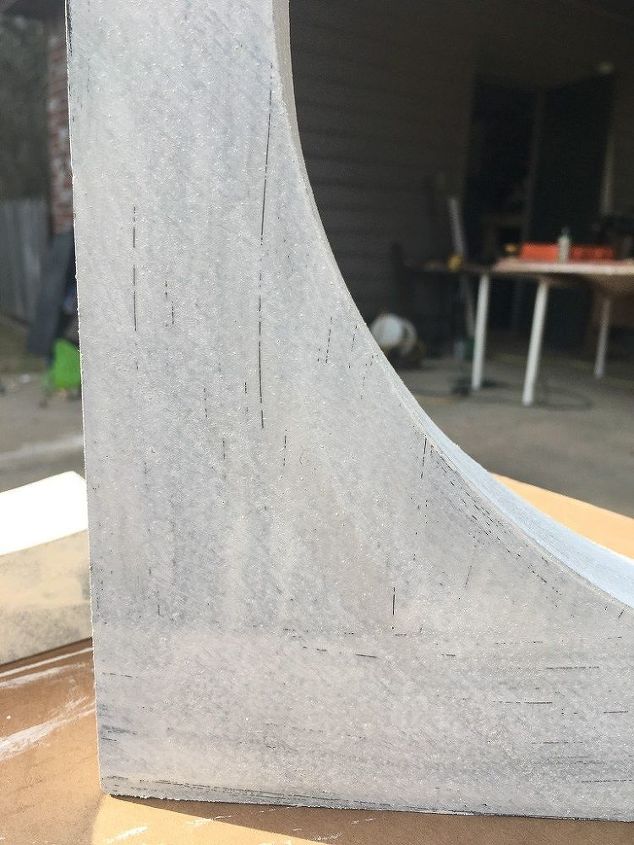
Right after you apply your wax, paint the corbels with milk paint. I used 2 coats, letting it dry between the coats. It dries pretty quickly. As the paint dries, you will see it start to crackle and chip. Yay!! This is what we want!
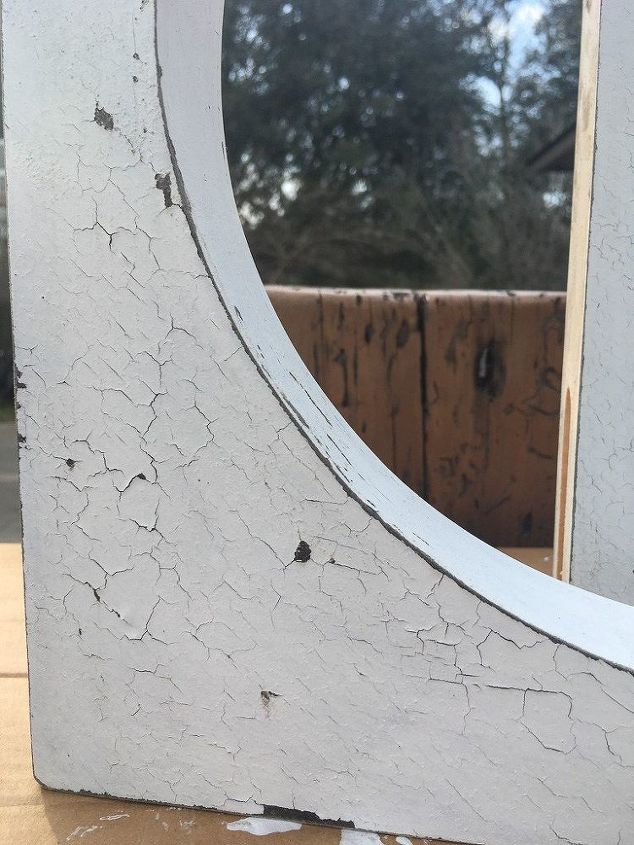
Depending on the chippiness (I don’t think that’s a word, but I like it) you want, you can use a putty knife to scrape away as much of the paint as you’d like. I also used sandpaper to go around the edges and distress some.
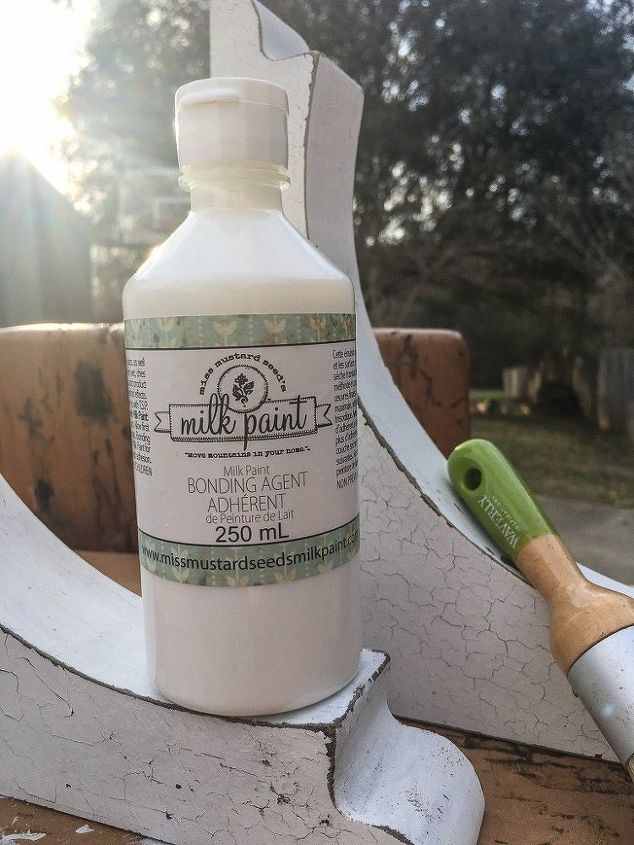
Once you get the look that your little heart desires, you are going to seal it with the bonding agent. This is so the paint doesn’t continue to chip off. Bonding agent is also good to use on your authentic chippy pieces, especially if the original paint may contain lead and it’s continuing to chip off.
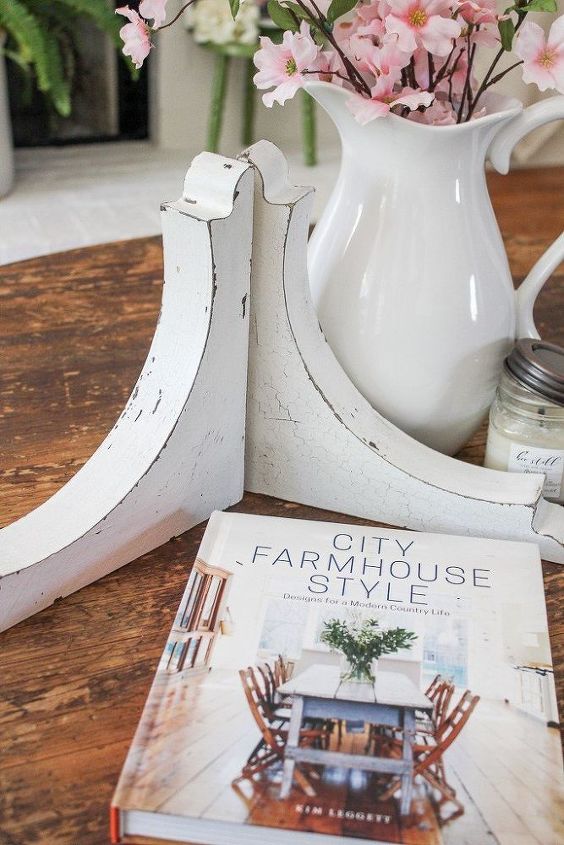
Now for the fun part. You get to style these babies in your home. These are great to use under a piece of wood for a bookshelf, as book ends, or just cute decor pieces. I’m sure you have many other great ideas for their use as well.
I originally made these to go under a shelf that we haven’t put together yet, so in the meantime they are hanging out on my coffee table.

Want more details about this and other DIY projects? Check out my blog post!
Comments
Join the conversation
1 comment
-
Love this look!! Thanks for posting


Frequently asked questions
Have a question about this project?