


DIY Bed Liner for Jeep Interior Floor
3 Materials
$140
3 Days
Medium
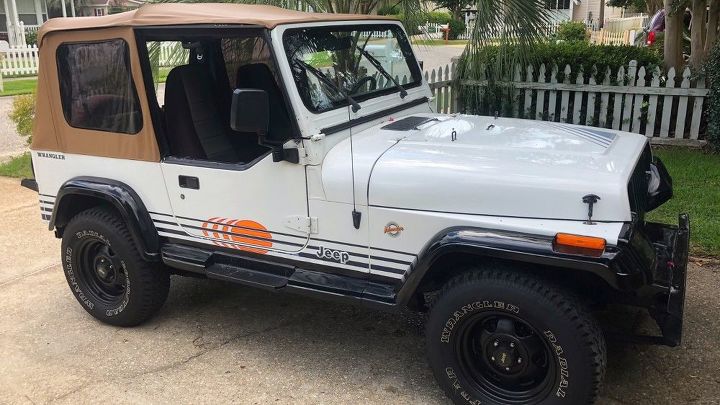
My wife and I purchased a 1992 Jeep Wrangler YJ Islander recently to use as a beach cruiser. We chose this Jeep Wrangler YJ Islander because it fit our lifestyle (beach/island) and had all original factory parts. Also, it didn't have things we didn't want or need such as a lift kit, massive tires, and extravagant mods. Ultimately, we like the classic look of this YJ Islander.
We sold our street legal golf cart I built back in 2012 because we are tired of spending $1200 every other year on new batteries.
In case you didn't know, batteries are like children. They like to drain their energy, recharge, and repeat. Since our golf cart was parked for 7 months out of the year, we had to replace batteries very often. Also, we purchased our 1992 Jeep Wrangler YJ Islander for the same price as we sold our golf cart.
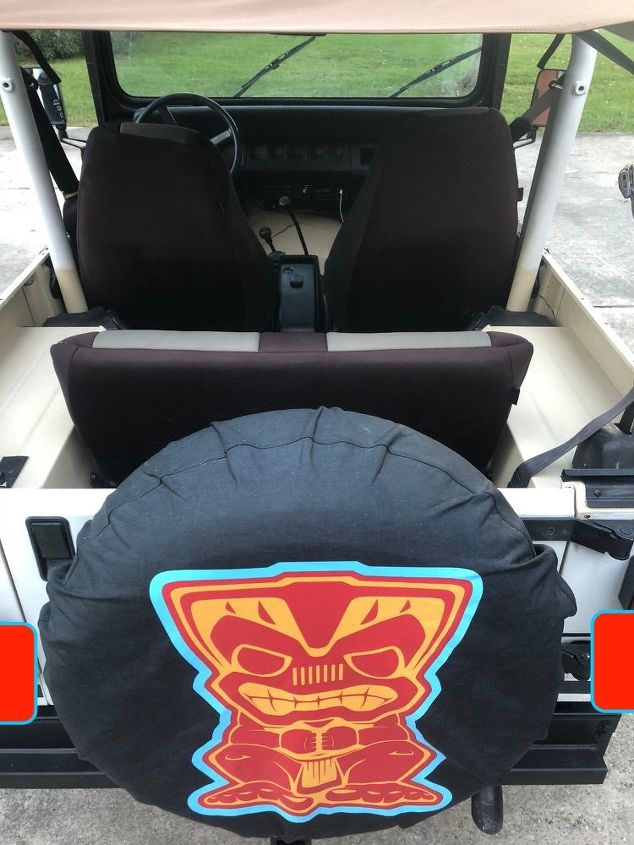
Jeep Interior Tub Rust for Jeep Wrangler
With only 99,500 miles on the 1992 Jeep Wrangler YJ Islander, the Jeep YJ was in great shape with no rust on the frame.
However, the carpet was nasty and the interior tub had rust along with small holes. Also, most of the rust was at the driver and passenger side floor board caused by 26 years of wet feet. After many hours of DIY spray bed liner research, I decided to install bed liner in the Jeep Wrangler interior tub. So, I purchased the Raptor Tintable Spray Bed Liner Kit (Beige) and got to work.
{
"id": "5122776",
"alt": "",
"title": "",
"video_link": "https://www.youtube.com/embed/JwoifTAF4-c",
"youtube_video_id": "JwoifTAF4-c"
}
{
"width": 634,
"height": 357,
"showRelated": true
}
Remove Everything from Jeep Interior
Once summer ended, I parked my Jeep Wrangler YJ Islander in my workshop to prep for the DIY spray bed liner.
First, everything within the interior tub of my Jeep had to be removed. This included the carpet, front seats, rear seat, seatbelts, center console, side doors, rear door, and any other hardware I was unable to tape off.
Remove Seats and Seatbelts
To start, I removed the front seats and seatbelts.
I realized very quickly this project was going to take much longer than I anticipated. Why? Each bolt took me an average of 10 minutes to remove. More on rusted bolts in a later section.
Jeep Interior Carpet Removal
Once the seats were removed, I easily removed the carpet. The carpet was filthy and dry rotted, but it was held in place by adhesive strips and cut to fit the Jeep. Ultimately, the carpet can be removed with the seats in place just as easily as with the seats removed.
Organize Jeep Interior Bolts and Screws
I used a bolt organizer along with sticky notes to keep track of each bolt I successfully or unsuccessfully removed. This is very important because many of the bolts are different
For example, the 4 bolts which secure the front seats to the interior tub are 3 of one type and 1 of another type.
Quick Tip: Use a Bolt Gauge to Determine Bolt Sizes
Only a few bolts in my Jeep were the type/size they were supposed to be according to the official manual. As a result, I wasted time and money purchasing incorrect bolts.
Therefore, I highly recommend you spend a few dollars and purchase a bolt gauge to determine the exact size of the removed bolts. Bolt gauges help you determine the following bolt most important attributes in order to purchase a suitable replacement:
- SAE (US) or Metric
- Thread Pitch
- Diameter
- Length
Furthermore, your local big box stores (HD or Lowes) will likely not have the bolts you need. I purchased the bolts I needed from Amazon. Most importantly, purchase Grade 8 bolts as replacement bolts. For your convenience, I've included a list of replacement bolts I purchased along with other useful tools/materials for this section.
Best Ways to Remove Rusted Bolts from Jeep
The bolts used in my Jeep and many older Jeeps (and maybe newer ones as well) are Torx bolts, which are likely rusted and very difficult to remove.
Instead of grabbing a breaker bar and violently tugging on the bolts to remove them, I have 2 tips that may help you remove rusted bolts from a Jeep.
PB Blaster
First, apply PB Blaster to the perimeter and under the bolt if possible. Next, allow it to sit for 24 hours. Then, try to remove the bolt by slowly turning with a breaker bar.
Apply Heat to the Bolt
If PB Blaster doesn't work, use a mini torch on the head of the bolt. Heat the bolt for 45 to 60 seconds. Then, try to remove it. Ultimately, there is a 75% chance the bolt will break if the Jeep is 10+ years old. So, be patient and try your best to remove it the natural way (i.e. without breaking it).
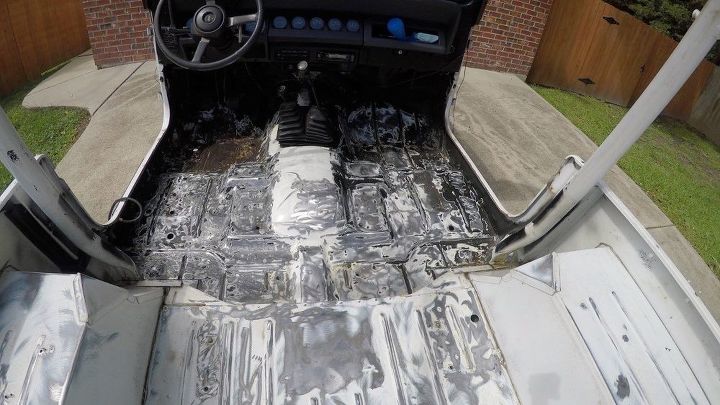
Prepare Jeep Interior Tub for Spray Bed Liner
The most important step in my DIY Spray Bed Liner project was the preparation.
It is so important to prepare the Jeep Interior Tub appropriately. This allows the Raptor DIY Spray Bed Liner to properly adhere and perform as it was intended to. My Jeep Wrangler YJ Islander had a coat of black paint or something else that was applied very poorly. Also, bondo was used in various places to patch holes. However, the bondo was also applied poorly with many high spots. I had my work cut out for me in order to get this surface ready for spray on bedliner.
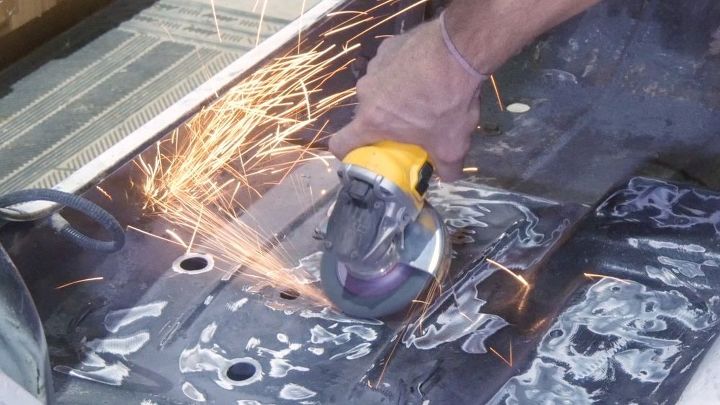
Remove Rust from Jeep Interior Tub
First, I needed to remove the loose and flaking rust for my Jeep. I used my angle grinder with a grinding disc to knock down the high spots. I lightly went over the surface in order to not puncture more holes in the interior tub.
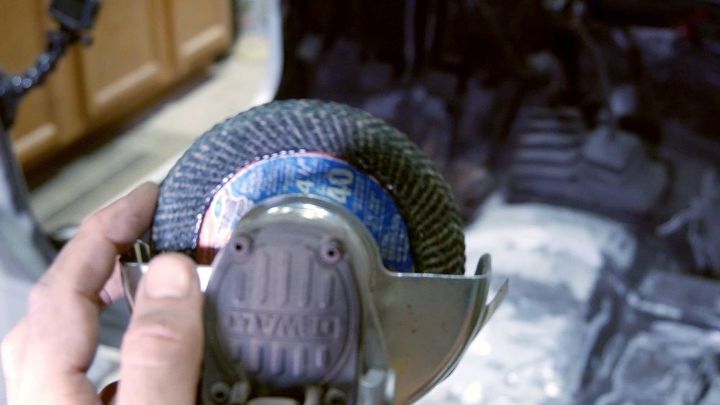
Next, I used my 40 grit metal sanding disc to get a smooth surface.
Keep in mind, perfection is not needed in this step. Complete rust removal was not necessary as I use a product in a later step to address this issue.
The goal is to simply remove the loose rust and achieve a somewhat smooth surface.
Best Way to Fill Small Holes in Jeep Wrangler Tub
As I previously mentioned, the driver side and passenger side floor had various small holes I needed to patch. Each hole was the size of a shirt button or smaller.
Instead of using bondo on these small areas, I used an epoxy filler made by POR15. I highly recommend this product because it worked very well.
Sand Smooth Areas and Remove Tacky Strips
Before sanding, I used adhesive remover to remove the tacky strips used to hold the carpet in place.
I sprayed the tacky areas and removed the material with a scotch brite pad or flat head screwdriver.
The original paint was in very good shape in the rear of the Jeep.
So, I used my random orbital sander with 80 grit sandpaper to lightly scuff up these areas and remove embedded dirt.
Rust Prevention
How to prevent rust from coming back? To prevent rust from coming back. I used POR15 on the interior floor with rust and any other areas with minor rust.
Although POR15 is normally used on the undercarriage and frame, it works just as well any place rust exists.
POR15 is a rust-preventive paint designed for application directly on rusted or seasoned metal surfaces. Furthermore, it dries to a very hard, non-porous finish that won't chip, crack, or peel. Additionally, it prevents rust from reoccurring by protecting metal from further exposure to moisture.
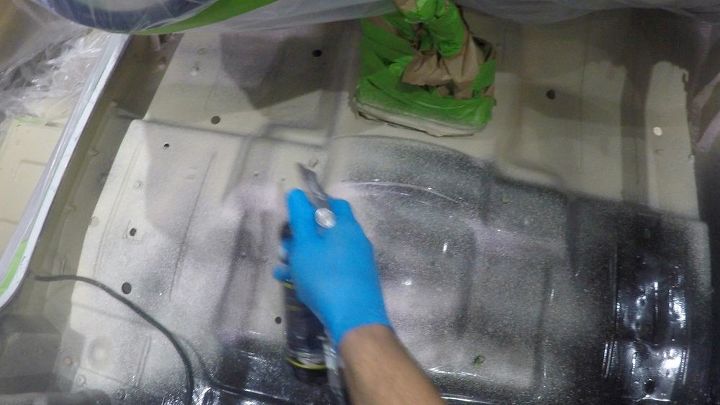
Degrease and Etch Jeep Interior Tub
Before I applied POR15, I prepared the surface with the included degreaser and metal etch in the POR15 kit.
First, my son and I rolled the Jeep out of the garage and I sprayed degreaser on the entire interior tub. I let this sit for 15 minutes.
Then, I applied the metal etching with a spray bottle and made sure to coat the exposed metal.
My son and I let this soak for 30 minutes, rinsed with water, and rolled the Jeep back into my workshop.
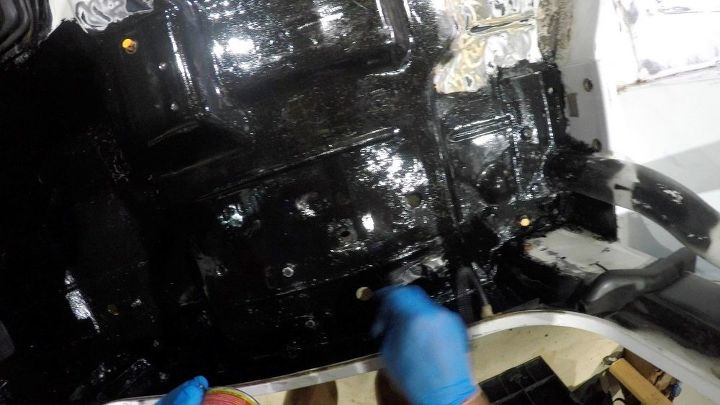
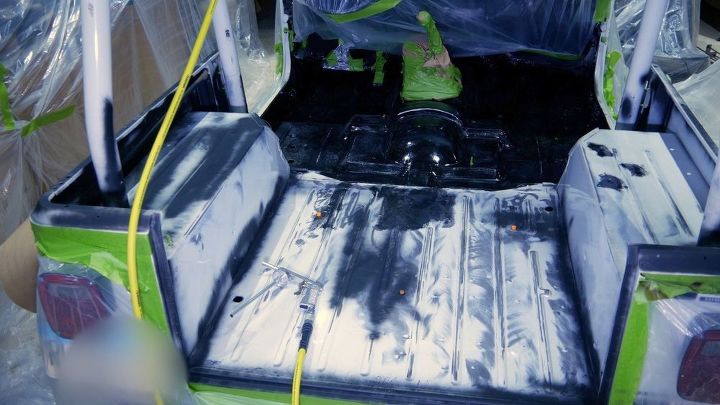
Apply POR15 to Jeep Interior Tub Rust
First, I applied POR15 to each floor board and to all areas with surface rust with a chip brush. POR15 is really thin and goes a very long way as I only used 2 small cans. Furthermore, POR15 dries quickly and it is very hard. Be sure to wear a respirator and gloves when applying POR15 as it has a very strong smell.
Next, I allowed this to dry overnight and applied a second coat making sure to get all areas I missed the day before.
Hand Sand POR15
Once the POR15 was completely dry, I lightly hand sanded with 80 grit sandpaper to lightly scuff the smooth surface. Ultimately, I did this to ensure the DIY spray bed liner would properly adhere to the surface.
Mask Area and Plug Jeep Bolt and Screw Holes
First, I used painters tape and plastic tarps to cover the Jeep and surrounding areas. This was my first time applying spray bed liner, so I was unsure about the overspray.
Next, I used orange ear plugs and rolled painters tape to cover the bolt and screw holes in the interior of the Jeep.

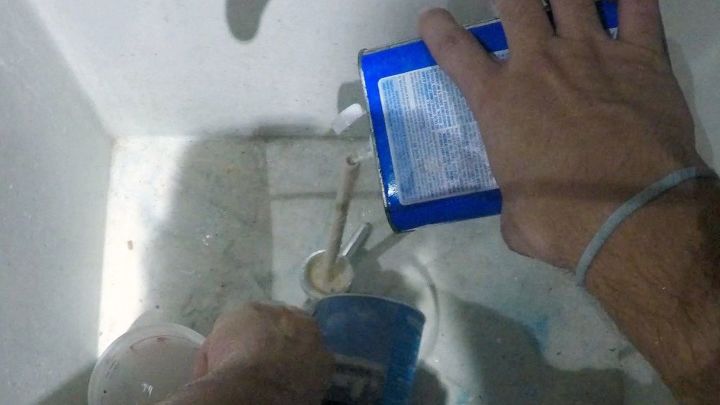
Mix Tintable Raptor Bed Liner
Finally, it is time to spray bed liner in my Jeep Wrangler interior tub.
The Raptor Spray Bed Liner Kit comes with 2 bottles, 2 hardener cans, 2 bottles of beige tint, and a spray gun. Ultimately, this kit gives me 2 full coats and I hoped this would be enough for the interior tub of my Jeep Wrangler YJ Islander.
First, I poured the hardener and the beige tint in the bottle according to the instructions.
I quickly realized there was not enough room to properly mix the material by shaking it. Raptor Liner's slogan is "Fill, Shake, Shoot." Well, there wouldn't be much 'shaking' going on in this bottle because there wasn't enough room.
Obviously, this is an issue raptor liner needs to address.
As a workaround, I poured the material in a mixing container and then poured it back in the bottle over and over until I felt it was mixed.
Later, I found a YouTube video of a person recommending a more viable workaround which you will read in a later step.
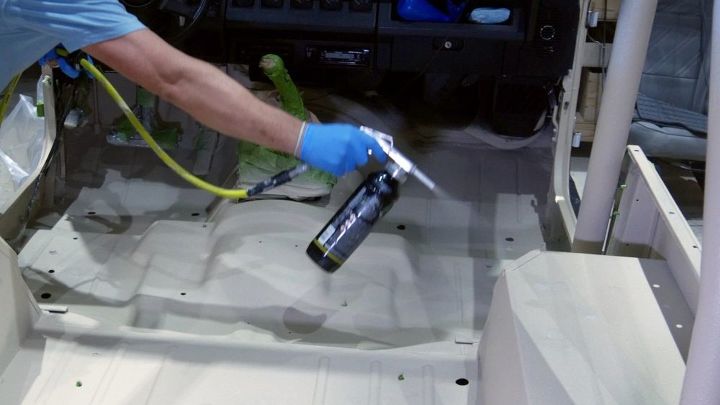
Spray Bed Liner for Jeep Wrangler Interior Tub
It's important to test the air pressure on a test piece to ensure you get the consistency you want.
The amount of air pressure determines the consistency of the material. 60 psi was my preferred setting. First, I sprayed the Jeep tailgate. Next, I focused on the hard to reach places like behind the gas pedals, around the base of the roll bars, and in the corners. Also, I installed 2 air vents in my workshop and these did a great job at removing the fumes.
Ultimately, I wanted to make sure to get a thin coat on the entire interior of my Jeep. When I felt the bottle getting lighter, I sprayed the outside edge of the Jeep. I was surprised at how much area I covered with one bottle. Once the material dried, I could see where I needed to spray more material.
Quick Tip: Spray Bed Liner in hard to reach places
Be sure to carry a chop brush with you to get the hard to reach places. The spray gun has an air hole at the top. Therefore, material will spill out if it is turned upside down a particular way.
Clean Spray Bed Liner Gun
First, I removed the Raptor Liner bottle from the spray gun.
Next, I used acetone to clean the material from all parts of the gun.
Then, I removed the tip of the gun and bottom piece and poured acetone into the gun chamber and to these pieces. I wiped each piece with a shop towel.
As a side note, I should have worn gloves when cleaning the gun. However, I ran out of rubber gloves.
This stuff dries quickly, so I decided to not use gloves and be very careful to not spill any on my hands.
Also, the Raptor Liner instructions did not specifically recommend a product to clean the spray bed liner gun. If they did recommend a product, I missed it.
Second Spray Bed Liner Coat
First, I poured all the material in a mixing container.
Next, I mixed the material with a the handle of a chip brush because I ran out of stir sticks. Then, I poured the material back into the bottle.
I focused on the areas I missed and then applied an even coat on the rest of the interior of the Jeep.
Then, I removed the tape and allowed the material to set for 3 days before installing the seats, seat belts, and door hardware.
Install Seats and Interior Hardware
Once I had the proper bolts and screws, I installed the seats and interior tub hardware.
My installation went very smooth and I want to share with you 2 important tips. The 2 tips below will make your installation go smoothly and it will also make removing the seats in the future go much smoother.
- Before you tighten the bolts, make sure to read the Jeep manual regarding proper torque. Obviously, you need a torque wrench. The unit of measure for torque that we all know, the "ft-lb," "lb-ft," or "foot-pound" is the amount of turning force applied to move one pound a distance of one foot around an axis at a radius of one foot. The same concept applies to "inch pounds".
Use anti seize lubricant on bolts. Just a little will prevent the bolt from fusing to the Jeep interior tub with rust.
Conclusion
Conclusion
I hope you learned something from this project even if you don't have any plans to apply spray bed liner in the near future. If you ever do, come on back to Hometalk and find this post. :)
I have free DIY plans for this project (and many others) available for download on my website - check those out HERE.

Want more details about this and other DIY projects? Check out my blog post!


Frequently asked questions
Have a question about this project?