


DIY PVC Pipe Halloween Decor
Are you still looking for some fun ways to add a little halloween decor to your front porch and yard this year? I've got a great DIY for you!
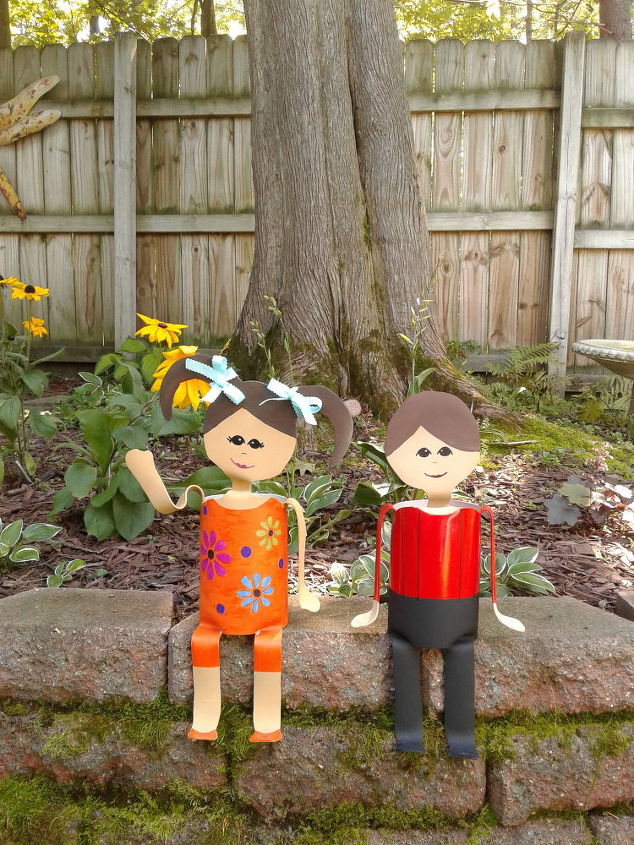
Take a pvc pipe from the plumbing section of your local home improvement store and turn it into some fun characters for halloween!
Start out by creating a pattern for your PVC. I have created patterns for many different types of birds and animals, plus 2 cute little PVC kids. I've also created patterns for Christmas and Easter, but for halloween, I made a skeleton, a ghost and a pumpkin.
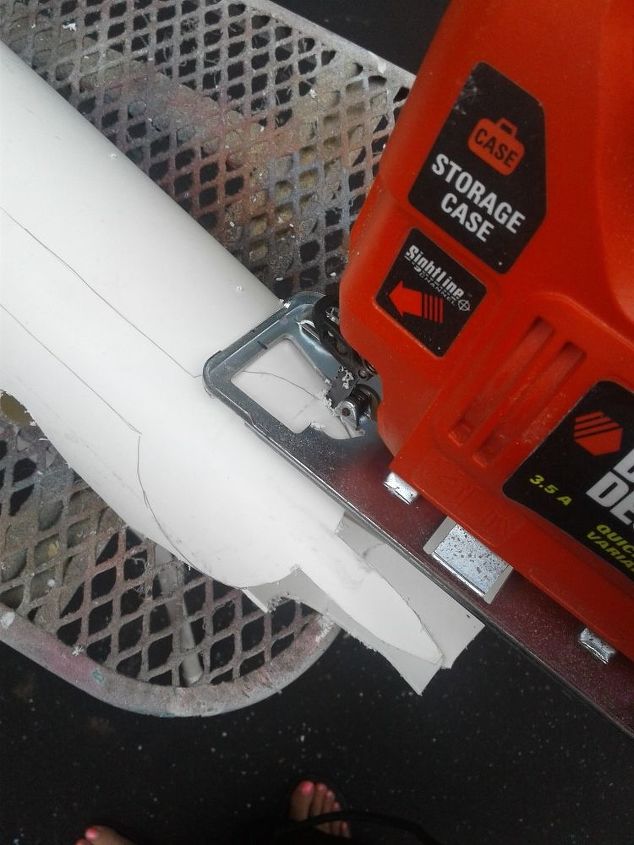
Once you have your pattern created, trace it onto your PVC pipe. When it is traced on the pipe, you are ready to cut it out. Grab your jig saw and some safety glasses and cut the entire pattern out of the pipe. For some reason I didn't take a picture of cutting our halloween patterns, so I'm using a photo of the bird being cut out instead. Same process, different pattern.
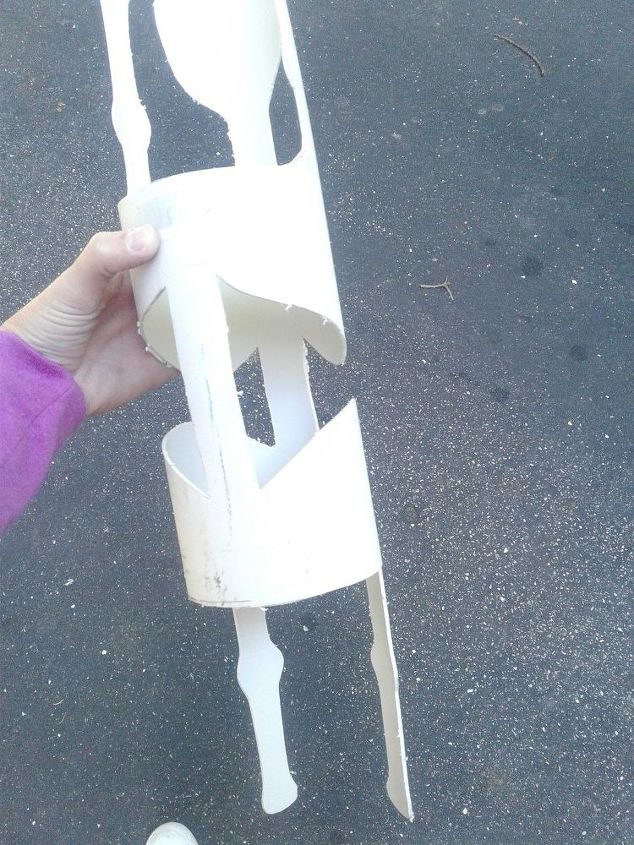
Now that you have your pattern cut out, use some sandpaper and clean up all along the edges to remove the rough spots and the pvc scraps that are still stuck to the pipe.
Then you will also need to clean up the manufacturers markings on your pvc pipe. You can use a pvc pipe cleaner, some acetone or even your sander to remove the ink.
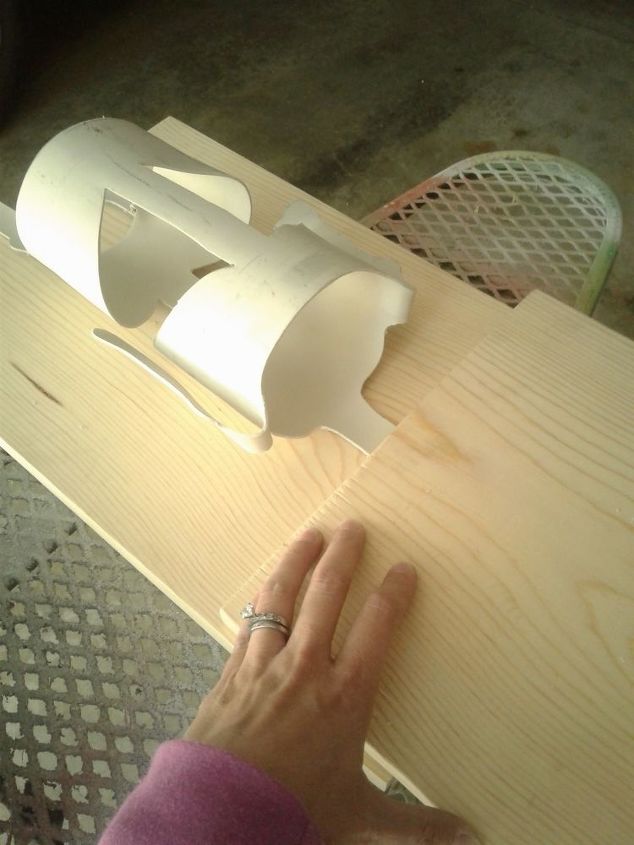
Once you have your little guy cleaned up, it's time to start reshaping him. Here I started with his head.
Aim your heat gun at the one area you want to reshape and heat that area until it becomes warm enough that you can reshape/bend it. Please use heatproof gloves and use caution to protect your hands from the heat.
Here I am reshaping the head of the skeleton. I heated up the head area and once it was warm and pliable I placed it between 2 boards and held it in place until it had cooled to make it nice and flat. Once you have the area in the shape you want it, keep it in place with your hands, boards, etc until it has cooled completely and been reshaped.
Continue working around your piece, heating and reshaping each area at a time. If you reshape it and it doesn't look right - no worries! Just reheat it and try again. It can be frustrating when you're doing it the first time, but keep at it and you'll get it.
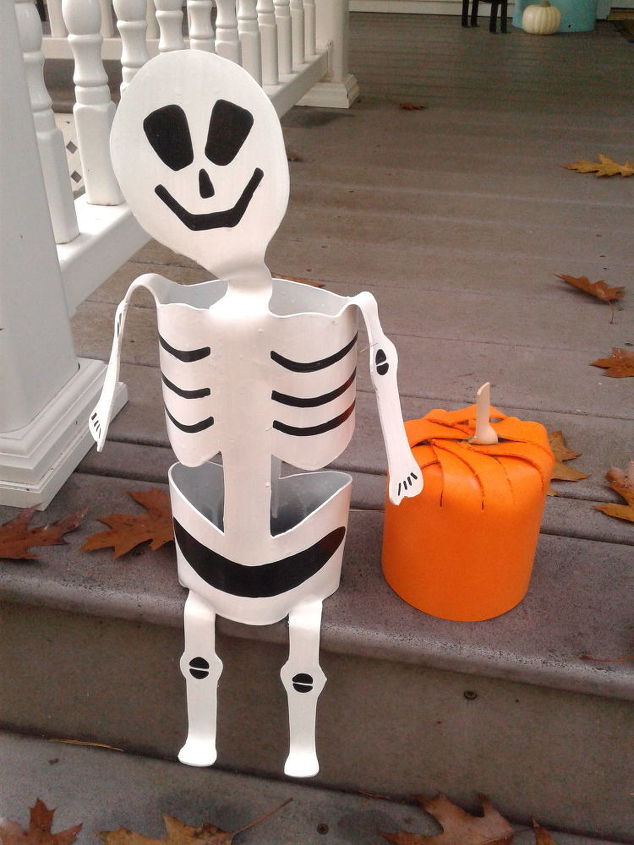
Then it's time to paint it! I usually use spray paint that is meant for plastic, but for this little guy, I used a permanent painters markers that I got at our local craft store. I've even used acrylic paint to paint in the details on some of my pieces. Once you have your little guy all painted, spray him with at least 2 coats of a clear acrylic spray sealer to help protect the paint job.
And you don't have to paint him like I did. Use your imagination and paint your piece how you want and shape him however you want!
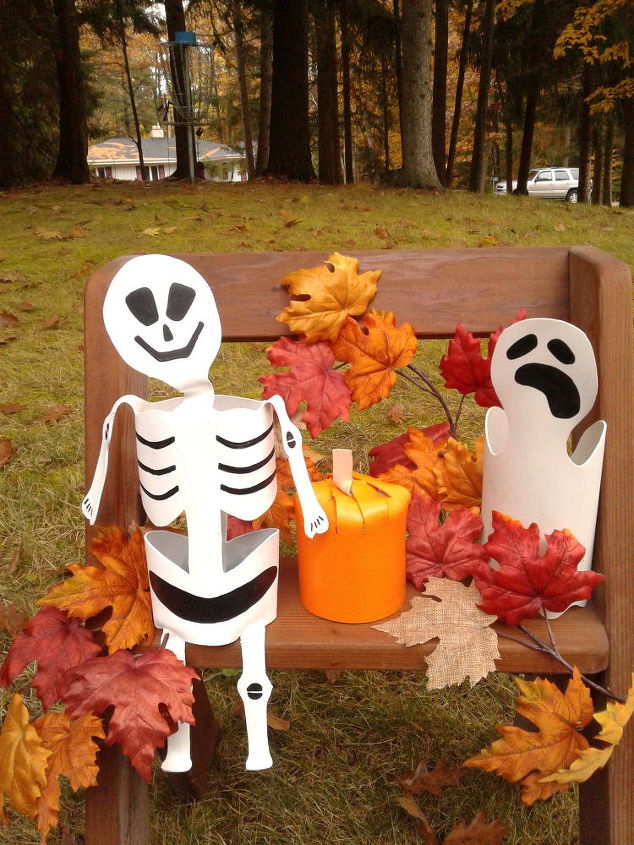
Here is a picture of my finished Halloween pieces: pumpkin, skeleton and my ghost.
I plan to make quite a few ghosts so that I can display them all over the yard and hang a few of them from our trees in the front yard 
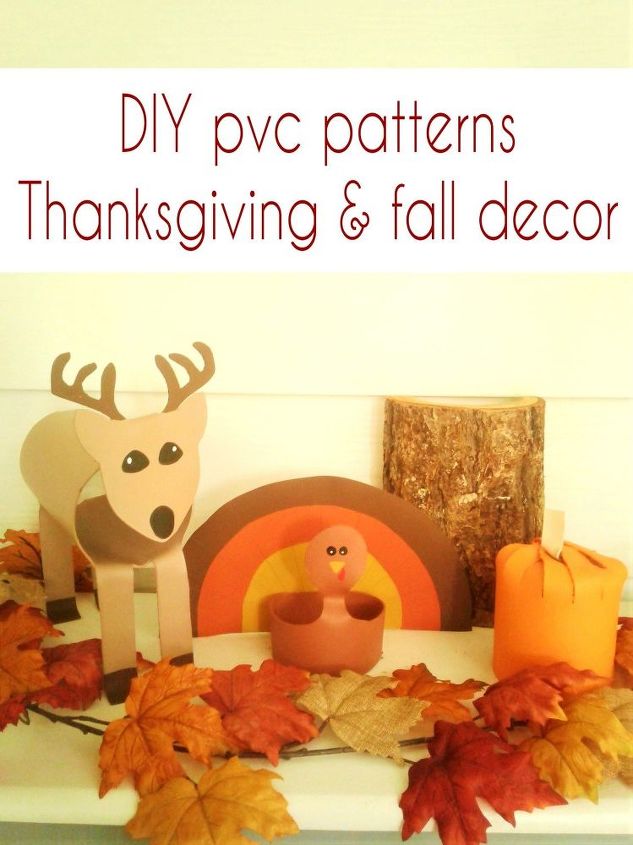
Here you can see the ones that I've got made for the fall season: a deer, a turkey and the pumpkin.
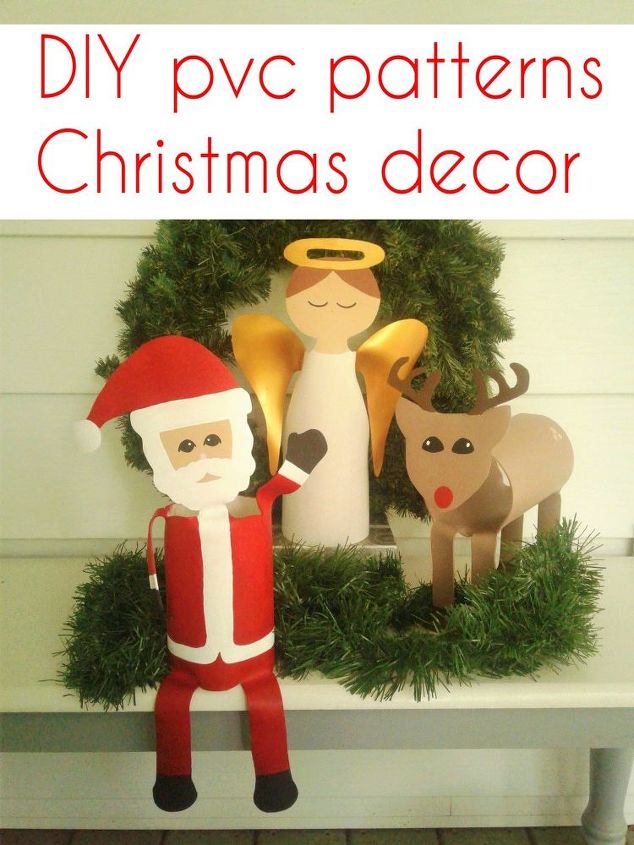
And a little sneak peak at what's coming up for Christmas 
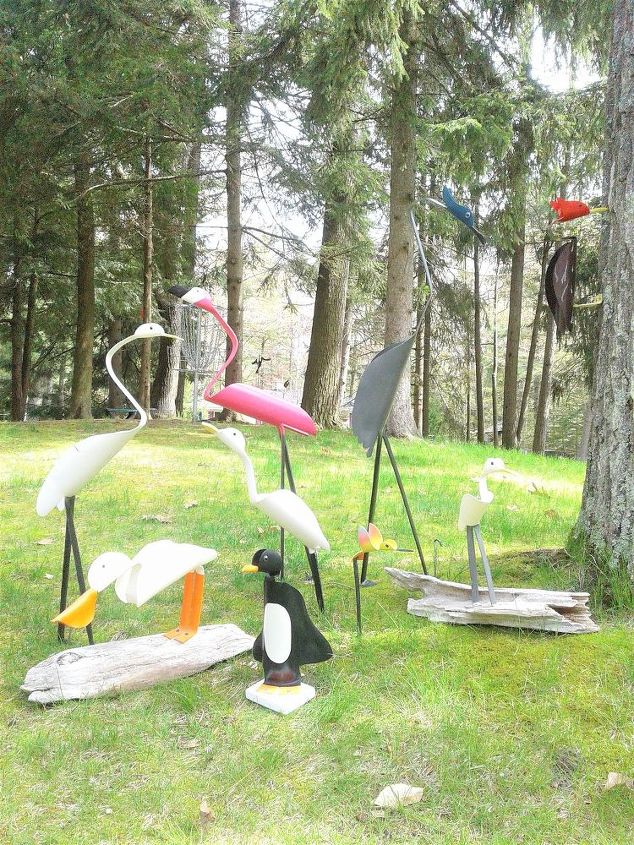
As you can see, I love crafting with PVC. Here are some of the PVC birds that I have made.
Resources for this project:
See all materials


Comments
Join the conversation
-
How about using glow in the dark paints
-
Birds and kids.are fantastic in Europe we do not celebrate Halloween


Frequently asked questions
Have a question about this project?