


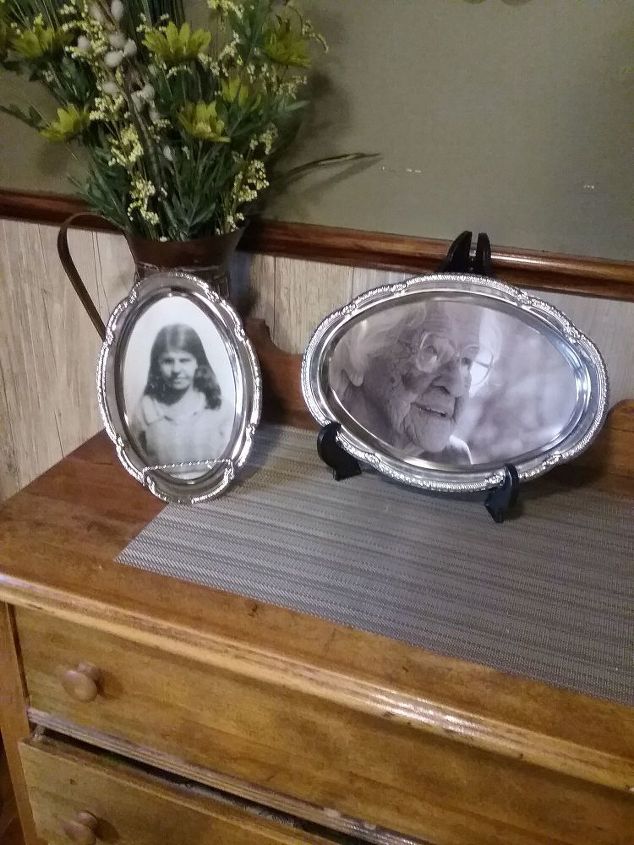
From Serving Platter to Picture Frame

I'm sure if you look around in your cupboards you will find one or two of these, we all have them. By them I mean the silver serving platters. I inherited mine and held on to them. Never actually used them for what they were supposed to be used for, but I loved the shape of them. So when I was searching for the perfect frame for my beloved Grandma's pictures these immediately came to mind. My Gramma lived to the beautiful age of 103. She passed last November due to complications from a fall. Up until then she was blessed with good health and was able to live in her own home. I was given a picture of her when she was a young girl of 13 and I had the picture of her already of her at 103. She is deeply missed but these pictures help fill that void and are a reminder of what a remarkable woman she was.
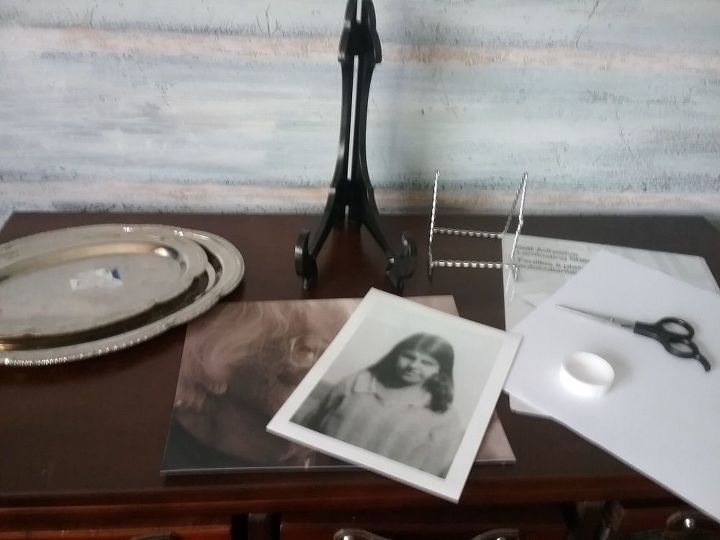
To begin this project I first went to Wal-Mart and enlarged my photos I would be using. Next was to gather all supplies needed for this project. Two serving trays, mine held a 5x7 print and an 8x10 print. Two sheets of laminating paper, two sided tape, two plate stands, two sheets of paper, pencil and scissors.
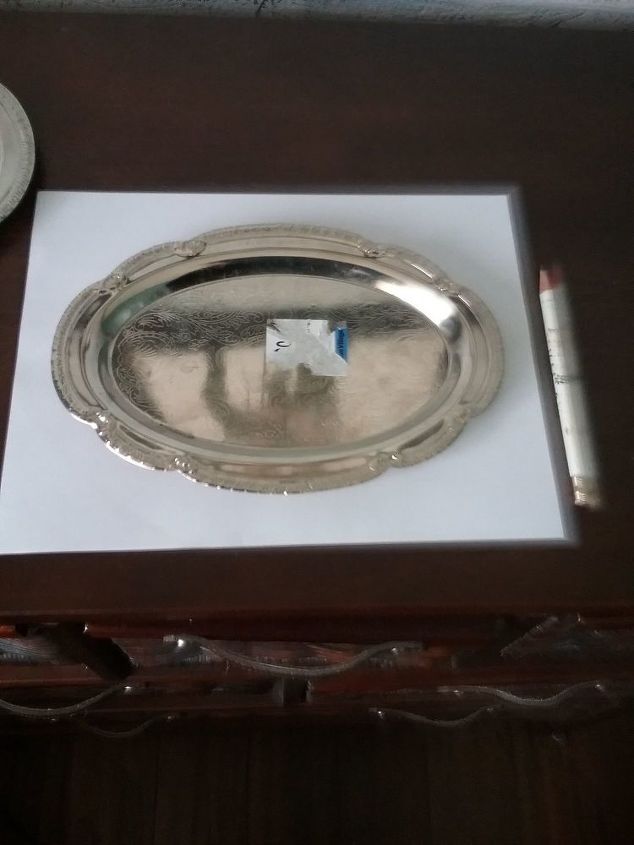
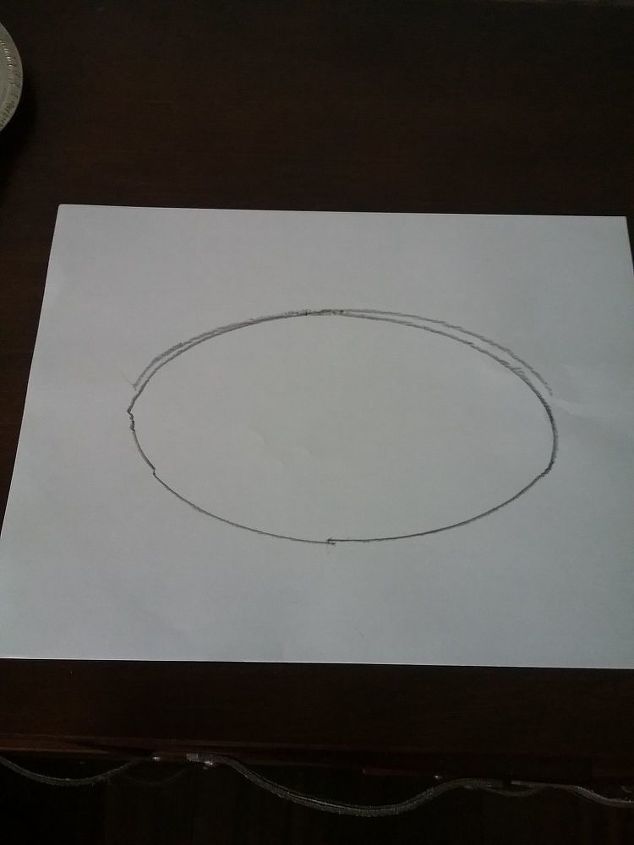
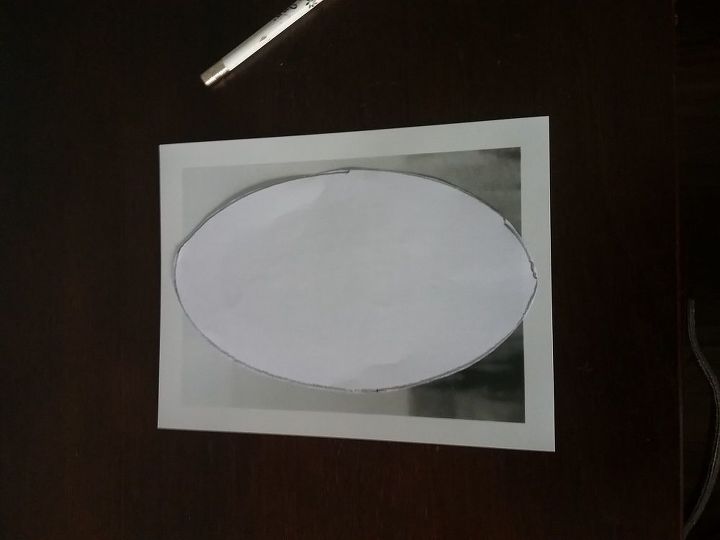
Next you are going to take one of your sheets of paper and place it on a hard flat surface. Take one of your platters and place on top of paper. Hold securely with one hand and using your other trace around the bottom of the tray.
Once completed remove tray from paper and cut out with a pair of scissors.
Once cut out, take one of your pictures and place the cut out on top. Center and trace outline of shape with your pencil and cut out the picture.
Next you are going to take your laminating paper. Place picture face down, remove backing and seal over top of the picture. Rub with hand to remove any air bubbles. Once satisfied cut around the shape of the picture.
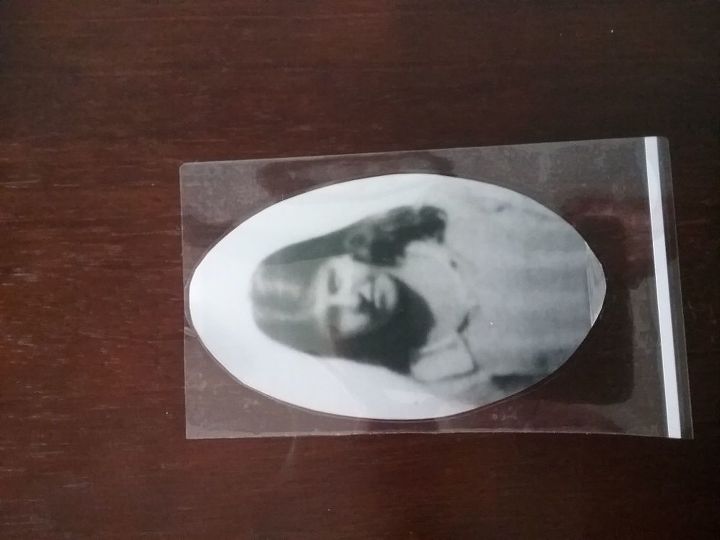
After picture is cut out. Turn face down once again and using your two sided tape cut four strips and attach to the back. Take your tray and place picture pressing firmly. Place your new frame on your stand.
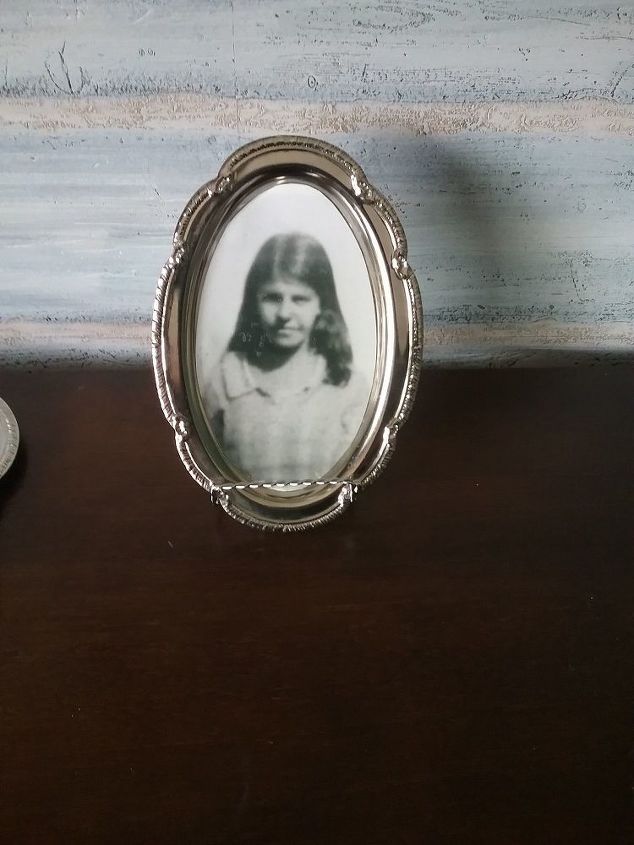
Repeat the same steps as above to do the 8x10 photo.
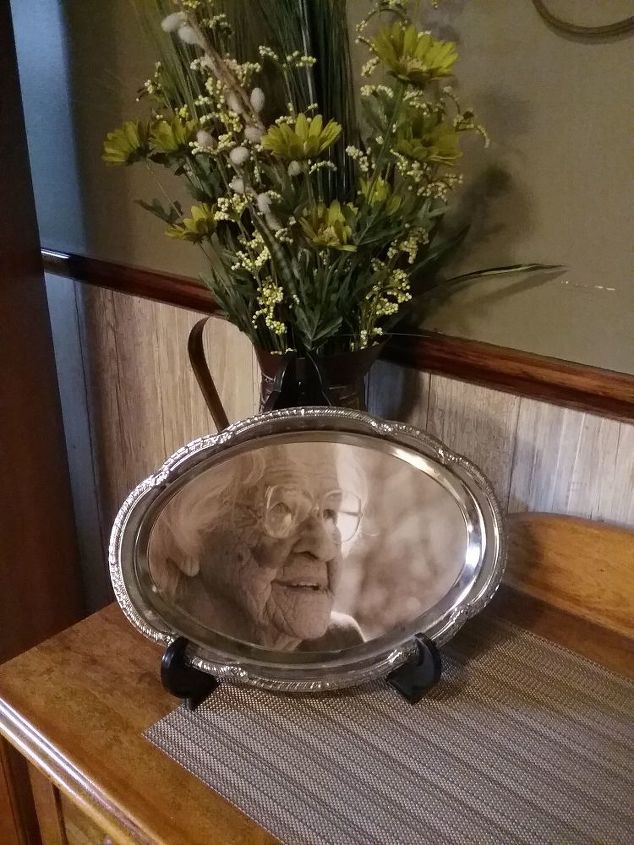
I am so thrilled with how this project turned out. It was a cheap alternative to purchasing picture frames and my pictures look amazing.
Resources for this project:
See all materials


Comments
Join the conversation
-
I wonder if it is possible to use silver polish on the tray-frame without getting it on the photo. Lovely idea!
-
What a beautiful idea!


Frequently asked questions
Have a question about this project?
How to restore a fokati rug that has many clumps. Brushing out the clumps with a wide tooth metal comb results in fluffy, bushy patches. How can I turn these fluffy patches back into thin, separated strands of wool?
Should you use modpodge to seal the photo ? And still not have "blick" on the silver frame? How to both preserve and clean is where I'm going with this.
I just love these! Especially the older lady picture..just seems perfect on that tray! Any she looks so radiant!
Very creative and unique!
