


My Walnut and Ash Mosaic Nightstands

So years ago I saw a coffee table that had a mosaic wood pattern that slowly transitioned from a darker wood to a lighter wood. It’ been stuck in my mind ever since, there's just something about that style that I find so cool and attractive. I also happened to need a set of new nightstands. I decided this was an oppurtunity to finally try and recreate that coffee table I saw years ago, but put my own twist on it!
What a project this was. Let me tell you, this probably took me close to a month to finish. I was only working on it in my spare time on weekends and after work, since my day job has been really busy lately. Definitely one of my longest projects, but totally worth it! I’m really happy with how it all turned out!
If you like this build and my photography check out my Instagram. I offer daily bite sized content on instagram and try to make myself available to answer as many questions as possible! Find me @zacharyms
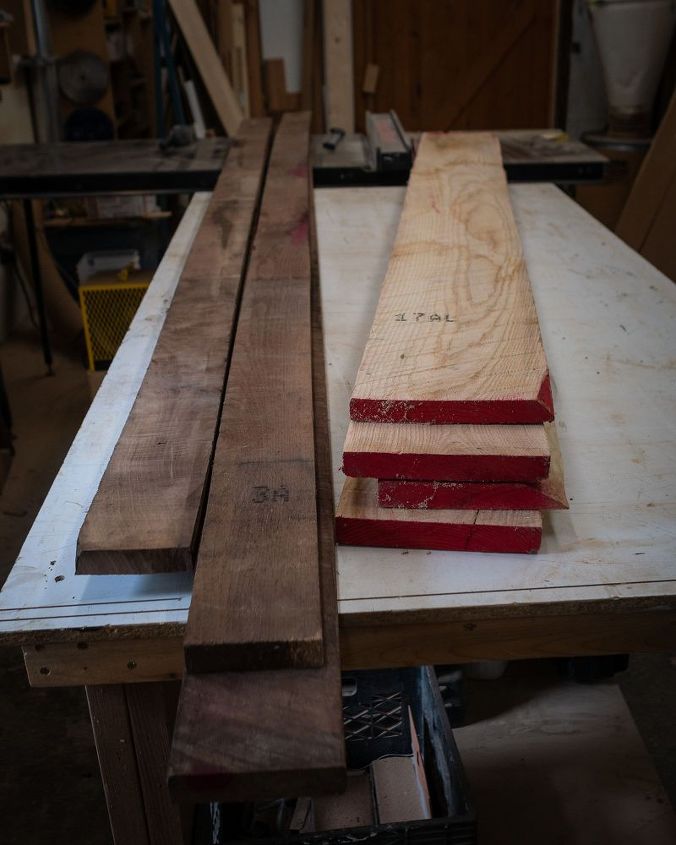
This is the small pile of wood I started with. Just some 4/4 ash and 4/4 walnut.
I had about 20 board feet of each type of wood. I bought it at a local mill and it cost me about $150 CAD. This was the bulk of the cost for the project, I used a lot of stuff I already had, but I’d say I had a good $50 dollars in other misc expenses along the way (glue, wood filler, etc).
When I was picking out my wood I tried to pick pieces that had as few defects as possible to maximize my yield. It helps that I cut everything up into small strips, but even still any cracks or missing knots can make a piece unusable. I also tried to pick pieces that divided nicely into 1″ increments because that’s the width I’d be cutting everything to.
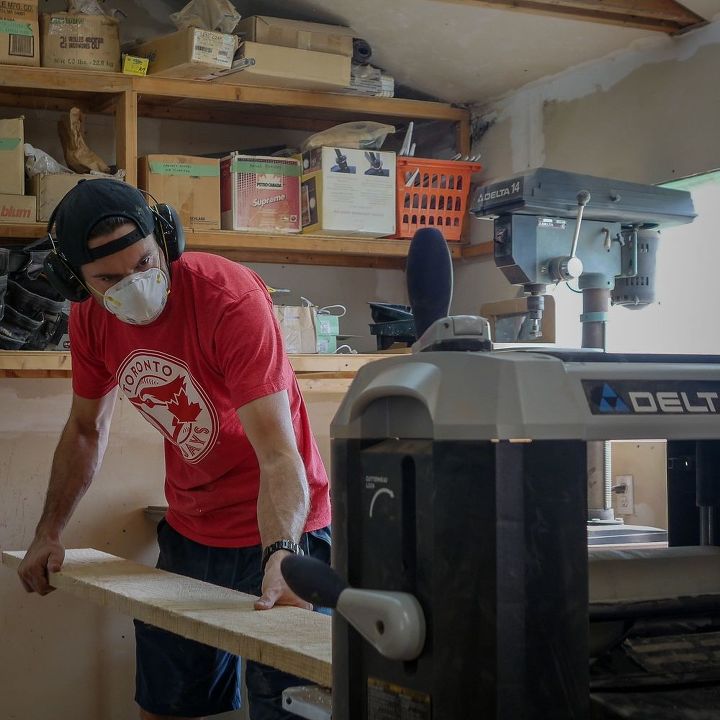
To start I cleaned up every piece of wood by running it through the planner. This process removes a thin layer from the top of the wood, exposing the nice smooth surface beneath. I repeated this process many times until each piece of wood I had was a uniform thickness.
By the time I was done I was 3 hours older and the wood was about 3/4″ thick.
Note my ear protection. They actually double as a bluetooth headset. While I worked I listened to a lot of audio books and podcasts. And for anyone who thinks that stuff is boring, I’d counter that it’s not nearly as boring as planing wood in complete silence.
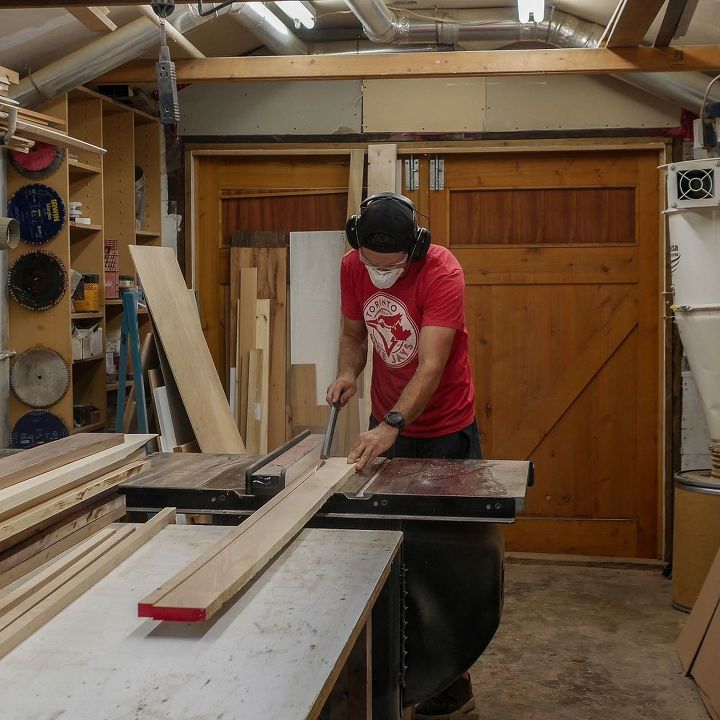
Once I knew all my wood was straight and a uniform thickness I set about cutting it into smaller strips. I set my table saw to 1″ and began ripping. I pushed each and every piece through the table saw until I had a bunch of long 1″ x 3/4″ sticks of ash and walnut.
Again this was pretty time consuming, thankfully I still had my headphones and my audiobook. As the pictures go on, you’ll see I actually switch headphones quite a bit. When the battery runs out on one pair I switch to the other.
Heaven forbid I actually have a moment alone with my own thoughts *shudder*.
After everything was ripped on the table saw I cut all of my sticks of wood into random lengths. I then arranged them on my work table in a pattern that resembled the coffee table I talked about before.
Tick tock! This part was a bit of a race against the clock.
I rolled each piece over onto its side and then applied a generous bead of wood glue to each piece. Once every piece had some glue on it I rolled them back over and squished them together.
This is a race against the clock because if I'm not fast enough the glue will start to dry before I get everything assembled. If the glue dries I'm screwed and would have to start all over! It was a bit nerve racking, but I made it through.
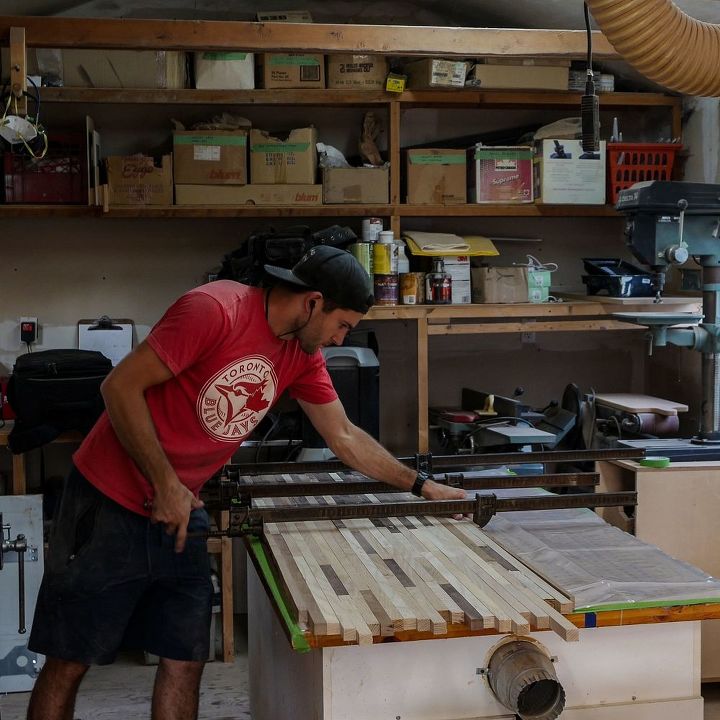
With all of the glue applied and all the pieces in the correct position, I was ready to start clamping.
I clamped my new wood mosaic in 7 different spots using big bar clamps. Again, in the interest of saving time, I had preset all of my clamps to the right size during the dry run phase. So when it came to this step I could just drop the clamps in position, spin the tensioner a couple of times and I was good to go.
It’s all about working as efficiently as possible when you’re doing a big glue up.
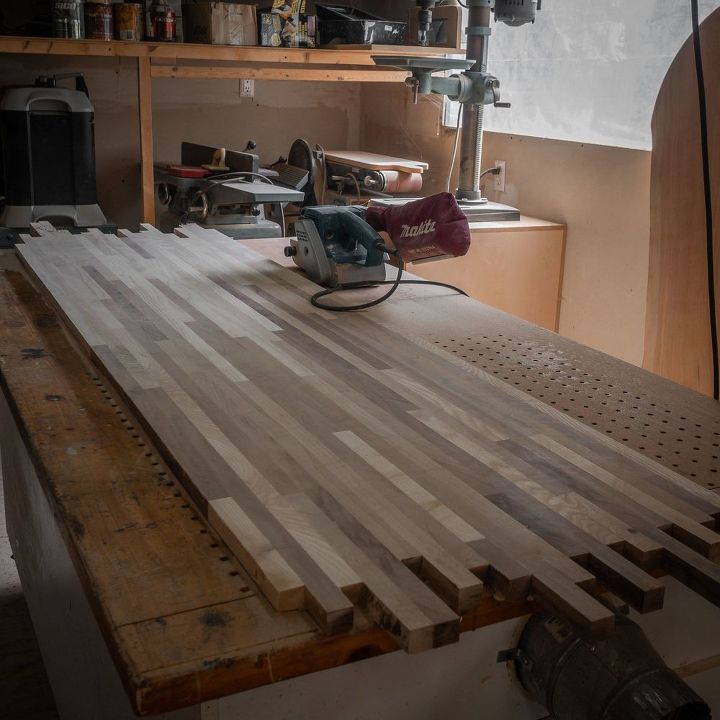
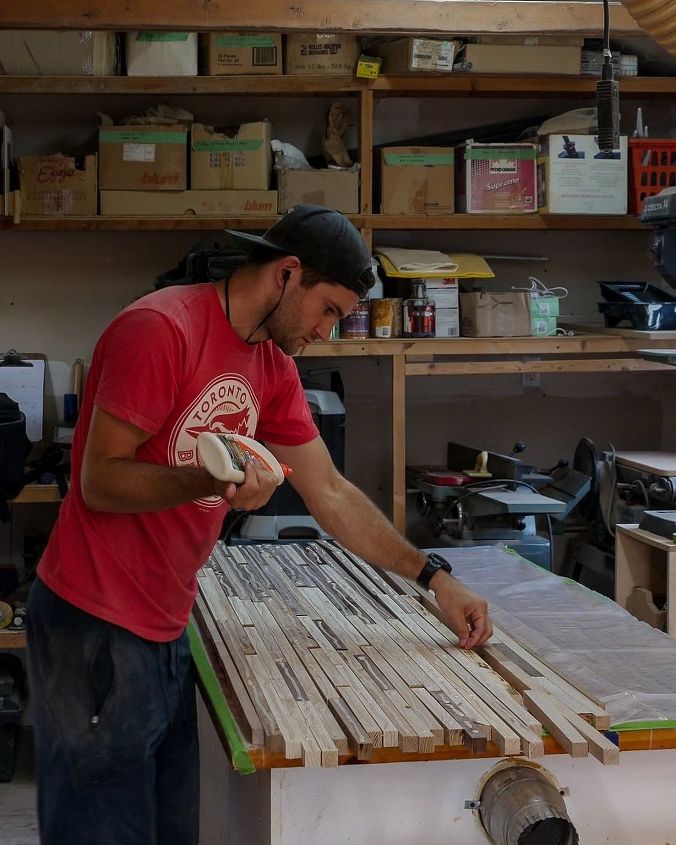
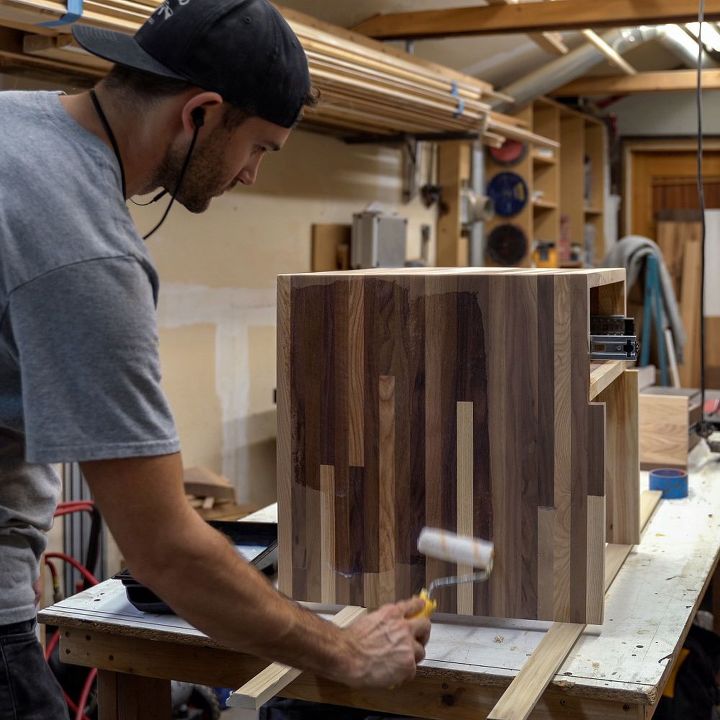
Once the glue dried I removed the clamps and used my belt sander and some 80 grit sandpaper to smooth the entire surface. I worked hard to make it as flat as possible. I took breaks randomly to check my work and apply wood filler to any small gaps between pieces.
I really wish I had a giant planer I could feed this whole thing through, but for now, the best I have is this belt sander.
This is the part of the process where pictures don’t really do the amount of work any justice. You, the reader, simply scrolled from one picture to the next. That single picture has to encapsulate like 3 hours of sanding. Needless to say, I made a lot of progress on my audiobook during this part of the project!
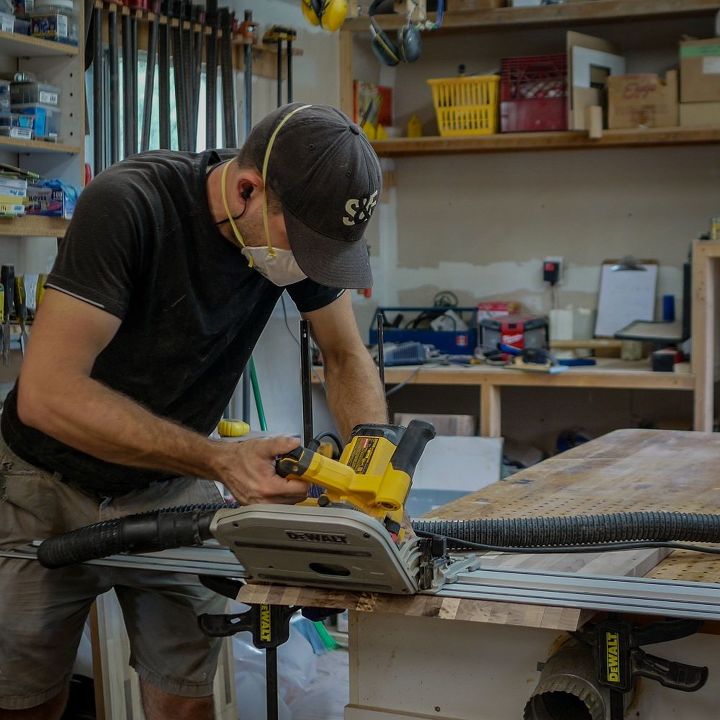
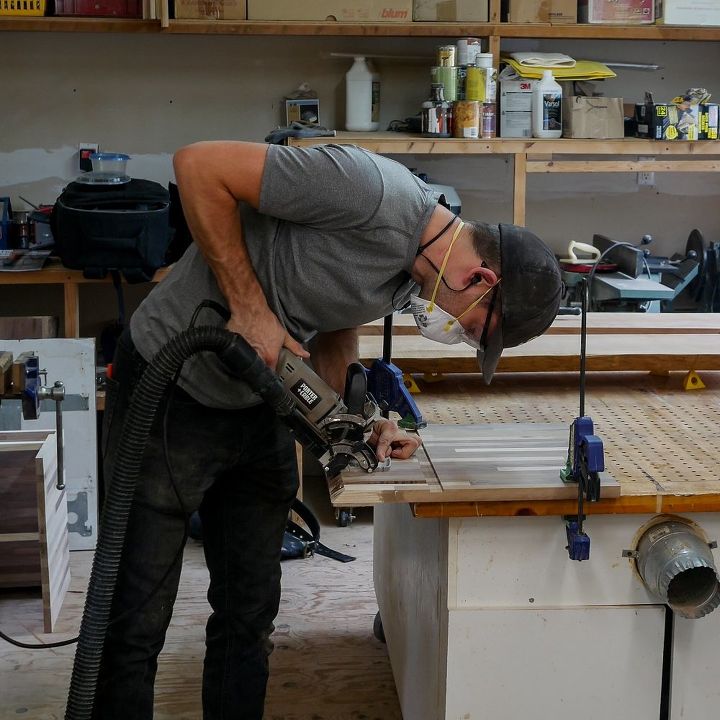
With all the sanding behind me, I was ready to grab my track saw and get to cutting. I cut the giant mosaic sheet into piece that I would then assemble into my nightstands. This part was actually pretty easy because of all the planning I did previously. I knew exactly where I had to cut and what angles were necessary.
It’s important to note though that because I wanted my nightstands to have a continuous grain pattern I really only got one shot at each of these cuts. If I messed one of them up and had to do it again or use a different piece it would’ve been really noticeable.
Similarly, because I wanted to have the cleanest miter cuts possible I had to do all of my track saw cuts in a single pass with no stopping and restarting. Luckily it all went off without a hitch.
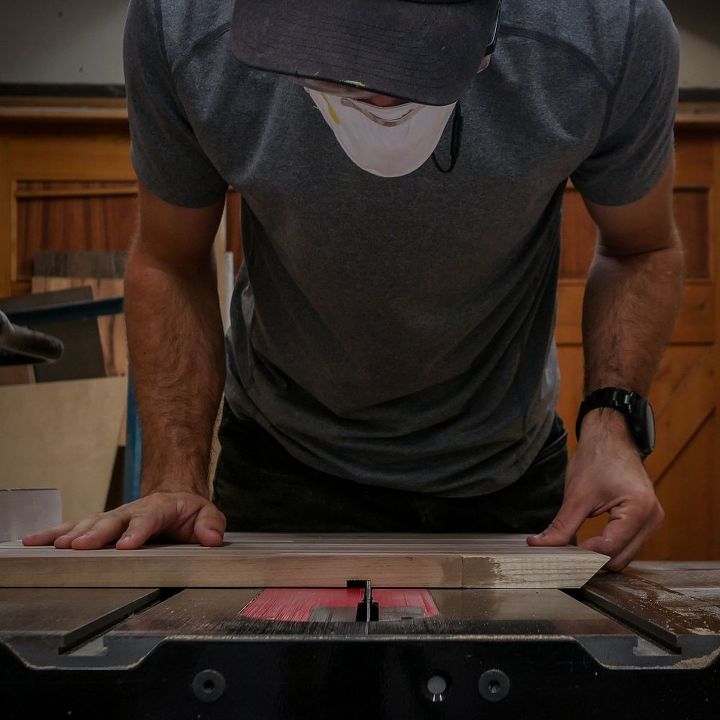
Before I could do any assembly though I still had some mortising to do on each piece.
I set the table saw blade 1/4 above the table surface and cut the mortises by remove one blade of material at a time.
I probably should’ve done this with a dado blade or a router, but honestly sometimes setting up the dado blade takes more time than just doing multiple passes with a regular blade.
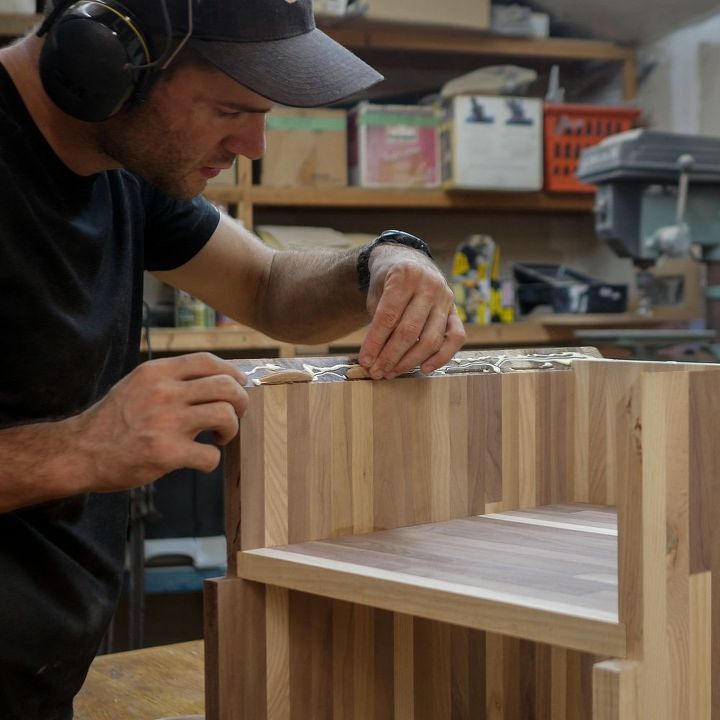
To hold my mitered corners together I used a biscuit joiner. The biscuit joiner cuts pockets in the wood that you can insert wooden “biscuits” into.
If you have two pieces of wood and each piece has a corresponding pocket you can use a biscuit to bridge the gap between them and then glue the whole thing together. Biscuits help keep things aligned and add strength to the miter.
I’ve had various people tell me that biscuits aren’t strong enough for miters or they don’t lend any strength to the join, but, that hasn’t been my experience. I’ve used this exact same technique on things I built years ago and the miters are still perfect despite regular use and abuse. People often recommend that I use a Festool Domino jointer instead, though I can’t see how a domino jointer would be significantly stronger. I suspect this may be a case of people parroting information they’ve heard other people say without actually considering the matter, but who knows.
More glue! Yay! I really need to start buying this stuff in bulk.
Let’s assemble all these various components into something that looks like an actual nightstand!
I applied a generous amount of glue into my mortise channels and then slotted everything into place. The two sides, the middle section and the back all got glued and clamped together.
Here you can see me inserting the biscuits into the pockets I made along with a generous helping of glue as well.
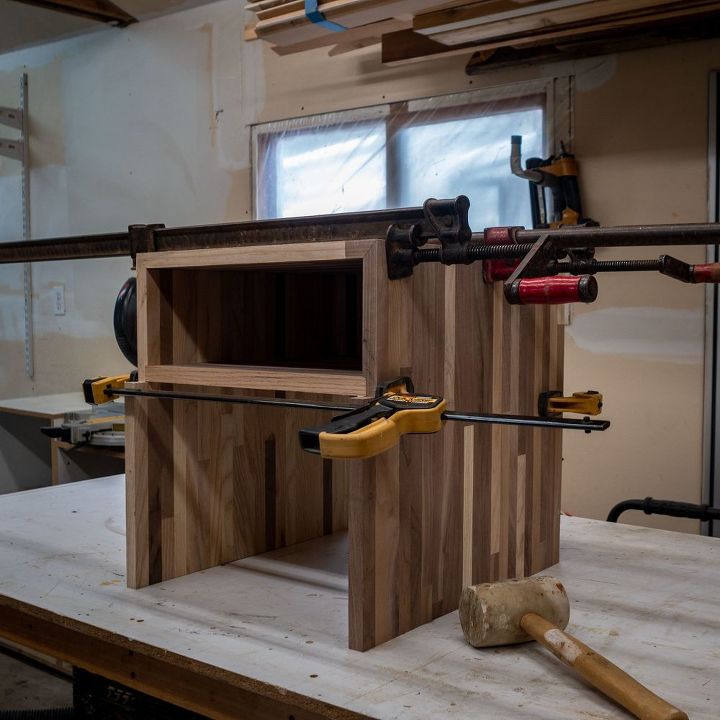
The last step of assembly was clamping everything together. I used a bunch of bar clamps to make sure everything was just where I wanted it before leaving for the night.
The clamps really helped pull everything together and close any remaining gaps.
It’s really easy to over tighten your clamps and end up pulling something out of square. I went over every corner with a finishing square to make sure I hadn’t thrown anything out of wack while tightening down the clamps.
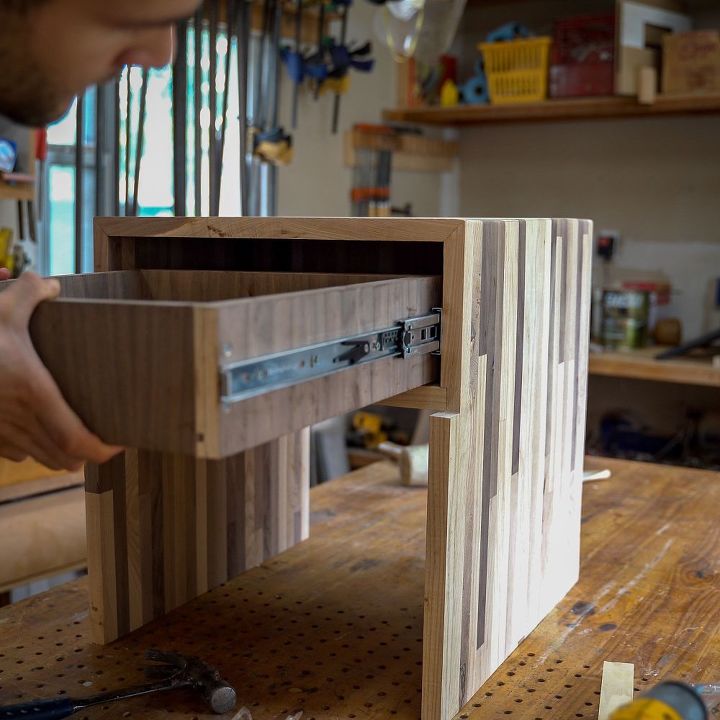
After removing the clamps I assembled and install a drawer in each night stand. I used soft close drawer slides for an extra satisfying closing experience.
Honestly this "step" could be a post on it's own and I go into much more detail about it on my blog which is linked below.
To finish everything off I applied a satin clear coat to the whole thing. This helps to seal the wood and give the grain a little bit more "pop". I like to use floor varnishes for all my furniture because they're much tougher than normal varnishes and tend to be a bit cheaper!
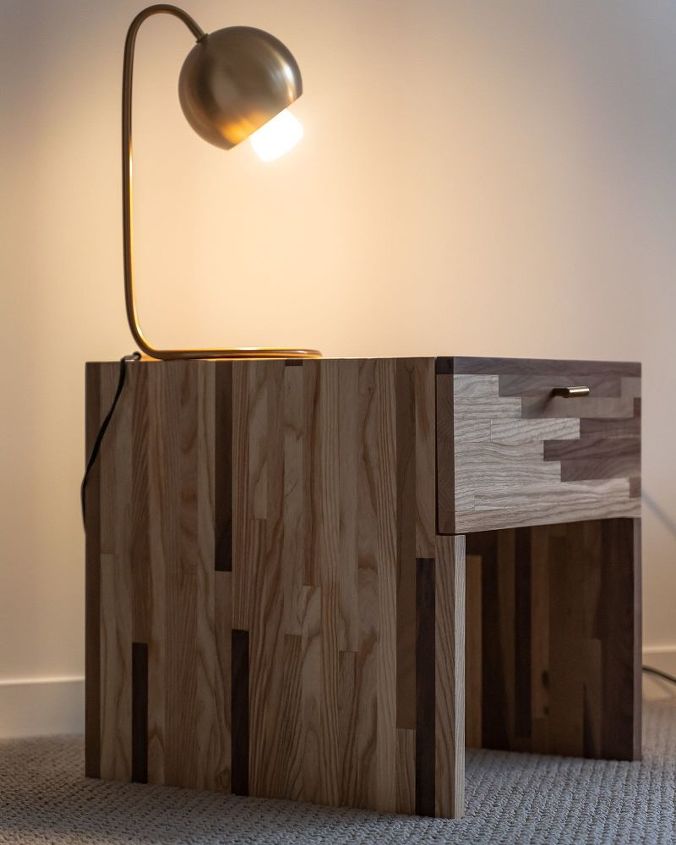
This is what the final product looked like! I'm super thrilled with how it turned out. My girlfriend bought some really nice lamps to go with them.
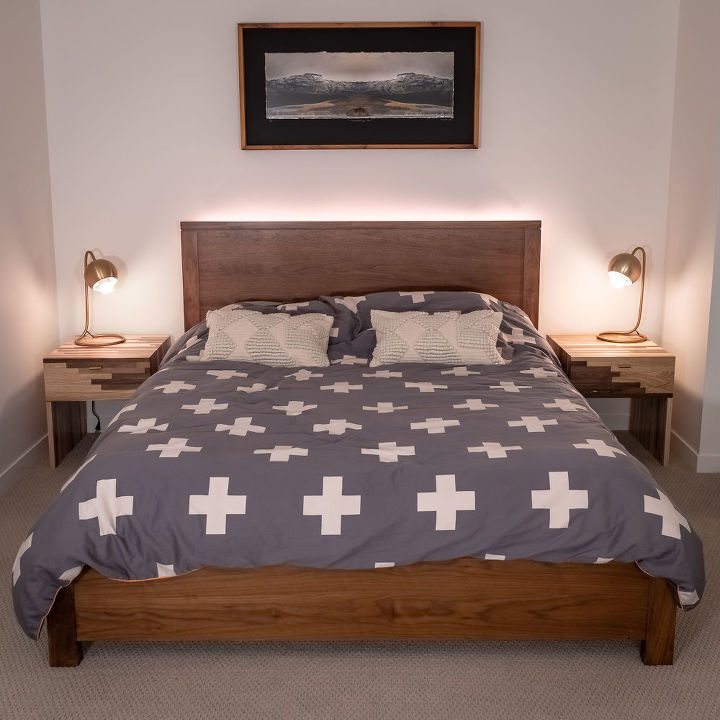
Here they are setup in my bedroom. I placed the walnut side of each nightstand facing towards my bed frame because it's made of walnut too. The ash side faces towards the wall where I think I'll be adding some ash shelves in the near future.
This was a long project. It took me over 3 days to complete but I couldn't be happier with the final results.
I had a to trim a lot of content out of this post to make it fit, but I have a much more detailed build guide available for free on my site. You can find it at https://zacbuilds.com/2018/10/08/walnut-and-ash-mosaic-nightstands/
If you like this build and my photography check out my Instagram. I offer daily bite sized content on instagram and try to make myself available to answer as many questions as possible! Find me @zacharyms
Resources for this project:
See all materials


Comments
Join the conversation
-
They really did turn out beautiful. I'm under the impression that you've done this kind of work before... You're Very Talented.
-
Wow. That looks well above my skill level but I’m still going to try it. It looks wonderful.


Frequently asked questions
Have a question about this project?
Wow, my god what a beautiful pair of nightstands, love them! One question, when you used the bar clamps on that first big glue-up, did you alternate the clamps, one up, one down? In the pic they are all facing the same direction. If not, how did you make sure there was no warping?
Also way above my skill level, do you ever take commissions?