


Wooden Bench Upcycle
I got this wooden bench from a thrift store but it didn't match my home's colors. I knew it was time to upcycle it using a wood grain tool and a stencil.
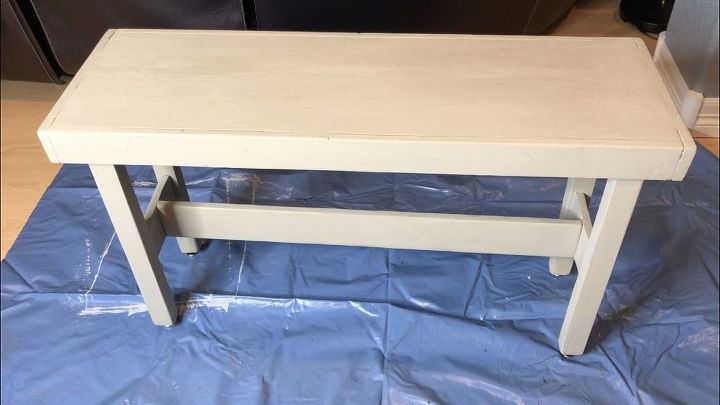
Here is the original bench. It's color was a taupe color and it just didn't match my home's colors.
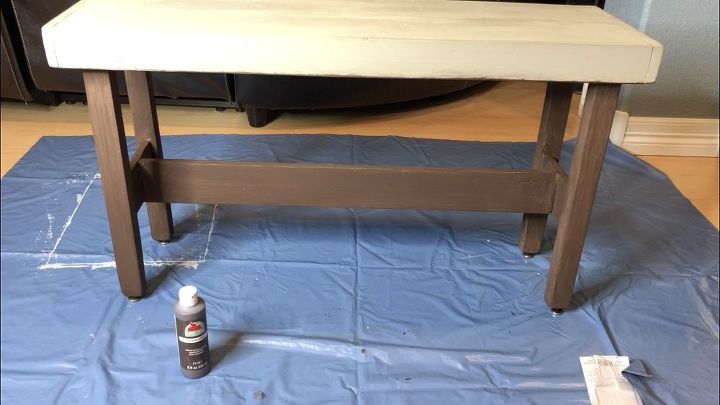
I painted the legs with Apple Barrel Brown acrylic paint.

I painted the top and side of the bench with Apple Barrel Warm Buff paint and let that dry completely.
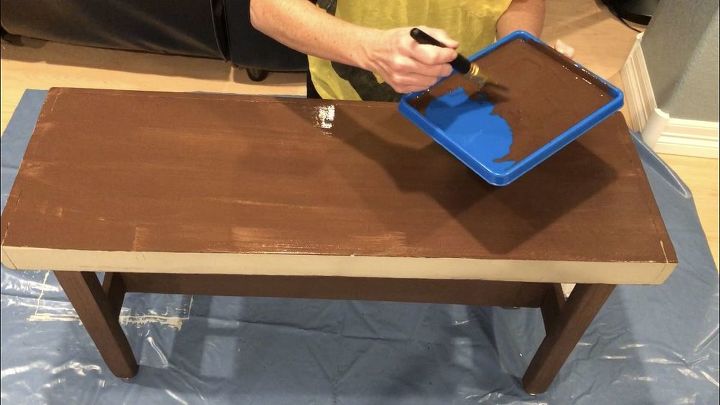
I made a mixture of the Apple Barrel Brown with water to create a glaze. I painted this on the top of the bench.
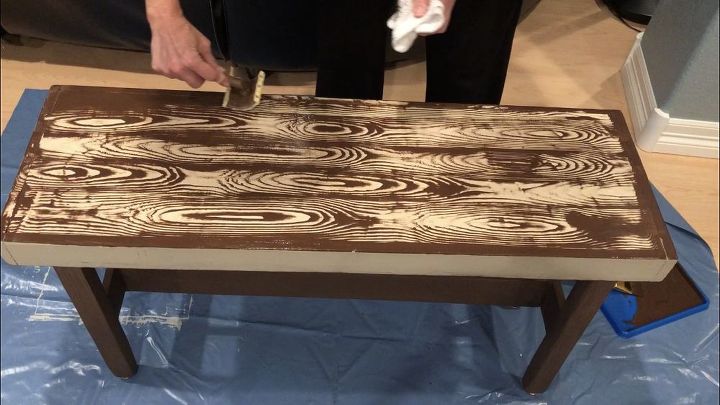
I used a wood grain tool to create a wood grain effect on the top. I rocked the tool back and forth to create the textured look as I dragged it along the top of the bench.
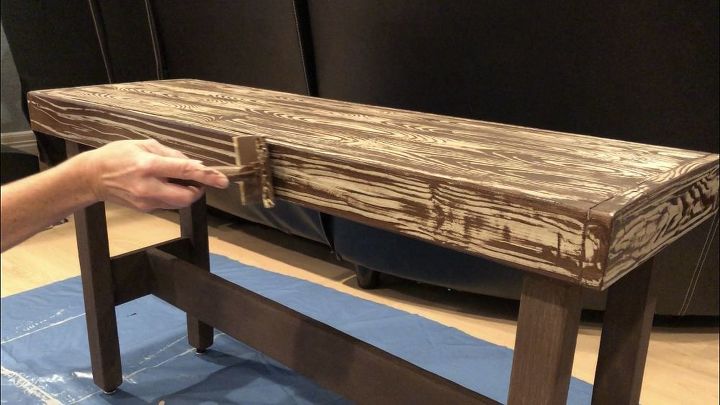
I did the same thing to the sides of the seat of the bench as well.
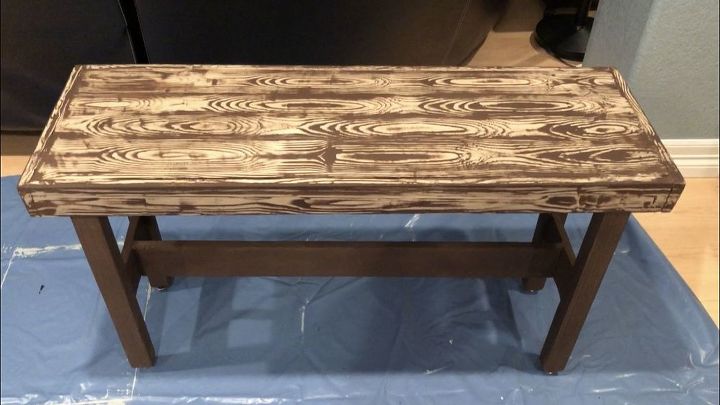
I let this all dry completely.
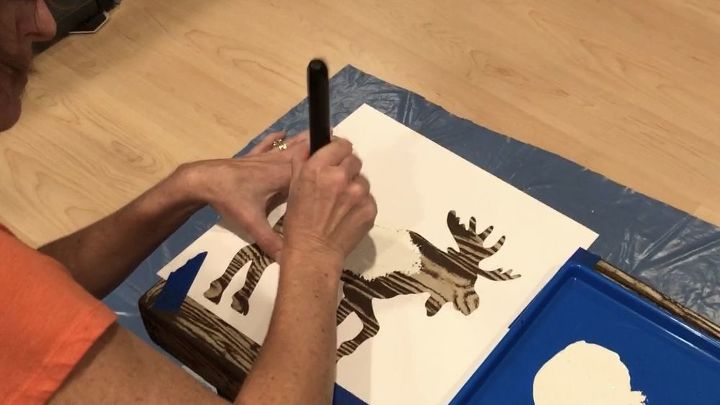
I place my Plaid Woodland Stencil of a Moose onto my bench and held it secure with painters tape.
I used Apple Barrel White with a little Apple Barrel Warm Buff mixed in to get the stencil color I wanted.
I used My Plaid stencil brush, dipped the brush in the paint and then pounced the brush to unload as as much paint as possible to be ready to stencil. I then pounced the my stencil brush onto the bench and stencil.
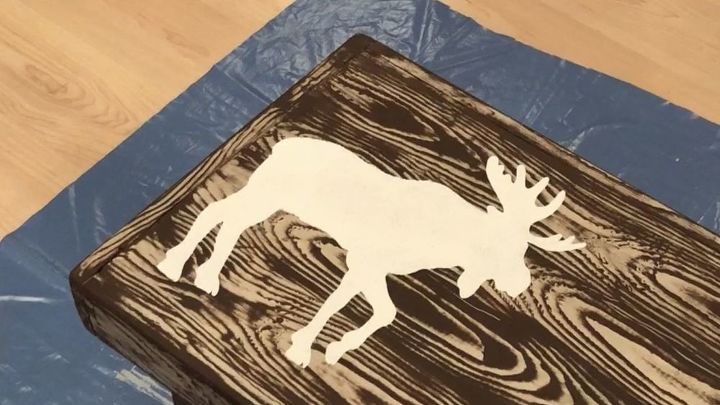
I carefully lifted the stencil off and let the moose dry completely.
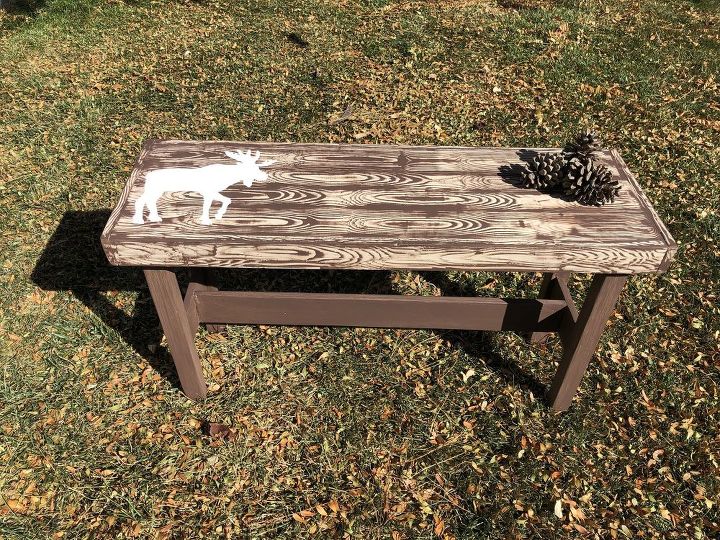
Here is the completed bench. I'm so happy with the way it turned out.
I would love to have you stop by my blog Chas' Crazy Creations for the full tutorial as well as sign up for my latest creations, posts, recipes, exclusives, and more...
I would love for you to subscribe to my YouTube channel to see more of my crazy creations - https://www.youtube.com/c/chascrazycreations
Resources for this project:
See all materials


Comments
Join the conversation
-
Hi great job on the bench. .Very creative. .
-
Great job, I love it.


Frequently asked questions
Have a question about this project?
Wonderful tutorial. Very Nice Job
Are you going to have to seal it, for leave it organic?
Wow! That turned out great! I love how you achieved the wood grain effect! I’ve seen the wood grain tool used before but haven’t tried it yet. Is it something you should practice with first?
Where can I get a wood grain tool?