


Acrylic Paint Pour With Feathered Gold Enamel Wall Art

Acrylic paint pours are easy to do! You can use whatever colors you like and however many you want too, maybe just two or three or 10! You can also do this to so many different types of materials/objects like furniture, glass, canvas, metal and more! Colorful, easy to create and makes a statement without the price tag  !
!
Here are 2 of my latest wall art creations!
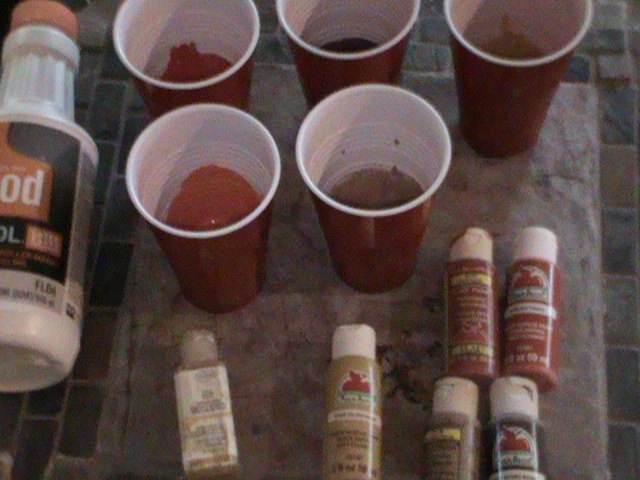
I love vibrant fall colors so that is what I will be using for this project. For the first piece I used Nutmeg Brown, Caramel Candy, Golden Sunset, Ripe Tomato and Red Apple acrylic paints with Flood as the medium. Flood is my go to medium !! I do not have a recipe for paint pours because I decide the thickness of the paint by project. I also do not add water, only the Flood. On this project I wanted the pour to be thick but not globby so the paint would take longer to dry. I'll tell you why in a few more steps. Pour the Flood and paint in a cup, stir well with a popsicle stick. 5 colors ready to go!
Pouring paint can be messy so I used a box with trash bags in the bottom to catch the run off along with old coffee containers to hold the canvases up. I poured the color mixes up and down and sideways too! The gold enamel I squeezed out over the acrylic pour. Do not add Flood to the enamel paint it is already thin and will dry quicker than the acrylic paint.
I got a 12 pack of 5" x 5" mini canvases for $16 on Amazon! Good deal!
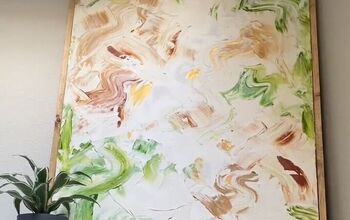
This is the results from the first pour! WOW I love it!!
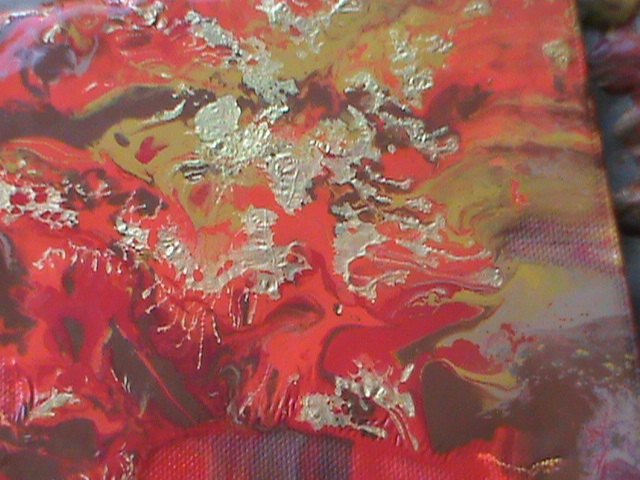
You can see the gold enamel here and how it looks when added on top and dried first. It adds texture to, it crinkles and feathers out while the acrylic paint is still drying around it.
This video is of the second pour and how to make the gold enamel feather out and crinkle.
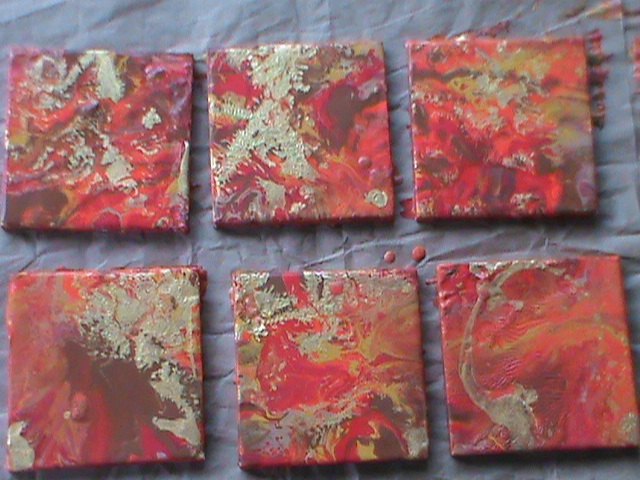
More of the second pour after drying the gold a bit more. These will all be dried in about 24 hours.
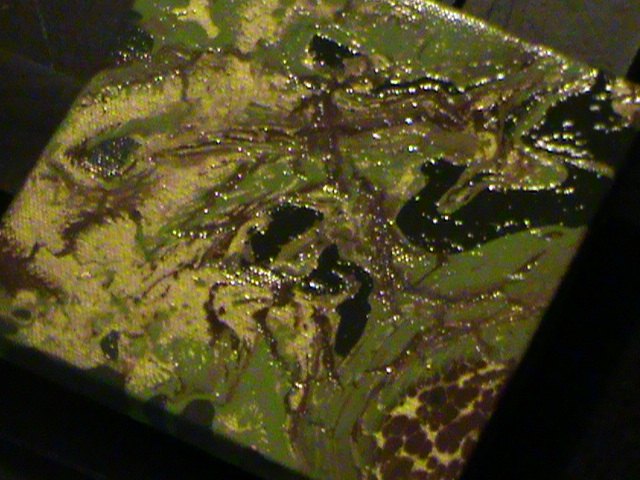
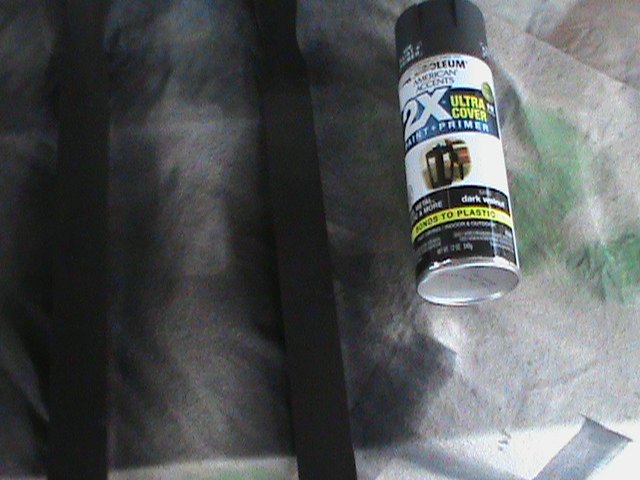
And the results of the second pour! Love it, love it! A textured feel to the art! I also used a clear gloss spray paint, 2 light coats is plenty to make it shine even more!!
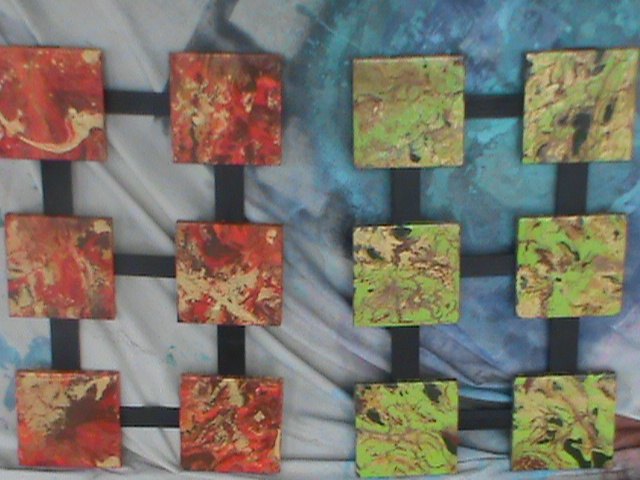
Well I wanted to group the canvases together and I thought of several ways to do that by adding ribbon, chain, wood, etc... I really wanted to keep the whole piece light in weight because there is no stud where I want to hang them .
.
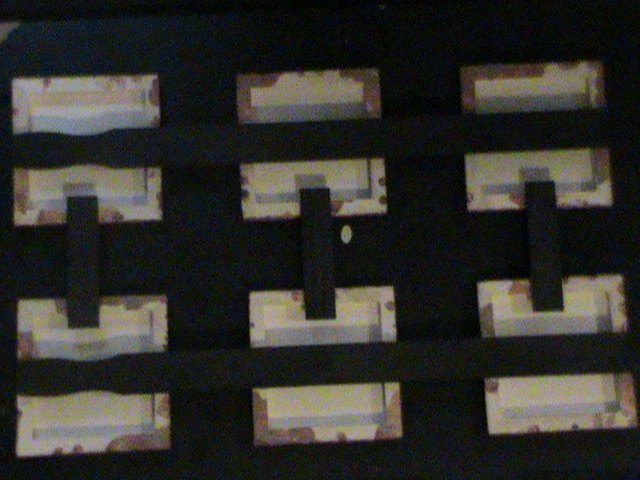
I went with painter's stir sticks, 4 long and 3 short ones. I cut the short ones in half with a chop saw. I flipped the canvases over (face down), took 2 of the long sticks, laid them down the middle of a row of three then took the halves of the smaller sticks, laid them across from one row to the other row.
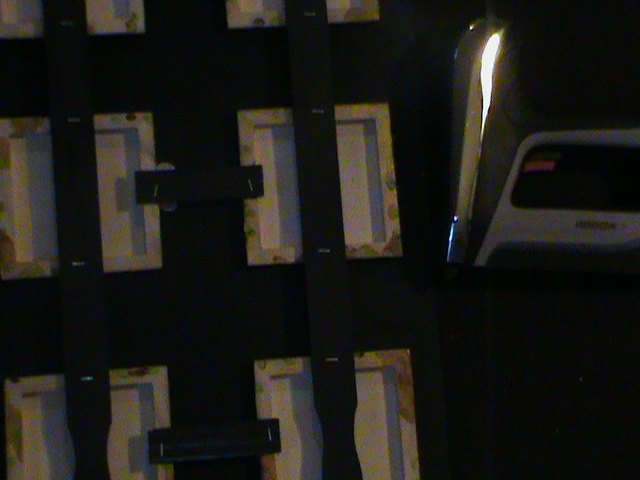
I used a staple gun to attach the sticks to the canvases. You could use glue too!
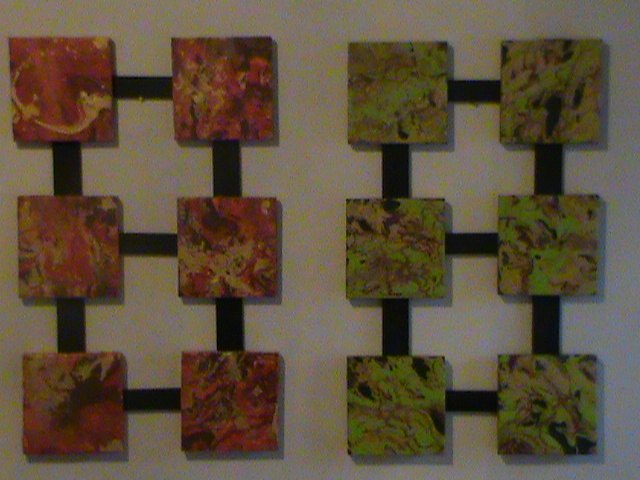
All finished!! They are so cool and modern looking!!
Outside drying.
I already have these up but my lighting is so bad inside the house the picture would be awful! I will take a picture of them hanging up when I have a bright and sunny day here!
Thanks for looking, questions and comments are always welcomed!
Comments
Join the conversation
-
I am using Minwax polycrylic as a finish, and the gloss is amazing!
-
FABULOUS~ They are So Pretty! I've got a bunch of bathroom tiles that I think would work pretty good for my first time trying this.
I really like the way you've connected them~ it makes a more visually unique & lovely display.
Thanks for sharing this GR8 idea!
 Thank you again!


Frequently asked questions
Have a question about this project?
Would this work with rough tiles???
What is flood
I wonder, could you do this on tiles to make coasters? It is so pretty.