


Rustic Glam Christmas Tree Ornament

I am planning to change the color scheme and style of my Christmas decorating this year. This change up has sent me scouring for new materials to make some new decorations. Luckily, I found some inspiration in a leftover piece of faux tin tile and made this cute rustic glam ornament to decorate my tree!

I had this piece of faux tin tile left over from a previous project. This material looks like tin but is actually plastic. It's available at most big box home improvement stores. It's a little pricey, but was perfect for my previous project.
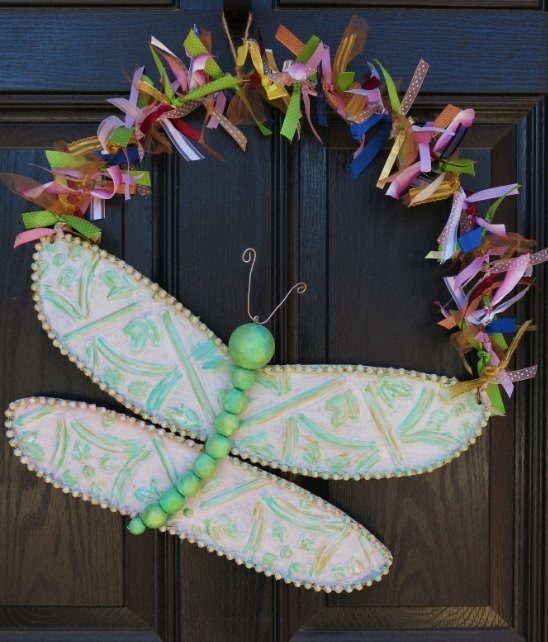
My original project was this dragonfly door decoration for spring. You can find more photos and my directions on my blog.
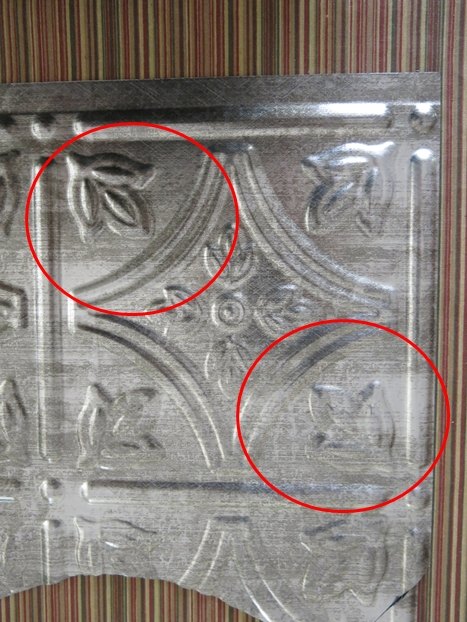
Since this pressed plastic material is expensive, I had saved every scrap from that other project. When I decided to make some new decorations for Christmas this year, I thought of the shapes and designs on this material.
I realized I could cut out two of the small corners from the pressed design and use them to create a Christmas tree ornament.
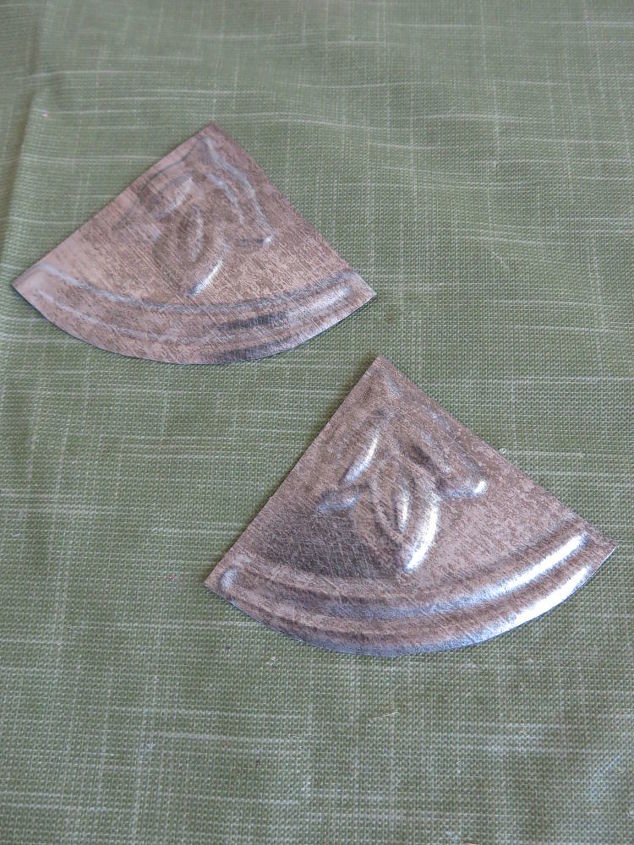
I cut out and trimmed down two of the corners from the piece above. You can cut this material with a good pair of everyday scissors.
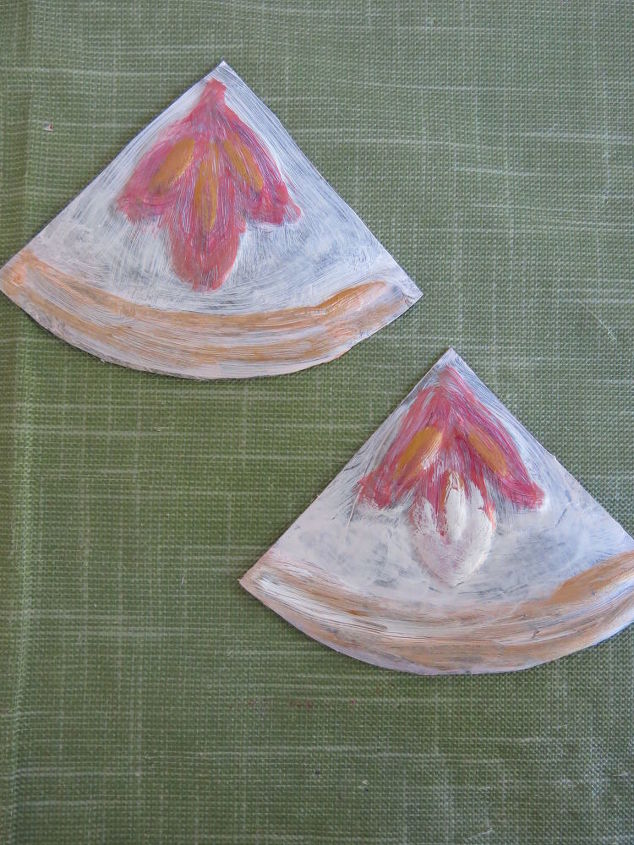
Next, I painted these pieces with acrylic paint. I just gave the background a light white wash, and used pink and gold to highlight the designs.
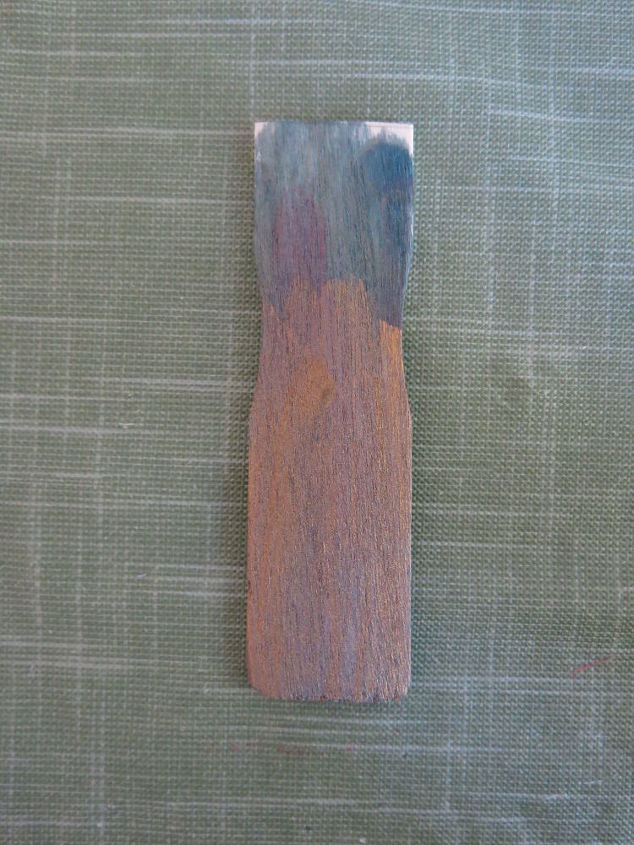
While those pieces dried, I took the end of an old paint stirrer and painted it brown to use as a tree trunk. I cut this piece long to be the support that I glued all my pieces to.
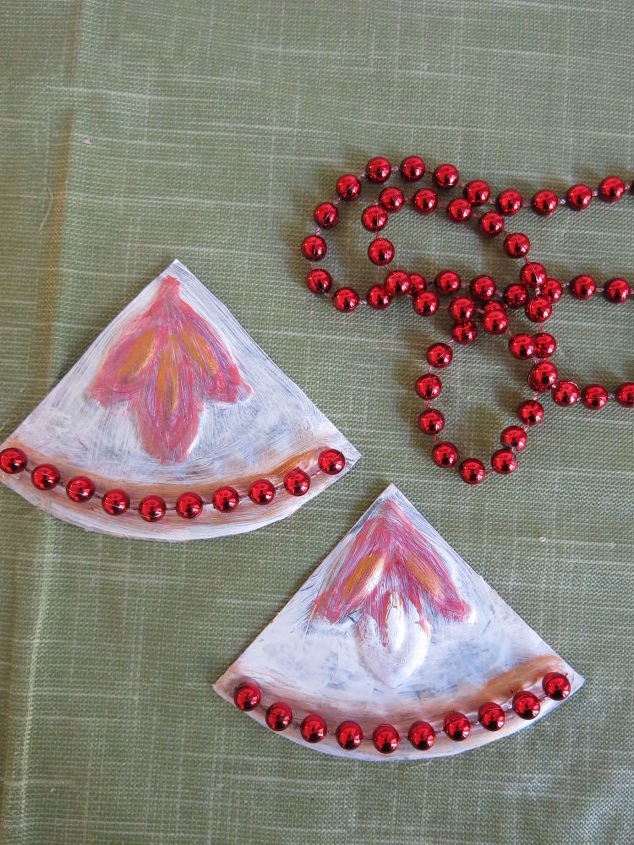
Then I used some cheap Mardi Gras beads (!!!) I had in my supplies to add a little shine to my decoration. I cut short pieces from this string of beads and used hot glue to attach them to my plastic pieces. I placed the beads along a semi-circle that was already pressed into the design of my plastic.
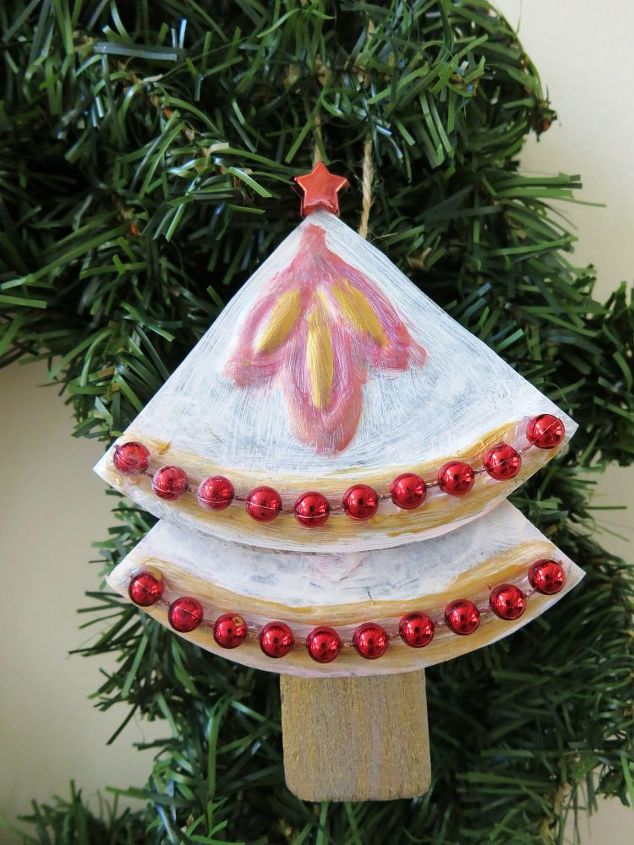
I used more hot glue to attach and layer my pieces of pressed plastic to form my tree. I used a loop of twine as a hanger and stuck that in the hot glue as I was attaching the top part of my tree. I finished off my rustic glam Christmas tree with a shiny little star at the top!
I think this little Christmas tree will be the perfect addition to my holiday decorating this year!
Resources for this project:
See all materials


Frequently asked questions
Have a question about this project?