


Turn a Pub Style Table Into a Farmhouse Table for About $50
Guests are coming and Thanksgiving is only a week away. My dining room needs a new look, STAT! I had purchased two pub style table years ago (they were cheap and I was on a tight budget). Pushed together they make a decent dining room table for when guests come for dinner. But I'm over it. Its plain, and I'm ready for a change...but surprise surprise, I'm still on a tight budget! Hmmmmmmmmmmmm...
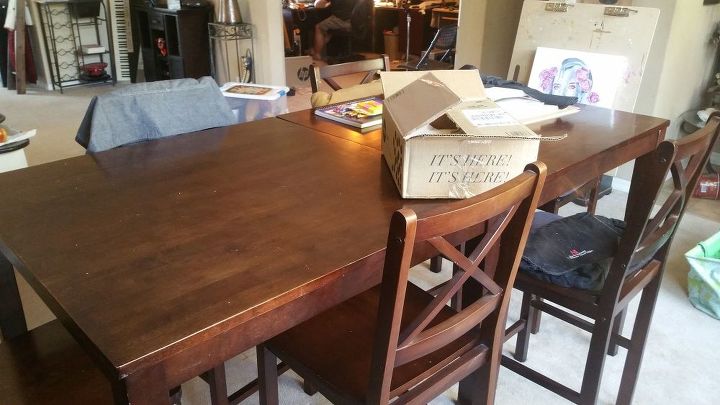
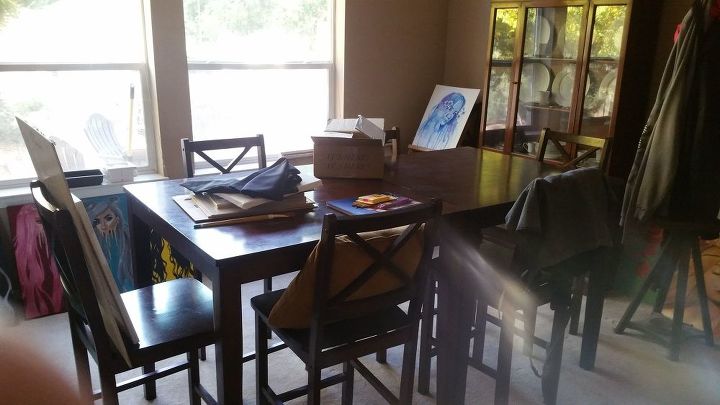
Here are two views of my front dining room, which is frequently used as my son's art studio. He paints here because the lighting is good. For the Holidays, however...I need it to actually serve as a dining room table. My goal is to build a farmhouse style table top with stained wood planks in 3 days and spend less than $100. Challenge accepted!
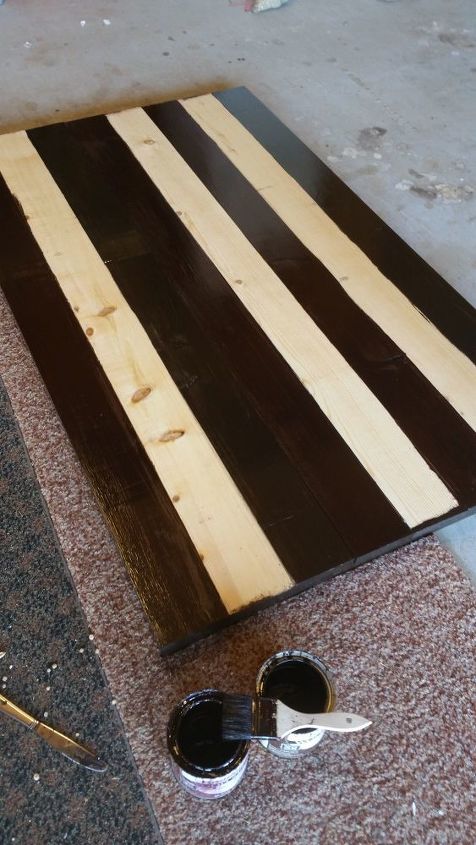
Of course the first step was to measure my table and decide how big I wanted the top to be. I won't bother with the math, because if you are doing this project, your dimensions will be different. Its a pretty easy formula. Find the planks you want to work with and purchase as many as it takes to achieve the length and width. You will also need 2 cross pieces cut to the width of the table. My cross pieces were 3" wide, and cut to 36" long. The planks I purchased were 1x6x8...but cut down to 6 1/2' long.

The step I skipped because I was in a hurry, (and I'm notably impatient) is to sand the wood planks. In retrospect I should have taken the time to do it because my table top has some rough edges. My bad. Also, when you are choosing planks, make sure they are as straight as possible, compare them side by side at the store. If they don't lay flush (or at least close) your project will not work.
I know most of you won't believe this, but I used NO HARDWARE to put the table top together. ONLY WOOD GLUE. And believe me...its SOLID. The picture above shows how I glued the planks together. One of my planks was slightly bowed, so I laid a heavy rock on top of it while the glue was drying. Be sure to do this on a flat surface where you don't care if glue drips...I am working on my garage floor.
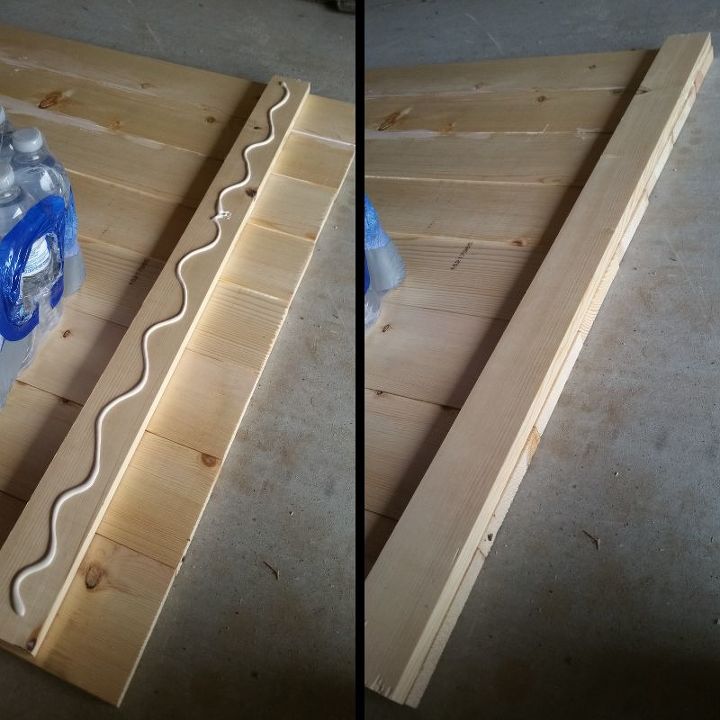
Next...I glued down a cross piece on either end of the planks. I use more glue for this part than I do for between the planks. The cross pieces serve 2 purposes. 1) it stabilizes the project and 2) because the measurement between the two cross pieces are the same or slightly more than the length of the table, this will hold the table top in place with minimal sliding. In other words you don't want the cross pieces to lay on the table, but rather on each side. Measure twice, glue once!
The glue will dry in a few hours. To be safe, I let it sit over night. Be sure to lay heavy objects (like a rock) on the cross pieces while they are drying.
OK, the glue is dry. Now it's time to flip your table top over and see how the glue down worked. This was admittedly a heavy piece, so I was kinda nervous it wouldn't hold together. But Gorilla glue did not let me down!
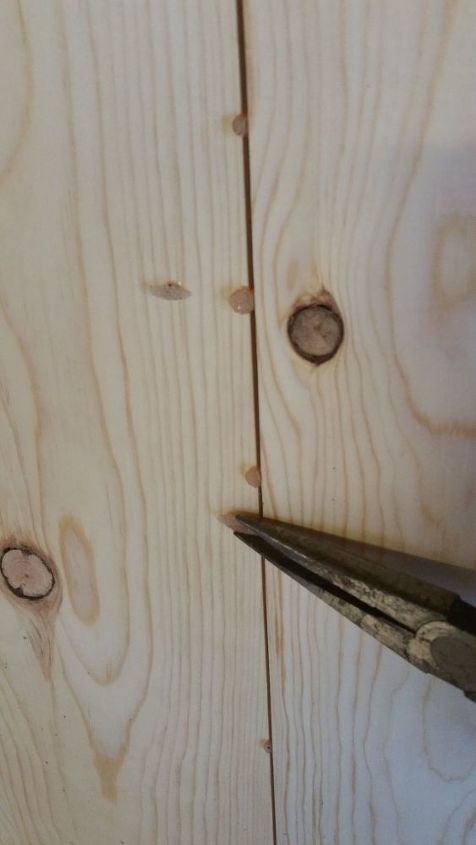
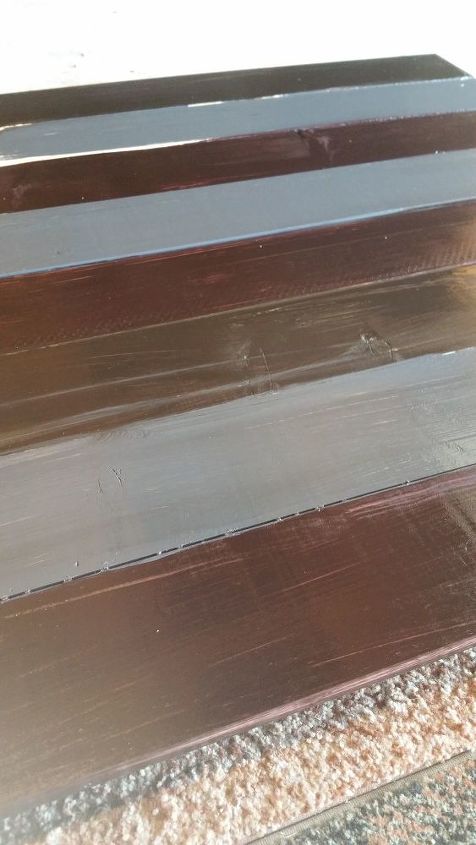
If you do this project, I want to tell you upfront...the glue WILL seep through the planks and dry on the table surface in little "buttons", especially with the planks that don't lay flush against each other. This is why you want to take the time to find the straightest boards possible that fit together. Since this is a farmhouse project, I'm not looking for perfection, but I don't want these "glue buttons" on the surface...no problemo...pull and twist them off with needle nose pliers, easy fix! 
I also recommend sanding...run your hand over the surface of the tabletop to look for rough spots. Wear some thin gloves to avoid splinters!
Time to stain! My go-to is to use three colors of stain, I'm not sure why...but I just love the tri-tone look. Here I started with Kona and Black cherry stain. In this photo it is very hard to tell them apart.
Dark gray is the third stain color. This is the artistic part, have fun with it! I think it would also be fun to work with chalk paint also to give it a more antiqued look. Allow stain to dry and cure overnight.
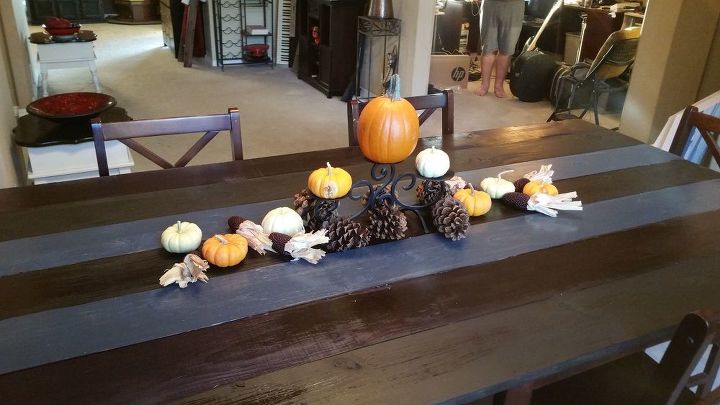
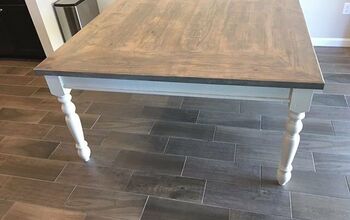
The last step! Time to bring the masterpiece inside! I just love the new look of my table now. The beauty of it is, I can always remove it so my son can paint when the holidays are over. I might even be able to find another artistic way to use it! I'll post a few more angles...
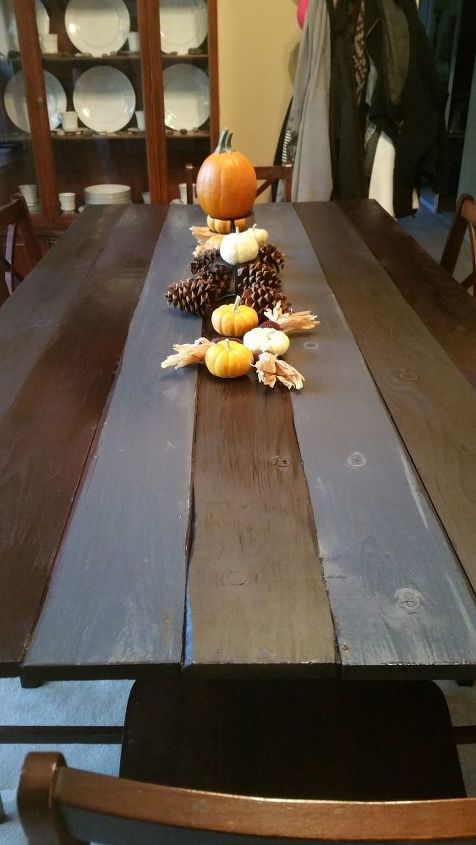
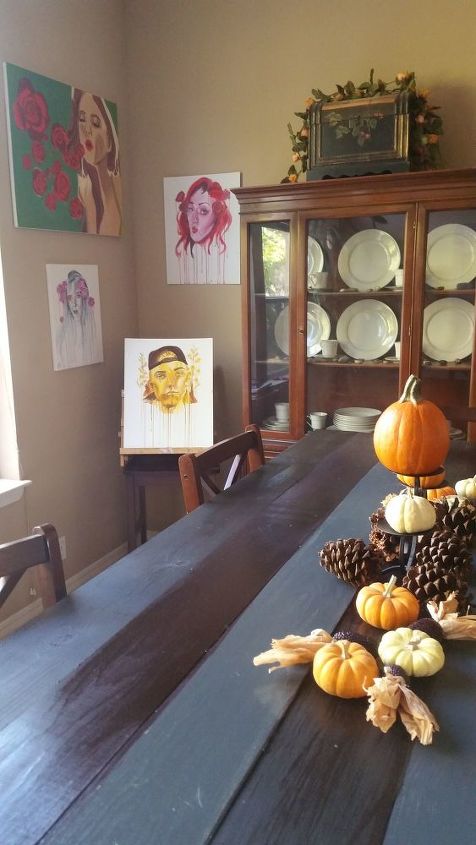
Since I displaced my son's workspace I decided it was only fair to hang and display his artwork. Hope you all had a wonderful Thanksgiving. Ours was amazing. 
I don't have this specific project posted to my blog yet, but feel free to visit me at JanesRealLife.com for more DIY and homesteading tips!
Resources for this project:
See all materials


Comments
Join the conversation
-
Great looking table. I’m in the process of repurposing a school lab table into a dining table. I want mine to be stationary rather than removable but since yours turned out so great I may have to rethink that. Thanks for sharing. Happy Holidays
-
Thank you everyone. It was a quickie project, so I know its not perfect...I love doing stuff like that just too see if it'll work out.


Frequently asked questions
Have a question about this project?
Love this idea and am thinking of trying it myself. How did you attach the top to your existing pub tables?