


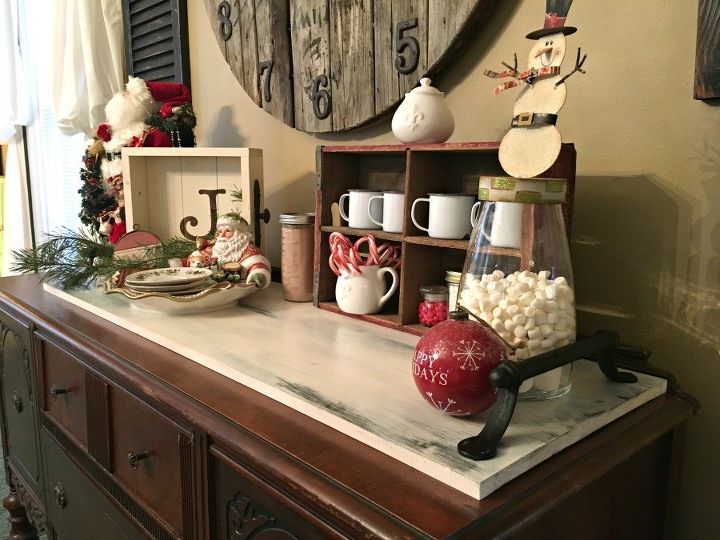
A Killer Charcuterie Board DIY

I have this beautiful antique sideboard that I’ve probably had for over 17 years or more. While I USE my antiques (their not just for show), I like to protect them. I’ve always wanted to make a safe surface for my sideboard because I use it a lot. So I thought of a dual purpose board...a charcuterie board & a protective surface.
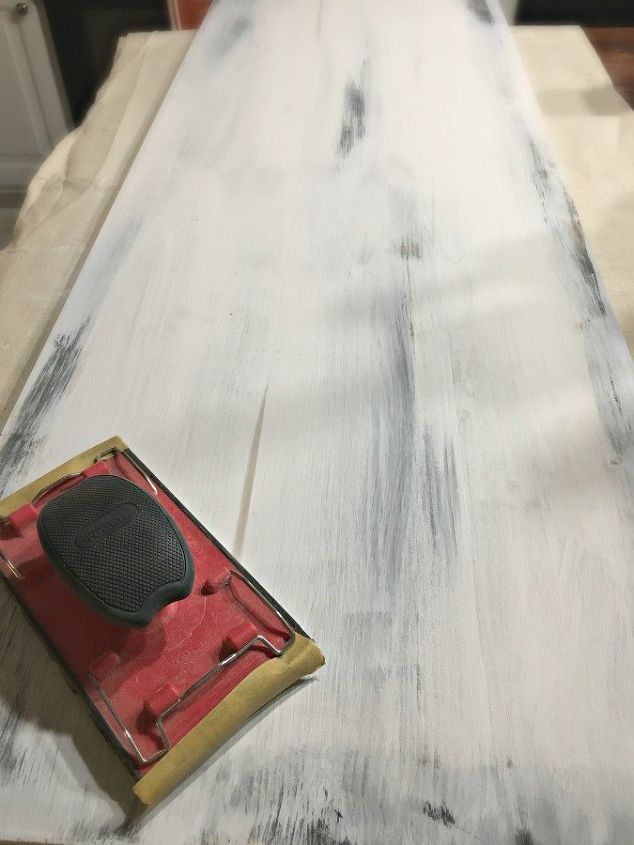
DIY STEPS: I purchased a large pre-cut 3/4″ pine board ($12 @ Home Depot).
- I sanded it a bit (I wanted a rough – rustic finish), so I didn’t do a lot of sanding on this piece.
- I sporadically added black paint in various areas, especially the outer edges.
- Followed by a white wash on the entire surface and sides after the black paint dried. I didn’t paint on the black surfaces (to keep exposed).
- Sanded lightly
- Applied 2 coats of polyurethane. (Allow to dry for several hours in between each coat!)
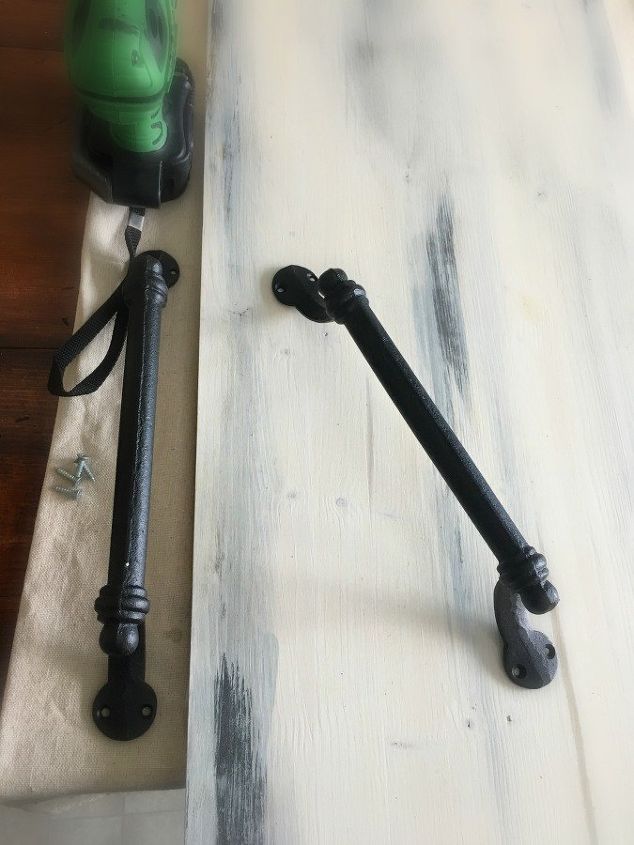
- Attached 2 handles on each end. (I purchased 2 beautiful wrought iron handles (online $19) that would make a statement (go BIG!) lol
- THAT’S IT!
Installing the wrought iron handles.
Final finish.
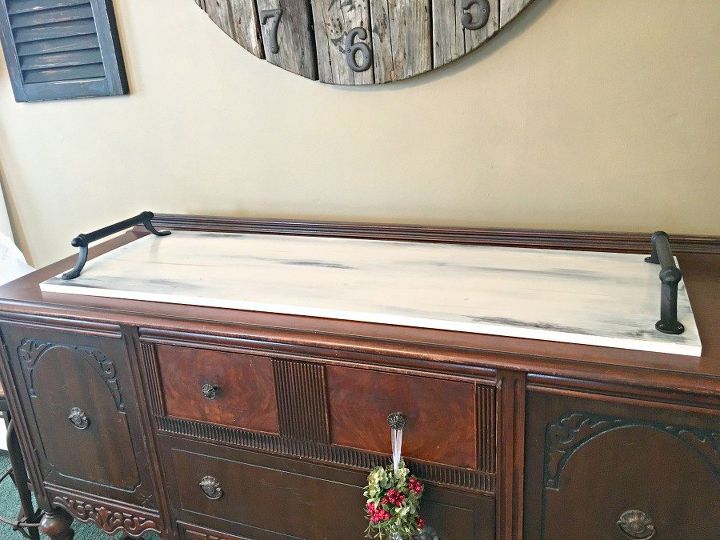
Dual purpose board.
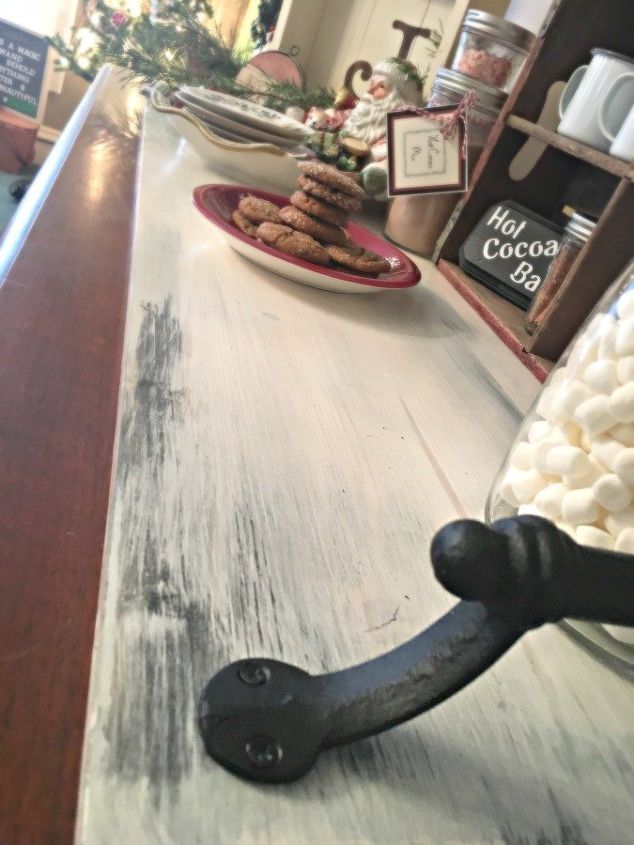
This was a fun but VERY easy project that took no time whatsoever to make! It will get a lot of use.
READ MORE:
https://www.gullycreekcottage.com/how-i-made-a-custom-killer-charcuterie-board/
Comments
Join the conversation
-
That was a GREAT idea!! And, it look great, too! Well done!


Frequently asked questions
Have a question about this project?