


Part 2 of Putting Your Home Back Together After an Accident

As I described in Part 1 https://www.hometalk.com/diy/repair/home-exterior/putting-your-home-back-together-after-an-accident-40310913, our house (which we had just moved into), was hit by an SUV. I listed all the important steps like filing the police report, contacting your insurance company, having the building checked for structural issues. We were very fortunate that there were witnesses, the SUV didn't end up in the living room (the SUV lost, the house survived) and that the driver had insurance.
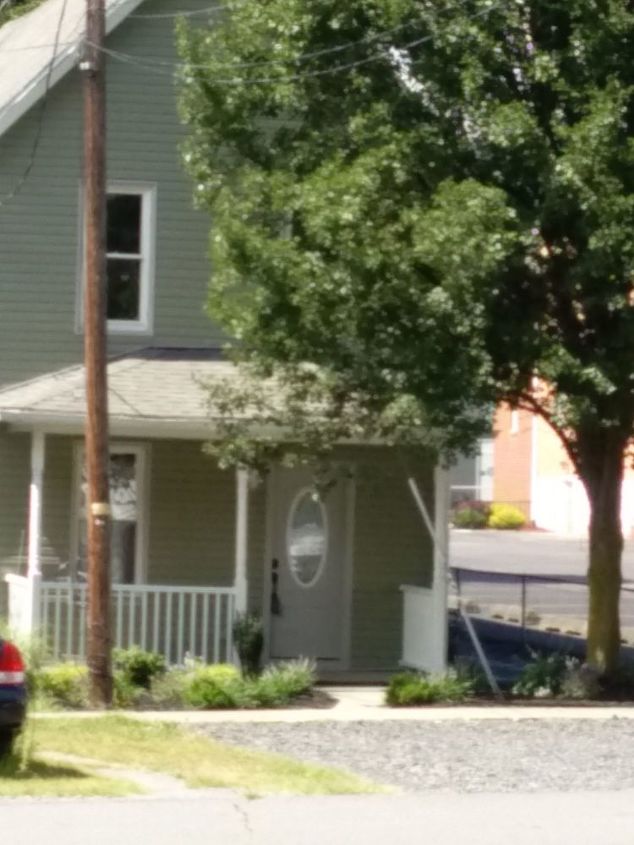
This was our house before we bought it. Notice the nice quiet parking lot next door. Fenced in, with curbing, it is only in use a couple times a week, normally. Kids aren't allowed to hang out there (Sister Mary Ann is in charge), but, they have a playground down the street, no worries, so except for the occasional person taking a shortcut through the lot, mass attendance, and grounds maintenance, they are very quiet neighbors. It was a selling point for my husband, since it meant we only had a neighbor on one side, and across the street (one being our oldest daughter). It's a quiet street with minimal traffic, routine police patrols and nice neighbors. Then the day came, when the fencing, curbing and sidewalk didn't help. The day a lady panicked when she hit the gas instead of the brake, crushed the fence, jumped the curbing, the space between our properties, and our sidewalk, plowing into our house. We had owned the house three weeks.
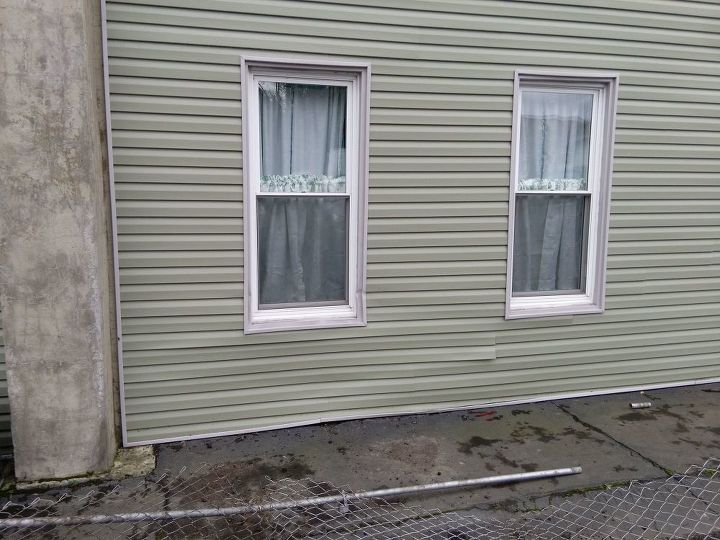
Other than the damage to the window frame and some loose siding, it appeared we had escaped any major damage.
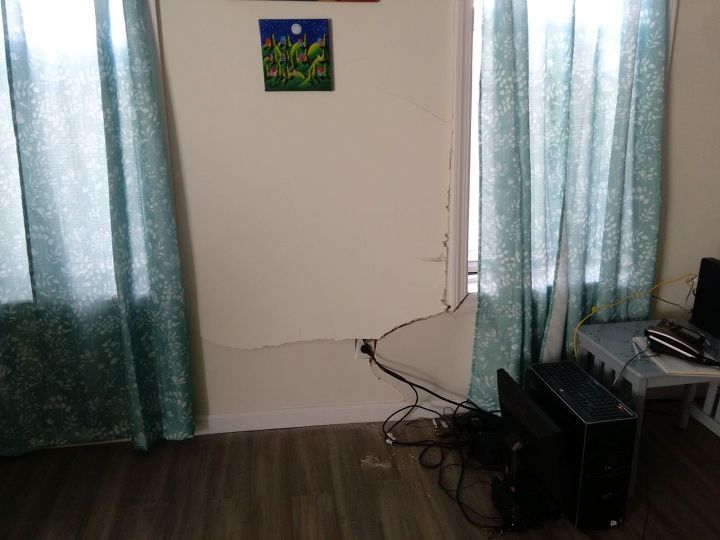
Until you went into the house. There is where you could see the damage. The impact pushed a heavy wood desk part way into the room, knocking everything off the desk, including my computer monitor. The window didn't break, despite being twisted in the frame from the impact. Our insurance recommended a restoration specialty company, especially since the house had just been completely redone from the shell in (and out) by a contractor with all new wiring, plumbing, framing, insulation, etc., basically rebuilt. Financially, it was a hit, because our two thousand dollar deductible had to be paid up front, to get the work started, with the insurance company covering the balance when it was completed. With the window not broken, the siding intact, we had to stop any drafts, which I did with plastic, painter's tape, a shower curtain over that, hidden by a curtain. Then, we had to wait for the contractor to be available. Once the project supervisor came in to set up the project, order materials, etc. he freed up a carpenter to make some emergency repairs to close it up better with the weather turning colder.
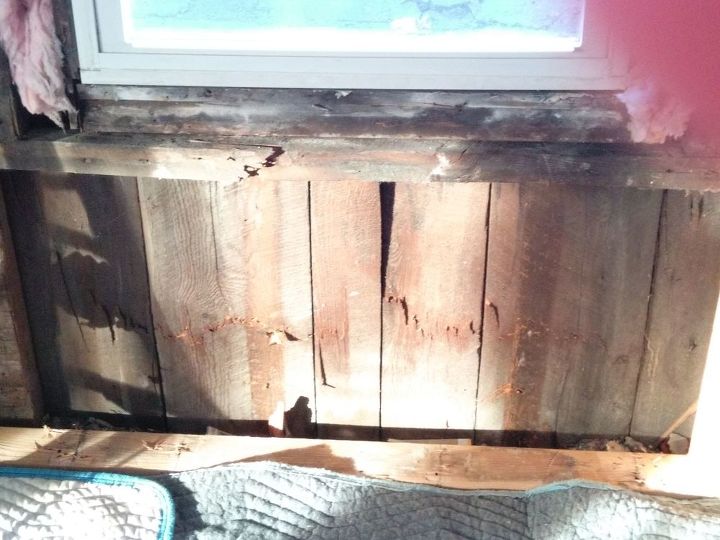
George, our carpenter put mats down to protect our floor. Then he cut the paint on the edges of the molding so he could pry it away without forcing it (something I wouldn't have thought to do) removing the moldings without breaking them. The flat pry bar was a good tool, too. He cut the sheetrock with a knife to minimize the dust, cut it in sections, and vacuumed the dust and chunks that came loose, as he worked. He took the sheet rock off to the nearest undamaged section, then carefully removed the insulation. That's when you could see the hidden damage. There was the newer framing already removed when I took this picture. It had broken in half.
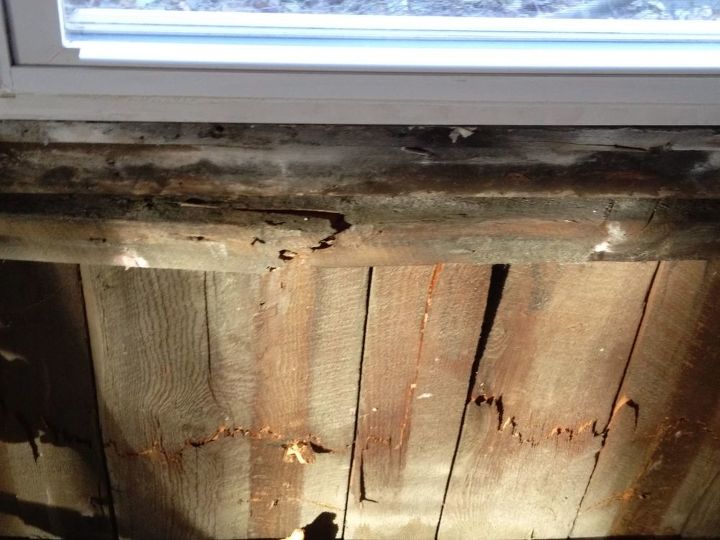
You never know what you will find when you open up a damaged wall. As you can see, the plank cracked from the impact. The newer framing could actually be moved around, as it had cracked all the way through and was loose and was easily pulled out. The plank is tough stuff, as I know from cutting through it in our old house. It looks old on the outside, but cut into the stuff and you are amazed at how hard it is, and how it looks new on the inside. The plank didn't move like the modern framing, but, had cracked all the way across. They really knew how to build a sturdy house back in the day. No 2x4 framing then!
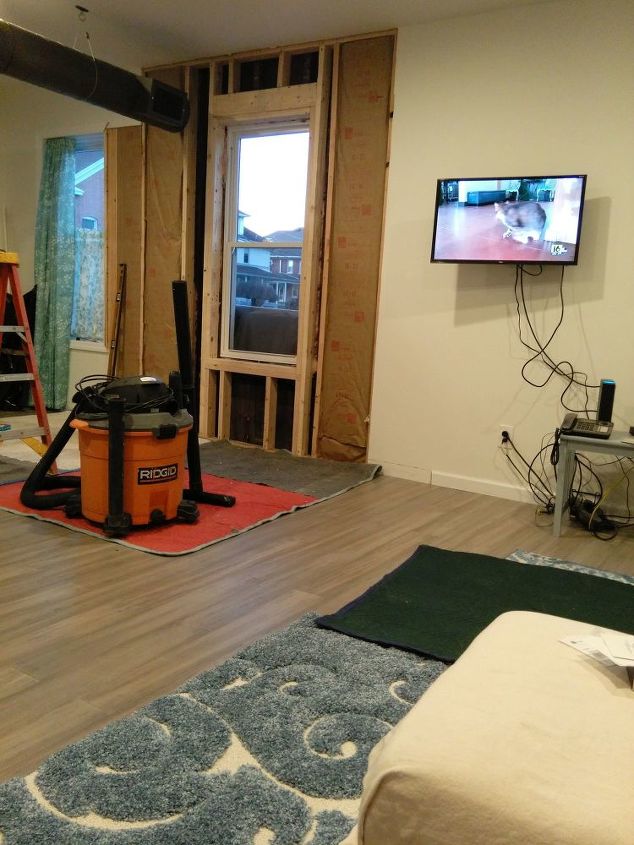
Cleaning as he went, George reframed the window and the wall. I tried not to get in his way, so I took this one while he was cutting more wood. By the time it was completely framed, I figured it could take another hit, but, fingers crossed, it won't ever need to.
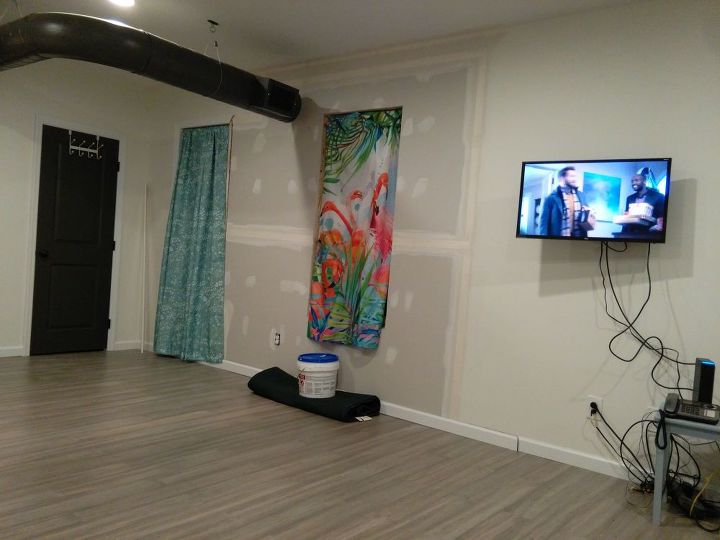
By the end of a busy day (for the carpenter), the framing was finished, new sheet rock was installed, the first coat of spackle (mud) and tape had been applied. The good news on the other side of the wall was that although the cladding on the outside of the window (aluminum) was toast, the vinyl siding came off without breaking or cracking, so it can be reused. Our seller left us one length of siding "just in case" from its installation, but, hopefully we won't need it. Siding can be tricky to match, even if you buy the same brand and color.
George will be back tomorrow to sand, apply more mud and work on the outside. Then he will have the painters come in to repaint our open concept living room so that it matches. A fencing company will be putting the fence back together. Glad I'm not paying for the whole thing! Enjoy my fancy shower curtain because the real curtains will be back soon!
Comments
Join the conversation
-
You did a great repair on your own!
-
Hi Wendy! Can't take the credit for this one, but, I am glad to give all the credit to George our carpenter!


Frequently asked questions
Have a question about this project?