


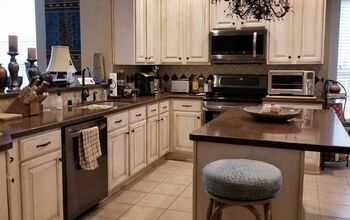
Kitchen Cabinets Chipped or Baseboards Peeling? Here's What to Do!
Here's how to fix scuffed or peeling baseboards and chipped cabinets with paint that matches!
Do you live in a house with factory painted cabinets and need to fix either a chip or scuffed and peeling baseboards, but don't own the paint that matches? I've found a solution that involves a custom tinted paint to match your cabinets that will fix those unsightly blemishes.
Guess what? This solution only costs $5 and is an easy DIY fix that makes your baseboards look brand new and hides chips in your cabinets. If you are selling a home, this is a must read to get your kitchen looking it's best!
Matching Your Current Painted Cabinet Color
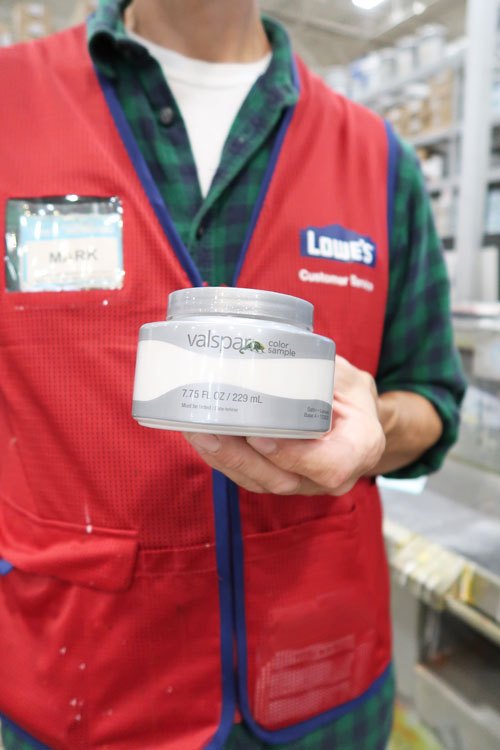
Did you know you can have Lowe's Home Improvement stores custom match a paint color? Cool right? If you are new to my blog, I worked at Valspar and with Lowe's for 5 years and have some expertise in paint!
The sample created for all of my touch-ups was on sale for $3.98. Pretty affordable fix right? Everyday price is $5.
Please visit my blog to learn about the entire color match process!
What Can Be Color Matched
To get the best match possible, whatever you are matching needs to be smooth and solid. Those options include:
- Cabinet drawer or door that's painted
- Paint chip from any manufacturer
What Can't Be Color Matched
- Stained woods
- Fabrics
For a kitchen, the best item to bring in for color matching is a cabinet drawer front or cabinet door. I removed the smallest drawer front I have and took it to Lowe's.
Repairing Peeling Cabinet Paint or Chips
This is REALLY important! Do not brush on this paint sample to the face of your cabinets! The color will match, but the sheen most likely won't and you will be able to see the touched up area.
I'm recommending this custom paint sample for only two things:
- Touch-up chips on the face of the cabinet
- Painting the quarter round moulding at the floor and baseboards
Why it works for the baseboard area is because it is under the cabinets and a small area, so you can paint the entire piece. When the baseboard and moulding is fully painted you won't see the sheen differences.
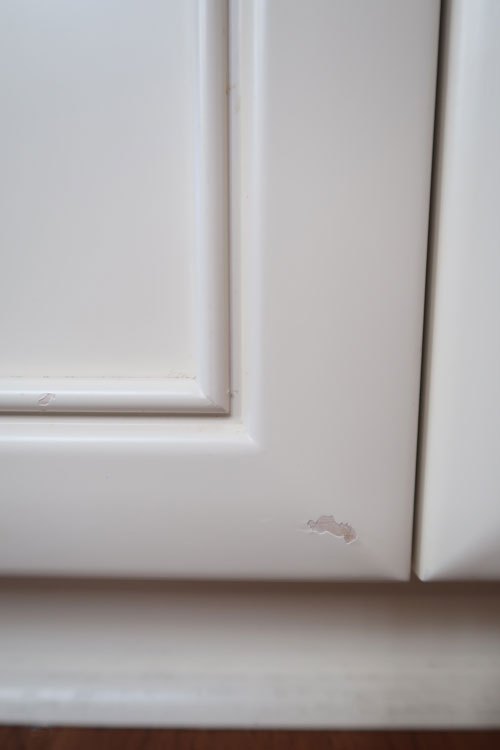
For chips, apply as I've shown below so you are just filling in the chip itself.
Paint Touch-Up for Cabinet Chips
You MUST clean the cabinet thoroughly and remove all traces of dust and dirt before beginning.
I typically will only use a Norwex cloth and water, which has worked well for me.
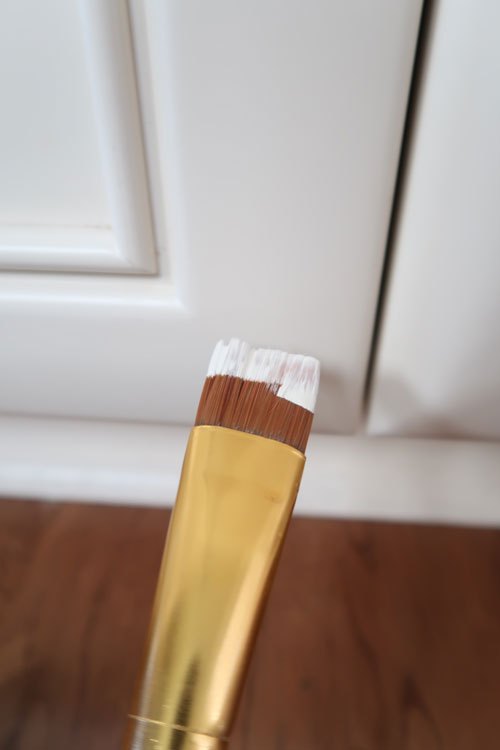
Using a small craft brush, tap paint only into area that has been chipped.
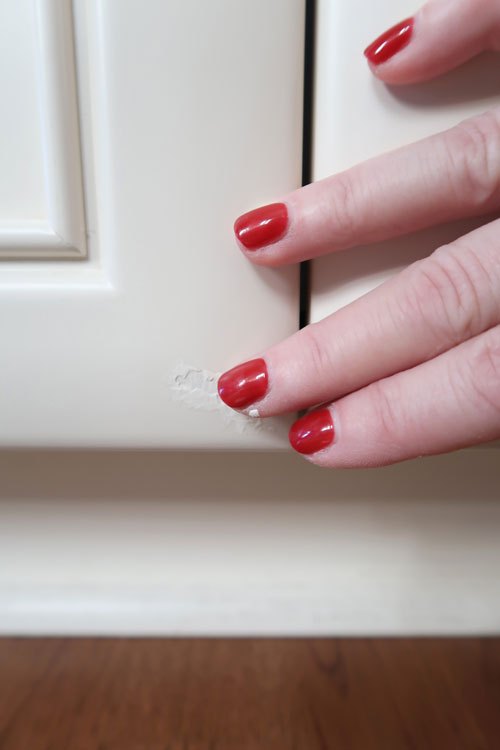
Take your finger and lightly remove paint from outer edges. I keep baby wipes on hand to wipe the paint off of my fingers.
To get the best coverage, REPEAT this process every half hour 3 times.
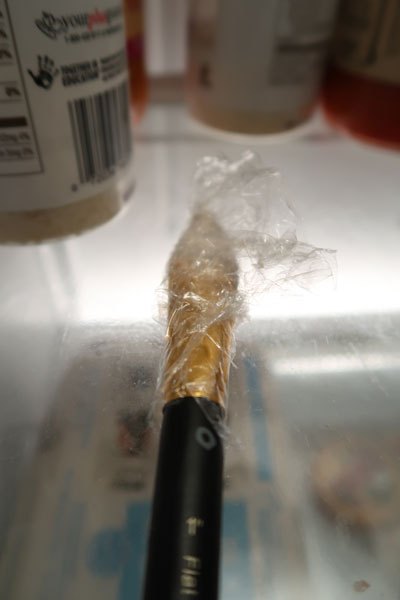
In between application, store your paint brush wrapped in plastic wrap in the refrigerator.
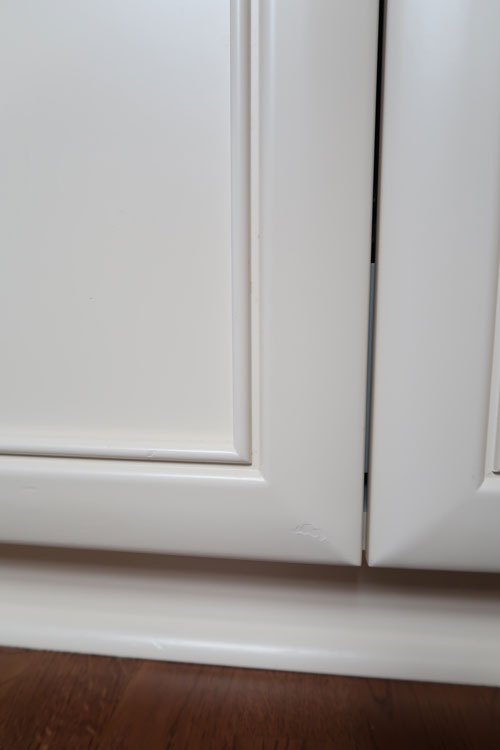
Cabinet Paint Chips Repaired
This is the next morning after both the chipped areas had been repaired.
You can see that the chipped areas are still visible, but now blend in with the rest of the cabinet. With the naked eye, you really don't see there was ever a chip.
Using a wood filler to build the area is possible, but I would be concerned about sanding it smooth creating a larger area to touch up.
Then the sheen difference would be obvious, where here it isn't.
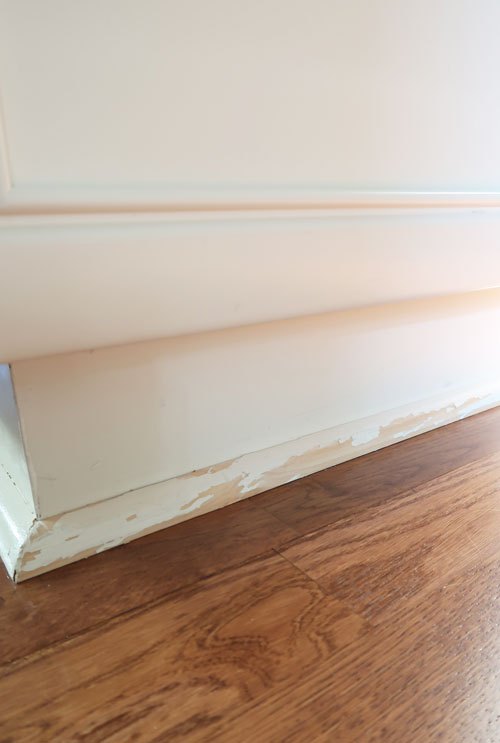
Paint Touch-Up for Scuffed or Peeling Cabinet Baseboards
This is where my sweet dog Mick's dog bowls are, and they have done a number on my baseboards.
The constant splashing of water throughout 4 years of filling his bowl weakened the paint.
Latex paint is made with water, so it gets weak over time if it is constantly exposed to water.

Step 1:
Vacuum up loose particles and thoroughly clean area to be painted with a Norwex cloth and water.
Step 2:
Tape off floor below quarter round moulding. Work to slide Frog Tape under the moulding to prevent paint from getting on the floor.
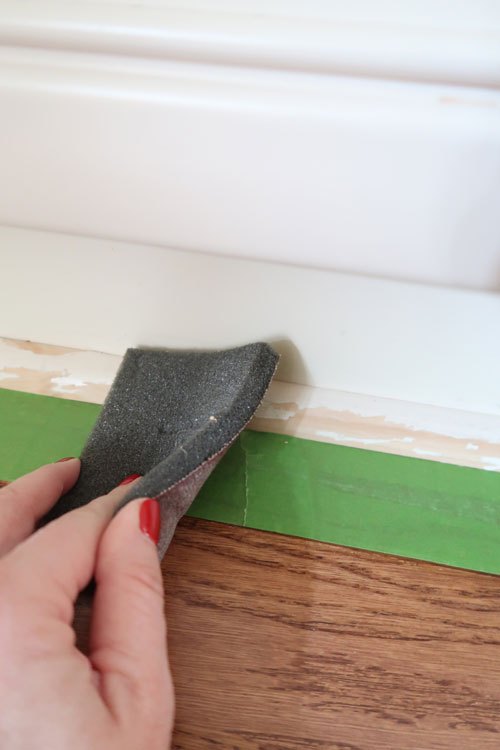
Step 3:
With a sanding sponge, roll it over and just sand the quarter round moulding. Make sure all loose and chip paint is sanded smooth.
AVOID SANDING THE FLOOR! Lightly sand the baseboards below the cabinets.
Vacuum up all loose particles and wipe the area clean, so it is dust free.
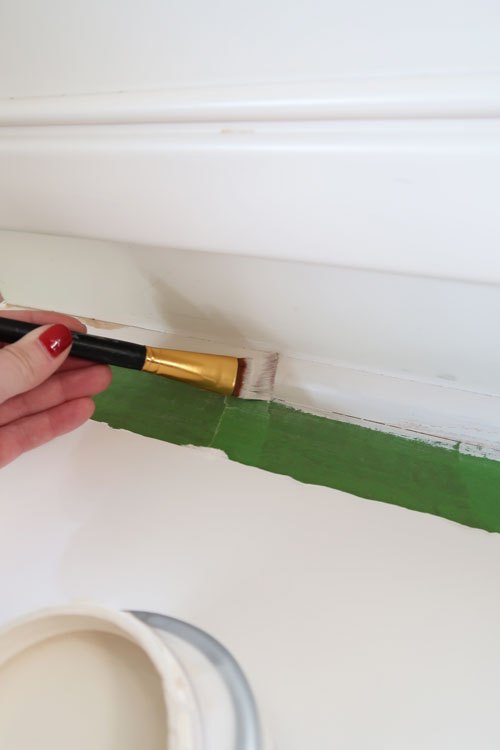
Step 4:
Apply paint to baseboard and moulding. Your first coat won't cover, so only apply a thin coat.
I put a small piece of foam core down to place my sample and brush and protect the floor. You could use cardboard from one of your Amazon deliveries :)
As a note, I also applied the touch up paint in the grooved area of my cabinet to cover up the chip you see above. It was safe to do this because the sheen difference will be hidden by the groove.

Step 5:
Let paint dry about an hour - store your paint brush in the refrigerator (as I showed above) wrapped in plastic wrap. Apply 2nd coat of paint.
Remember that wet paint is LIGHTER while it is drying. You can see in the picture above where the paint started to dry and where it is wet.
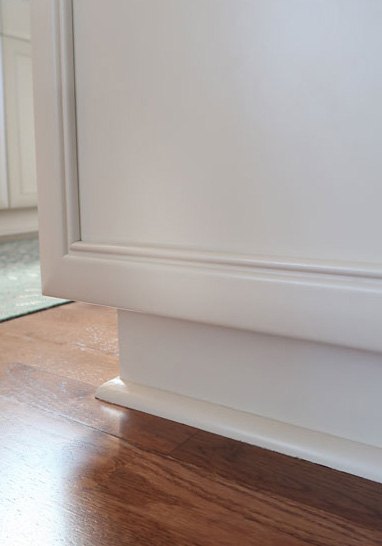
Cabinet Chips and Peeling Paint Repaired
Here is a picture of the finished result after drying overnight. The color match was PERFECT! You can't tell I repainted under the cabinets. Boy does it looks SO much better.
There is something about a fresh coat of paint that just feels good and clean!
No more peeling paint! Scuff marks gone! It really was an embarrassment to see that bare wood and flaking paint. Mick's bowls have been relocated and he's good with the new location :)
Seeing the results I was able to achieve in this small area, I'll be applying paint to all of the baseboards in my kitchen for a fresh new look.
Long Term Wear and Tear
This is a quick fix friends. Let's be real this is not how I would EVER paint cabinets, but this works in this small area to solve a problem.
If you want to know how to paint ALL of your cabinets - even over stain, please READ THIS POST.
I'm going to keep the paint sample handy for any future blemishes that develop and maintain the baseboards from time to time. The satin paint used can be easily wiped down and I expect will hold up well over time.
Paint is not permanent, so I have realistic expectations that the paint may peel at some point and I'll have to follow this process all over again.
The good news? It's a cheap and easy fix!
Resources for this project:
See all materials


Comments
Join the conversation
-
That’s is a great tip I just had my kitchen totaly done and found scratches so will try this thank you .
-
A couple helpful hints that I have used in my 30+ years of home maintenance;
1) for sanding very small areas, think outside of the box- or even the hardware store! A visit to your local beauty supply store with fresh eyes will be amazingly helpful! 2 things u have found to be extremely useful are 1” square foam sanding blocks, they are meant to be used to smooth artificial nails and come on a variety of grits. Some even have 4 different grits on the same sponge!! The second item is absolutely super for tiny jobs - basically it is an orange wood stick with sand paper bonded to one end! ! Absolutely perfect for working tiny , delicate spot work.
My other “best tip” is to keep touch-up paint handy, I use it rather RE-use a squeeze condiment bottle that has a rubber/ silicone diaphragm and attached flip cap (currently my interior trim paint is available in a recycled caramel ice cream topping bottle.) This bottle is made to be stored standing on the cap and so it is great for paint, as it maintains an air-tight seal. So when i’m Ready to paint I simply flip open the top, squeeze out a bit, and I’m ready to go!
I try to reserve the last bit of paint ffdtwhatever room project I’ve been working on and save and store it this way- labeling with the room, color, and date. It also helps cut down on shelf storage since I’m not trying to hang on to a bunch of mostly empty gallon a paint cans!


Frequently asked questions
Have a question about this project?
How do I get rid of drain flys ?