


Pallet Santa

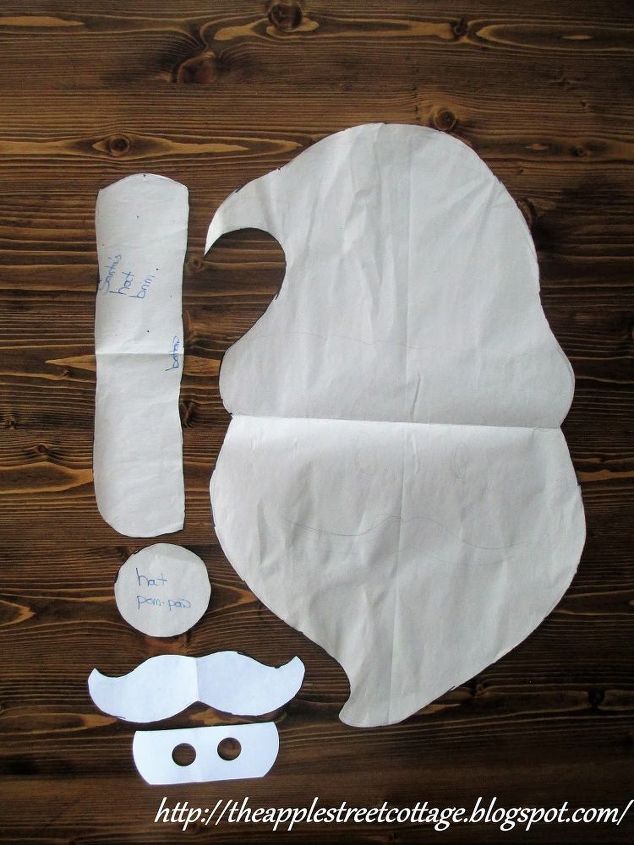
I am loving my pallet wood and things you can make with it. I wanted a Santa so I started searching on Pinterest for ideas. After looking at several options, I created a pattern (using the various ideas) to create my own original design. I wanted the main piece to be 4 boards wide and I wanted to fit 2 of them on the full-length of the board. Does that make sense? Since my pallet wood is about 40" long, I made each Santa 19" in height. Here are the pattern pieces I drew on newsprint:
After tracing them on the wood with a marker, the jigsaw got to work:
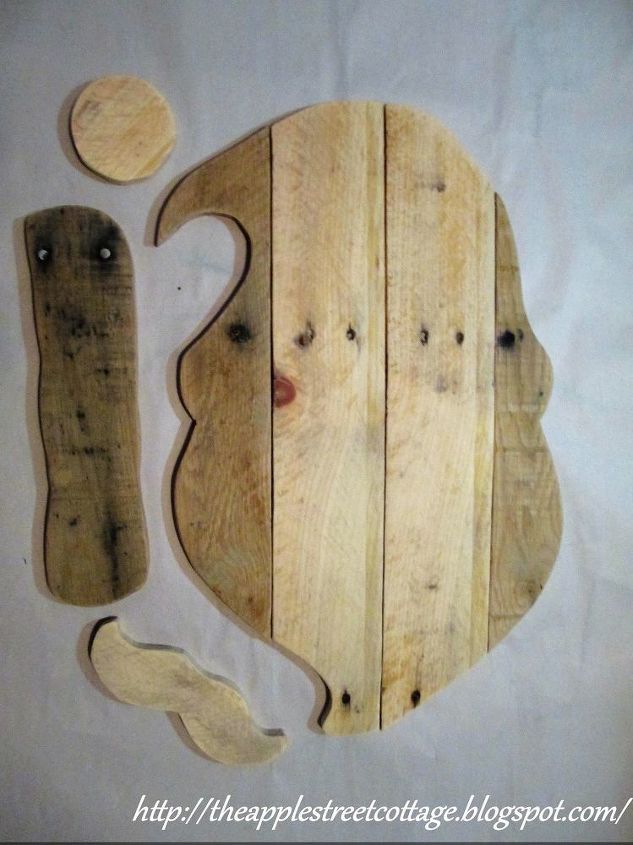
You'll notice I chose 2 lighter-colored boards for the center pieces. That way I didn't have to paint Santa's face. After sanding to smooth the wood, I used super glue to attach the 4 main pieces and finishing nails to give it more support.
Time to paint:
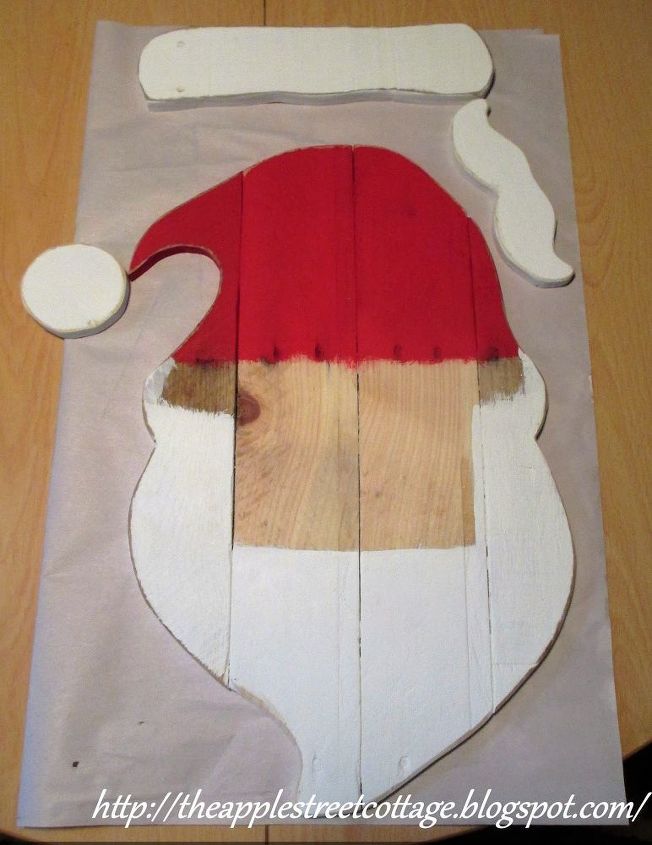
The red is acrylic craft paint and the white is leftover house paint. Yes, I use whatever I have around the house! The edges got a little distressing and it was time to assemble.
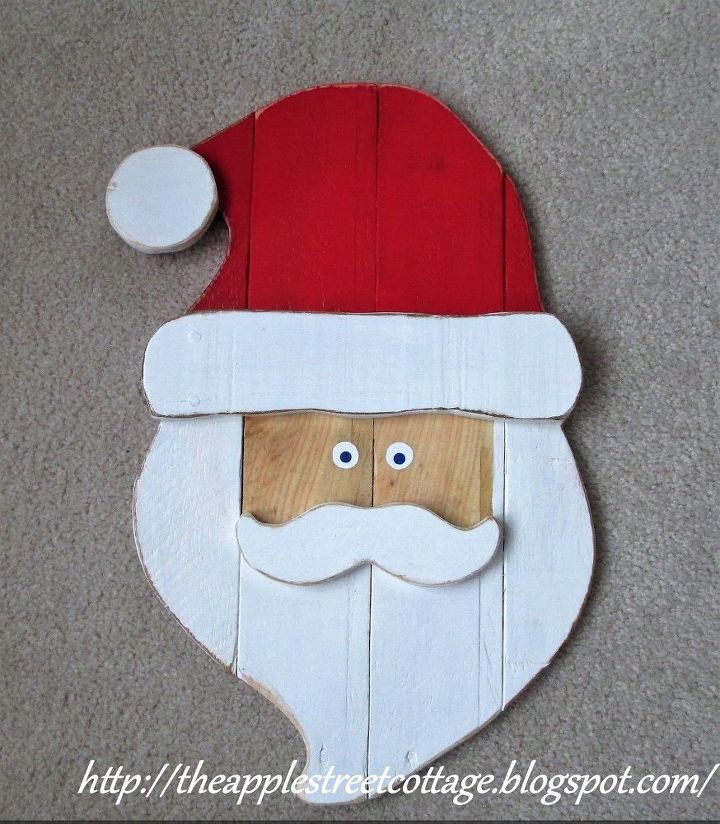
Attaching the brim, pom-pom, and mustache was easy with some Liquid Nails. I painted the eyes by hand using the stencil I made as a guide. The blue dot was added with a pencil eraser dipped in blue craft paint.
Santa was done. He was sprayed with Krylon for a little protection and a piece of twine was stapled to the back for hanging.
Merry Christmas! I hope you'll stop by my blog for more ideas and projects!


Frequently asked questions
Have a question about this project?
Can you download the pattern?